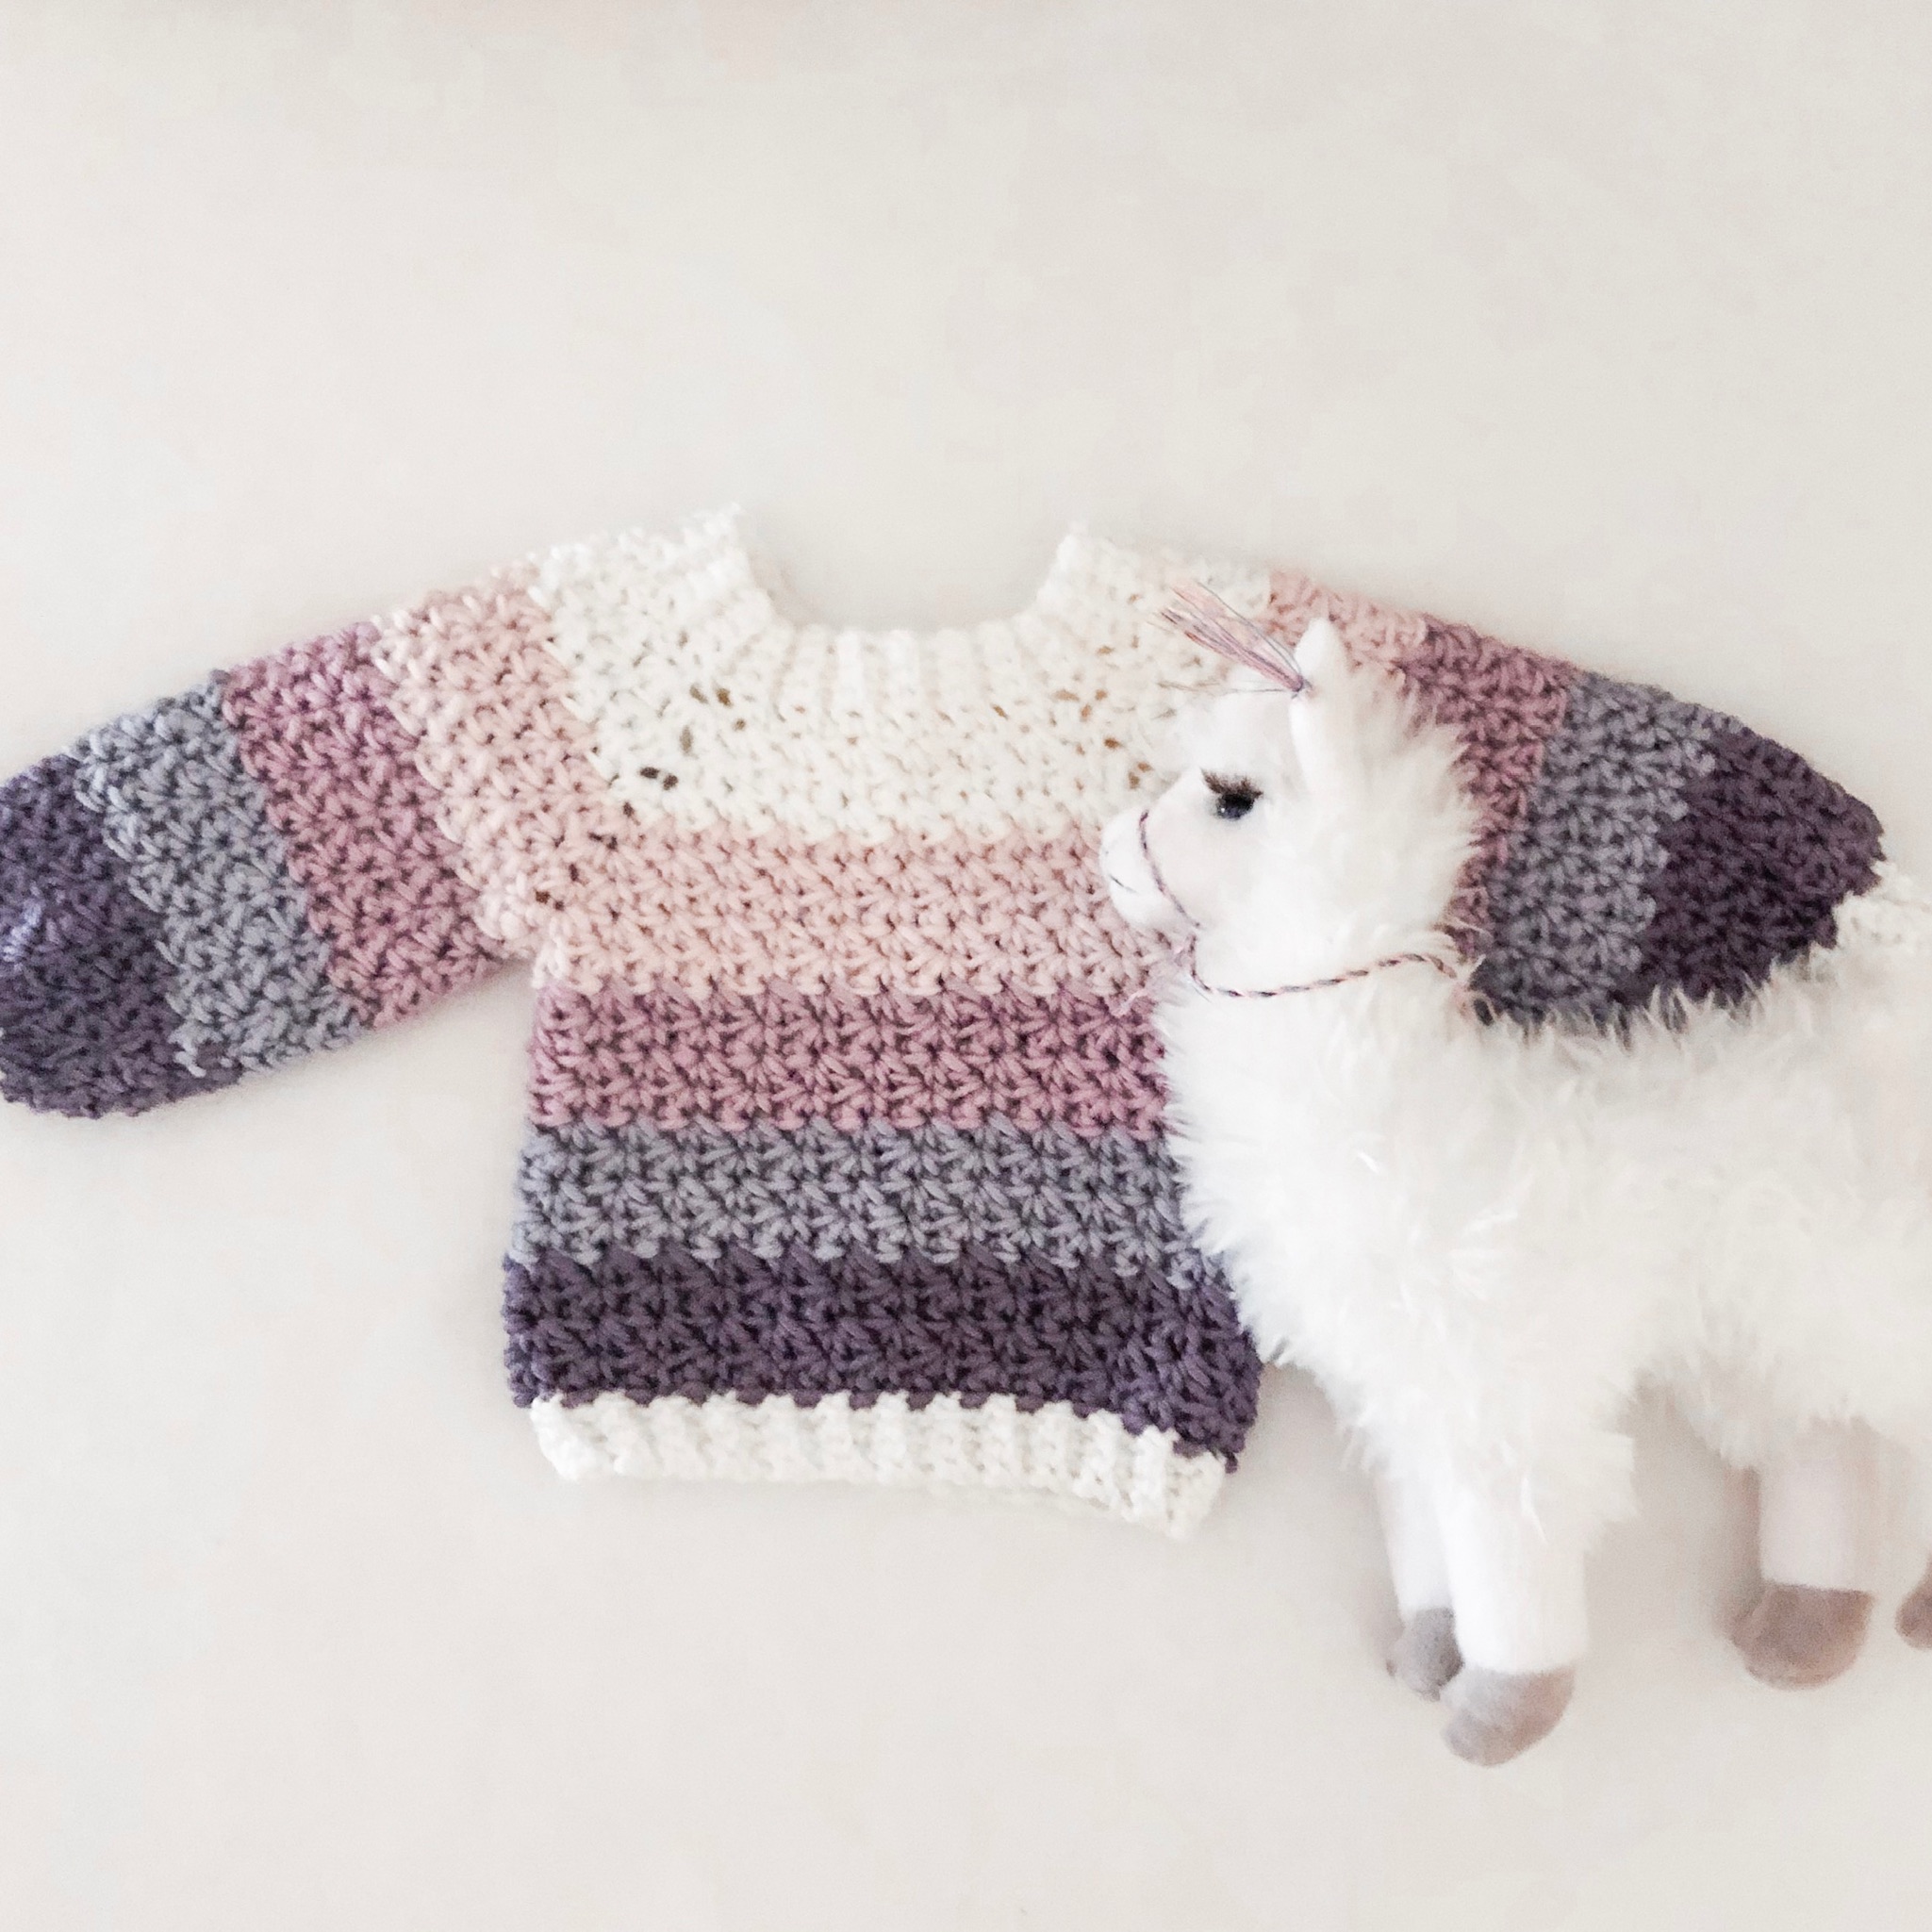
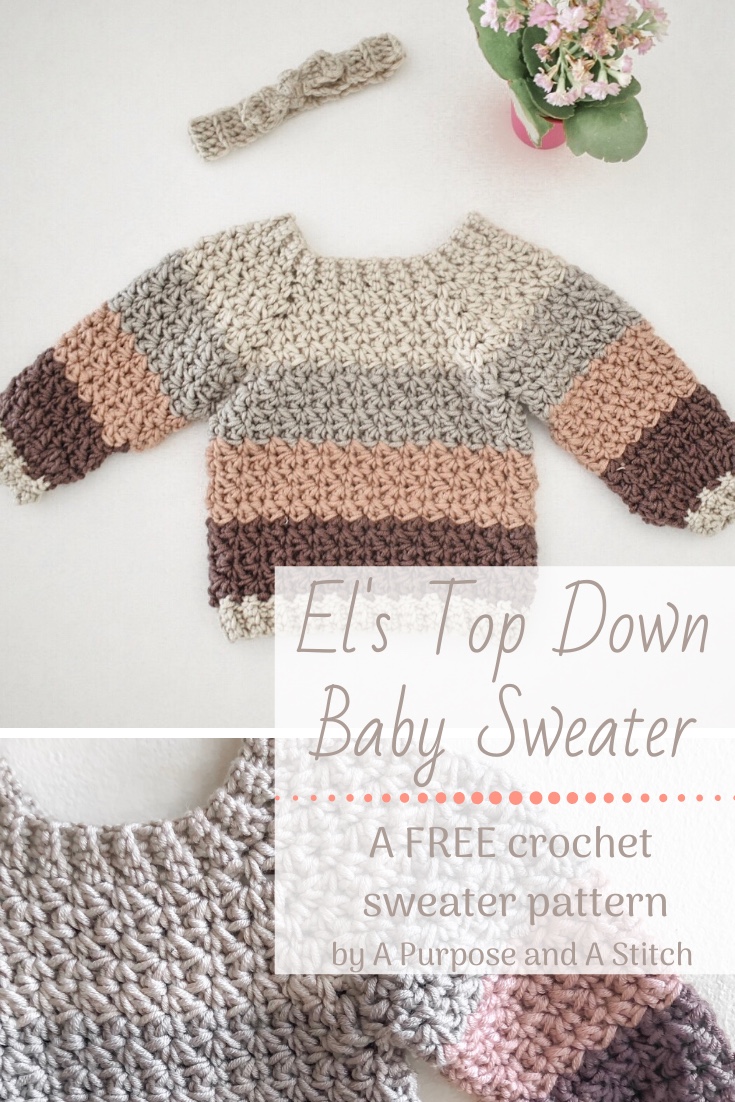
El’s Top-down Sweater- Free Crochet Pattern
Well it’s been a minute since I had a pattern to share with you all, but I’m happy to be back with a bang!
This is the first top-down raglan style pattern that I’ve written and we’ve had so much positive feedback already. I hope you all love it as much as we have been around here!
If you’re looking for an ad-free, large font PDF version of this pattern, you can purchase it from our Etsy shop here or you can purchase from or ad to your Ravelry que here. The PDF also includes comprehensive notes to adjusting sizing to fit your exact needs, and instructions to working with a different amount of colors than is written in the pattern provided below.
If you’re looking for more detailed instructions, I highly recommend checking out our blog post with step-by-step pictures here.
What You’ll Need:
Approximately 290 (360, 370, 430, 450, 470) yards of bulky weight (5) yarn- I used 2 braids of Caron X Pantone Yarn to make a 3/6month sweater.
6.0mm (US J) crochet hook
stitch marker
scissors
embroidery needle (for weaving in ends)
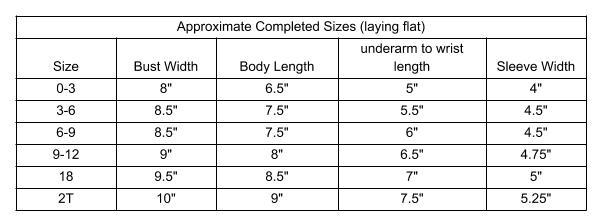
Approximate Completed Sizes:
Abbreviations Used:
ch=chain
St (s)= stitch(es)
Sc= single crochet
blo= back loops only
dc= double crochet
ss=slip stitch
sk= skip (stitch)
Ch sp= chain space
Fo= fasten off
p/u= pick up
Gauge Used
6 Suzette Stitches ((sc, dc ) into 1 sc) = 4″
10 rounds= 4″
Pattern Notes:
- This Pattern uses US standards
- The pattern is written in 0/3 month with (3/6month, 6/9 month, 9/12 month, 18 month 2 T) numbers following
- I recommend going through and highlighting the numbers associated with the size sweater you are making before you start.
- The entirety of this sweater is worked in continuous rounds (vs. joined rounds). I recommend placing a stitch marker in your first stitch and moving it down as you go. The stitch marker will also more easily help you identify the “starting st” mentioned while splitting the yoke.
- I made my sweaters in a striped pattern, using Caron X Pantone yarn which typically comes in 5 colors. If you choose to follow this design, you can either change colors based on your personal preference and amount of yarn, or you can follow the graph shown below each pattern section for a more equal distribution of colors.


- When starting the body portion, the first pattern line will apply to the 0/3mo, 18 mo and 2T sizes only. For the 3/6mo, 6/9 mo and 9/12 mo sizes, you will skip on to the next pattern line.
- The sleeves will start out differently depending on which size you are making, please make sure to pay close attention to which sleeve you are working or the stitch may look a little different where you pick up the sleeve.
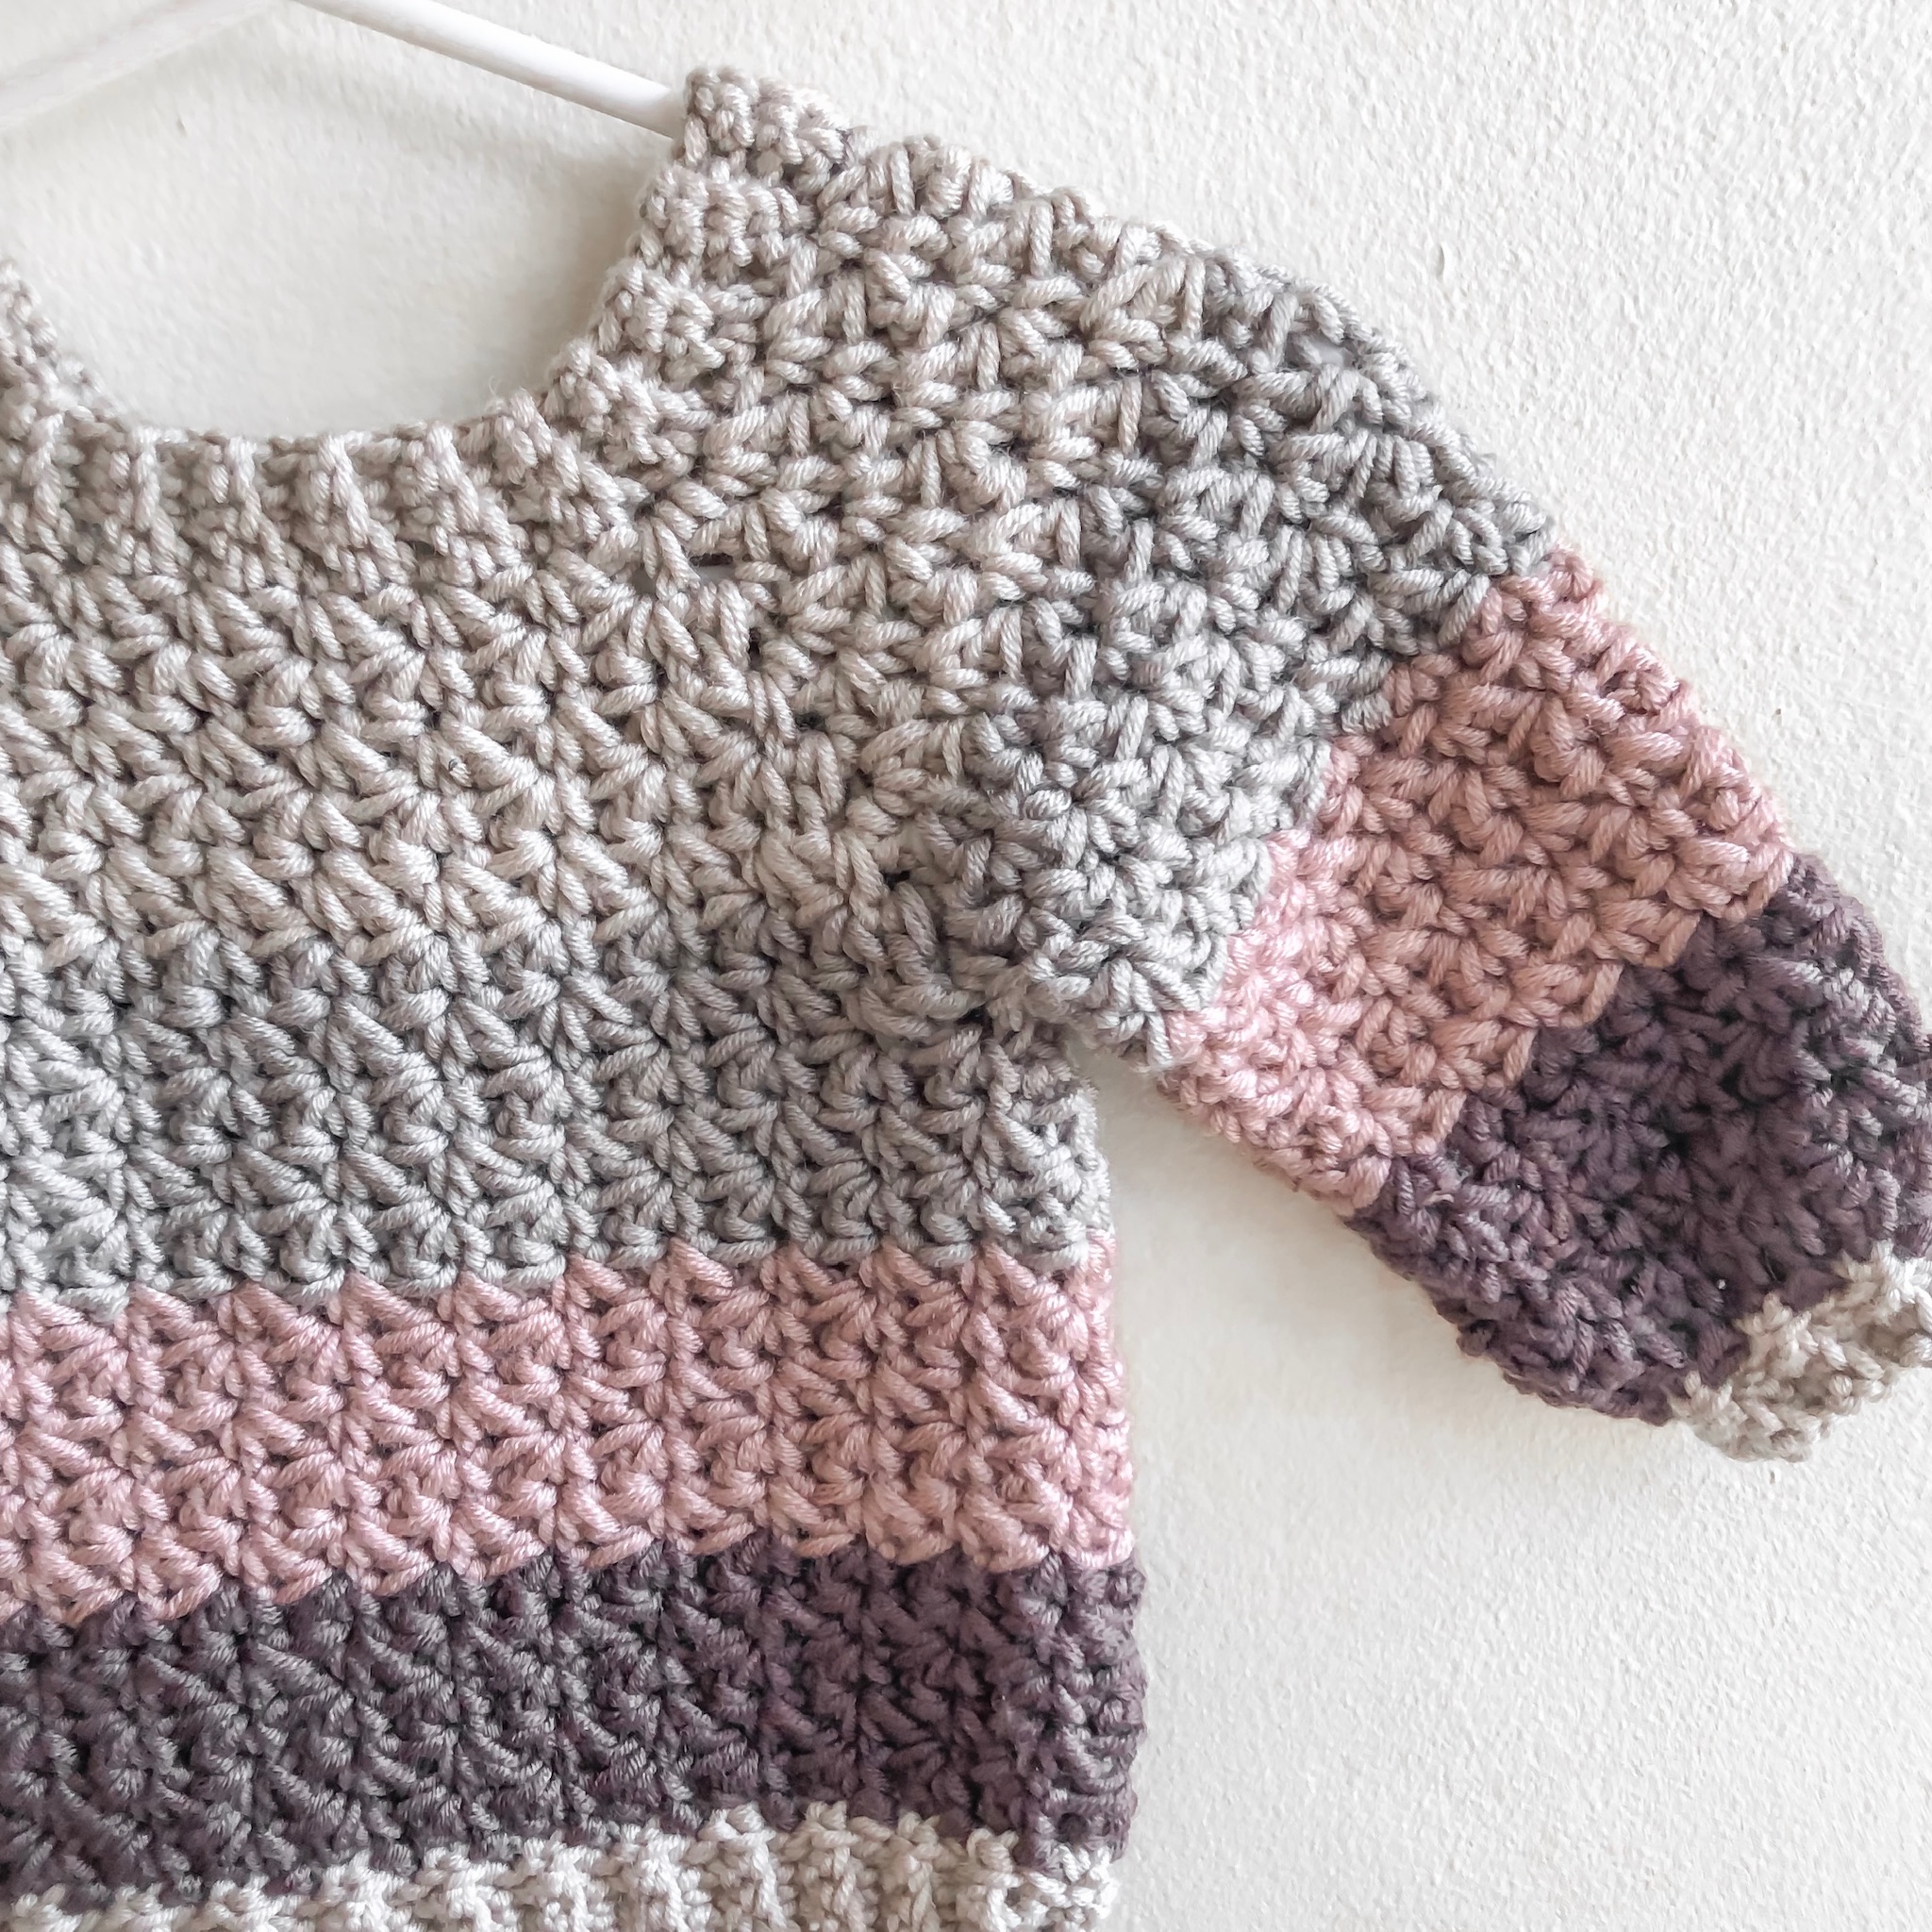
- With the exception of the ribbing, this sweater is made completely in the Suzette stitch. Since the Suzette stitch is meant to be worked flat, you will be alternating rounds of working a (sc, dc) into each sc, and rounds of working (dc, sc) into each sc. For each round you will be working into sc stitches only, skipping the dc stitches, regardless of round.
- While working the ribbing for the body and the wrists, I fastened it in place while I worked it, I cannot recommend this video by Toni from TL Yarn Crafts enough to see exactly what I did. The actual technique tutorial starts at right around 2 minutes in. By doing this, you will not need to attach any additional pieces to this sweater.
Neck Ribbing
Foundation: ch 5, starting in 2nd ch from hook, sc in blo, turn (4)
Row 1- 51: ch 1, sc in blo, turn (4)
Join foundation and row 51 together with ss in all 4 sts, continue onto yoke pattern (do NOT cut yarn)
Yoke Pattern

Foundation: ch 1, working one st into each row of the ribbing: sc 6, ch 2, sc 12, ch 2, sc 12, ch 2, sc 12, ch 2, sc 6 (48)
Round 1: *(sc, dc) in first st, sk 1, repeat from * to 1st ch 2 sp, *(sc, ch 2, dc) in ch 2 sp, (sc, dc) in next st, sk 1, repeat from * around (56)
Round 2: *(dc, sc) in 1st sc, sk dc, repeat from * to ch 2 sp, *(dc, ch 2, sc) into ch sp, sk dc, (dc, sc) in each next sc, repeat from * around, ss into last dc (64)
Round 3: *sk dc, (sc, dc) in next sc, repeat from * to ch 2 sp, *(sc, ch 2, dc) into ch sp, (sc, dc) into sc, sk dc, repeat from * around (72)
Round 4- 6 (7,7,7,8,8): repeat rounds 2 & 3, changing colors as indicated in graph
Splitting the yoke for 0/3 mo, 18 mo, 2 T:
Round 7 (9,9): *sk dc, (sc, dc) in sc, repeat from * to first ch 2 sp, sc into ch sp, fold yoke in half so that starting st is in back. dc into ch 2 sp opposite (1st arm hole created), *sk dc, (sc, dc) into next sc, repeat from * to next ch 2 sp, sc into ch sp, dc into ch 2 sp opposite (2nd arm hole created), *sk dc, (sc, dc) into next sc, repeat from * around.
Splitting the yoke for 3/6mo, 6/9mo, 9/12mo:
Round 8 (8,8): *(dc,sc) in sc, sk dc, repeat from * to first ch 2 sp, dc into ch sp, fold yoke in half so that starting st is in back. sc into ch 2 sp opposite (1st arm hole created), *(dc, sc) into next sc, sk dc, repeat from * to next ch 2 sp, dc into ch sp, sc into ch 2 sp opposite (2nd arm hole created), *(dc, sc) into next sc, sk dc, repeat from * around.
Body [continued from “splitting the yoke” working into the center portion only]
Round 8 (10,10) *for 0/3mo, 18mo and 2T only*: *sk dc, (sc, dc) into sc, repeat from * around (49, 57, 57)
Round 9 (9,9,9,11,11) *for ALL sizes*: *(dc, sc) into sc, sk dc, repeat from * around, ss into last dc (48, 52, 52, 56, 56, 56)
Round 10 (10, 10, 10, 12, 12): *sk dc, (sc, dc) into sc, repeat from * around (49, 53, 53, 57, 57, 57)
Round 11 (11, 11, 11, 13, 13)- 16 (19, 19, 20, 22, 23): repeat rounds 9 & 10, changing colors as indicated, if you so choose, leave yarn in tact and move on to ribbing.
Ribbing for the body
**If you are working with multiple colors, you will work a ss into the 1st st, picking up your ribbing color as you go, cut the last color of the body, leaving an approximate 2″ tail, and follow on to the foundation, working this tail into the ribbing slip stitches as you go.
Foundation: ch 4, sc in blo back towards the body, ss into the next 2 sts of the body, turn (3)
Row 1: sc in blo, turn
Row 2: ch 1, sc in blo, ss into next 2 sts of the body, turn (3)
Row 3- 48 (52, 52, 56, 56, 56): repeat rows 1&2
Row 49 (53, 53, 57, 57, 57): bring last row towards foundation row, work a series of ss across both rows to join the ribbing, fo and cut yarn, weave in ends. (3)
Right Sleeve for: 0/3mo, 18mo, 2T
Left Sleeve for: 3/6mo, 6/9mo, 9/12mo
Foundation: in 1st sc, p/u loop, *(dc, sc), sk next dc, repeat from * working into sc sts only, ss 3 into spacing at armpit. (24, 27, 27, 28, 28, 28)
Round 1: *(sc, dc) into sc, sk dc, repeat from * around ss into 2nd ss from previous round. (24, 27, 27, 28, 28, 28)
Round 2: *(dc, sc) into sc, sk dc, repeat from * around, ss into last dc (24, 27, 27, 28, 28, 28)
Round 3: *sk dc, (sc, dc) into sc, repeat from* around (25, 28, 28, 29, 29, 29)
Round 4: *(dc, sc) into sc, sk dc, repeat from * around (24, 27, 27, 28, 28, 28)
Round 5- 13 (14, 15, 17,18,19): repeat rounds 3 & 4, changing colors as you go if you are working with multiple colors.
Round 14 (15, 16, 18, 19, 20): sc2tog around, move on to “Wrist Cuff” portion of the pattern, sc in last for 6/9mo and ss in last for 18mo. (12, 14, 14, 14, 14, 14)
Left Sleeve for: 0/3mo, 18mo, 2T
Right Sleeve for: 3/6mo, 6/9mo, 9/12mo
Foundation: In first sc: pu loop, *(sc, dc), sk next dc, repeat from * working into sc sts only, ss 3 into spacing at armpit. (24, 27, 27, 28, 28, 28)
Round 1: *(dc, sc) into 1st sc, sk dc, repeat from * around, ss into last dc, and 2nd ss from previous round. (24, 27, 27, 28, 28, 28)
Round 2: *sk dc, (sc, dc) into sc, repeat from * around, ss into 2nd ss (24, 27, 27, 28, 28, 28)
Round 3: *(dc, sc) into sc, sk dc, repeat from * around, ss into last dc (24, 27, 27, 28, 28, 28)
Round 4: *sk dc, (sc, dc) into sc, repeat from * around (25, 28, 28, 29, 29, 29)
Round 5- 13 (14, 15, 17,18,19): repeat rounds 3 & 4, changing colors as you go if you are working with multiple colors.
Round 14 (15, 16, 18, 19, 20): sc2tog around, move on to “Wrist Cuff” portion of the pattern, sc in last for 6/9mo and ss in last for 18mo. (12, 14, 14, 14, 14, 14)
Wrist Cuff:
**If you are working with multiple colors, you will work a ss into the 1st st, picking up your ribbing color as you go, cut the last color of the sleeve, leaving an approximate 2″ tail, and follow on to the foundation, working this tail into the ribbing slip stitches as you go.
Foundation [continuing from each sleeve]: ch 4, sc 3 in blo, ss into 2 of the sts of the wrist
Row 1: sc in blo, turn (3)
Row 2: ch 1, sc in blo, ss into 2 of the ss of the sleeve (3)
Row 3- 12 (14, 14, 14, 14, 14): repeat rows 1 & 2
Row 13 (15, 15, 15, 15, 15): bring last row towards foundation row, work a series of ss across both rows to join the ribbing, fo and cut yarn, weave in ends. (3)

That’s all there is to it! I hope you enjoyed making this sweater as much as I did, and if so, I hope you’ll also enjoy our Mary’s Cardigan for adults and the Easy Crochet Pullover for children.


Hello! I’m currently working on this pattern to make an 18month size sweater. I’ve crocheted up to the part where I am supposed to split the yoke and I am a little bit confused about how to follow Round 7 (9,9) with splitting the yoke. When I fold the piece in half it doesn’t look like it will fit my 18 month old even though I followed the instructions clearly. Will I do round 7 (splitting the yoke) and then repeat it twice to get to round 9? If that’s the case, then as I look forward in the pattern the rounds don’t end up lining up. Does this question make sense? Thank you so much for this beautiful pattern though!
Hi Georgia,
Sorry for any confusion you’re having with this pattern. First, I want to confirm that you have worked rounds 2&3 up through round 8 for the 18 month size. If you have worked less than 8 rounds, then the bust will not be large enough for the 18 mo size. The numbers in parenthesis listed in each pattern line from this point forward are referencing the varying sizes that this pattern is graded for. So the round 7 is for size 0/3, but when it references (9,9), those are the rounds you should be on for the 18 mo and 2T at this point in the pattern. Then subsequent lines will have varying starting rounds, based on the pattern size you are making. Hope this makes sense!
If you have indeed worked through round 8 before the split, and the measurements do not match those listed in the size chart on the pattern, then I suggest double checking your gauge to make sure it is not off. If your sweater is turning out too small, you may need to size up your crochet hook.
Hope this all helps and happy crocheting!
-Bernadette
The ribbing is confusing me 🙁
I slip st at the end of the body. Moving onto the foundation, I chained 4, then put a sc in the 2nd ch from the hook? Just lost over here 🙁
Hi Shelbi, Sorry for the confusion! You’ll sc in the 2nd ch from your hook and in each stitch back down to the body portion where you’ll slip stitch into it to connect the ribbing as you go. So the ribbing 3 stitches long, and that “ss in next 2 of the body” is referring to the part where you connect to the body. I really like this tutorial if your a visual learner and want to see this technique in action: https://www.youtube.com/watch?v=xsEPLeUSwmg&t=2s
Could make video of it, I’m a visual learner
Hi there! Sorry, I’m not currently working on an additional videos. But when I get back to it, I’ll be sure to add this one to the list of potential videos to make!
Hi could you please explain for example what
Round 4-6 (7,7,7,8,8) : repeat rounds 2 & 3
Means
Thankyou
Jill
Hi Jill,
The number 4 indicates the next round (for all sizes), the 6 (7,7,7,8,8) would be the thru-rounds for the various sizes this pattern is written for. So the 6 would be what round you would stop at for the 0-3mo size, whereas the 7 indicates the stopping round for the 3-6mo, 6-9mo, 9-12mo and the 8 for the 18mo and 2T sizes. The “repeat rounds 2&3” indicates that you follow the instructions for the 2nd and 3rd rounds until you get to the round you are directed to stop at for the size you are working according to the 6 (7,7,7,8,8). Hope this makes sense and helps you out!
Warmest Regards,
Bernadette
I’m a little confused about pattern note 6. For the alternate sizes, do you start with foundation and then move to round 2 and skip round 1? If so, do you count round 2 as round 1 for the color chart? Thanks!
Hi Megynn,
Thanks for reaching out and sorry about the confusion. The 6th pattern note refers to the body portion of the pattern (after you split the yoke), not the start of the actual pattern.
It’ll make more sense when you get there- but in order to keep the stitches consistent, half the sizes needed an extra round after the split of the yoke before continuing on to the body section. That’s what that note is referring to.
Hope this helps and happy crocheting!
That clarifies things a lot! Thank you for you4 quick response! It’s so cute, can’t wait to see how it turns out!
Of course! Hope you love it!
Thank you so much for this delightful little sweater pattern! I am making up little outfits for our local Downs Syndrome Association, and this one will be a winner, along with a beanie, booties and a little snuggly toy.🤗
Thanks so much Jen! And what a fantastic cause you’re giving to, I’m so deeply honored to have one of my patterns help contribute to what you’re doing! Keep up the amazing work! 💕
-Bernadette