Easy Crochet Pullover-Blog Post

**Below you will find the story behind and picture tutorial for making your very own Easy Crochet Pullover sweater. If you are looking for the pattern, you can find it for free here.**
Are you familiar with that feeling when your senses seem to heighten so much that you can almost feel your pulse? With every long breath you can feel your chest constrict. Your body doesn’t know if it’s excited or scared. You simultaneously feel like exerting a burst of energy, and collapsing with exhaustion.
That is me today guys. I am releasing my first ever sweater pattern. GAHHHH! I made the Sea & Shells dress last year, but that was SO simple to make with only two pieces that it hardly felt like a garment.
Will you guys love it? Will you hate it? Does anyone even want to wear a bulky stripped sweater?
I keep telling myself that at the end of the day, I like it. I’m super proud of how it turned out, and the fact that I was able to create it from scratch means that I can do it again and that hopefully with every new garment pattern, I continue to learn. But let’s be real…. I really do hope you all like it!

Here are some of my favorite things about this crocheted sweater:
- It works up quickly- I’m talking a single weekend for an experienced crocheter.
- It’s slightly oversized making it both comfortable and forgiving to all body types.
- It’s got long sleeves- I can’t be the only one who hates having sleeves that barely cover my wrists. But if you’d rather have normal length sleeves- I’ll walk you through adjusting that as well.
- It’s got a pocket!
- The main stitch of this pattern is a modified half double crochet, making it incredibly easy for beginners, but giving it a different look than the normal and obvious crochet rows.
What will your favorite thing(s) be about this crocheted pullover? I can’t wait to hear!
This sweater is made up of 5 main pieces; a front and back panel, 2 sleeves, and a collar. The front and back panels are essentially 2 large rectangles with easy shoulders added on at the end. It really is the perfect Netflix binge type of project, at least until you get to the sleeves- when you’ll need to track your rows.
That being said, the sleeves are about as easy as can be. I’m telling you guys- this pullover has a very simple and straight-forward design.
To start things out, you’ll need to grab your bulky weight (5) yarn. I used Lion Brand’s Color Made Easy (get yours here) and it took less than 5 skeins to make a medium! You’ll also need a US L (8mm) crochet hook.

I cannot stress enough to check your gauge on this one or it could end up too small or too large, and with a sweater, we don’t really want to take that chance, do we?
If you’re like me, the number one thing that keeps you from checking your gauge is impatience and not wanting to spend time on something you know you’ll end up frogging. But I’ve got good news! You can check your gauge on the pocket. It’s slightly larger than a 4X4 swatch, and uses the same stitch as the gauge pattern. You can kill 2 birds with one stone, so to speak.
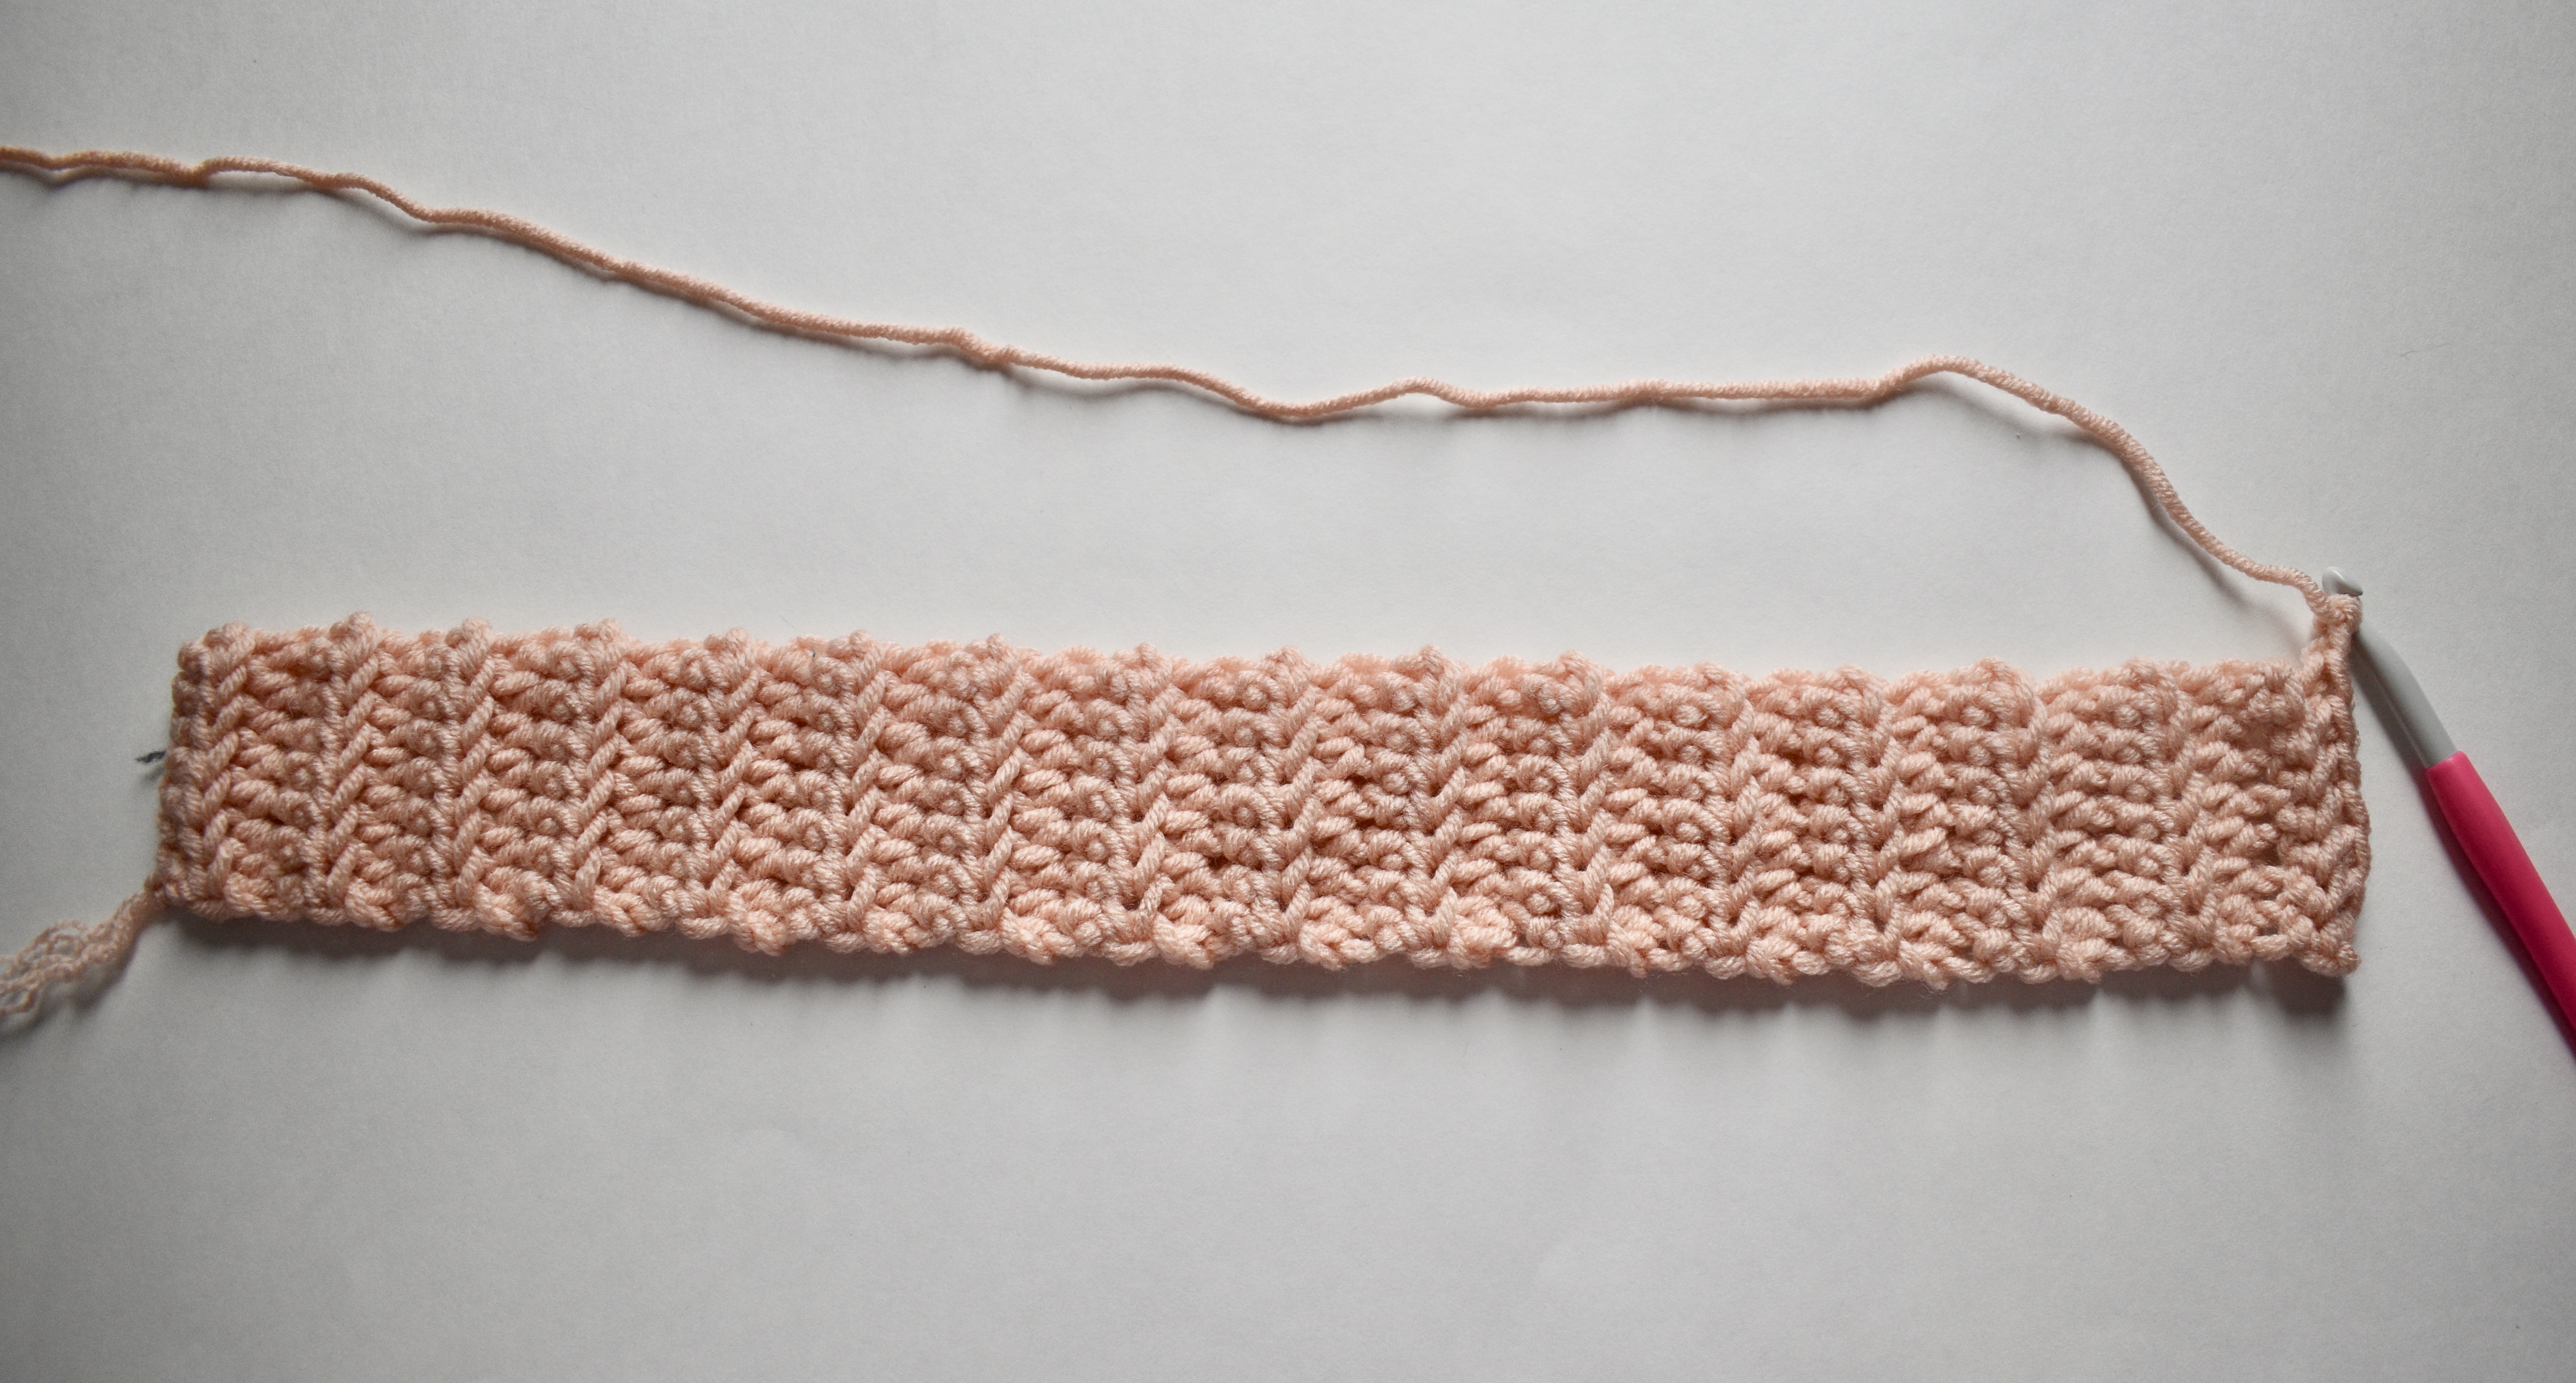
The pocket is actually worked upside down, starting that the brim that will eventually be the top of your pocket. So if you choose to add on the pocket, you’ll start at the brim, working a few rows of half double crochet stitches in the back loops only.


From here, you will chain 2 and pick up half double crochet stitches across the edge of your brim.


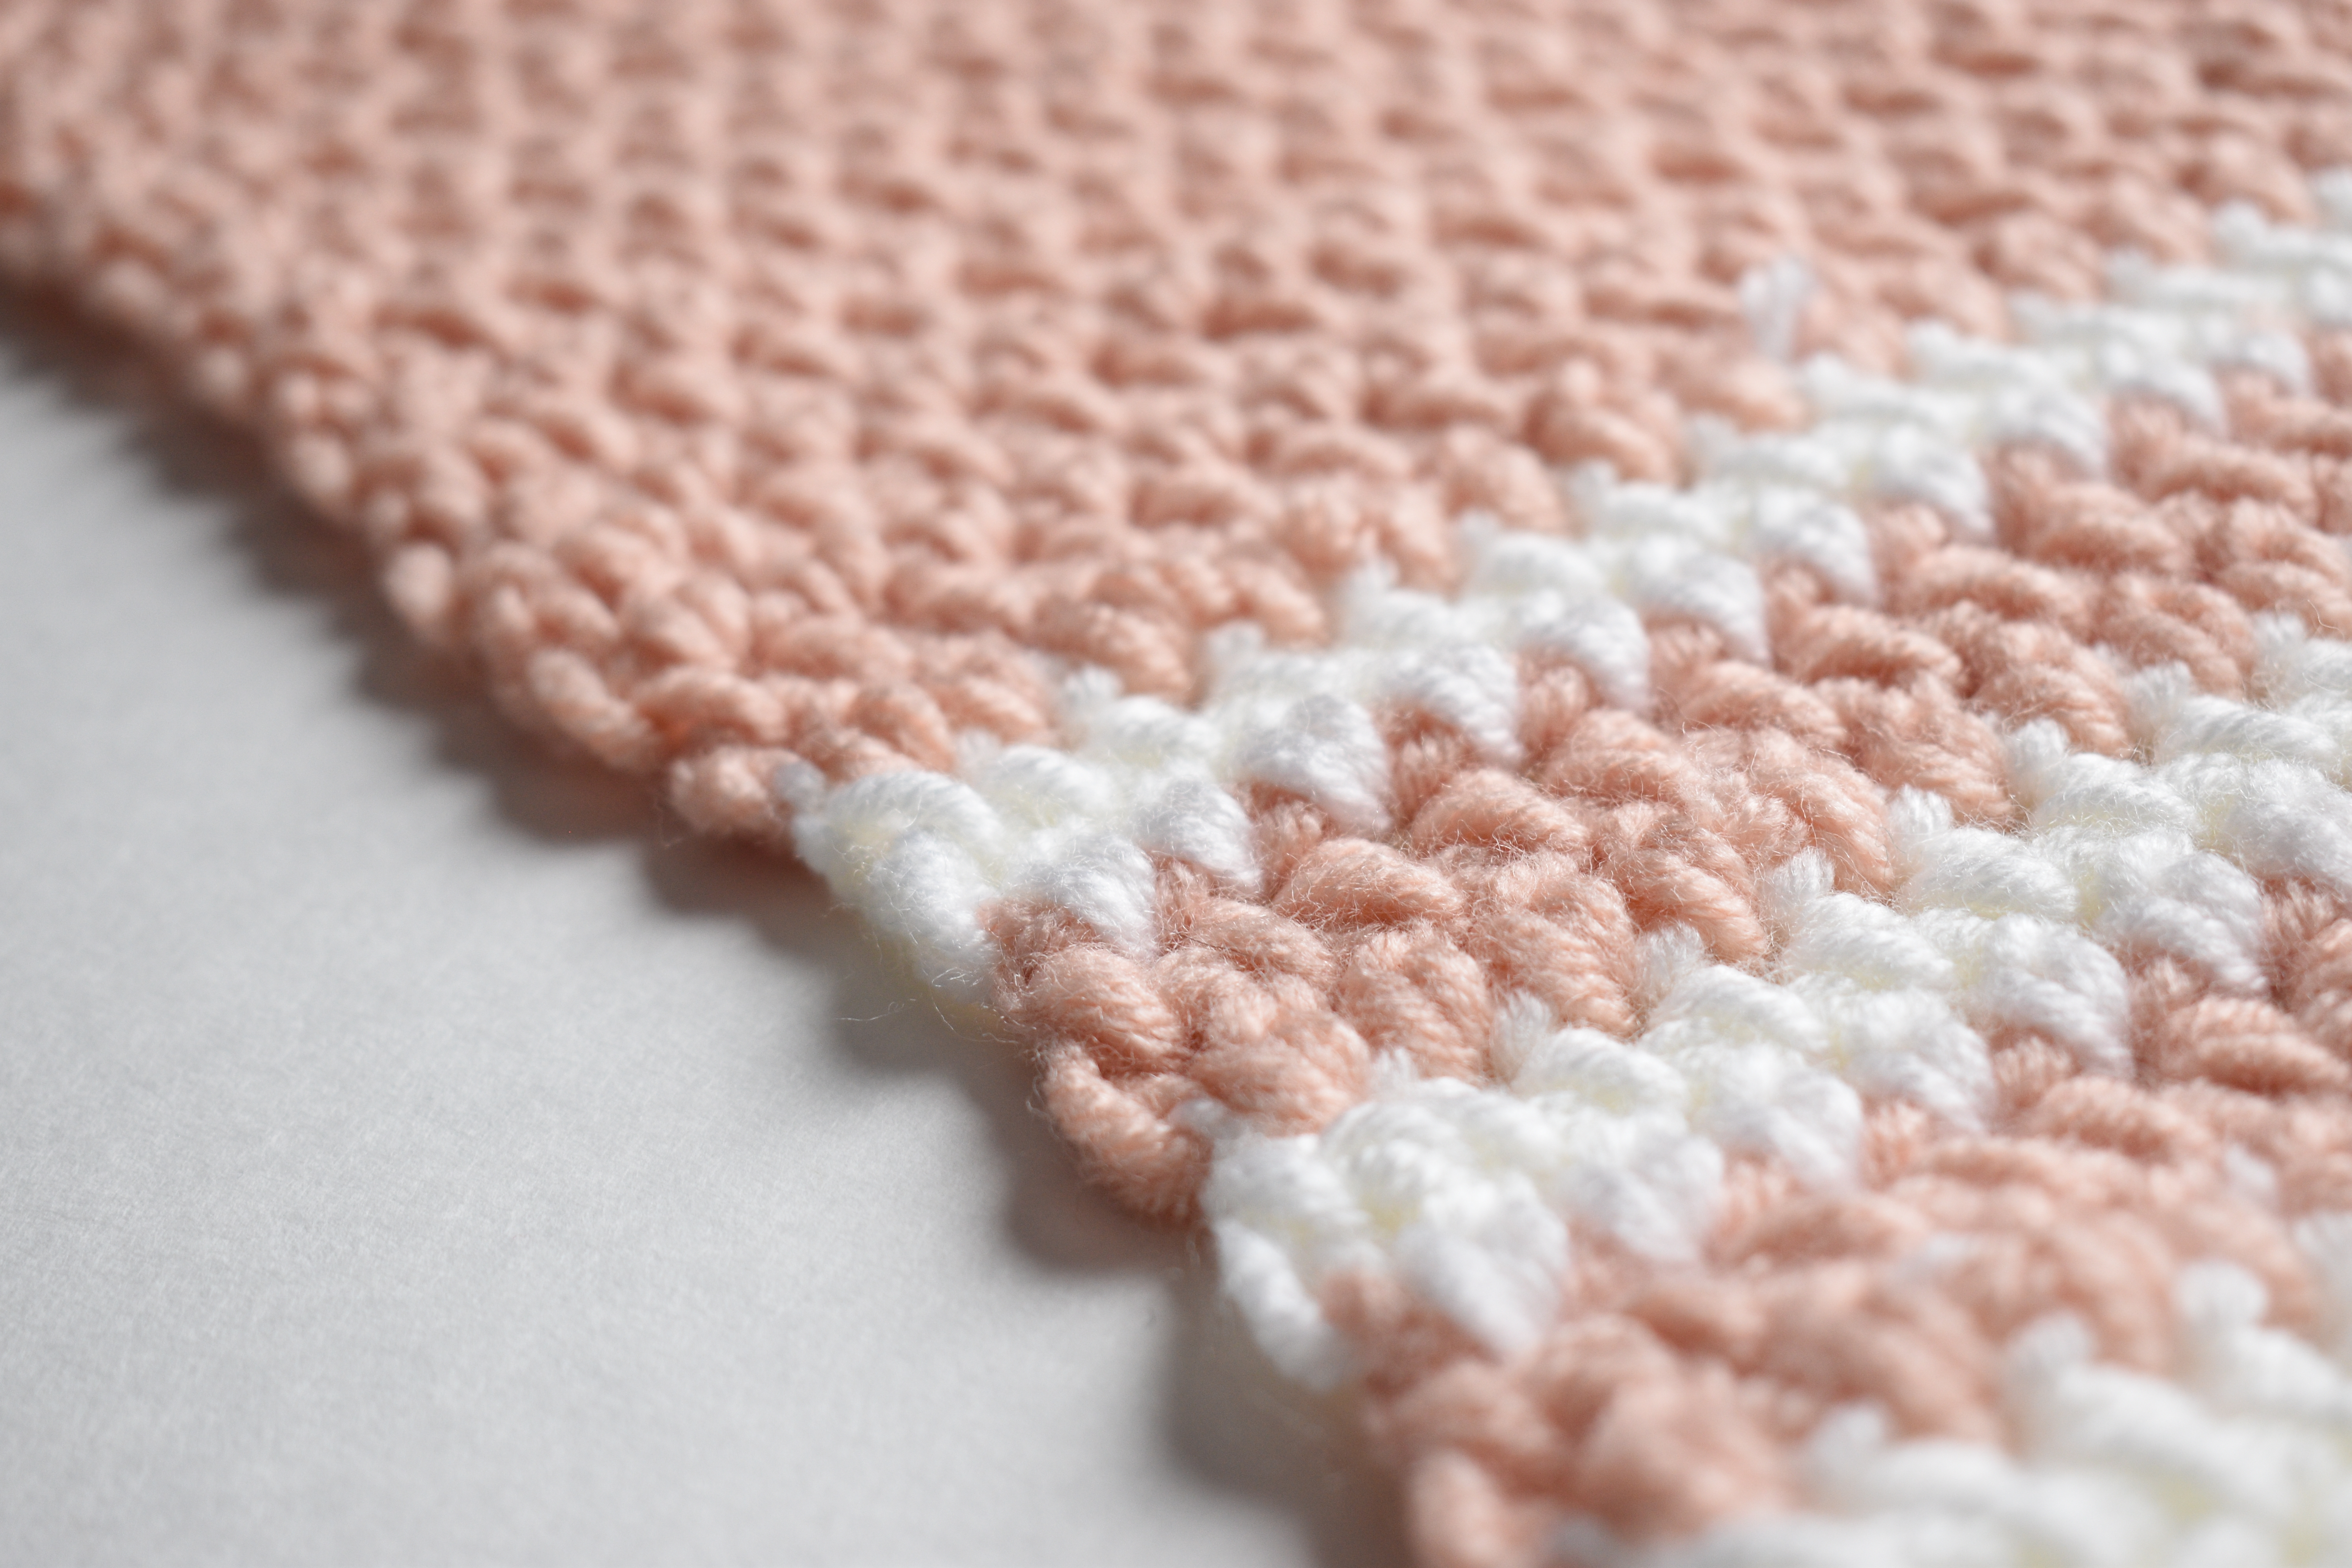
The next row is when the modified half double crochet stitch comes in. This modified stitch is the same idea of a normal half double crochet, but is worked between the posts of your stitches as opposed to under the “v” of each stitch. This gives an interlocking look to each row which I just love! (Please note that the picture shown below is of the sweater, not the pocket)

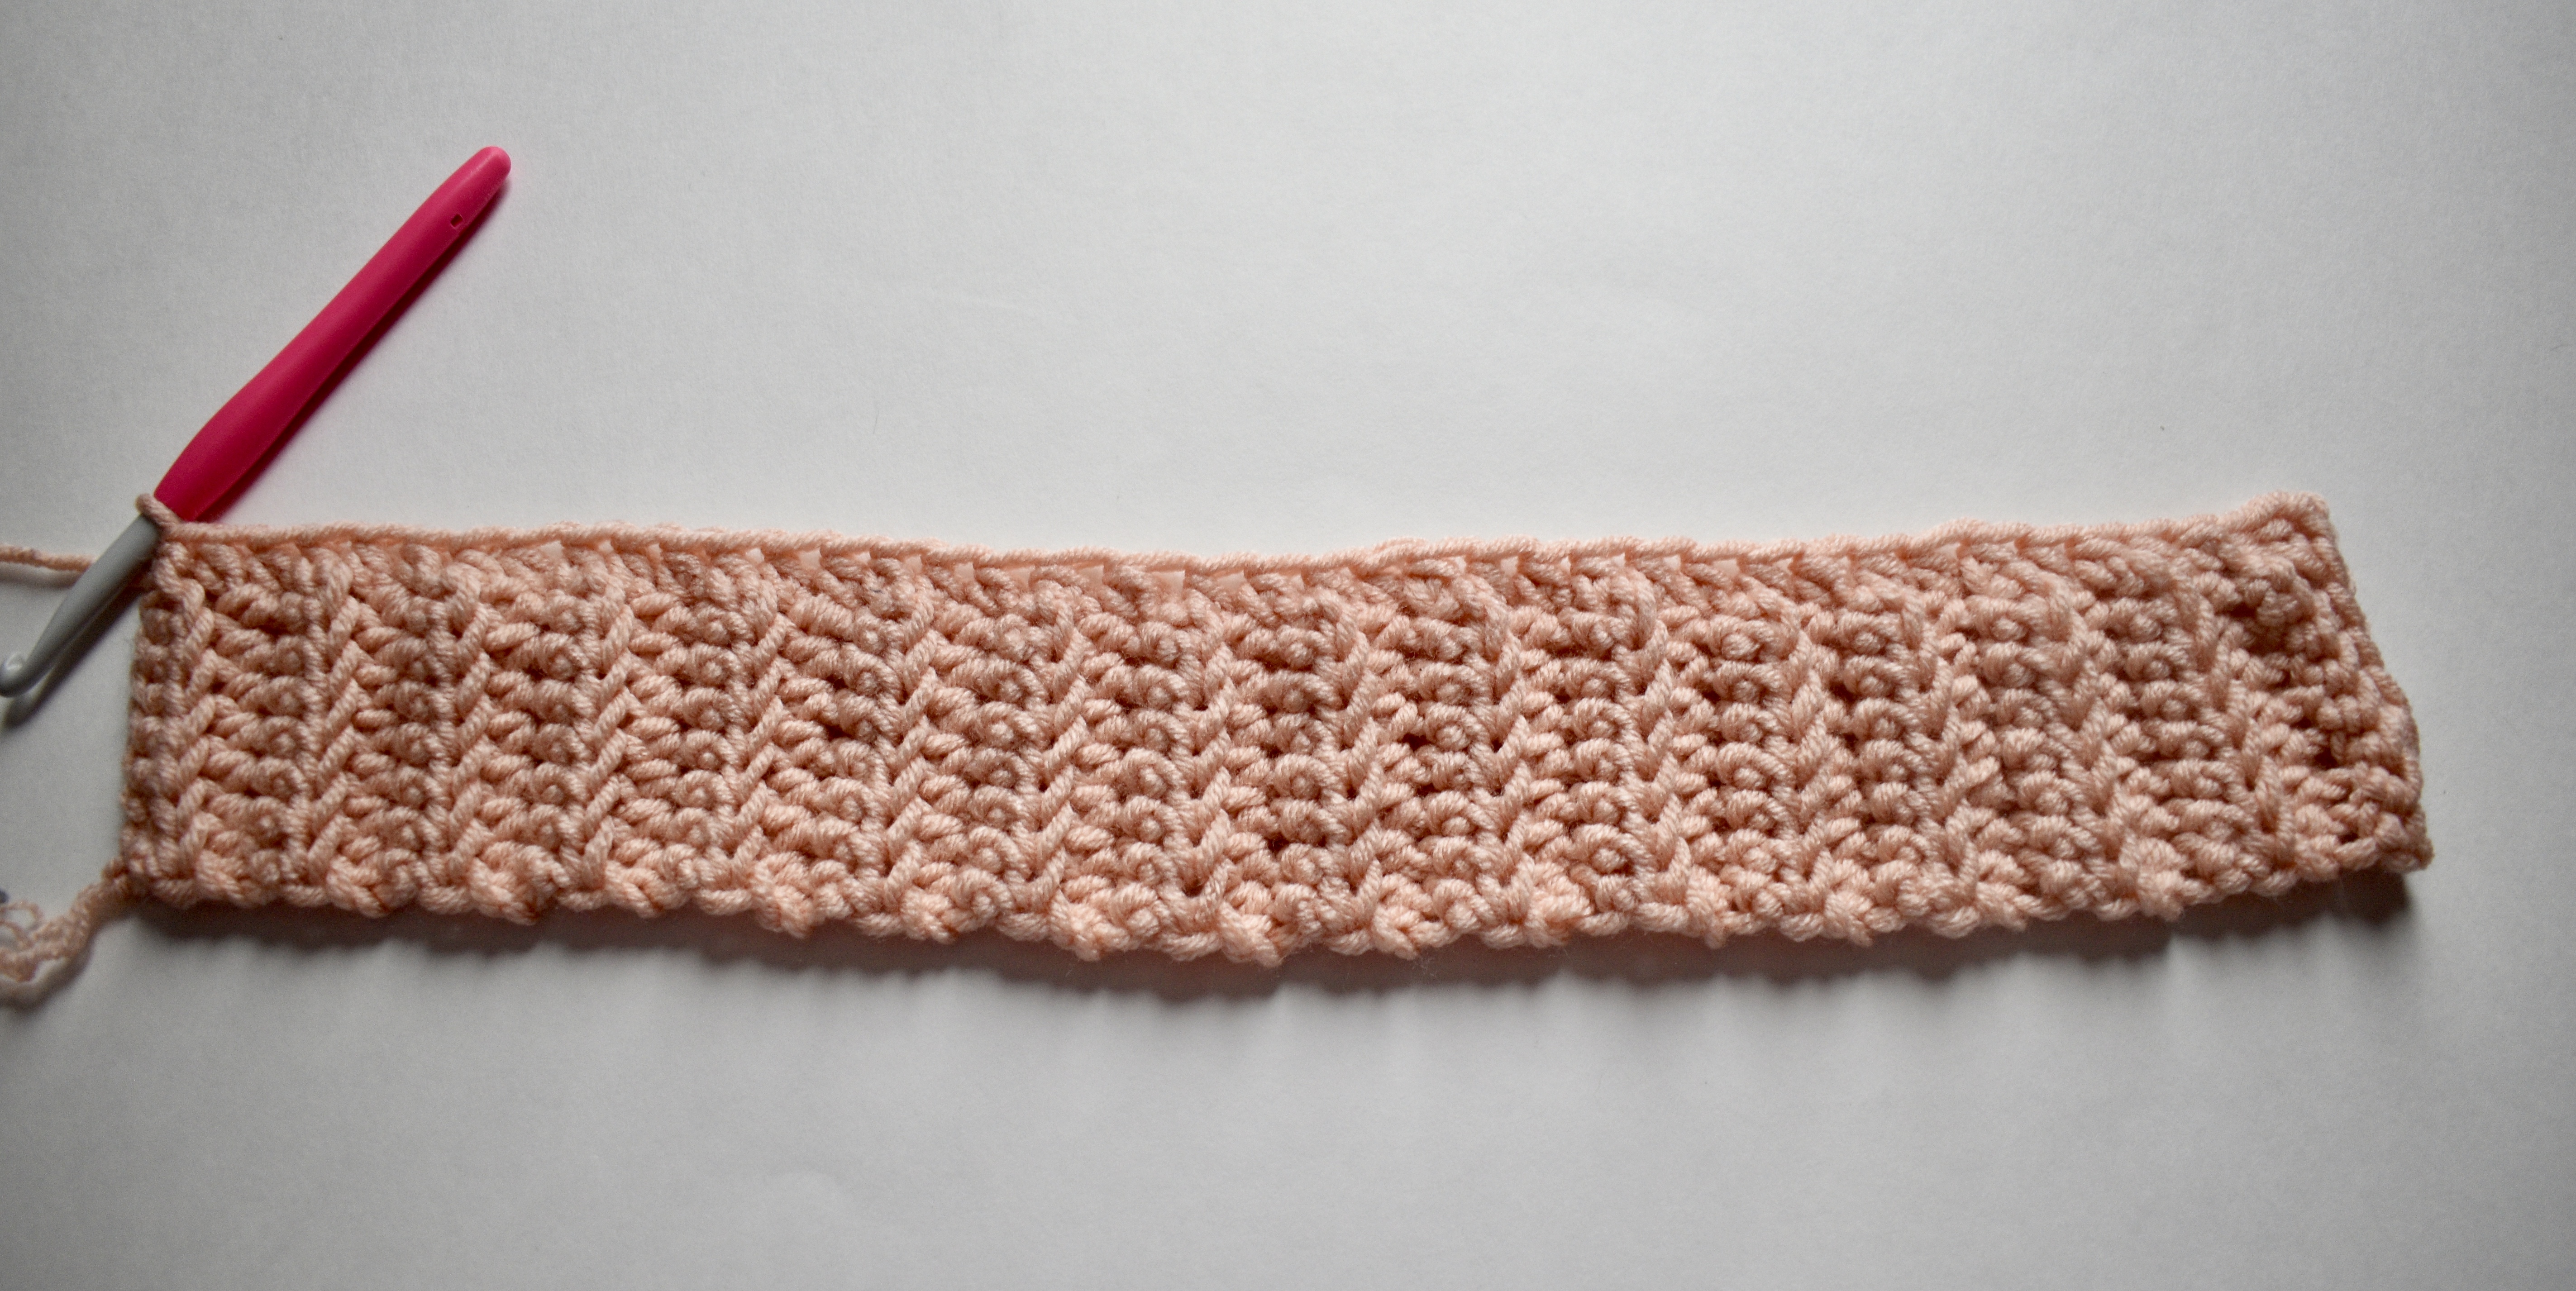
The rest of the pocket is just a repeat of the second row, working half double crochet stitches between the posts across.
Once your pocket is complete, you can fasten off leaving a long tail and check your gauge. So long as your gauge is good to go, you can move onto the body of the sweater.

The front, back and arm panels all start out the same as the pocket, with a brim of half double crochets worked into the back loops only.
I started my sweater with the front and back panels. Once the brim is long enough, you will chain 2 and pick up half double crochets across the top of the brim.
You will need to add in additional stitches (this helps to stretch out the brim once complete), but there is no real science to this. Just try to pick up the extra stitches evenly spaced across the top.
The very next row will be the first color change of this sweater. I like to save some time weaving in ends later on by working my new color tail into the first few stitches of the next row.
So to do this, you will chain 1 and cut off the primary color leaving about a 3-4″ tail. Pull that tail through the chain 1 (as you would for fastening off a project), but do not pull the tail tight just yet. First, you will want to pull up a loop of the secondary color into the chain 1. Now you can pull the tail tight, which will secure the secondary color into place.


Chain 1 more in the secondary color (2 chains total) and work half double crochets across, carrying the tails into the first few stitches as you go.


The next row you will begin again with the half double crochets between the posts, continuing this for a few rows before changing colors again.


The first row of each color change will be normal half double crochets, with subsequent rows in the same color being worked between the posts.

Once the stripes are all done, you will work the rest of the panel in the primary color as half double crochets between the posts.


After getting the panel long enough, you will add on the shoulders.
You will start the first shoulder on the right of the panel, starting the row as normal. Only for this row, you will stop a few stitches in, then work one half double crochet decrease, and turn your work.
For the half double crochet decreases in this pattern, you will yarn over, insert into the first stitch, and pull up a loop. Then insert your hook into the second stitch, yarn over and pull up another loop (4 loops on your hook). Pull last loop through all loops on your hook (as you would a slip stitch).


The next row will start with another half double crochet decrease, and finish with a few more half double crochets between the posts.

This process will repeat for 4 rows total, at which point you will fasten off.

Since the stitches in this pattern are reversible, you’ll now flip your work over and pick up the yarn on the opposite end, repeating this process for the other shoulder.


Once the front and back panel are complete, you will begin the arms.
They start in the same fashion, with the brim of half double crochets worked into back loops only.


Once the brim is complete, you will start to work up the arm. Both arms for each size is worked in the same fashion. You will increase in the first and last stitch of every 5th row.

As mentioned above, this sweater is meant to be oversized with long arms. If you have shorter arms, I would recommend working a row or two less than the pattern mentions. If you’re making an x-small, or small, and want shorter sleeves, then you can work an increase in the first and last stitch of the 33rd row and fasten off at the end of the 35th row. All other sizes, you can fasten off at any point after the 35th row.


Once complete, the arms will look like a long triangle. You’ll bring the edges together and mattress stitch together.

The last piece required for the pattern is the collar. This is a long rectangle made up of several rows of half double crochets worked into the back loops only.


Now is the “fun” part- assembly! You’ll start by joining the shoulders together. To do this, you’ll line up the front and back panels and mattress stitch the top rows of the shoulders together.


I added my collar next. You’ll first want to join the foundation to the last row to create a circle. Then stitch the edges of the collar to the neck opening of the sweater.
I recommend securing the collar at the shoulder seams with a safety pin or stitch marker before you begin. The collar stitches will not be equal to the amount of stitches around the neck, so you will need to stretch it a bit. Using the stitch markers will help keep it even on the front and back.


You’ll attach the arms next, but before you do, you’ll need to create the arm hole.
With the front and back panels lined up, measure the appropriate arm hole size down the side of the sweater and place a stitch marker there. Seam up the sides starting at the bottom of the brim up to the stitch marker for the arm hole.

Now you will attach the top of the sleeve to the arm hole. Place the 90º angle of the sleeve towards the top of the sweater before you stitch into place.

Repeat with the other arm, and your sweater is officially done!
If you would like to add on the pocket, I recommend putting the sweater on and deciding where you would like it to be placed, putting a stitch marker in a spot of where you’d like the sweater seaming to start. I decided to put mine in the lower right hand side of the sweater with the top of the brim lined up with the top of the last stripe.

Seam the pocket to the sweater starting at the top of on side, working down and across the bottom, then back up the other side. Fasten off and weave in the ends.

Your sweater is now complete and ready for cozying up with! I hope you all enjoyed making this Easy Crochet Pullover, and stay tuned for more garment patterns to come!
