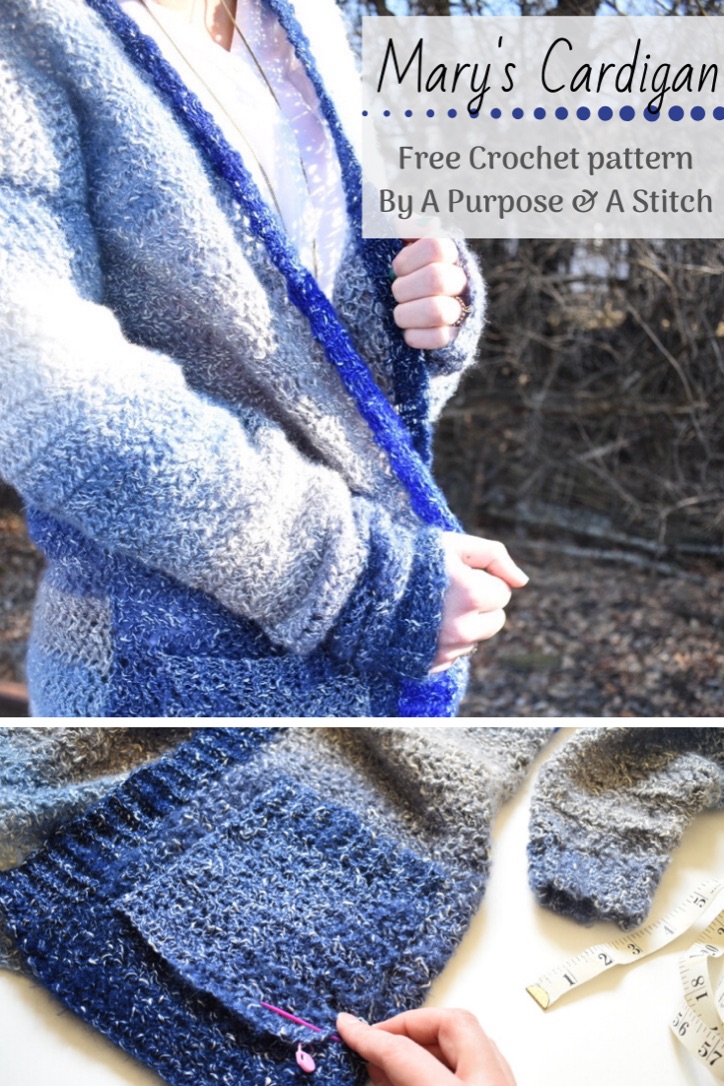
Mary’s Cardigan- Free Crochet Pattern

The Mary’s Cardigan is finally here, and I couldn’t be more excited about it! This has quickly become my favorite sweater, and I hope you feel the same way!
You will find the free pattern below, or you can get the inexpensive, ad-free, large font PDF available in our Etsy shop here and Ravelry shop or que here. You can also not purchase the PDF directly through out site, here.
Please make sure you read through all pattern notes before starting, and I also highly recommend checking out the straight forward, step-by-step picture tutorial on our blog here as well!
My husband likes to call cardigans “granny sweaters”, so I couldn’t resist naming this one after my late grandmother who really helped me to perfect my crochet skills. Made up mostly of the Herringbone double crochet stitch, with very little assembly and shaping, this sweater couldn’t be more fun to make, or more Netflix- watching worthy. 😉
I don’t think this one needs much more introduction than that, so without further ado, I give you: Mary’s Cardigan.

Approximate Completed Measurements
X-Small: 34″ around, 22″ long
Small: 36.80″ around, 22.25″ long
Medium: 41″ around, 23″ long
Large: 44.5″ around 24″ long
X-Large: 47.5″ around, 25″ long
2X-Large: 52″ around, 25″ long
3X- Large: 55″ around, 25.75″ long
4X-Large: 56.5″ around, 26″ long
5X- Large: 60.75″ around, 26.50″ long
What You’ll Need
6.00 (US J) hook
2 (3, 3, 3, 4, 4, 4, 5, 5) skeins of Shawl in A Ball (see pattern notes for alternate yarn usage)- approximately 1085 (1210, 1342, 1528, 1690, 1800, 1890, 1985, 2180) yards
scissors
embroidery/ darning needle
stitch marker
measuring tape
My Amazon Picks
Gauge Used
12 hbdc = 4″
9 rows = 4″
Abbreviations
ch= chain
hbdc= herringbone double crochet
fo= fasten off
p/u= pick up
sc in blo= single crochet in back loops only
ss= slip stitch
st= stitch
yo= yarn over
hbdc inc= herringbone double crochet increase
Special Stitches
Herringbone Double Crochet= yarn over, insert hook into designated st, yo and pull through the ch and the first loop on the hook, yo and p/u 1 more loop, yo and pull through 2 remaining loops on hook. (for more help with this stitch- check out Jess from Make and Do Crew’s video here).
Single Crochet in Back Loops Only= insert hook into the back loop only of the “V” of the stitch, work single crochet as normal.
Herringbone Double Crochet Increase= work 2 herringbone double crochet stitches into one stitch (for the first increase of each increasing row, you may also work the extra stitch into the 1st stitch of the row- which would typically be skipped)
Pattern Notes
- This Pattern uses US standards
- This cardigan is meant to be oversized (a plus 6″ adjustment to a fitted garment), for a more snug fit, I recommend going down a size from your normal size choice
- I recommend going through and highlighting the numbers associated with the size sweater you are making before you start.
- The pattern is written in X-Small with (Small, Medium, Large, X-large, 2X-large, 3X- Large, 4X- Large and 5X-Large) numbers following
- For the Herringbone Double crochet stitch, you will be counting the turning chain as a stitch, so you’ll need to make sure to skip the first stitch of each row to keep the count correct.
- This cardigan has longer arms for extra comfort, and optional cuff rolling. If you would rather have shorter arms, you can stop working the rows
- When adding a new skein, I tried to find one that started with the same color I ended on. If you cannot find one, you can ball up a bit of the new skein until you get to the needed color.
- * The Border portion is not meant to be exact, I have provided numbers for reference, but there is no real need to count each row, just work the border as what feels most comfortable. For a video reference of the technique I used, I recommend checking out Toni from TL Yarn Crafts video on Crochet Ribbing. The actual technique tutorial starts at right around 2 minutes in.
Pocket Pattern (make 2)
Brim
Foundation: starting with a long tail, ch 6, starting in the 2nd ch from the hook, sc across, turn (5)
Row 1-15: ch 1, sc in blo across (5)
Foundation [working across the top of the brim]: ch 2, hbdc in each row from the brim across, turn (15)
Row 1-8: ch 2, hbdc across, turn (15)
Row 9: ch 2, hbdc across, fo (15)
Body Pattern
Foundation: ch 58 (62, 67, 74, 79, 86, 90, 93, 99), starting in 3rd ch from the hook, hbdc across, turn (56, 60, 65, 72, 77, 84, 88, 91, 97)
Row 1-50 (52, 54, 56, 58, 59, 60, 61, 62): ch 2, hbdc across, turn (56, 60, 65, 72, 77, 84, 88, 91, 97)
Row 51 (53, 55, 57, 59, 60, 61, 62, 63) – 99 (103, 107, 111, 115, 117, 119, 121, 123): ch 2, hbdc 20 (22, 24, 27, 29, 32, 34, 35, 38), turn (21, 23, 25, 28, 30, 33, 35, 36, 39)
Row 100 (104, 108, 112, 116, 118, 120, 122, 124): ch 2, hbdc across, fo (21, 23, 25, 28, 30, 33, 35, 36, 39)
Flip work over and p/u yarn and starting at opposite corner of row 51 (53, 55, 57, 59, 60, 61, 62, 63), continue to foundation below:
Foundation: ch 2, hbdc 20 (22, 24, 27, 29, 32, 34, 35, 38), turn (21, 23, 25, 28, 30, 33, 35, 36, 39)
Row 1-50 (52, 54, 56, 58, 59, 60, 61, 62): ch 2, hbdc 20 (22, 24, 27, 29, 32, 34, 35, 38) Do NOT fasten off. (21, 23, 25, 28, 30, 33, 35, 36, 39)
Your cardigan should now be a large rectangle with the two front panels attached on either end of the top resembling a large “U”. You’ll work the border next, up the one front panel, around the gap between, then back down the other front panel, all on the inside portion of the “U”.
Border Pattern (*See Pattern Notes)
Row 1[continuing with the attached yarn from the body]: ch 9, starting in the 2nd ch from your hook, sc across, ss to the row most parallel on the body portion, then ss again in the row just above on the body portion, turn your work (8)
Row 2: ch 1, sc in blo across, turn (8)
Row 3: ch 1, sc in blo across, ss to the row most parallel on the body portion, then ss again in the row just above on the body portion, turn your work (8)
Row 4-127 (131, 137, 143, 149, 153, 155, 159, 161): repeat rows 2 & 3 (8)
Row 128 (132, 138, 144, 150, 154, 156, 160, 162): ch 1, sc in blo across, fo (8)
Arm Pattern (make 2)
Brim
Foundation: ch 8, starting in the 2nd ch from the hook, sc across, turn (7)
Row 1-19 (21, 21, 22, 22, 23, 24, 25, 25): ch 1, sc in blo across, turn (7)
Sleeve- sizes XS (S, M, L, XL)
Foundation [working across the top of the brim]: ch 2, hbdc 19 (21, 23, 26, 30) in each row from the brim across, turn (19, 21, 23, 26, 30)
Row 1-2: ch 2, hbdc across (19, 21, 23, 26, 30)
Row 3: ch 2, hbdc inc, hbdc across, hbdc inc in last, turn (21, 23, 25, 28, 32)
Row 4- 39 (40, 40, 41, 41): Repeat rows 1-3, fo leaving long tail (43, 47, 49, 52, 56)
Sleeve- sizes 2XL (3XL, 4XL, 5XL)
Foundation [working across the top of the brim]: ch 2, hbdc 23 (24, 28, 30) in each row from the brim across, turn (23, 24, 28, 30)
Row 1: ch 2, hbdc inc, hbdc across, turn (24, 25, 29, 31)
Row 2- 42 (43, 43, 43): Repeat row 1, fo leaving long tail (65, 67, 71, 73)
Assembly
Fold front panels down on top of back panel, so that the bottoms and sides are flush. Measure for armhole 7.5″ (8″, 8.25″, 8.75″, 9.5″, 10.5″, 11.25″, 12″, 12.5″) down from the top and place stitch marker.
Mattress stitch up from the bottom of the back and front panel on each side up to the arm hole stitch marker. If you are unfamiliar with how to work the mattress stitch, I recommend this helpful video tutorial from Chi Wei of One Dog Woof found here.
Fold arms in half lengthwise, and mattress stitch from top to bottom, creating a cylinder. Mattress stitch the upper arm opening to the armhole of the body of the sweater, with the right (90º) angle of the sleeve lined up with the very top of the cardigan. Repeat on the other side.
With the cardigan laying flat, you will locate the pocket placement. The side of each pocket should measure 1″ in from the front opening of the body. The bottom of each pocket should be located approximately 2″ up from the bottom of each front panel.
Use the starting tail of each pocket to mattress stitch the sides and bottom of the pocket in place (the brim of the pocket will be located at the top opening).
Weave in all ends, and your Mary’s Cardigan is complete! I hope you enjoyed making this cozy and fun sweater with me!