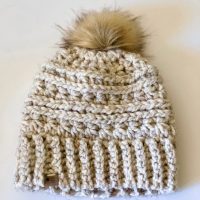
The Elmwood Beanie- Free Pattern
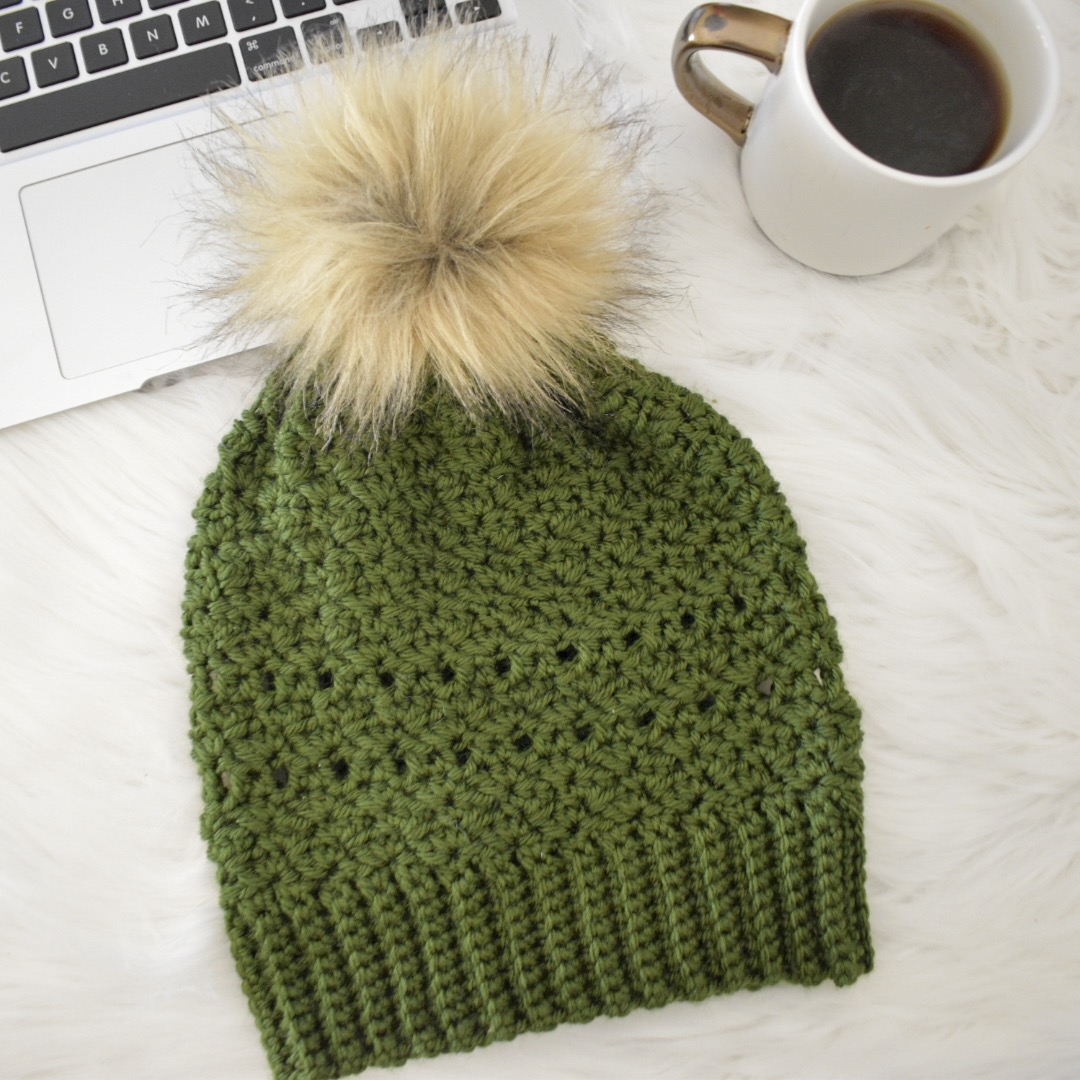
Thanks so much your interest in the Elmwood Beanie! The FREE crochet pattern for this beautiful slouchy-style beanie is located at the bottom of this post, with a step-by-step picture tutorial preceding it. I always recommend reading through the tutorial and all pattern notes before beginning, to ensure the most positive experience making one of our patterns.
**If you would prefer a colored, ad-free version of this pattern, you can purchase the inexpensive PDF from our Etsy and Ravelry shops. To purchase from Etsy, please click here. To add to your que or purchase from Ravelry, please click here. **
The Story Behind It
Winter brings with it so many things; cold, yummy food, holidays and of course- ALL the winter makes. My favorite of which are sweaters and beanies!
While brainstorming this year’s beanie patterns, I knew I wanted to have another pattern available that was made in a worsted weight yarn (right now, it’s just the Murphy Slouchy and The Jennie Beanie). I also knew I wanted said pattern to feature one of my new favorite stitches: The Sedge Stitch. I used this stitch in our “In The Kitchen” series earlier this year, and everyone loved the texture so much, I couldn’t wait to see it on a beanie.

About This Pattern
This is an intermediate beginner level pattern, which is worked bottom, up and offers an approximate 2″ stretch.
There is a lace- mesh design towards the bottom of this pattern to offer a bit more detail and unique style to this beanie.
With beautiful drape, and a lot of texture, I hope you enjoy this pattern as much as I do!
How to Make It
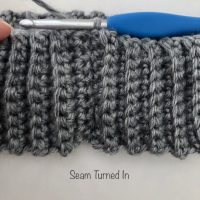
You’ll start this beanie by working the ribbing section first. This is worked by crocheting single crochets into the back loops only of each row until the needed length for the brim is complete. Once length is acquired, you will bring the foundation and last row together and work a series of slip stitches across the stitches of both rows.


After the slip stitches are placed, I recommend turning the brim inside out so that the slip stitches are hidden inside of the finished beanie, but if you prefer the look of the slip stitches, feel free to skip past this part.

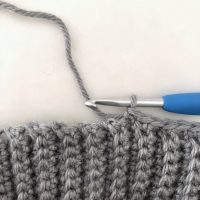
From here you will pick up a round of single crochet stitches across the top side of the brim. There should be one stitch worked into each row (including the foundation) around.

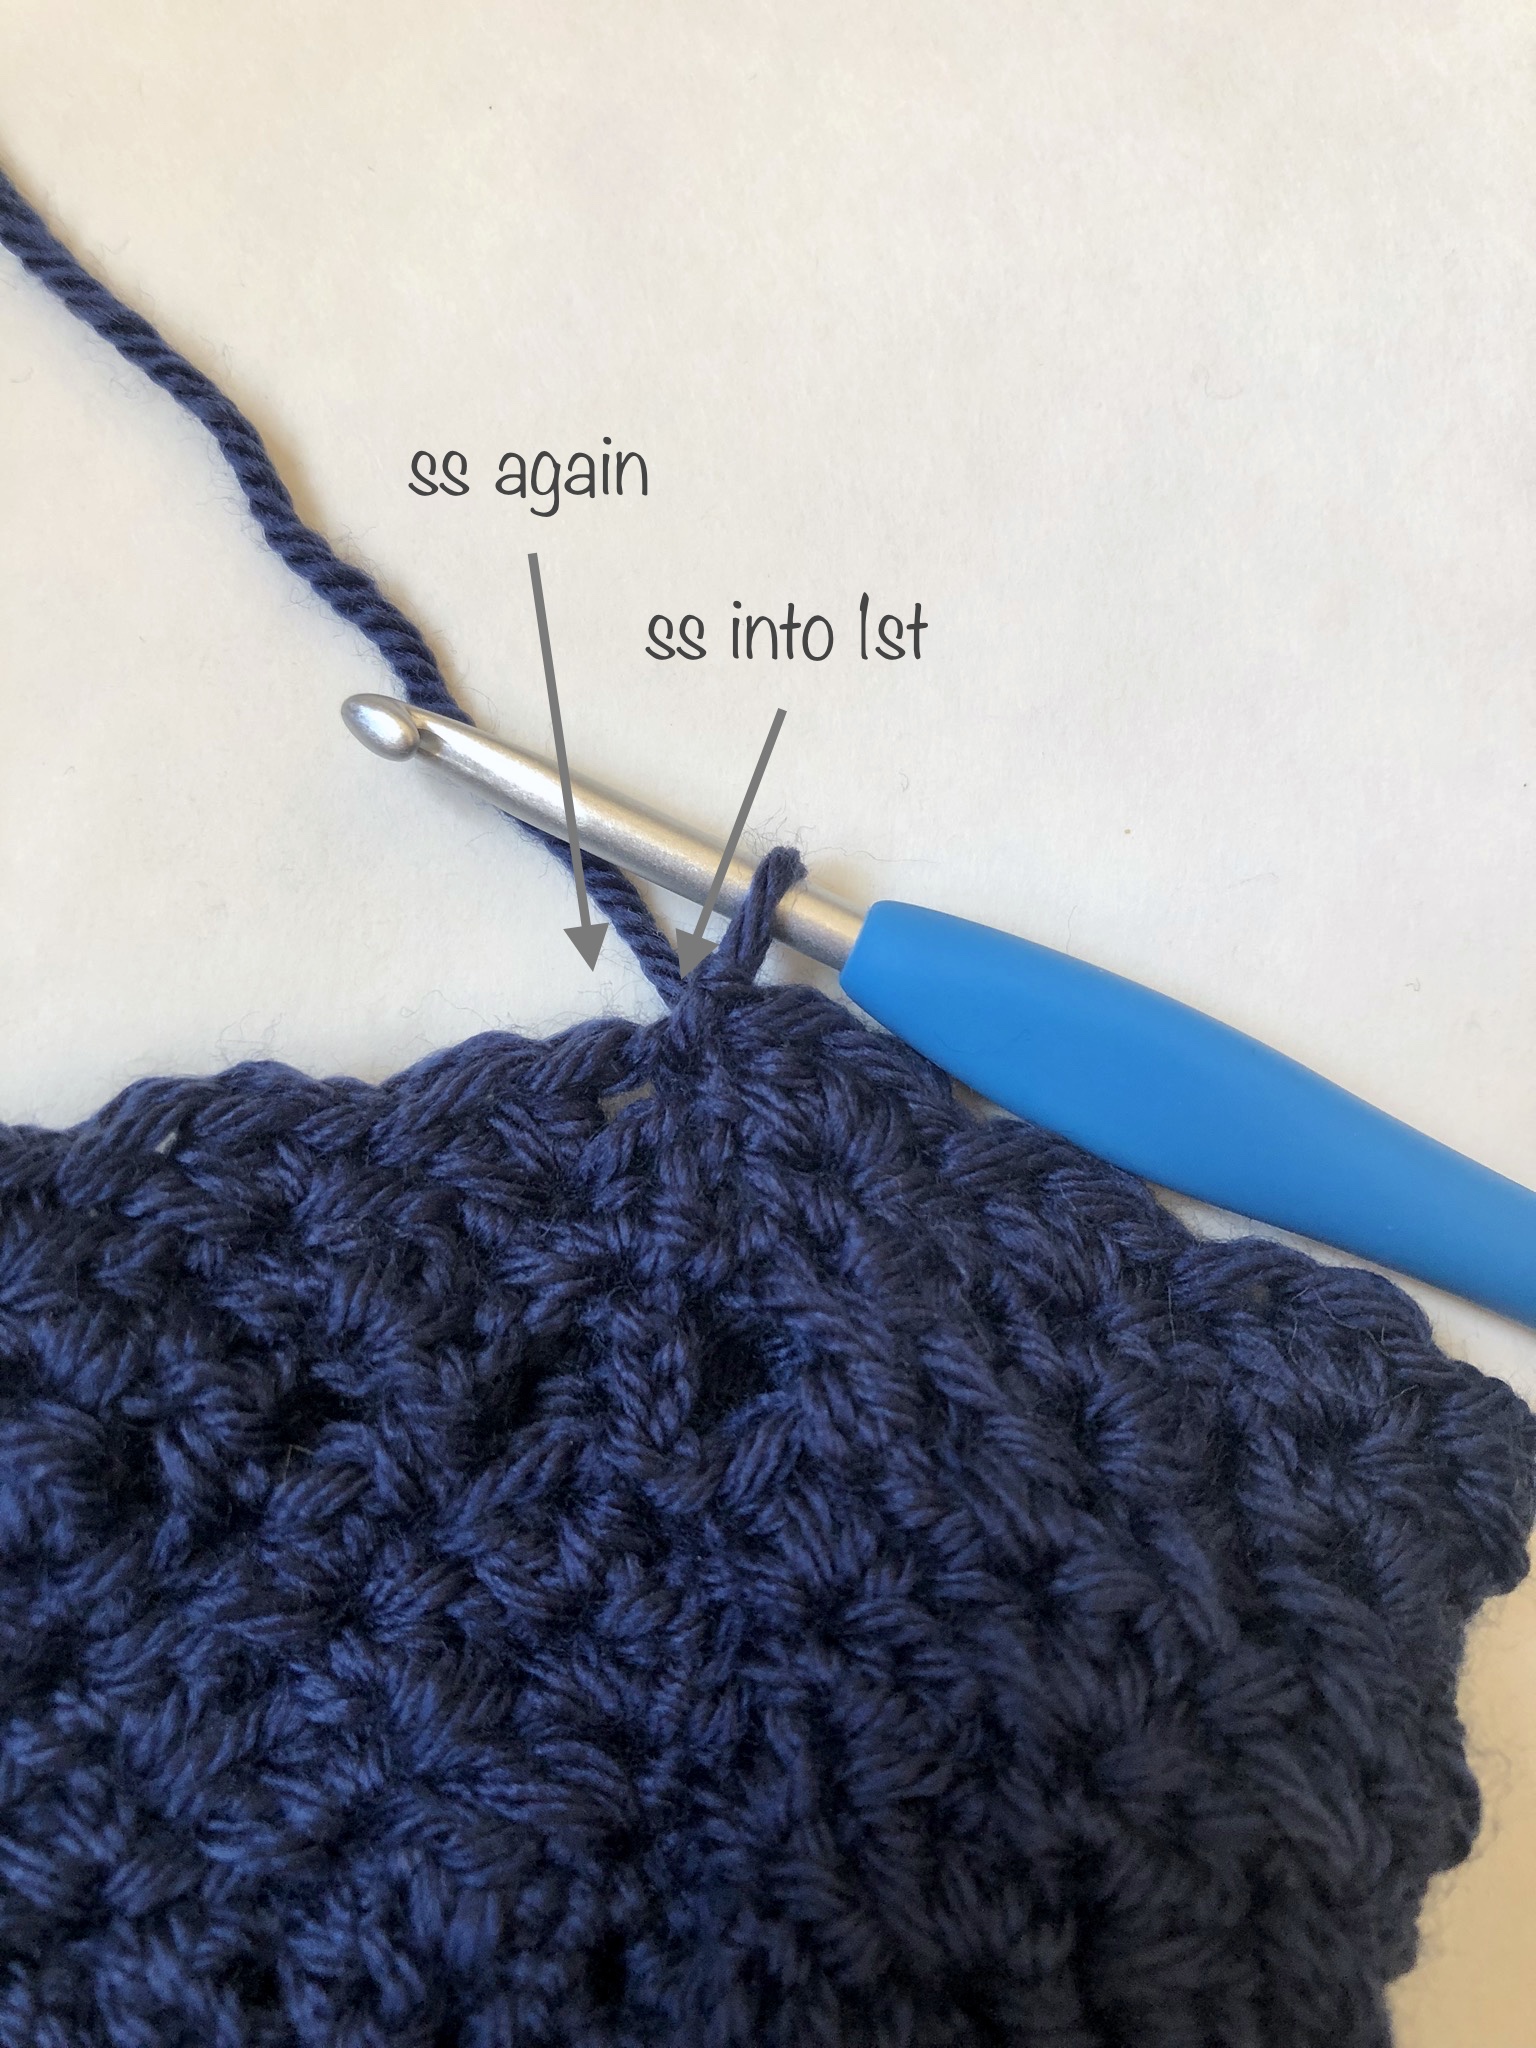
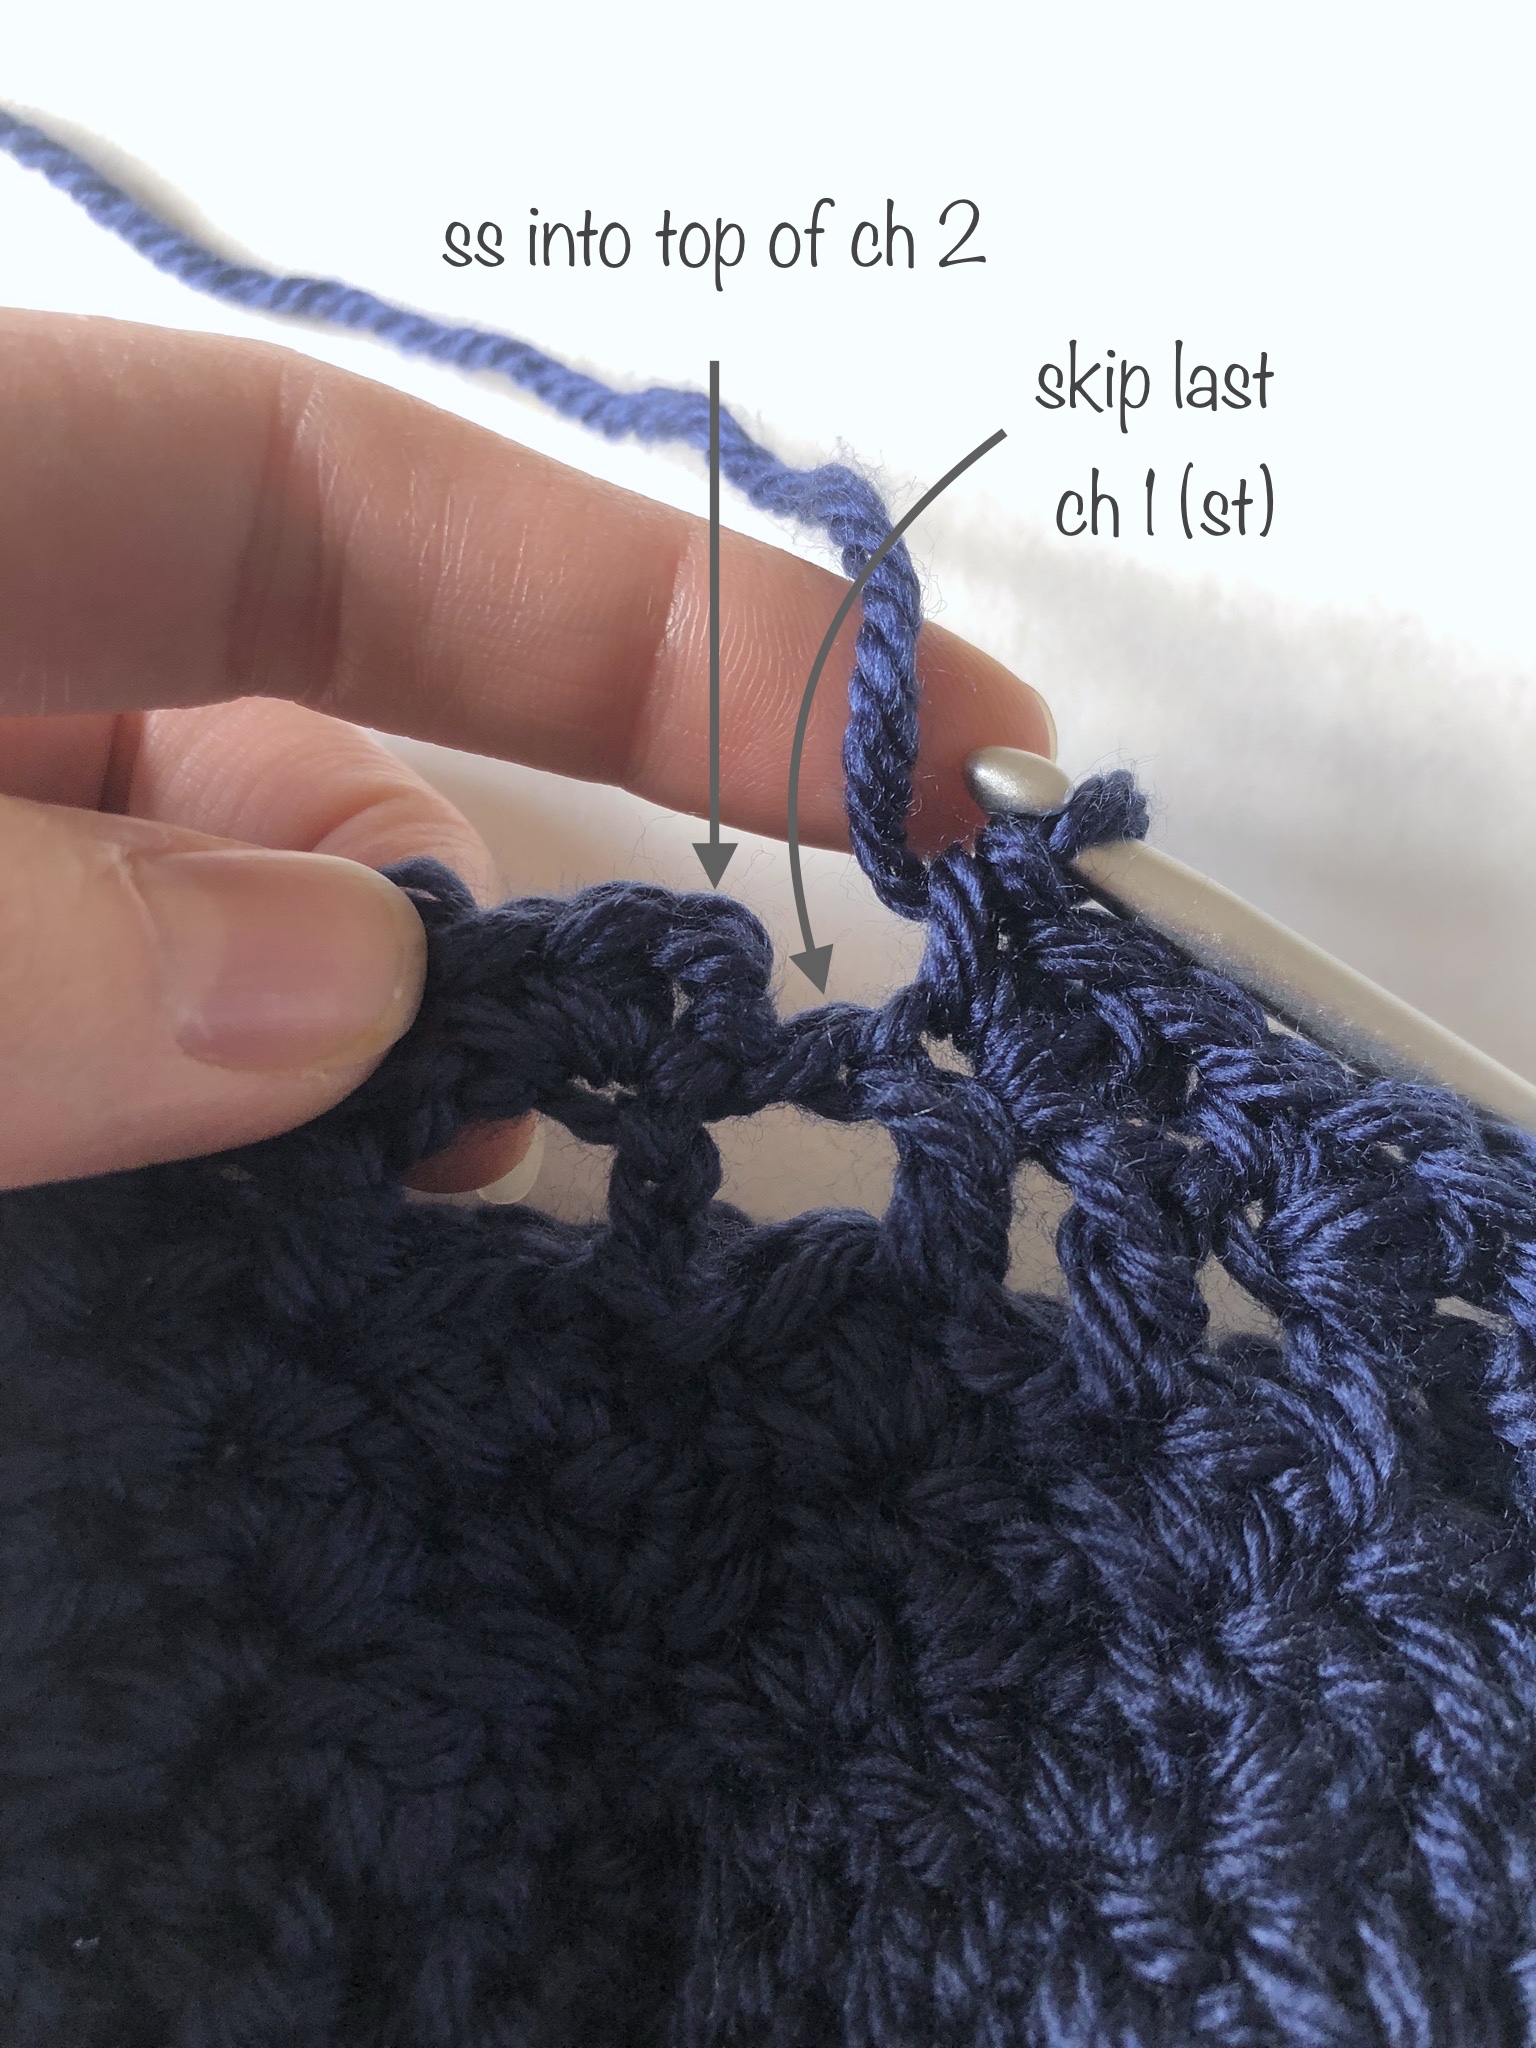
After this, you will work 3 rounds of the sedge stitch. For additional help with this stitch, we have a complete step-by-step picture tutorial that you can find here. Each round of the sedge stitch will start with either a chain 1 or chain 2 (more on the chain 2’s in a minute).
The chain 1 will count as your first single crochet (whereas, the chain 2’s will count as the first double crochet). The key to keeping the stitch count correct, is that you will end each round by slip stitching into that chain (or the top of the chain 2).

So what’s with the chain 2’s? Typically the Sedge Stitch is worked in rows, since this beanie is worked in the round, I have done my best to mimic the same look by modifying the typical way this stitch is worked.
To modify, you will work every other round of the sedge stitch opposite of the round prior. So, in round 2, for example; rather than working a single crochet, half double crochet, double crochet; you will work a double crochet, half double crochet, single crochet into each single crochet [from the previous round] only.


Once the base is set, you will begin the mesh portion of the beanie. This is a relatively simple stitch pattern consisting of: a double crochet, skipped stitch and ch 1 repeated around.


For a seamless look, you will need to slip stitch into the starting chain 1 space of the round, and then into the very next stitch before chaining for your first mesh stitch.
 This will allow you to end this round with a chain one and one stitch left that you will skip. Since you are not working into the first slip stitch, this round will have one less stitch count than the other rounds. That is totally okay! Once you pick the sedge stitch back up, your count will go back to normal.
After the mesh round is complete, you will pick up the sedge stitch pattern again. You will need to count each double crochet and chain one as a stitch while working the sedge stitch pattern, taking care to skip 2 stitches when working the sedge stitch into the designated space.

For the newborn and baby sizes, you will skip ahead to continue working the sedge stitch pattern only until the beanie reaches the height needed. For all other sizes, you will work another round of the mesh pattern after repeating the sedge stitch two more times.

From here, it’s a simple matter of continuing the sedge stitch until you get achieve the desired height.

The very last round will be a round of single crocheting two stitches together, to help close the top before cinching closed. If that still seems like too much fabric, you could work an additional round of decreases to close it up more.
After that, you will fasten off leaving a long tail. Using an embroidery needle, you will weave the tail in and out of each stitch around and pull tight to close. Tie it off and feed the tail through the top, weaving in the ends as you go. Attach pom pom if desired.


Your Elmwood Beanie is now complete!
If you liked this beanie, you may also enjoy our Murphy Slouch Beanie (a beautiful cabled beanie also worked in worsted weight yarn), and our Fireside Beanie (a quick make full of wonderful texture and details).

Now on to the pattern!
| What You Need |
| Approximately 54 (87, 120, 135, 160, 180, 220) yards of soft acrylic-based worsted weight yarn (I used Red Heart Soft)
5.0mm (US H) crochet hook stitch marker (optional) scissors embroidery needle (for weaving in ends) |
| Approximate Completed Measurements |
| Newborn: 11.5” circumference & 5” tall
Baby: 13” circumference & 6.5” tall 2T-3T: 16” circumference & 7” tall 4T- 10 years: 17.5” circumference & 7.5” tall Teen: 19” circumference & 8.5” tall Adult Female: 19” circumference & 9.5” tall Adult Male: 21” circumference & 10” tall |
| Gauge Used |
| 15 sts of the sedge stitch (sc, hdc, dc) = 4″
13 rows of sedge stitch (sc, hdc, dc) =4″ |
| Abbreviations Used |
| ch=chain
st (s)= stitch(es) sc= single crochet blo= back loops only hdc= half double crochet dc= double crochet ss=slip stitch sk= skip [stitch] fo= fasten off sc2tog= single crochet two [stitches] together |
| Pattern Notes |
|
Ribbing Pattern
Foundation: ch 8 (8, 8, 11, 11, 11, 11) in 2nd ch from hook, sc across, turn (7, 7, 7, 10, 10, 10, 10)
Row 1-44 (50, 62, 68, 74, 74, 80): ch 1, sc in blo, turn (7, 7, 7, 10, 10, 10, 10)
Join Together: ch 1, sc in blo, turn, ss into each st of last row & foundation row across, leave yarn in tact flip brim so that join seam is facing inward (or you can alternately whip stitch together for a seamless join).
Body Pattern
Foundation: ch 1, sc in each row of ribbing around, ss to join to 1st st (45, 51, 63, 69, 75, 75, 81)
Round 1: ch 1 (counts as 1st sc) , (hdc, dc) in same ch space, *sk 2, (sc, hdc, dc) in next, repeat from * around, sk last 2, ss into starting ch 1 (45, 51, 63, 69, 75, 75, 81)
Round 2: ch 2 (counts as 1st dc) , (hdc, sc) in ch 1 sp, *sk 2, (dc, hdc, sc) in next, repeat from * around , sk last 2, ss in top of starting ch 2 (45, 51, 63, 69, 75, 75, 81)
Round 3: ch 1 (counts as 1st sc) , sk 1, (hdc, dc) in 1st sc, *sk 2, (sc, hdc, dc) in next, repeat from * around , ss into starting ch 1 (45, 51, 63, 69, 75, 75, 81)
Round 4: ss in 1st st, ch 4, sk 1, dc in next, *ch 1, sk 1, dc, repeat from * around, ch 1, sk last, ss into 3rd ch from starting ch 4 (44, 50, 62, 68, 74, 74, 80)
*for Newborn & Baby size- skip to round 8, for all other sizes move on to round 5*
Round 5-7: repeat rounds 2-4
Round 8-14 (19, 18, 18, 21, 23, 26): repeat rounds 2 & 3
Round 15 (20, 19, 19, 22, 24, 27): sc2tog around sc in last, fo leaving a long tail (23, 26, 32, 35, 38, 38, 41)
Assembly
Weave tail in and out around the top, pull tail to close the hole and tie off. Attach pom pom if so desired.


i susbscribed because i love the detailed pictures you give to your patterns…You are the best!! looking forward to more.
Can you please change the color of your print from Grey to black! Those of us with vision issues or are older ( I’m both) can’t see light & neon printing! Thank you
Hi Cindy,
Sorry you’re having a hard time following along with the design of our site. If you are unfamiliar with it, I would recommend trying to use reader mode on your web browser to view our site (or any other site you may struggle seeing).
Reader mode will automatically remove any design features of the site so that you can view the page in a black, block-text format.
Hope this helps, and happy crocheting!