Summer’s Breeze Top- Blog Post
So you want to make a Summer’s Breeze crocheted top, do ya? Well then, you’ve come to the right place! While this top was rated by our testers as a basic to easy-level pattern (the tank being more basic than the halter), there are some more advanced techniques used in this pattern, so I’m going to do my best to walk you through the more challenging aspects of this top.
Want to jump right in? You can get the free pattern on our blog here. Alternately, you can also purchase the inexpensive ad free version of this top on our site, Etsy and Ravelry stores.
About this Pattern
Last year when I designed the In The Kitchen series, I quickly became obsessed with the Sedge Stitch. I started using it for everything; the Elmwood Beanie, a pillow cover (not yet released), and I had the idea for making a summer top with it as well.
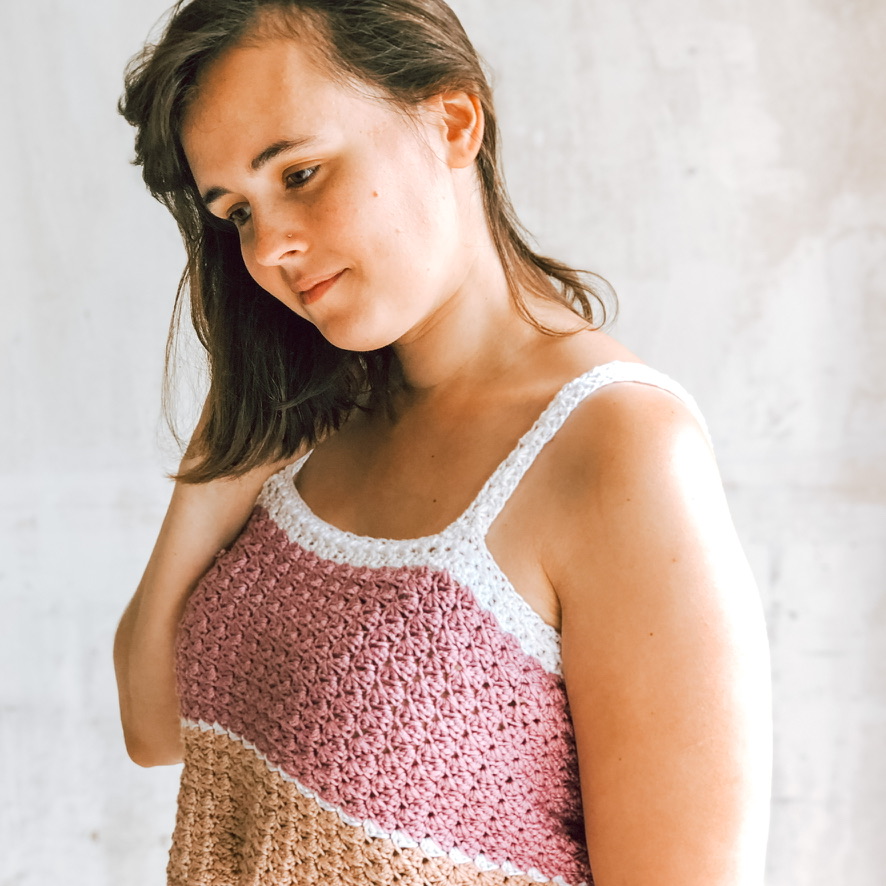
My problem right up until the time when I started swatching was that I couldn’t decide if I wanted a Tank Top or a Halter top. “Tank Top, Halter Top? Tank Top! No wait… Halter Top!” After my friends over at Lion Brand Yarn sent me some Truboo to try out, I realized I would have enough yarn to make both… so I did. 😆
And I’m so happy I did. It was more work, but after seeing the two variations completed; it was TOTALLY worth it. I hope you all agree and cannot wait to see which variation (or both) that you make!

Starting out
First things first, I used the Foundation Single Crochet technique to start the neck ribbing portion of this pattern. If you have never worked the Foundation Single Crochet technique before, you may prefer to chain the stitches indicated plus one, and single crochet in each chain across starting in the 2nd chain from your hook. The Foundation Single Crochet can result in a looser tension than you’d normally have if you’re not used to it. BUT it is a total time saver once you get the hang of it. LIFE CHANGING!
From here, the neck ribbing will have some fun detailing offered by the Star Stitch. If you’re unfamiliar with it, I walk you through my way of working this stitch in our Star Spangled Clutch tutorial, linked on this page. I have also linked to another video tutorial on the actual pattern page for a modified version of how we make it, but it’s more to the point than our tutorial will be.
Once you get past the Star stitches, the majority of this top will be worked in the Sedge Stitch. The quick explanation is that it’s a single crochet, half double and double crochet all worked into a single stitch. When turning these rows, it offers the most beautiful texture, but is also pretty dense, giving this top great coverage. If you’re new to this stitch, I have a picture tutorial that you can find here. And if you love it as much as I do, you’ll want to make our In The Kitchen series next, because it’s the main stitch in our washcloth, tea towel and pot holder. 😬
Working the Tank Top Version
If you’re working the tank version, you will repeat this process by making the straps (only difference is that these are worked in rows vs the round the neck ribbing is in).
A few quick notes on these straps… The Truboo I used is very heavy (I go into a bit more detail about this and alternate yarn options on the Pattern Page for this top), and has a bit of give. These two factors will stretch your straps. I graded them to offer an armhole depth of about -1 from the CYC standards to account for this. Therefore, if you’re using a lighter yarn, you may want to increase the amount of stitches worked for a slightly longer strap. Likewise, you may also find that the top is so heavy that it pulls the straps down too much and you could either decrease the amount of stitches worked for the straps, or do as one of our testers did and double up on the straps (repeat the star stitch rows to double the width).
Once the straps are made, you will need to affix them to the ribbing pattern. One point of confusion for our testers was where exactly to place the straps (since I don’t give a stitch count on where to place them). So the best thing to do is lay your top ribbing flat on top of itself with the back seam in the center back. Measure the inches indicated in from the outermost edge. The start of your strap will begin there. You can now either tac in place or seam in place on the front and back of the top ribbing portion. The benefit to just leaving it tacked for now would be if you find you need to adjust the sleeve length after adding the body portion.

Repeat this process on either side for the straps.
Now you will set the foundation for the Body Pattern. To do this, you will need to pick up some extra stitches around the star stitch Top Ribbing Pattern by single crocheting 2 into some of the stitches around, as needed for your size.
It should also be noted that when I attached my straps, I attached to the Foundation Single Crochet side, so that the last round of the Top Ribbing Pattern is down. This will make it easier to work into when you add the Body Foundation Pattern.
Working the Halter Top Version
This top variation is worked more similarly to a top-down raglan, as it grows towards the under arms in each row. It also offers a beautiful racerback for some extra pizzaz.
You’ll start at the front section, by skipping enough stitches for the armhole and pick up your yarn. After the first row of sedge stitches has been worked, you’ll start each row by working a sedge stitch into the double crochet that ended the last row. You’ll then work another sedge into the single crochet from that same sedge stitch, and in each remaining single crochet across.

After the front has grown enough to cover a little more than the front half of the top, you’ll fasten off and start on the back side to work the racer back.

The racerback is worked a little differently than the front since there are no increases. So you’ll work this part exactly like we do when we work the sedge stitch in our tutorial. It works up really quickly and then it’s off to joining the front to the racerback and work the rest of the body!

The most challenging part of this pattern for my testers was the “Body Join Pattern”. In order to keep the count on track (working the same amount of stitches across the “Racerback, the Front and working in multiples of 3 around for the armhole) we had to get a little creative and throw in some slip stitches that will not count as a stitch.
However, if you’ve ever worked slip stitches next to chain stitches before, it can be a little tricky to differentiate. The easiest thing to do when counting this round is to count the total Sedge stitches, as opposed to each individual stitch.


All in all, this round is not the most important, so don’t get hung up if you’re having a hard time to get the numbers to match. If things are off by one or two stitches when you’re counting, try to adjust for that in the next round when picking up the sedge stitches into the chain stitches under the armholes. That second round is when you will lock in the stitches for the bust, so thats the round you want to have the perfect count on.
I have also included instructions to sizing between sizes for the bust in our PDF version of this pattern, so if you want more info on how to do that, I recommend considering that option for this pattern.
Working the Body (for both style tops)
Once the foundation for the bust width has been set, it’s more or less smooth sailing until the bottom ribbing. After a few rounds of working the sedge stitch, it should come pretty easily and will quickly become you’re new favorite stitch!
For the body to have the most consistent look, you’ll be working the body portion in joined turning rounds.
To do this, I worked my pattern the same as I would flat (starting with a chain 1, half double crochet and double crochet in the first and ending with a single crochet in the last stitch). Then when I reached the end of each round, I slip stitched into that chain 1 space, turned and repeated.


I did have a tester just work the full sedge stitch right out of the gate and then slip stitch into the starting single crochet before turning ( as opposed to splitting up the first sedge stitch as I did). Her theory was that it would offer a more seamless look, which it did; but it also gives a greater density to that section, so it’s not completely invisible. Whichever method you prefer will work, just make sure you keep your count consistent throughout. 😉
Since this top is worked top-down, the length is completely up to you. I have given a good idea of the length needed for a typical top in the pattern, but do not give specific row counts. This was intentional since the halter and the tank will start at different points on the body, so to keep things uniform, I leave the rows worked really up to you. The yarn usage suggested in the pattern is for if you were to work the tank top in the length suggested (the halter will need less yarn).
After the length is achieved, you’ll work the bottom ribbing. I chose to work my ribbing, adding it as I went, and have included a link to a video tutorial in the pattern post, but I’ll go through it quickly with pictures here as well.
To start out, you’ll want to make sure your top right side out. This is important since the add as you go method is not reversible. From here you’ll start out as you would normally work ribbing by chaining, and single crocheting in each ch across. Then when you get back to the body, you’ll slip stitch into the next 2 stitches of the body.


From here, you’ll turn your work and then ignoring those 2 slip stitches, you’ll single crochet into the back loops of each single crochet to the last stitch, when you’ll single crochet into the full stitch.
Turn your work, chain one and repeat this process around. Once you reach your starting round, you’ll slip stitch to join the foundation to the ending row and fasten off.
Weave in all the ends and your top is officially complete!
I sincerely hope you enjoy this top as much as I do and hope you’ll share pictures of your completed top with us on Instagram or in our comments below!
where are the directions and amount of yarn, what kind?
Hi Mary,
You can find all the information regarding the pattern on the pattern page located here: https://apurposeandastitch.com/summers-breeze-top-free-pattern/
Cheers!
-Bernadette
Hi, thank you for the pattern. I am working on the halter version and was wondering if you had a video of the body joining part, where you are joining the racer back part to the front? I guess it’s the body foundation row. Or maybe pictures of how it should look? I’m just a little confused about how it goes together
Hi Terri,
Thanks so much for giving this pattern a try! I’m so honored you chose this one to make. To join the halter front to the racerback, you’ll follow the “Body Join Pattern” then move on to the “Body Pattern” section. There will be a chain on either side of the racerback that will join to the front and that chain will end up under your arms. I don’t have a video showing this, but just so happen to be working on this pattern now, and would be happy to update this post with some pictures of this section once I get there! If you still need help, please feel free to email me at: apurposeandastitch@gmail.com and I’d be more than happy to send you unedited pictures sooner. 🙂
Warmest Regards,
Bernadette