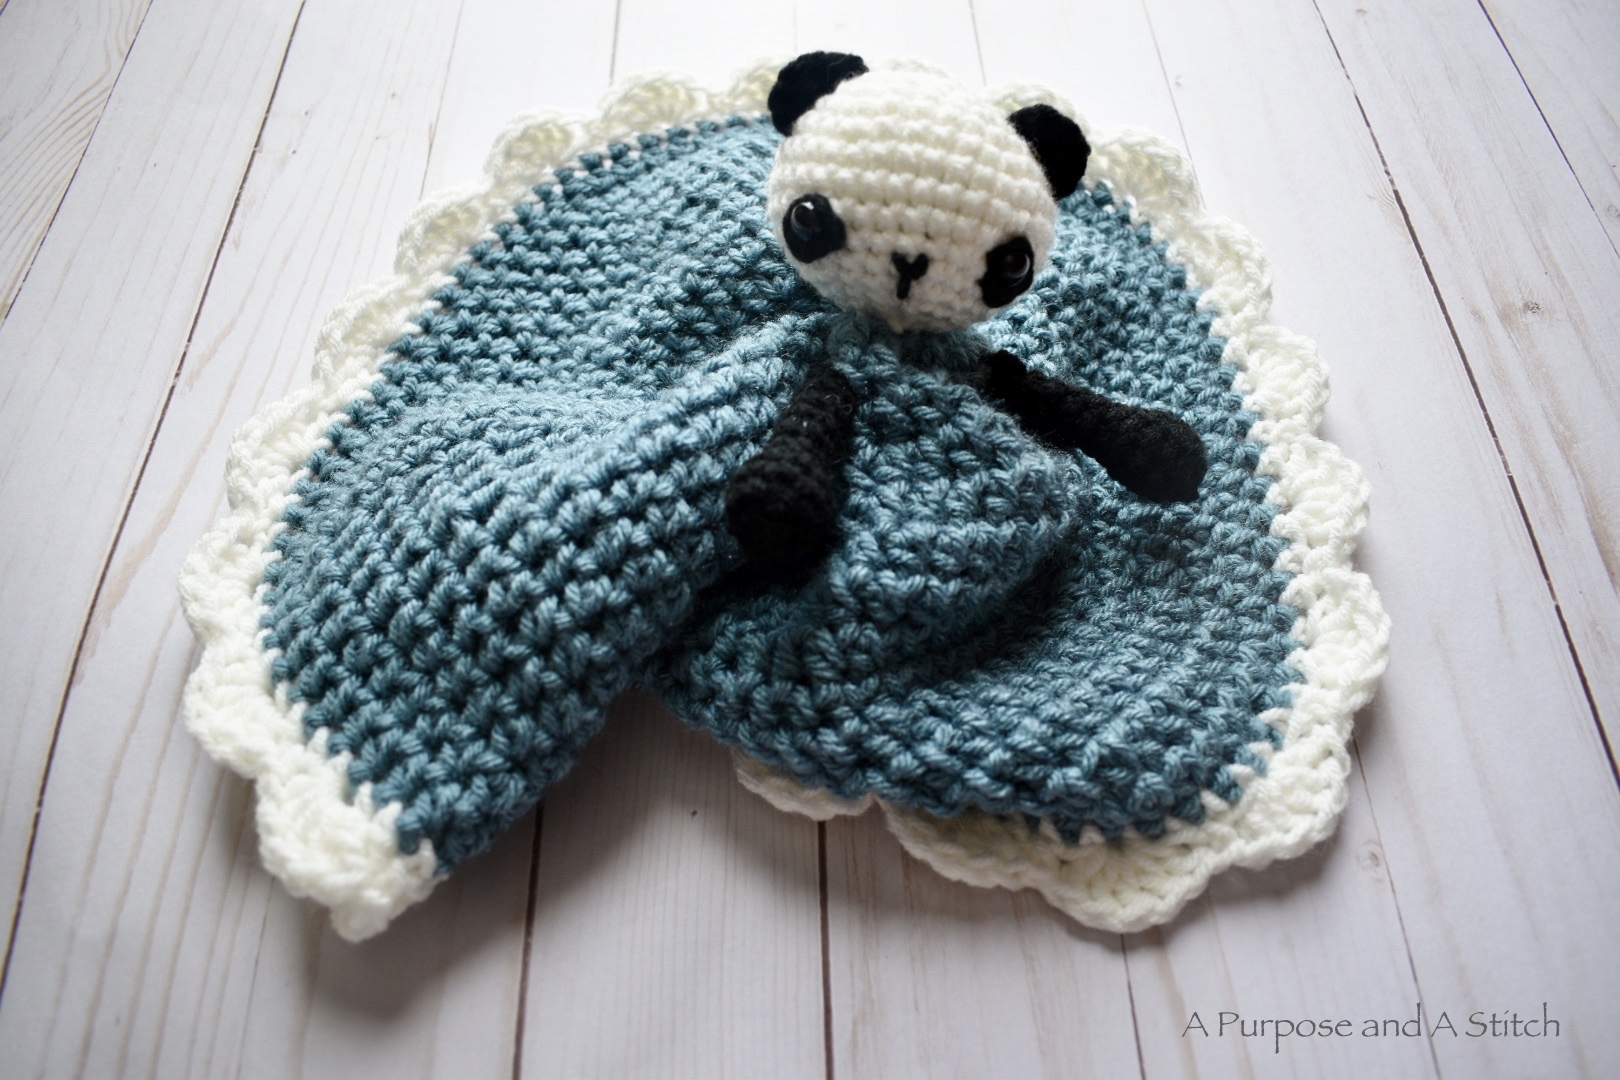
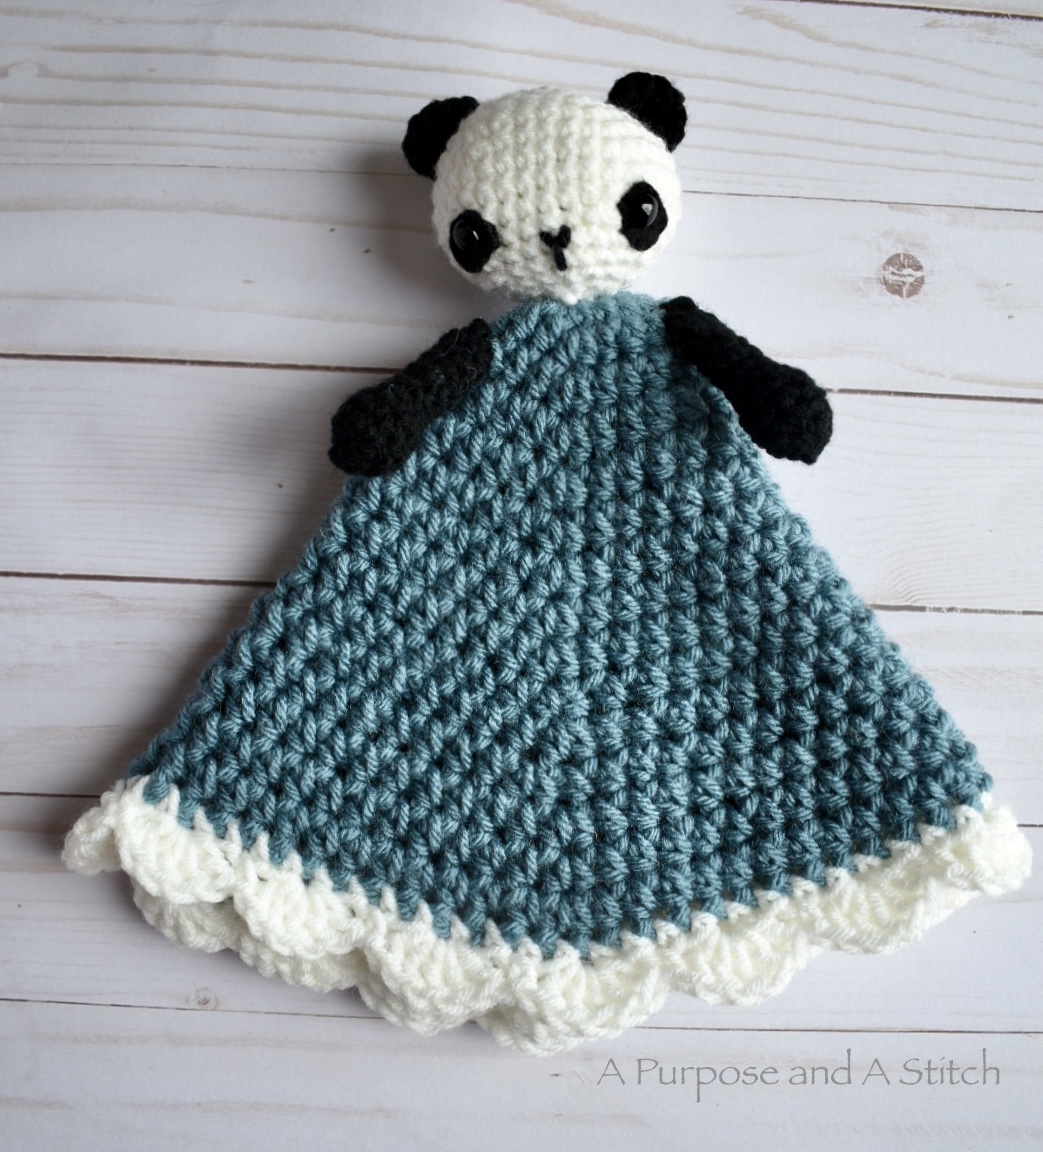
Petunia the Panda Lovey- Blog Post
**Below is the free step-by-step picture tutorial of making Petunia the Panda Lovey. For the written pattern, please see the pattern page here.**
A few months back I released my first lovey pattern of Lambie the Lovey. You guys liked her so much, that a few months later I released Ellie the Elephant Lovey.


We just had some friends have their first baby, and I wanted to make a new lovey for them. I’ve always been a huge fan of panda bears so I knew that’s where I wanted to start.

I’m super happy with how she turned out, and hope you enjoy making one as well!
To get started on your own Panda Lovey, you will start by making the head with the white yarn.
Beginning with a magic ring, you will gradually start to increase, working in continuous rounds. If you are unfamiliar with the magic ring, I really like this helpful video tutorial by June of Planet June, found here.


You will continue to gradually increase for the next few rounds. Once there is a good base for the sphere of the head, you will work a few rounds of regular single crochets.
For the next few rounds, you will be working a series of gradual decreases. I like to use the invisible decrease method when working with amigurumi, and have a picture tutorial to walk you through that technique here.
Before decreasing too much, you will want to add on the eyes and nose. For the black portion around the eyes, I used black felt. I like the way this contrasts with safety eyes and prefer it to a crocheted background as I think the safety eyes blend in with the texture of crochet a bit more.

You’ll just need to cut two ovals that measure slightly larger than the safety eyes being used. Then you will make a small hole in the felt for the back of the safety eye to go through.
Stitch the felt in place on a slight angle a little lower than half way down the head, then insert and fasten on the safety eyes. Once secure, you will use the black yarn and an embroidery needle to stitch on the nose.

Next, you will stuff the head and continue to decrease the head until it’s closed, stuffing with more fiber fill as you go.
You’ll be adding the ears next and they are super simple to make! You will work 3 single crochets into the magic ring, chain 1, turn and increase in each stitch across, fastening off at the end. After making one more, you will attach to the either side of the top of the head.


The arms also start in a magic ring. Followed by one round of increases and continued by working up for a few more rounds. After that you will work one round of decreases and finish by working several more rows straight upward, slightly stuffing as you go.


The last portion to be worked is the blanket. Again, this begins with a magic ring. The blanket starts out with a few rounds of gradual increases in single crochets and will then switch to gradual increases in half double crochets.
The rest of the teal portion is worked as increases in half double crochets. Once the blanket portion is large enough, you will pick up the white yarn again and begin to add the shell edge.


Before starting the actual shells, you will want to work one round of single crochets in the white yarn around. Followed by a slip stitch into the first stitch of your previous round.

You start the first shell by double crocheting 5 into the next stitch. Then you’ll skip the next stitch, and single crochet into the stitch after that. Your first shell is complete!
You will skip the next, and double crochet 5 into the following stitch to work the next shell. Each double crochet 5 group should have a skipped stitch on either side of it and a single crochet between each skipped stitch.


You just follow that process around and that’s all there is to it! Fasten off and weave in the ends once complete.
 Once the blanket is finished, you will attach the head to the most center (single crocheted) rounds trying to keep the join as even as possible.
 Next, you will be attaching the arms. The arms are attached a few rounds down from where the head is attached. I like to do this by folding the blanket into a triangle shape and attaching two to three rounds down from the head on the front most fold of the triangle.

Your Petunia the Panda Lovey is now complete! It’s really as simple as that. 😀 Feel free to wet block the blanket portion if you would like for it to fold into a triangle more naturally. I did that with mine and loved the end result, although it is not a required step.
Do you have a pattern for a hedgehog head for the Lovey?!?!? :-))))))
Drats! I don’t, but I love the idea! 💕 might just have to add that one to the list 🤔