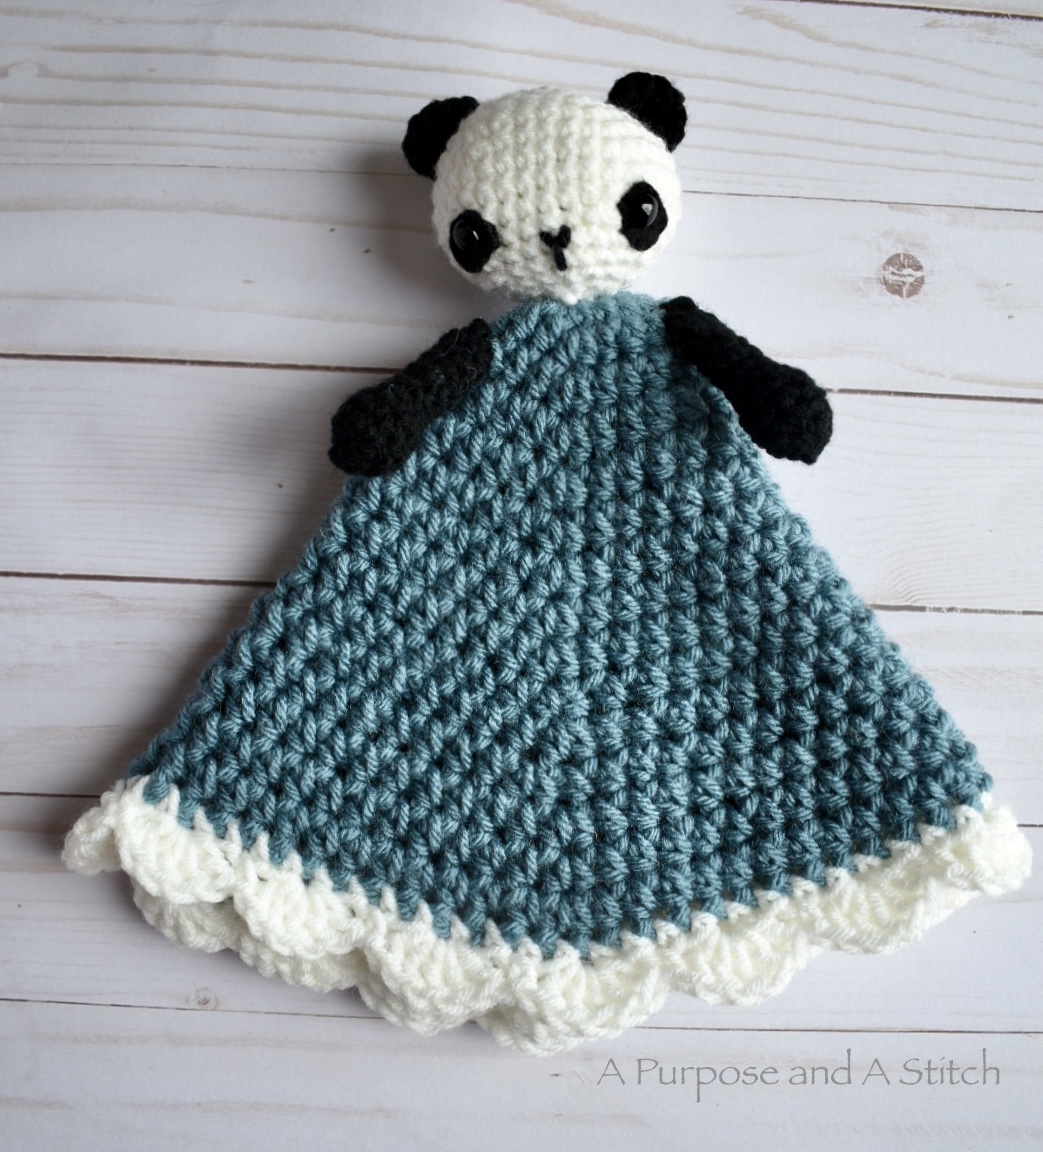
Petunia the Panda Lovey- Free Pattern

Below you will find the free crochet pattern for Petunia the Panda Lovey. For the free step-by-step picture tutorial, please see our blog post here.
**If you would rather have a large font, ad free version of this pattern, you can purchase the inexpensive PDF or add to your que on Ravelry here.**
This sweet panda lovey is incredibly easy to make, with just a few parts and minimal assembly.
I hope you enjoy making one of your very own!
What You’ll Need
4.00mm (US G) crochet hook
6.00mm (US J)crochet hook
Worsted weight (4) yarn in white- approximately 40 yards
Worsted weight (4) yarn in black- approximately 20 yards
Worsted weight (4) yarn for blanket- approximately 130 yards
2 9mm safety eyes
Black felt
Black thread & needle
Embroidery needle
Fiber Fill
Scissors
My Amazon Picks
Completed Measurements
10″ tall from top of head to bottom of blanket
Diameter of Blanket= 14.5″
Circumference of head= 8 1/4″
Width of folded blanket= 9.5″
Gauge Used (For Blanket- not measured on head or arms)
12 hdc= 4″
9 rows= 4″
Abbreviations Used
sc= single crochet
inc= increase (sc 2 into 1 st)
dec= decrease (I like to use the invisible decrease method)
ss= slip stitch
fo= fasten off
ch= chain
hdc= half double crochet
hdc inc= half double crochet increase (hdc 2 into 1 st)
dc= double crochet
sk= skip
sp= space
Pattern for Head
Using 4.00mm crochet hook
Foundation: Work 5 sc into the magic ring (5)
Round 1: sc 2 into each around (10)
Round 2: *sc, inc, repeat from * around (15)
Round 3: *sc 2, inc, repeat from * around (20)
Round 4: *sc 3, inc, repeat from * around (25)
Round 5: *sc 4, inc, repeat from * around (30)
Round 6: *sc 5, inc, repeat from * around (35)
Round 7-9: sc around (35)
Round 10: *sc 5, dec, repeat from * around (30)
Round 11: *sc 4, dec, repeat from * around (25)
Start stuffing with fiber fill
Round 12: *sc 3, dec, repeat from * around (20)
Cut two small ovals out of the black felt. Cut a small hole towards the bottom center of each oval for the safety eyes. Stitch in place using needle and thread on a slight angle directly above round 12. Insert safety eyes in hole and fasten in place.
Round 13: *sc 2, dec, repeat from * around (15)
Use black yarn and embroidery needle to stitch on nose between eyes working down towards round 13.
Round 14: *sc, dec, repeat from * around (10)
finish stuffing with fiber fill
Round 15: dec around, fasten off leaving tail for attaching to blanket (5)
Pattern for the Ears (make 2)
Using 4.00mm crochet hook
Foundation: work 3 sc into the magic ring (3)
Row 1: ch 1, turn, sc 2 into each across, fasten off leaving tail to attach to head (6)
Pattern for the Arms (make 2)
Using 4.00mm crochet hook
Foundation: work 6 sc into magic ring (6)
Round 1: *sc, inc, repeat from * around (9)
Round 2-3: sc around (9)
Round 4: *sc, dec, repeat from * around, begin to lightly stuff with fiber fill (6)
Round 5-9: sc around, lightly stuffing with fiber fill as you go (6)
Round 10: dec, sc, dec, sc, fo leaving 2-3” tails(4)
Pattern for the Blanket
Using 6.00mm crochet hook
Foundation: work 6 sc in magic ring (6)
Round 1: sc 2 in each around (12)
Round 2: *sc, inc, repeat from * around (18)
Round 3: *sc 2, inc, repeat from * around (24)
Round 4: *hdc 3, hdc inc, repeat from * around (30)
Round 5: *hdc 4, hdc inc, repeat from * around (36)
Round 6: *hdc 5, hdc inc, repeat from * around (42)
Round 7: *hdc 6, hdc inc, repeat from * around (48)
Round 8: *hdc 7, hdc inc, repeat from * around (54)
Round 9: *hdc 8, hdc inc, repeat from * around (60)
Round 10: *hdc 9, hdc inc, repeat from * around (66)
Round 11: *hdc 10, hdc inc, repeat from * around (72)
Round 12: *hdc 11, hdc inc, repeat from * around (78)
Round 13: *hdc 12, hdc inc, repeat from * around (84)
Round 14: *hdc 13, hdc inc, repeat from * around (90)
Round 15: *hdc 14, hdc inc, repeat from * around (96)
Round 16: *hdc 15, hdc inc, repeat from * around (102)
Round 17: *hdc 16, hdc inc, repeat from * around (108)
Round 18: switch to white yarn, single crochet around (108)
Round 19: ss into 1st st of previous round, dc 5 in next stitch, sk 1 stitch, sc in next (1st shell created, *sk 1, dc 5 in next, sk 1, sc in next*, repeat from * around until you reach the last shell. Begin the last shell the same as the rest, ending with a ss into the very last st (rather than a sc), fo, weave in ends. (27 shells total)
Assembly
Stitch ears to the top of head. Weave in ends.
Attach the base of the head to the very center of your blanket. I used the line between the 3rd & 4th rounds of my blanket as a guide of where to attach the head.
Once your head is secured, you will attach the arms. A way to ensure good placement of the arms is to take the lovey by the pandas head, hold upright, and then lay on a flat surface so that the blanket folds under the head. If it does not naturally create a triangle shape, guide it to that shape so that the sides of the blanket are creased inwards and there are two main folds on the front and the back. Once you have the blanket set to it’s natural laying position, you will attach the arms a little below the head on either side of the front most fold.


I was so honored to test this pattern before it was released! It is a lovely pattern, works up quick and is an easy pattern to understand!
Thanks so much friend! So thankful for your help with getting her just right 😁