Lion Teething Rattle- Blog Post
*Below you will find the story behind and the step-by-step picture tutorial for making our latest teething rattle pattern, the Lion! If you’re looking for the FREE pattern you can find that here. Alternately, you can purchase the inexpensive PDF from our store here, on Etsy here or on Ravelry here. **
When I first designed the Hippo Rattle Teething Ring pattern, I knew it wouldn’t be the last teething ring rattle pattern I’d make. And when my cousin requested I make one for her son, I asked for animal suggestions and she did not disappoint when she went safari themed, suggesting “a giraffe, a zebra, a lion or an elephant?” And how could I turn down the prospects of turning one of my favorite amigurumi patterns (Lewis the Lion) into a teething ring pattern?

I did make a few adjustments to accommodate for a better fit on top of the teething ring, as well as for the potential of a baby sticking it in their mouth (can you say eyelash yarn fur ball?!?) and I’ve got to say, I love it just as much as the original!
So how do you make him?
I recommend making the ears first so that you can add those to the head before you close it up. These are simple enough as they are only 2 rows long. You will start each ear by working 3 stitches into the magic ring.

Turn your work and increase in the first stitch, single crochet in the next, and increase once more. Turn your work again and slip stitch across. Fasten off leaving a tail. Weave the starting tail through the bottom stitches to bring it to the outer edge of the ear opposite the ending tail. You should now have 2 tails on either end of the ears for easy attaching.


Next we’ll make the head. To get started, you will work 6 stitches into the magic ring. From here, you will start to increase directly into the next stitch, by working 2 single crochets into each stitch around.


Each subsequent round will continue to gradually increase until you have reached the 36 stitches needed for the width of the head. Now you will stop increasing, and work a few rounds of 36 stitches only. This will help add a sphere shape to your head as you work down.


Next is a simple matter of gradually decreasing to bring your sphere to a close, just make sure to add the ears, embroider on the facial details, stuff and add the rattle before you close it up too much!

I attached the ears on a slight angle on the top of the head, starting at about round 3 on either side of the foundation.
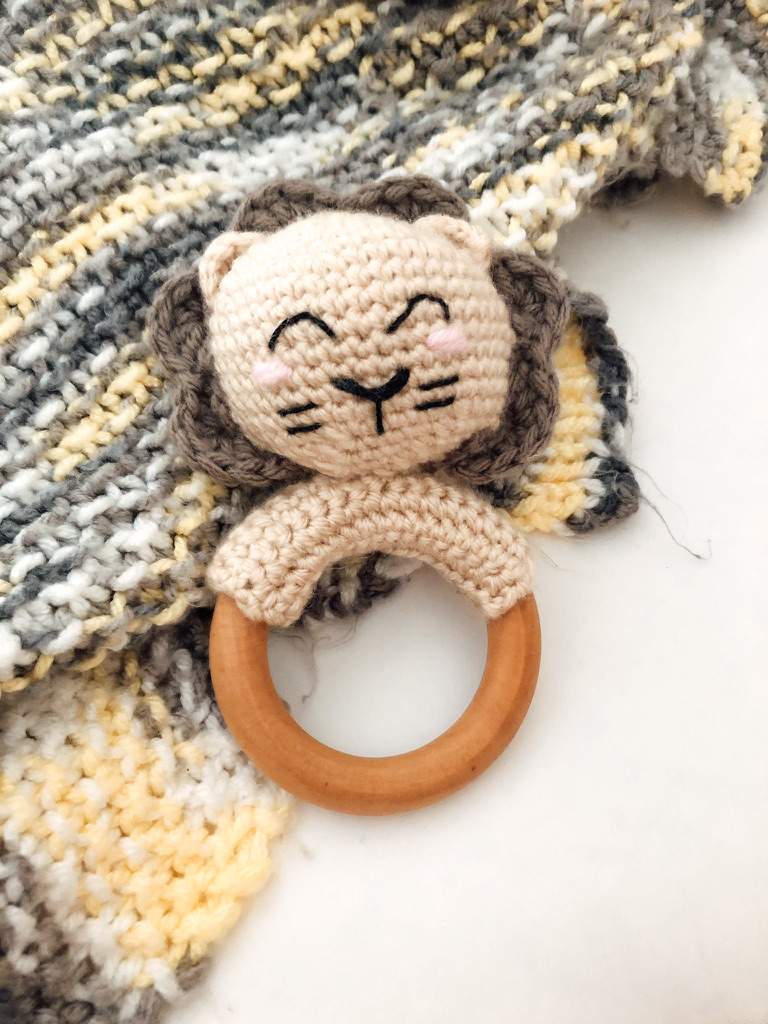
I embroidered on the eyes because I know a lot of people are weary of the safety of safety eyes for newborn toys. I placed my embroidery over round 9, about 3 stitches across and 3 stitches apart from each other.

The nose was added by working several laps of the black embroidery floss across 4 stitches over round 12 between the eyes. I then added the snout detail by feeding the floss through the head a row between the nose, in the center of the 4 stitches that the nose covered. I then fed that floss tail up and over the nose to pull down the strands and then fed the floss back through the head about 2 rounds down.


The whiskers were added between rows on either side of the snout, for some extra cuteness.
I then added some cute blushing cheeks right below over round 10 about 2 stitches across using some scrap pink yarn.

Once the ears are attached and the face is all set, you can start stuffing the head with fiberfill, adding a rattle (if using) between layers of fiberfill.
You can now finish decreasing the head to a close, continuing to firmly stuff with fiberfill as you go.
Fasten off and leave a tail for attachment.
You can now work on making the ring attachment, which is just a simple rectangle worked back and forth in rows in single crochets.
I have written the pattern to be wide enough for my ring, but realize that not all teething rings will be the same width, so feel free to adjust the amount of rows worked to accommodate the width of your ring.
You’ll want the attachment to fit securely, so I recommend leaving about 1/4″ gapping, which you will pull to a close when you attach your rectangle to the teething ring.


Once the ring attachment is secure around the teething ring, weave the tail in through to the center top of the ring attachment to use for securing the head in place.
You can now make the mane pattern, which is really quite simple, especially if you’re familiar with working the shell stitch. You’ll work a chain row and just work a series of shell stitches (dc 5 into 1 st, sk 2) across. This should be able to wrap all the way around the sides and crown of the head pattern.


To assemble, you’ll first want to attach the head to the ring. I used the 2nd to last round of the head as a rough guide of where to attach to the ring, and you’ll want to try and keep it as close to the center of your ring attachment as possible.
Once the head is secure in place, add the mane. Since you will be attaching against the rounds, tacking in place first is recommended. I also attached my mane to the back of the ears as I passed them to make sure it was held upright a bit better.


After the mane is attached, you’ll fasten off and weave in all the ends.
And that’s all there is to it! I hope you enjoyed making this adorable lion rattle as much as I did, and cannot wait to see yours!
