Cobblestone Cardigan- FREE Pattern
About The Design
You guys! It’s FINALLY here!!! Can you believe it? I know I hardly can.
I had originally designed this cardigan back when we didn’t all feel so bombarded with ick. That’s right, this cardigan has been in the works since Fall, 2019! Do you remember 2019? Back when Fall meant that kids were in school, meeting indoors at Starbucks for a Pumpkin Spice Latte was no big deal and you actually looked forward to all the holiday parties and events right around the bend instead of dreading what the next month might look like?
Well, as much as 2020 has been a real kick in the butt for most of us, it has brought about some good things… 1st we welcomed our 3rd little one to the family in April AND now I get to release this most amazing pattern to the world! Year made. Amiright? 😂
In all seriousness though, I do hope that this cardigan can bring some extra joy and cheeriness to the rest of your 2020 and beyond that. Because is there anything more cozy than a hot cuppa with an extra snuggly cardigan on a chilly fall or winter morning? There is not.
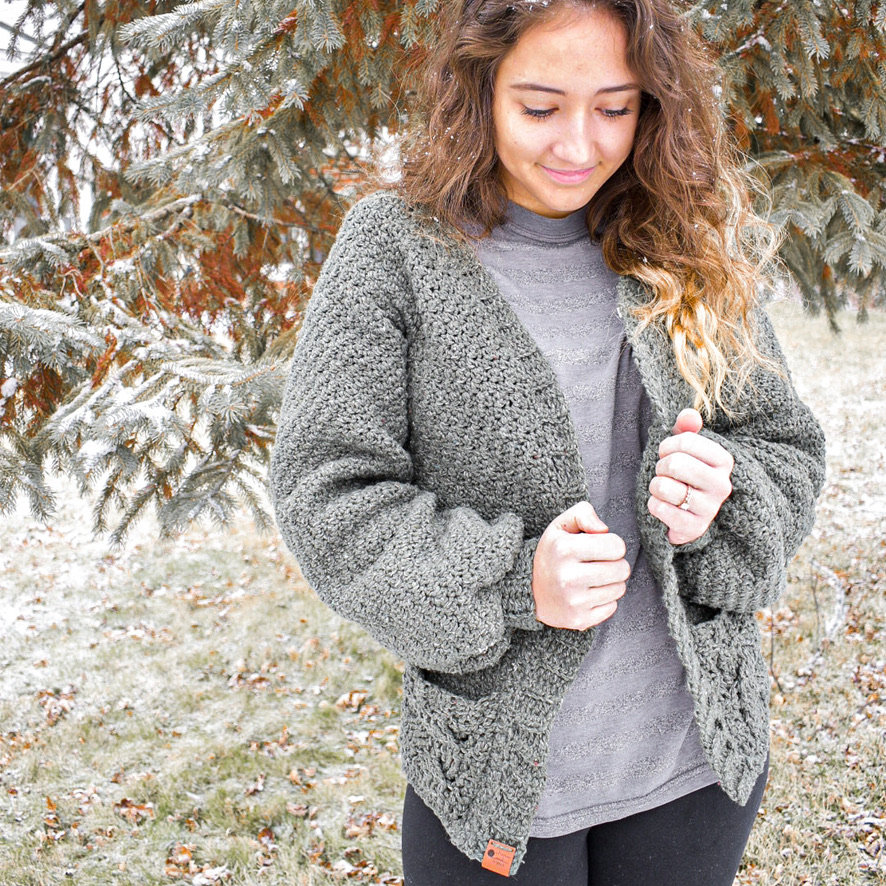
When I first designed this pattern all those centuries ago, I had one goal in mind. Cozy. I was just starting to get into making top down raglans and in need of a cardigan for myself. I wanted something that was a bit heavier weight than our Mary’s cardigan and really felt inclined to mimic the puffy sleeves of El’s Top Down Sweater. So the Cobblestone Cardigan was born.
But why did it take so long to get out into the world? Well, I can never do anything easy so I also wanted the opening around the front to gradually increase (instead of being a blunt corner by the neck) which posed some issues in our first round of testing on certain sizes. Rather than rushing to publish a pattern that would not comfortably fit all sizes, I decided to take a step back and work on perfecting it a bit more.
I worked with our testers to identify the problem areas and adjusted where I could. I hired a tech editor to make sure the pattern and math was perfect. And then I sent it out for a 2nd round of testing. And I’m pleased as punch to say that the 2nd round of testing was flawless! So I am now ready to share it with you all and feel pretty confident that you’ll love this pattern regardless of what size you need to make it in.
About the Pattern
This is an intermediate level pattern and is size inclusive, meaning it has been graded to fit all body types from XS-5XL. It is a top-down raglan style cardigan which means a few things. The length of the body and sleeves are completely customizable. There are no seams, and if you choose to work the ribbing as you go, absolutely no sewing is required with the exception of the optional pockets….
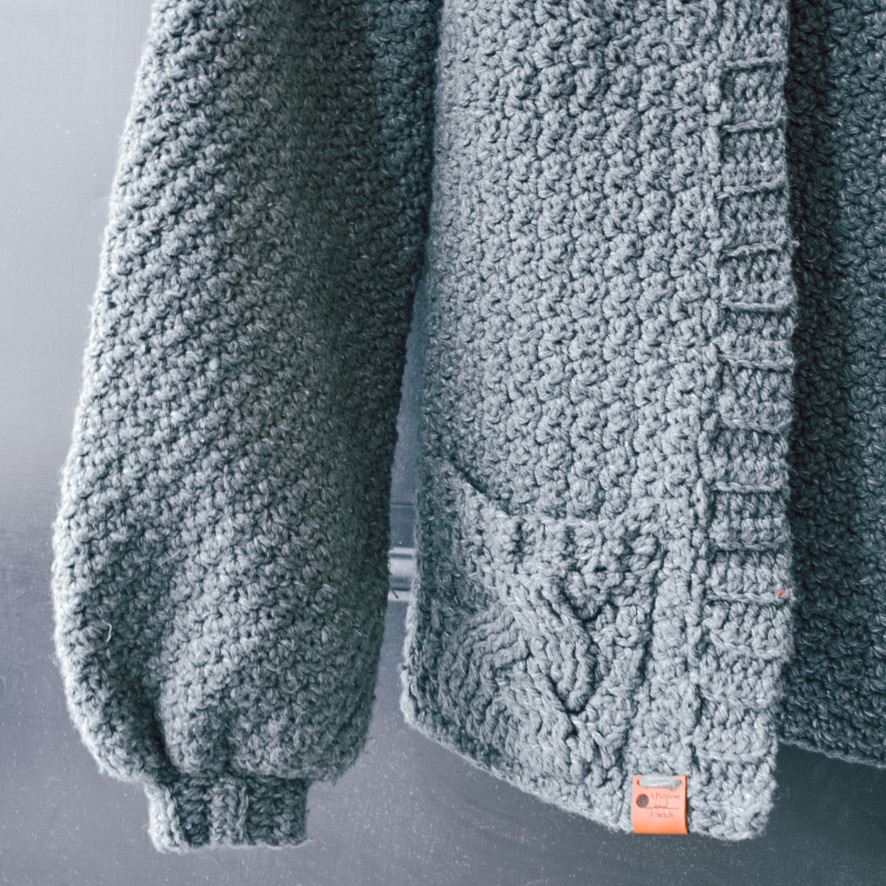
Oh the pockets. Did I forget to mention those pockets!?! This pattern comes with 2 different pocket variations. Seed stitch pockets (to match the rest of the cardi) or CABLED POCKETS. It’s got cabled pockets y’all! Boooya! 🎉.
Here’s the kicker tho guys, I don’t have a tutorial for the cardigan. I have some pictures added into the pattern to help you along and I am including some additional info regarding the 2nd row below, but no official video or picture tutorial. Since it’s been so long since I made my own and I was not proactive in editing and writing a tutorial while it was fresh in my mind, I felt it would be more of a disservice to try and go back now to put a tutorial together. So if you’re a new crocheter, you may find this pattern a little more on the challenging side. That being said; I do have a stitch chart for the yoke and schematic available on the PDF, which can often be helpful when navigating a pattern.
The inexpensive PDF is available across all our stores including: on our site, on Etsy and on Ravelry. This PDF is color coded for easy follow along, regardless of the size you’re making. It is printable and ad free. And best of all, 50% of all pattern sale proceeds are donated to end modern day slavery and human trafficking.
Ready to jump in and get crocheting? Cool! We’d be honored if you shared a picture of your completed Cobblestone Cardigan with us on Instagram and cannot wait to see how yours turns out!
About The 2nd Row
You may be wondering why I have a whole section dedicated to one line of the pattern. Well, since I don’t have a step-by-step tutorial, I wanted to address the trouble area for our testers. We tried rewording this portion in several ways, and have settled on the way it is written in the pattern.
This row is where you will be setting the foundation for the ch-2 spaces that will create the square of your yoke.

The confusion came in with how many stitches to work into each section surrounding the the ch-2’s. The way I have it written is that you will work the total amount of stitches mentioned in the pattern, i.e. for the XS, you will work a total of 13 stitches (counting each single crochet and double crochet individually) between the first and 2nd ch-2 spaces. So the very first seed stitch written in the pattern before the * that indicates the repeat will count as your first two stitches in that 13 total.
It’s important the the stitch count is correct in this row since every other row following will depend on this as the foundation for where you’ll be working to the ch-2 space corners. So if you end this row with stitches left over, or have too many stitches, it’ll be key that you frog it until you get the numbers to match up.
Still having issues? I love hearing from our followers, so feel free to “contact us” and I’ll get back to you asap. 😀
About The Yarn
I used Lion Brand Yarn’s Re-Tweed yarn for my cardigan. I love that this yarn has been made with recycled wool, it comes in beautiful colors and it makes for a really snuggly cardigan! HOWEVER, it will feel a bit stiff while making your cardigan. A few washes and some wear will help the drape significantly, but it does not make a cardigan that is ultra flowy (👈 It’s a word cuz I say so 🤣) so if that’s your goal- consider a softer yarn.

Don’t wan’t that fresh-from-the-sheep-farm feel to your cardigan? Any other worsted weight yarn will work fine as a substitute. This is a pretty standard worsted weight, so the key will be to make sure you meet gauge to get the best fit with the yarn you choose!
Now on to the pattern!
The Pattern
| What You Need |
|
| Approximate Completed Sizes | ||||
| Size | Bust Circumference |
Body Length |
Underarm to Wrist |
Arm Circumference |
| XSmall | 29″ | 23.25″ | 20.5″ | 15″ |
| Small | 33″ | 23.75″ | 21″ | 15.5″ |
| Medium | 37″ | 24″ | 21″ | 16″ |
| Large | 41″ | 24.25″ | 21.5″ | 17″ |
| XLarge | 45″ | 24.5″ | 21.5″ | 19″ |
| 2XLarge | 49″ | 24.75″ | 22″ | 21″ |
| 3XLarge | 53″ | 24.75″ | 22″ | 22″ |
| 4XLarge | 57″ | 25.25″ | 22.5″ | 23″ |
| 5XLarge | 61″ | 25.25″ | 22.5″ | 25″ |
| Gauge Used (body) |
| 12 in the seed stitch pattern= 4”
10 rows of seed stitch pattern= 4” |
| Gauge Used (ribbing portions) |
| 13 hdc sts= 4”
8 rows of hdc in blo= 4” |
| Abbreviations Used |
| ch= chain
sc= single crochet dc= double crochet Ch-1 sp= chain 1 space sm= stitch marker sc2tog= single crochet two together p/u= pick up [yarn] Sl st= slip stitch fo= fasten off |
| Special Stitches |
| Seed Stitch= sc in first stitch, dc in next. When working subsequent rows dc will be worked into sc, and sc will be worked into dc. |
| General Pattern Notes |
|
| Yoke Pattern Notes |
|
Yoke Pattern (all sizes)
Foundation: ch 47 (59, 65, 81, 101, 103, 115, 133, 145)
Row 1: starting in 2nd ch from hook *sc, dc*, repeat from * to * across, turn (46, 58, 64, 80, 100, 102, 114, 132, 144)
Row 2 (for X-Small through Medium Sizes): ch-1, sc, dc, (sc, ch-1, sc ) in next, *dc, sc*, repeat from * to *for a total of 13 (17, 19) sts, (sc, ch-1, sc) in next, *dc, sc*, repeat from * to * for a total of 12 (16, 18) sts, (dc, ch-1, dc) in next, *sc, dc*, repeat from * to * for a total of 13 (17, 19) sts, (dc, ch-1, dc) in next, sc, dc, turn (50, 62, 68)
Row 2 (for Large through 5X-Large Sizes): ch-1, *sc, dc*, repeat from * to * two more times (sc, ch-1, sc ) in next, *dc, sc*, repeat from * to * for a total of 19(27 ,27, 31, 35, 39) sts, (sc, ch-1, sc) in next, *dc, sc*, repeat from * to * for a total of 26 (30, 32, 36, 40, 44) sts, (dc, ch-1, dc) in next, *sc, dc*, repeat from * to * for a total of 19(27, 27,31, 35, 39) sts, (dc, ch-1, dc) in next, *sc, dc*, repeat from * to * two more times, turn (84, 104, 106, 118, 136, 148)
Row 3(for X-Small through Medium Sizes): ch 2, (dc, sc) in first st, dc, sc, (dc, ch-1, dc ) into ch-1 sp, *sc, dc*, repeat from * to * to next ch-1 sp, (dc, ch-1, dc) in ch-1 sp, *sc, dc*, repeat from * to * to next ch-1 sp, (sc, ch-1, sc) in ch-1 sp, *dc, sc*, repeat from * to * to next ch-1 sp, (sc, ch-1, sc), dc, sc, (dc, sc) in last sc, turn. (60, 72, 78)
Row 3 (for Large through 5X-Large Sizes: ch 2, (dc, sc) in first st, *dc, sc*, repeat from * to * to 1st ch-1 sp, (dc, ch-1, dc) into ch-1 sp, *sc, dc*, repeat from * to * to next ch-1 sp, (dc, ch-1, dc) in ch-1 sp, *sc, dc*, repeat from * to * to next ch-1 sp, (sc, ch-1, sc) in ch-1 sp, *dc, sc*, repeat from * to * to next ch-1 sp, (sc, ch-1, sc) *dc, sc*, repeat from * to * to last, (dc, sc) in last sc, turn. (94, 114, 116, 128, 146, 158)
Row 4: ch 2, *dc, sc*, repeat from * to * to first ch-1 sp, (sc, ch-1, sc) in ch-1 sp, *dc, sc*, repeat from * to * to next ch-1 sp, (sc, ch-1, sc) in ch-1 sp, *dc, sc*, repeat from * to * to next ch-1 sp, (dc, ch-1, dc) in ch-1 sp, *sc, dc*, repeat from * to * to next ch-1 sp, (dc, ch-1, dc) in ch-1 sp, *sc, dc*, repeat from * to * to end, turn (68, 80, 86, 102, 122, 124, 136, 154, 166)
Row 5: ch-1, (sc, dc) into first st, *sc, dc*, repeat from * to * to first ch-1 sp, (dc, ch-1, dc) in ch-1 sp, *sc, dc*, repeat from * to * to next ch-1 sp, (dc, ch-1, dc) in ch-1 sp, *sc, dc*, repeat from * to * to next ch-1 sp, (sc, ch-1, sc) in ch-1 sp, *dc, sc*, repeat from * to * to next ch-1 sp, (sc, ch-1, sc) in ch-1 sp, *dc, sc*, repeat from * to * to last st, (sc, dc) in last dc, turn (78, 90, 96, 112, 132, 134, 146, 164, 176)
Row 6: ch-1, *sc, dc*, repeat from * to * to first ch-1 sp, (sc, ch-1, sc) in ch-1 sp, *dc, sc*, repeat from * to * to next ch-1 sp, (sc, ch-1, sc) in ch-1 sp, *dc, sc*, repeat from * to * to next ch-1 sp, (dc, ch-1, dc) in ch-1 sp, *sc, dc*, repeat from * to * to next ch-1 sp, (dc, ch-1, dc) in ch-1 sp, *sc, dc*, repeat from * to * to end, turn (86, 98, 104, 120, 140, 142, 154, 172, 184)
Row 7-13 (13, 13, 13, 13, 17, 17, 17, 17): repeat rows 3-6 (150, 162, 168, 184, 204, 242, 254, 272, 284)
Row 14 (14,14, 14, 14, 18, 18, 18, 18): ch-1, *sc, dc*, repeat from * to * to first ch-1 sp, (sc, ch-1, sc) in ch-1 sp, *dc, sc*, repeat from * to * to next ch-1 sp, (sc, ch-1, sc) in ch-1 sp, *dc, sc*, repeat from * to * to next ch-1 sp, (dc, ch-1, dc) in ch-1 sp, *sc, dc*, repeat from * to * to next ch-1 sp, (dc, ch-1, dc), *sc, dc*, repeat from * to * to end, turn (158, 170, 176, 192, 212, 250, 262, 280, 292)
Row * (15, 15, 15, 15, 19, 19, 19, 19): ch-1, *sc, dc*, repeat from * to * to first ch-1 sp, (dc, ch-1, dc) in ch-1 sp, *sc, dc*, repeat from * to * to next ch-1 sp, (dc, ch-1, dc) in ch-1 sp, *sc, dc*, repeat from * to * to next ch-1 sp, (sc, ch-1, sc) in ch-1 sp, *dc, sc*, repeat from * to * to next ch – sp, (sc, ch-1, sc), *dc, sc*, repeat from * to * to end, turn (178, 184, 200, 220, 258, 270, 288, 300)
Row **(16, 16, 16, 20, 20, 20)- (16, 17, 18, 20, 21, 22): repeat last 2 rows (192, 216, 244, 278, 304, 324)
Splitting The Yoke

For sizes: XS, M, XL, 3XL, 5XL
Row 15 (17, 19, 21, 23): ch-1, *sc, dc*, repeat from * to * to first ch-1 sp, dc into 1st and next ch-1 sp (sk 39 (49, 61, 69, 81) between ch-1 sps, 1st arm hole created) , *sc, dc*, repeat from * to * to next ch-1 sp, sc into this and next ch-1 sp (sk 39 (49, 61, 69, 81) between ch-1 sp, 2nd arm hole created) *dc, sc*, repeat from * to * to end, turn (82, 96, 124, 142, 164)
For sizes: S, L, 2XL, 4XL
Row 16 (18, 20, 22): ch-1, *sc, dc*, repeat from * to * to first ch-1 sp, sc into 1st and next ch-1 sp (sk 45 (51, 63, 75) between ch-1 sps, 1st arm hole created), *dc, sc*, repeat from *to * to next ch-1 sp, dc into 1st and next ch-1 sp (sk 45 (51, 63, 75) between ch-1 sps, 2nd arm hole created) *sc, dc*, repeat from * to * to end, turn (90, 114, 134, 156)
| Body Pattern Notes |
|
Body Pattern (all sizes):
Row 16 (17, 18, 19, 20, 21, 22, 23, 24)- 57 (58, 59, 60, 60, 61, 61, 62, 62): ch-1, *sc, dc*, repeat from * to * across, turn (82, 90, 96, 114, 124, 134, 142, 156, 164)
Row 58 (59, 60, 61, 61, 62, 62, 63, 63): ch-1, *sc, dc*, repeat from * to * across, fo (82, 90, 96, 114, 124, 134, 142, 156, 164)
| Arm Pattern Notes |
|
Right Arm Pattern For sizes: XS, M, XL, 3XL, 5XL & Left Arm Pattern for S, L, 2XL, 4XL
Round 1: p/u yarn at dc worked into ch-1 sps (located at center-bottom of arm hole while splitting the yoke) sc into dc and place sm, dc in next, *sc, dc*, repeat from * to * around (39, 45, 49, 51, 61, 63, 69, 75, 81)
Round 2: *dc, sc*, repeat from * to * around (39, 45, 49, 51, 61, 63, 69, 75, 81)
Round 3: *sc, dc*, repeat from * to * around (39, 45, 49, 51, 61, 63, 69, 75, 81)
Round 4- 50 (51, 52, 53, 53, 54, 54, 55, 55): repeat rounds 2 & 3 (39, 45, 49, 51, 61, 63, 69, 75, 81)
Round 51 (52, 53, 54, 54, 55, 55, 56, 56):
Sc, sc2tog in each remaining st around, fo
(20, 23, 25, 26, 31, 31, 35, 38, 41)
Turn arms inside out for best seed stitch look
Right Arm Pattern For sizes: S, L, 2XL, 4XL & Left Arm Pattern For sizes: XS, M, XL, 3XL, 5XL
Round 1: p/u yarn at sc worked into ch-1 sps (located at center-bottom of arm hole while splitting the yoke) dc into sc and place sm, sc in next, *dc, sc*, repeat from * to * around (39, 45, 49, 51, 61, 63, 69, 75, 81)
Round 2: *sc, dc*, repeat from * to * around (39, 45, 49, 51, 61, 63, 69, 75, 81)
Round 3: *dc, sc*, repeat from * to * around (39, 45, 49, 51, 61, 63, 69, 75, 81)
Round 4- 50 (51, 52, 53, 53, 54, 54, 55, 55): repeat rounds 2 & 3 (39, 45, 49, 51, 61, 63, 69, 75, 81)
Round 51 (52, 53, 54, 54, 55, 55, 56, 56):
Sc, sc2tog in each remaining st around, fo
(20, 23, 25, 26, 31, 31, 35, 38, 41)
Turn arms inside out for best seed stitch look
| Ribbing Pattern Notes |
|
Body Ribbing Pattern (make 1)
Foundation: ch 6 (9, 12, 10, 10, 11, 13, 12, 14)
Row 1: starting in 3rd ch from hook, hdc across, turn (4, 6, 10, 8, 8, 9, 11, 10, 12)
Row 2- 78 (87, 91, 100, 116, 118, 126, 139, 147): ch2, hdc in blo across, fo (4, 6, 10, 8, 8, 9, 11, 10, 12)
Using an embroidery needle and yarn, attach the edge of body ribbing to the opening of the cardigan starting in the lower left corner, working around the neck and down the other side using the mattress stitch. Fasten off and weave in ends.
Arm Cuff Ribbing Pattern (make 2)
Foundation: ch 7
Row 1: starting in 3rd ch from hook, hdc across, turn
Row 2- 13 (13, 14, 14, 15, 15, 15, 16, 16): ch2, hdc in blo across, fo leaving a tail.


Use tail to seam foundation to last row of the ribbing with mattress stitch, creating a cylinder. Use yarn to mattress stitch the seam to sc2tog round of sleeve openings.
| Pocket Pattern Notes |
|
Cabled Pocket Pattern (make 2)
Foundation: ch-19
Row 1 (RS): starting in 4th ch from hook, dc across, turn (16)
Row 2 (WS): ch 2, dc2, bpdc 12, dc 2, turn (16)
Row 3 (RS): ch 2, dc 2, sk 4, fptc 4 in next 4, fptc in front of the 4 sk sts, fpdc 4, dc 2, turn (16)
Row 4 (WS): ch 2, dc 2, bpdc 12, dc 2, turn (16)
Row 5 (RS): ch 2, dc 2, fpdc 4, sk 4 sts, fptc 4 in next 4, fptc behind into the 4 sk sts, dc 2, turn (16)
Row 6-8: repeat rows 2-4 (1 more time), turn, with yarn in tact, move on to “pocket ribbing pattern)
Alternate Pocket Pattern (make 2)
Foundation: ch-17
Row 1: starting in 2nd ch from hook, sc across (16)
Row 2: ch-1, *sc, dc*, repeat from * to * across, turn (16)
Row 3-10: repeat row 2, with yarn in tact, move on to “pocket ribbing pattern”
Pocket Ribbing Pattern (for both pockets)
Foundation: Ch 5
Row 1: starting in 3rd ch from hook, hdc across, sl st into first 2 sts at top of pocket, turn (3)
Row 2: hdc in blo across, turn (3)
Row 3: ch 2, hdc in blo across, sl st into next 2 sts from top of pocket, turn (3)
Row 4-16: repeat rows 2&3, fo leaving long tail.
Using sm, place pockets on either side of the cardigan, approximately 1 row up from the bottom, and 1 seed stitch row in from the side of either opening. Using long tail from pocket, mattress stitch (or method of choice) the pocket into place, starting at one ribbing corner, working down, around the bottom and up the other side. Tie off and weave in ends.


