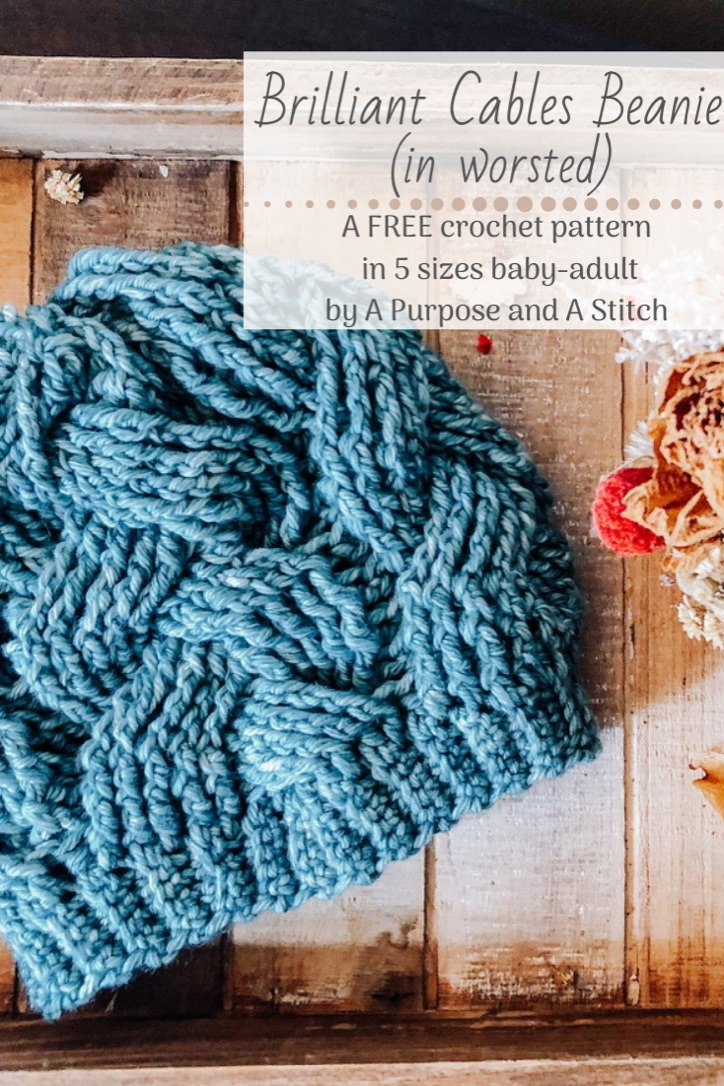
BCB Worsted

About The Design

The Brilliant Cables Beanie has been by and large our most popular beanie pattern to date (followed closely by our Fireside Beanie and our Jennie Beanie), but since publishing that pattern almost 2 years ago there have been 2 pretty consistent complaints (or constructive feedback if you will 😬) from followers. 1. The bulky weight yarn used to make the beanie too heavy and weighs the completed beanie down too much (please know neither I nor our testers felt this was an issue, but everyone has their preferences). And 2. It’s challenging to find bulky weight yarn.

The third issue was not a fault of the pattern, but cables can be tricky to make, and pictures don’t work for everyone. So while we do have a step by step picture tutorial available on this pattern with a supplemental video of braided cables worked flat (on this post), it is my goal to get a video tutorial up for this pattern as well by the end of the year.
To rectify points 1&2, it has been a goal of mine for quite some time to grade it for worsted weight yarn, while still offering that same massive cable look found with bulky weight yarn.So here we are. The Brilliant Cables Beanie (or BCB for short) is better than ever in worsted weight yarn! It is sure to become your new favorite beanie pattern, and with sizes available for everyone in the family, you’ll be able to make one for everyone’s Christmas gifts as well. 😂
Those worsted weight strands not feeling “brilliant” enough for you? The original BCB is here to stay, and you can find that beanie pattern here.
About The Pattern

As mentioned above, we do not YET have a video tutorial for this beanie. But you can find the step-by-step picture tutorial for the original here. The strands for the braided cables will look a little different (4 or 5 strands per section on this beanie vs the 3 or 4 on the original) and this beanie uses double treble crochets instead of the trebles in the original, but aside from that, they are exactly the same.
Please know that this pattern is intermediate level and experience in working cable crochets is recommended. However, if you don’t have experience working cables, then what better place to start than a fun beanie?!? Just watch out for round 4. That’s the round most people struggle with, as we switch from working double treble crochet stitches in front of our working stitches into the skipped ones and instead work between the stitches just made and the front of our beanie. That probably sounds confusing now, but when you’re stuck on round 4 come back and read that again. 🤪
Love this pattern but finding it too hard to follow on a screen? Or just want to have it easily accessible for market prep? The inexpensive printable PDF version can be found on our site, Etsy, and Ravelry shops. This PDF is the bees knees y’all. It is pre color coded for size, written in larger font and has an elegant layout.
About The Yarn

I made mine using some worsted weight yarn that I hand dyed myself. Wanna know more about that fun hand dyed yarn thing? Check out our yarn shop here.
But really any worsted weight yarn will work, and really; who doesn’t have a boat load of worsted weight yarn just dying to be made into something sitting in their yarn stash? You’ll need between 80-250 yards depending on the size you make, or about 1-2 average sized skeins.
On To The Pattern
| What You Need |
|
| Completed Measurements |
| Baby 12″ circumference 6″ tall Toddler 16″ circumference 7″ tall Child 18″ circumference 8″ tall Small Adult 19″ circumference 9.5″ tall Large Adult 22” circumference 9.5” tall |
| Gauge Used |
| 12 tr= 4”
4 rows= 4” |
| Abbreviations Used |
| ch= chain sc= single crochet blo= back loops only ss= slip stitch p/u= pick up tr= treble crochet st= stitch FPtr= front post treble crochet BPtr= back post treble crochet FPdtr= front post double treble crochet FPtr2tog= front post treble crochet 2 together |
| Special Stitches |
| FPtr= front post treble crochet: yarn over twice, [working in front of your work] insert hook behind post, yarn over, pull up loop, yarn over, pull through 2 loops, yarn over, pull through 2 loops, yarn over and pull through remaining 2 loops BPtr= back post treble crochet: yarn over twice, [working behind your work] insert your hook in front of post, yarn over, pull up loop, yarn over, pull through 2 loops, yarn over, pull through 2 loops, yarn over and pull through remaining 2 loops FPdtr= front post double treble crochet: Yarn over 3 times, [working in front of your work], insert hook behind post, yarn over pull up loop, yarn over and pull through 2 loops (4 loops remaining on hook), yarn over and pull through 2 loops on hook(3 loops remaining on hook), yarn over and pull through 2 loops on hook. (2 loops remaining on hook), yarn over and pull through remaining 2 loops on hook. FPDTF: front post double treble crochet in front of the stitches just skipped FPDTB: front post double treble crochet behind the stitches just skipped FPtr2tog= front post treble crochet 2 together: yarn over twice, [working in front of work] insert hook behind 1st post, pull up loop, yarn over, pull through 2 loops on hook, yarn over, pull through 2 more loops on hook (2 loops remaining on hook), yarn over twice, insert hook behind next post, pull up loop, yarn over, pull through 2 loops, yarn over, pull through 2 loops, yarn over and pull through remaining 3 loops |
| Pattern Notes |
|
Pattern for the Brim
Foundation: ch 6 (6,9,9,9)
Row 1: starting in 2nd ch from hook, sc across, turn. (5, 5, 8, 8, 8)
Row 2-52 (64, 78, 80, 96): ch 1, sc in blo, turn (5, 5, 8, 8, 8)
Rotate the brim 90º and work a ss into each stitch of row 52 (64, 78, 80, 96) to each stitch of the foundation row, joining the brim and creating a cylinder.
Pattern for the hat (Baby & Child Sizes)
Foundation: ch 3, p/u 52(78) tr sts around the top of the brim. (52, 78)
Round 1: ss into 1st tr, ch 3, *FPtr 12, BPtr 1*, repeat from * to * around. (52, 78)
Round 2: ss into 1st FPtr, ch 3, *sk 4, FPdtr 4, FPDTF 4, FPtr 4, BPtr 1*, repeat from * to * around. (52, 78)
Round 3: ss into 1st FPdtr, ch 3, *FPtr 12, BPtr 1*, repeat from * to * around. (52, 78)
Round 4: ss into 1st FPtr, ch 3, *FPtr 4, sk 4, FPdtr 4, FPDTB 4, BPtr 1*, repeat from * to * around. (52, 78)
Round 5-8(12): repeat rounds 1-4. (52, 78)
Round 9(13): repeat round 1. (52, 78)
Round 10 (14): ss into 1st FPtr, ch 3, FPtr2tog around. (26, 39)
Fasten off leaving long tail. Use tail to weave in and out around stitches of round 10(14). Pull tail tight to close the hat. Tie off and attach faux fur pom pom to the top if using.
Pattern for the hat (Toddler & Adult sizes)
Foundation: ch 3, p/u 64 (80, 96) tr sts around the top of the brim. (64, 80, 96)
Round 1: ss into 1st tr, ch 3, *FPtr 15, BPtr 1*, repeat from * to * around. (64, 80, 96)
Round 2: ss into 1st FPtr, ch 3, *sk 5, FPdtr 5, FPDTF 5, FPtr 5, BPtr 1*, repeat from * to * around. (64, 80, 96)
Round 3: ss into 1st FPdtr, ch 3, *FPtr 15, BPtr 1*, repeat from * to * around. (64, 80, 96)
Round 4: ss into 1st FPtr, ch 3, *FPtr 5, sk 5, FPdtr 5, FPDTB 5, BPtr 1*, repeat from * to * around. (64, 80, 96)
Round 5-8 (12, 12): repeat rounds 1-4. (64, 80, 96)
Round 9 (13, 13) –11 (15, 15): repeat rounds 1-3. (64, 80, 96)
Round 12(16, 16): ss into 1st FPtr, ch 3, FPtr2tog around. (32, 40, 48)
Fasten off leaving a long tail. Use tail to weave in and out around stitches of round 12 (16, 16). Pull tail tight to close the hat. Tie off and attach faux fur pom pom to the top if using.