Brilliant Cables Beanie- Blog Post
One of my favorite parts of being a crochet blogger, is the maker community I get to be a part of. I love seeing all the beautiful works of art created by my fellow makers on social media, and especially love it when those beautiful works of art lead to inspiration for me. 😀
While I typically try and be completely original with my patterns, I cannot lie that this pattern was totally 110% inspired by a knit pattern that looks very similar. I’ve seen several variations of the same type of beanie where it is just mega cables all around. Nothing else to it. Simple, elegant and absolutely stunning.

When I first saw it, I immediately started looking for a crochet version (I can knit, I’m just a gazillion times faster at crocheting), and to my surprise, I couldn’t find a single one. So of course… I had to make one.
Below you will find the step-by-step pictures and instructions on how to make it. The Brilliant Cables Beanie looks complex and difficult, but I promise you, with a little effort, you too can make this knit look beanie! If you’re still feeling lost, we also have a video tutorial on how to make our Cozy Cabled Blanket Square. The only difference between working the cables in this video and the cables in this pattern, is that the cables in the video are worked flat (vs. in the round), but it will still be helpful in teaching you the basics of cable crochet. You can find the high-quality video of the one featured here on our Youtube channel.
Now, if you’re ready to just hop right in and start crocheting, you can get the free pattern here!Before you begin, I have this one note about the type of yarn to use. I went with a bulky weight (5) yarn for this pattern because I wanted the cables to really look squishy and pop. However, not all bulky weight (5) yarns are created equal. You can take 3 different yarns all rated at weight 5, and you’ll most likely have 3 different levels of bulkiness. The yarns I tested this pattern out with were acrylic based and on the lighter side of “bulky”.
 I really liked working with Red Heart’s Hygge yarn for this project, but if you choose to use a different yarn, make sure to check your gauge and adjust your hook size accordingly!
To begin, you will start out with the brim of the hat. You’ll work this by single crocheting into the back loops only of each stitch across for each row. The amount of rows worked can be adjusted to fit a smaller or larger head as needed, and remember that it will stretch!


Once the desired length is acquired, you will join the last row to the foundation with a series of slip stitches. To do this, you will hold the two ends together and line up the stitches. Then, you will work slip stitches through the back loops of the last row and the loops of the foundation.


You will do this in each stitch across and once finished, you should have a cylinder for the base of your beanie.

Now you will start working on the beanie portion. You will begin by picking up 65 double crochets around the top of the brim. Regardless of how many rows you made, you will need 65 double crochets for the cabling pattern to work. If you find that working 65 double crochets with an 8.00 mm hook results in too large a beanie, you will need to either adjust your gauge, change the hook you’re using or change the yarn used.


Once the foundation of 65 double crochets has been laid, you will work a round of front post and back post double crochets. These will work as the foundation of the cabling.

To work the front post double crochets, you will insert your hook around the post (working from front to back to front again), working on the front side of your work. The double crochet portion is worked the same as a typical double crochet (it’s just worked around a post rather then into a stitch).

Working the back post double crochets is similar, but you will be working behind your work rather than in front of it. You will insert your hook around the post from back to front to back again and continue with the double crochet as normal.

The second round is when the actual cabling will begin. You should now have 5 sets of 12 front post double crochets. For the second round each 12 set will be broken up into 3 sets of 4. You will skip the first 4 stitches, and work 4 front post treble crochets (same concept as the fpdc, but ending in a treble crochet rather than a double).


You will then go back and work 4 more treble crochets into the stitches you just skipped. These stitches will be worked in front of the first 4 front post treble crochets.


The last set of 4 stitches will consist of 4 front post double crochets. You will repeat this process in each set of 12 around.

Between each 12 set, there will be one back post double crochet. This gives a very slight gap between the cables, and pushes them forward a bit for a more dramatic effect.
The following round will be another round of 12 front post double crochets separated by a back post double crochet. Just make sure to note that the stitch locations changed on the last round, but you will need to work all 12 front post double crochets in their new order.

I find that pulling on the edges of your work will help to straighten out the stitches, making it easier to identify which stitch to work next.

For the next round you will start each set of 12 with 4 front post double crochets. Then comes the trickiest part (at least to me) of working cables. You will skip the next 4, front post treble crochet 4, then go back and work 4 front post treble crochets into the skipped stitches, working BEHIND the 4 just worked.


It can be a little tricky to keep both your yarn overs on the hook while doing this, and your tension is bound to be looser than usual, but that’s okay. You’ll get the hang of it quickly and once you do, you’ll be able to breeze through this beanie!


You will then work your back post double crochet separating each group of 12 and repeat around.

The very last type of round that you’ll be working will be another round of 12 front post double crochets, separated by the 1 back post double crochet, again taking care to work each stitch in the correct order.  You will repeat these 4 rounds two more times to get some height on your beanie.

In the second to last round, you will work a series of front post double crochet decreases separated by the back post double crochet. These decreases are worked exactly like you would work a regular double crochet decrease, but in the posts instead of the stitches.
The very last round is a round of single crochet decreases around to close the top of the beanie a bit more before fastening off.
Once complete, you will fasten off with a long tail and weave that tail in and out around the single crochet decreases. Pull tight on the tail to completely close the top of the hat and tie off.
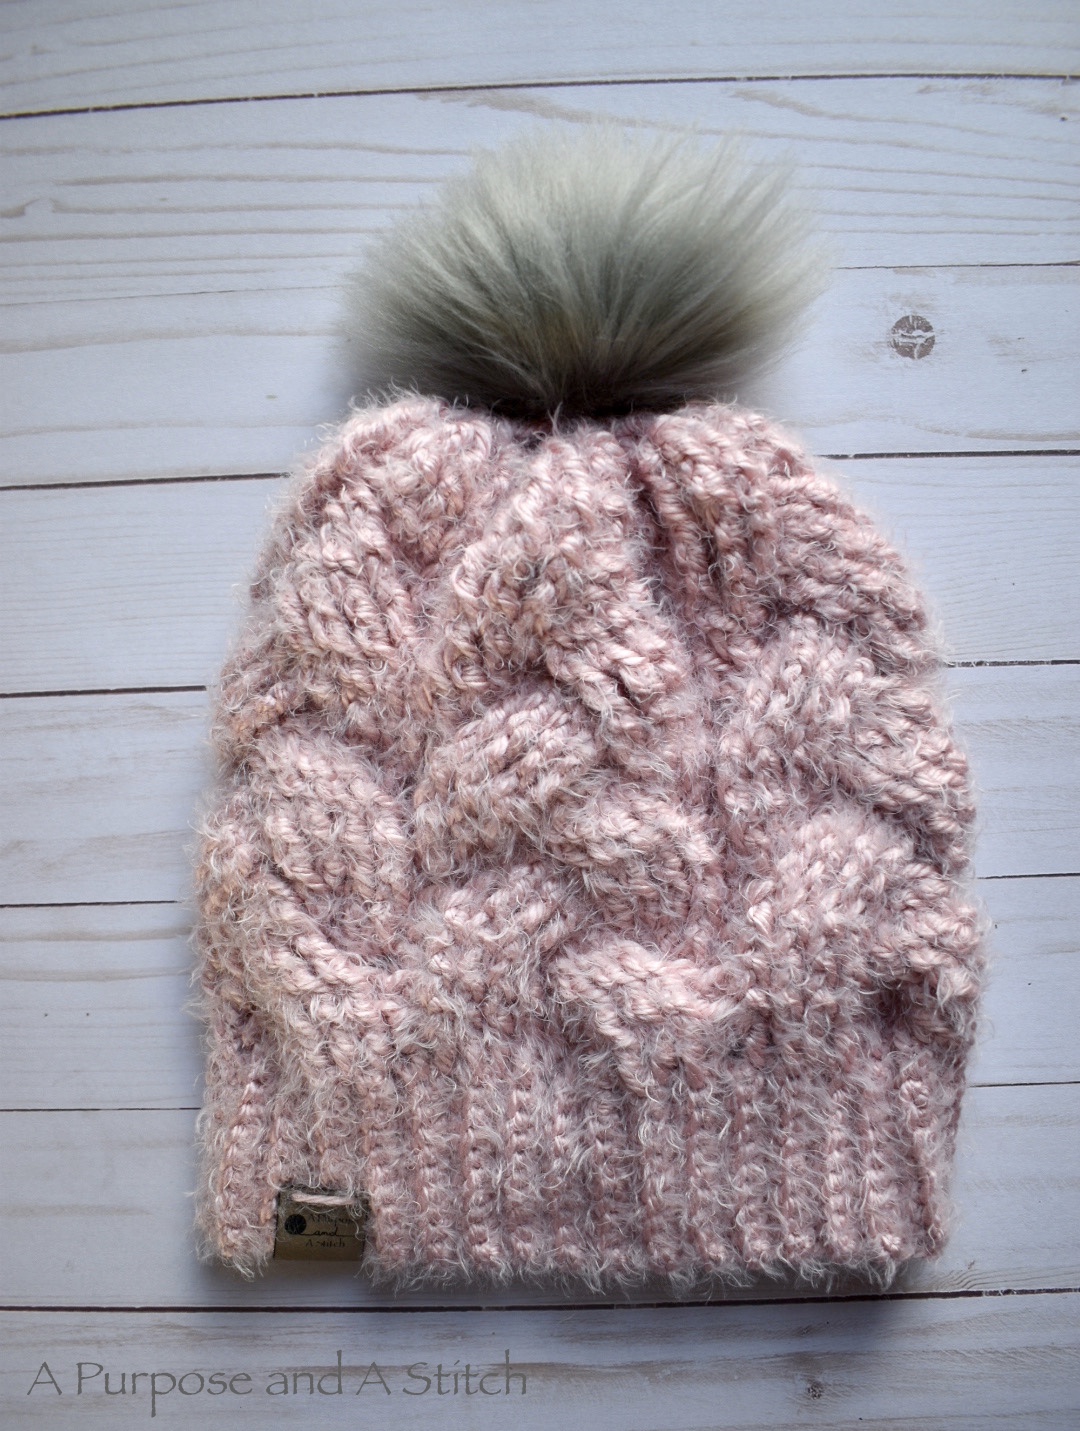
Add a faux fur pom pom if you so choose, and you’re all done!
I hope you enjoyed making this Brilliant Cables beanie as much as I did! Stay tuned for a Mommy & Me pattern with sizes baby, toddler and child!

I was making and doing exactly as the pattern described but using 65 rows for the band is way too big for a lady and even a man. I took the band down to 50 but kept the cable pattern at 65. Seems to be working out. Even at that I still need 1.5 skeins of the hyggie. Do you have any recommendations for me. I love the pattern.
Hi Susan,
So glad you like the pattern! It’s one of my favorites. It sounds like you’re having an issue with the gauge. My first recommendation would be to double check your gauge according to the pattern directions and adjust your hook accordingly (you might need to take it down a hook size or two). If that still doesn’t do the trick, you could try changing the cable stitch count to follow the toddler or child sized patterns (found here: https://apurposeandastitch.com/mommy-me-brilliant-cables-beanie/). That might help you get a better fit and save on some yarn.
Hope this helps, and happy crocheting!
-Bernadette
In Rd.3 you have FPTF but this abbreviation is not listed with the others… is this a typo or am I missing something. In the written instructions it doesn’t say what to do with the 4 skipped posts…. I am familiar with cabling but was confused with this
Hi Summer, the FPTF refers to the “front post treble crochet worked in front of the skipper stitches” listed under the “special stitches” section of the pattern 😁 hope this helps and happy crocheting!
I really wanted my finished version to look like the completed work shown here. I thought I followed the instructions properly but I was wrong. Looks nothing like your version. I like it but disappointed. Really wish there was a full video tutorial for this pattern. I’ll try again.
So sorry you’re having a hard time getting it to look like our version and that our tutorials available are coming up short. Crocheting cabling can be a little tricky, but once it clicks, it should go by quickly.
Hoping your next attempt yields more pleasing results! We’re currently working on a worsted weight version of this pattern, and if I can, I’ll do my best to make a full video tutorial in hopes of helping you and others get past the initial challenge of cabling. 🙂
Cheers,
Bernadette
Do you have a video tutorial of this beanie! I learn better by watching. Thank you
Sorry, we do not have a video tutorial for this exact pattern available at this time, but if you check out our video tutorial for the Cozy Cables Blanket Square, it uses the same braided cable as is found in this beanie, so you may find that helpful.
Any chance of doing this pattern in a 4 weight yarn? With as much yarn as i have (lots) I somehow have no number 5. I have tons of 4 and some 6 weight. I tried to learn to knit to do the knit version and I just can’t get it. After crocheting almost 40 years I’m just crushed I can’t get knitting. Going to go pick up some of this yarn.
Hey Cynthia,
Thanks so much for reaching out! If you’re using a heavier weight for (like a wool) then you’d probably be able to get pretty close to the right gauge. The yarn I used was all on the lighter side of a weight 5. 😊 Knitting can be so hard to get the hang of, especially when you’ve been crocheting for so long! Hope this helps and best of luck!
Sorry if it was mentioned, I couldn’t find, but how many skeins did you need of the hygge? Say for an average size adult head. I am a huge cable lover and cannot wait to make this! Thank you!!
Hi Stephanie, so happy to hear you like the pattern! It takes about 1 1/2 skeins of the Hygge yarn. Sooooo soft and squishy! 🥰
Adorable! May I ask where you got your pom poms?
Awe, thanks so much. I actually make them and will be releasing a tutorial of making your own in a few weeks 😉
Beautiful pattern. Can’t wait to try it. May I ask where you get your folding tags?
Oh thank you so much! Excited for you to give it a go :-D. I get my tags from Jen at the Paper Sushi shop on Etsy. I absolutely love them! She has such awesome products.
Thank you! I am currently working on a different beanie… as soon as I’m done with it, i’ll give this one a try!
I know which hat you’re talking about! I saw it on social media recently and determined that I would knit one for myself. It’s not difficult to figure out, but I never considered crocheting it! I’m going to try this version before I knit it. Thank you for the pattern!
Yay! I’d love to knit myself one too. 😁 I hope you enjoy this pattern in the meantime!