Andes Fair Isle Mitten- Blog Post

**Below you will find the free step-by-step picture tutorial for the Andes Fair Isle Crochet Mittens. If you are looking for the concise written pattern, you can find it for free here.**
First things first, why the Title, “Andes Fair Isle Mittens”? Well I suppose the most straight forward answer is that the tapestry design I went with reminds me of mountain peeks, and when trying to come up with a good mountain range to name these after, I kept coming back to the Andes. Probably because our first born son’s name is Andy so it just seemed to fit. 😀
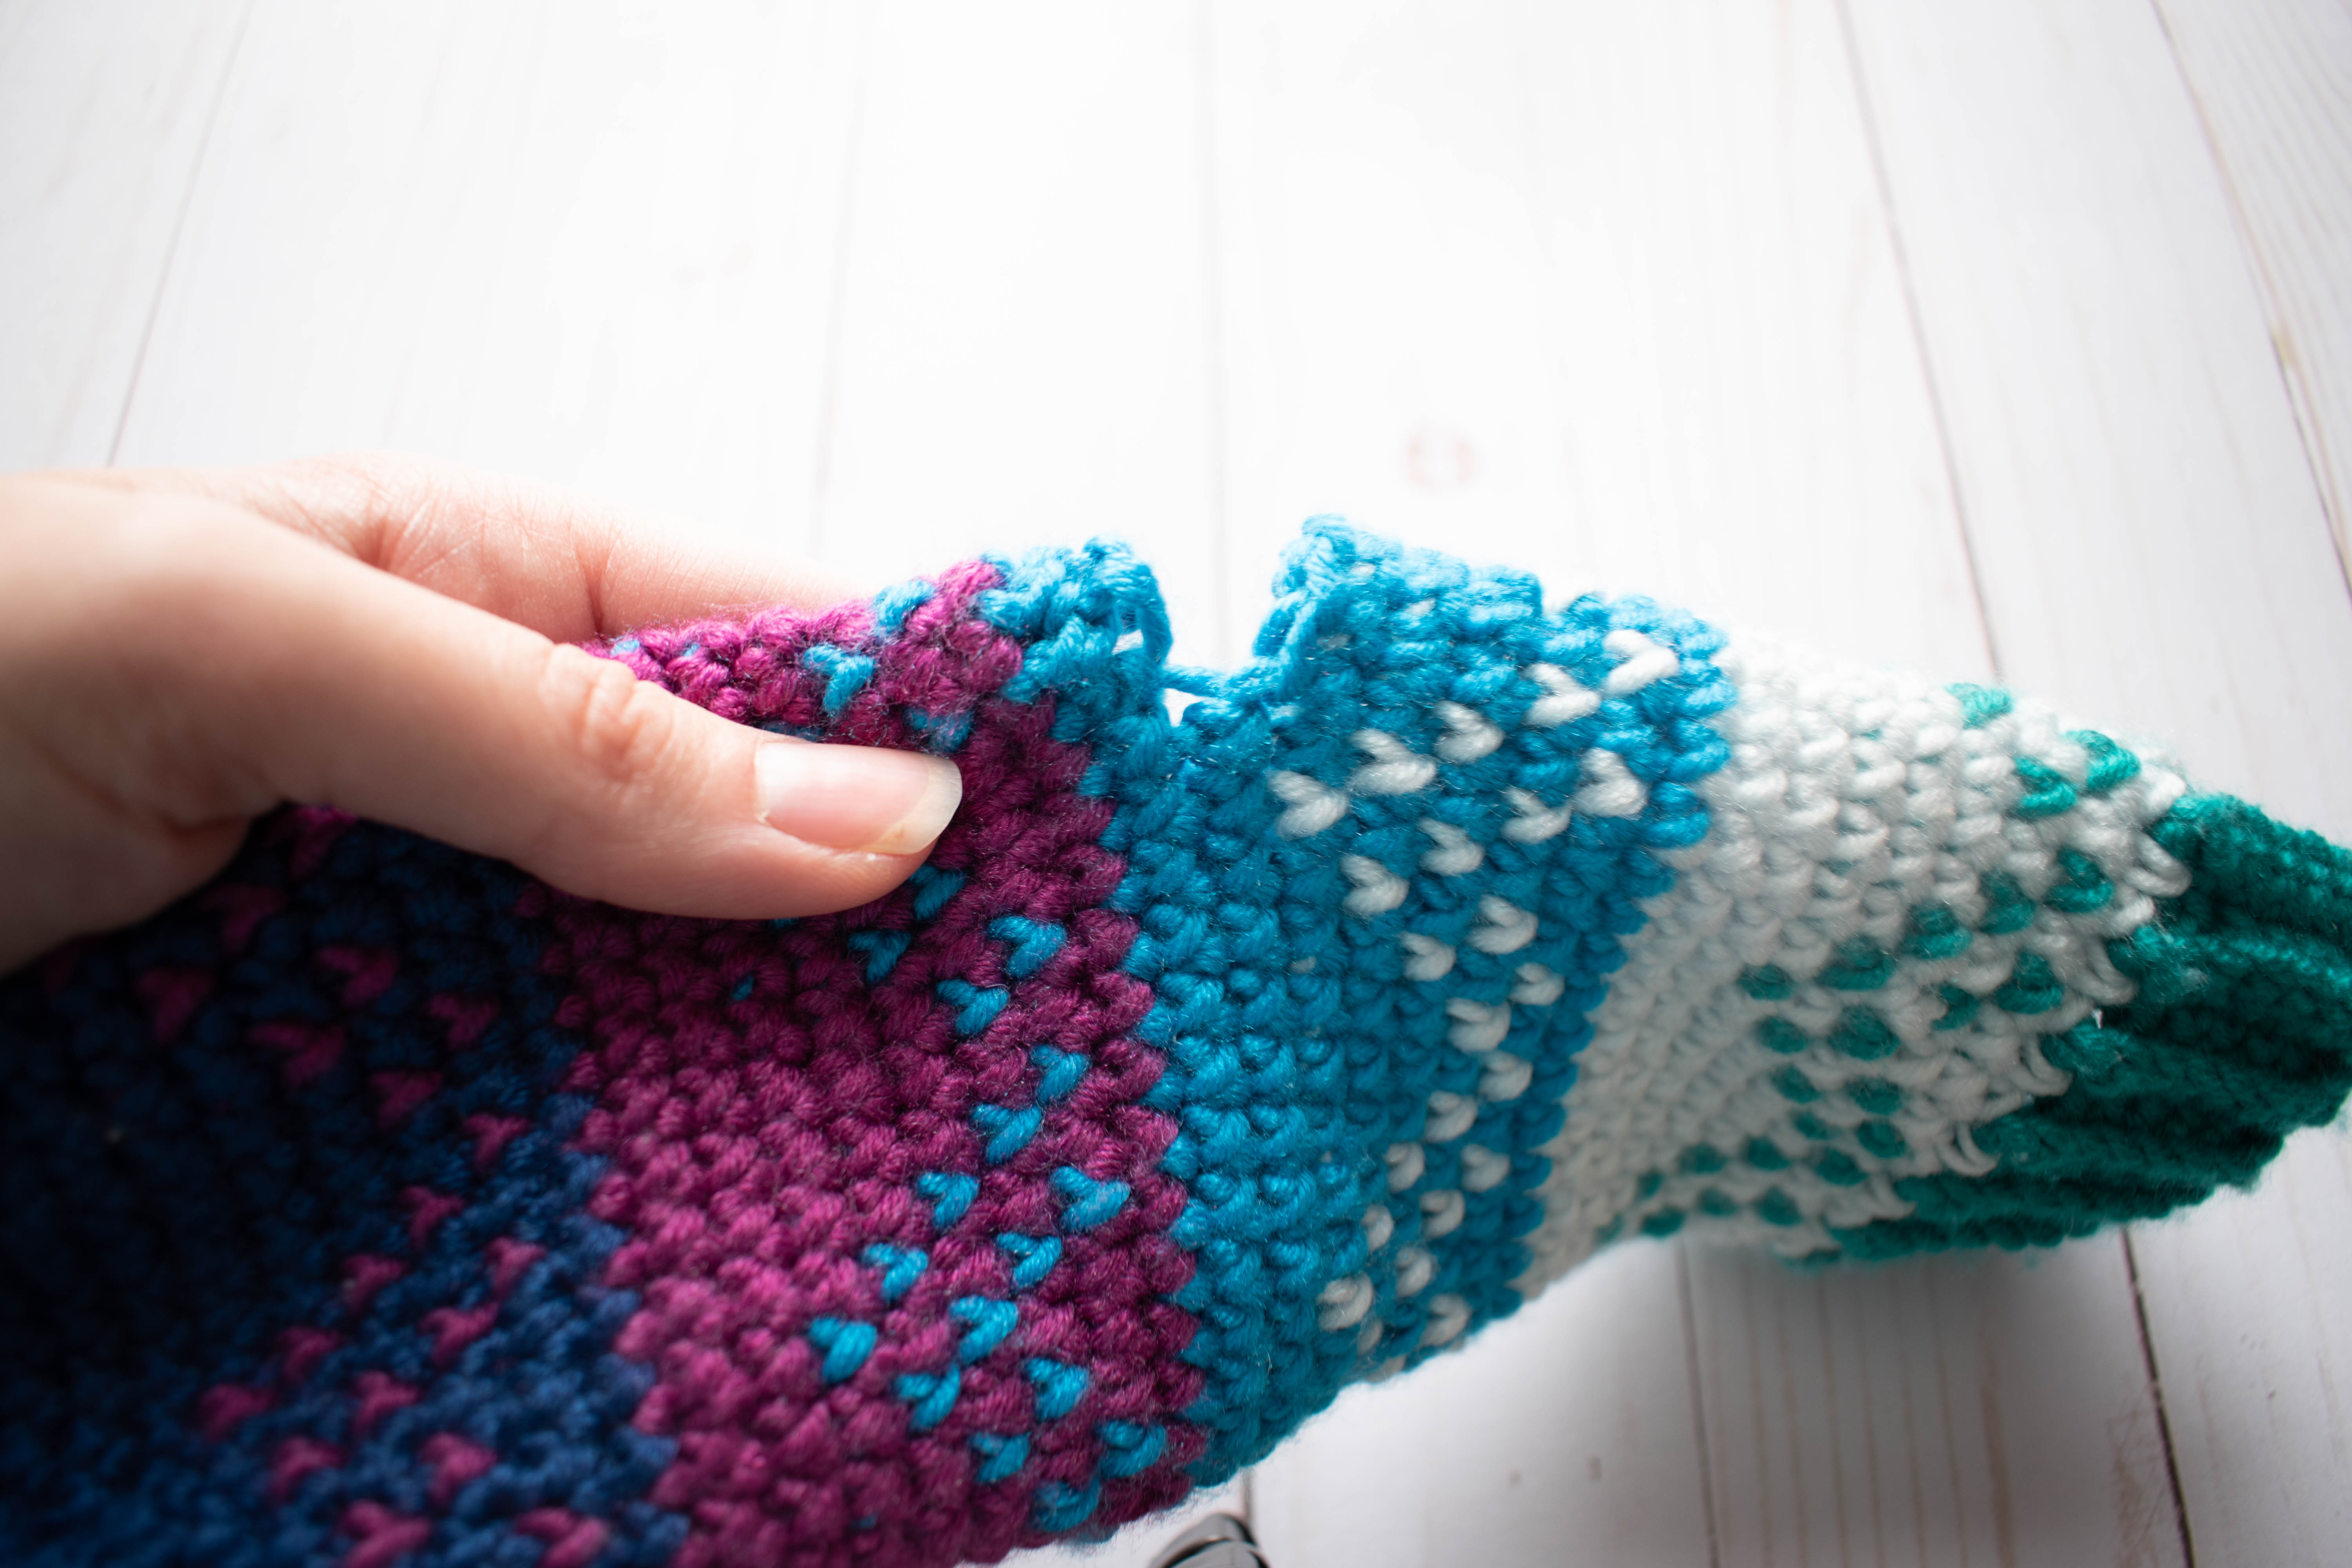
These mittens were seriously so much fun to crochet and I couldn’t be happier with how they turned out!

To make these mittens, you’ll need 2 braids of Caron X Pantone Yarn. You could also probably make them using 5 different colors of another heavy weight (category 5) yarn similar to the yarn I used, but I have not tried it.

Once the mittens are complete, you’ll have quite a bit of yarn left if you use the braids as I did, but don’t worry! I’m working on another crochet pattern that will put it to good use, so don’t get rid of it just yet!
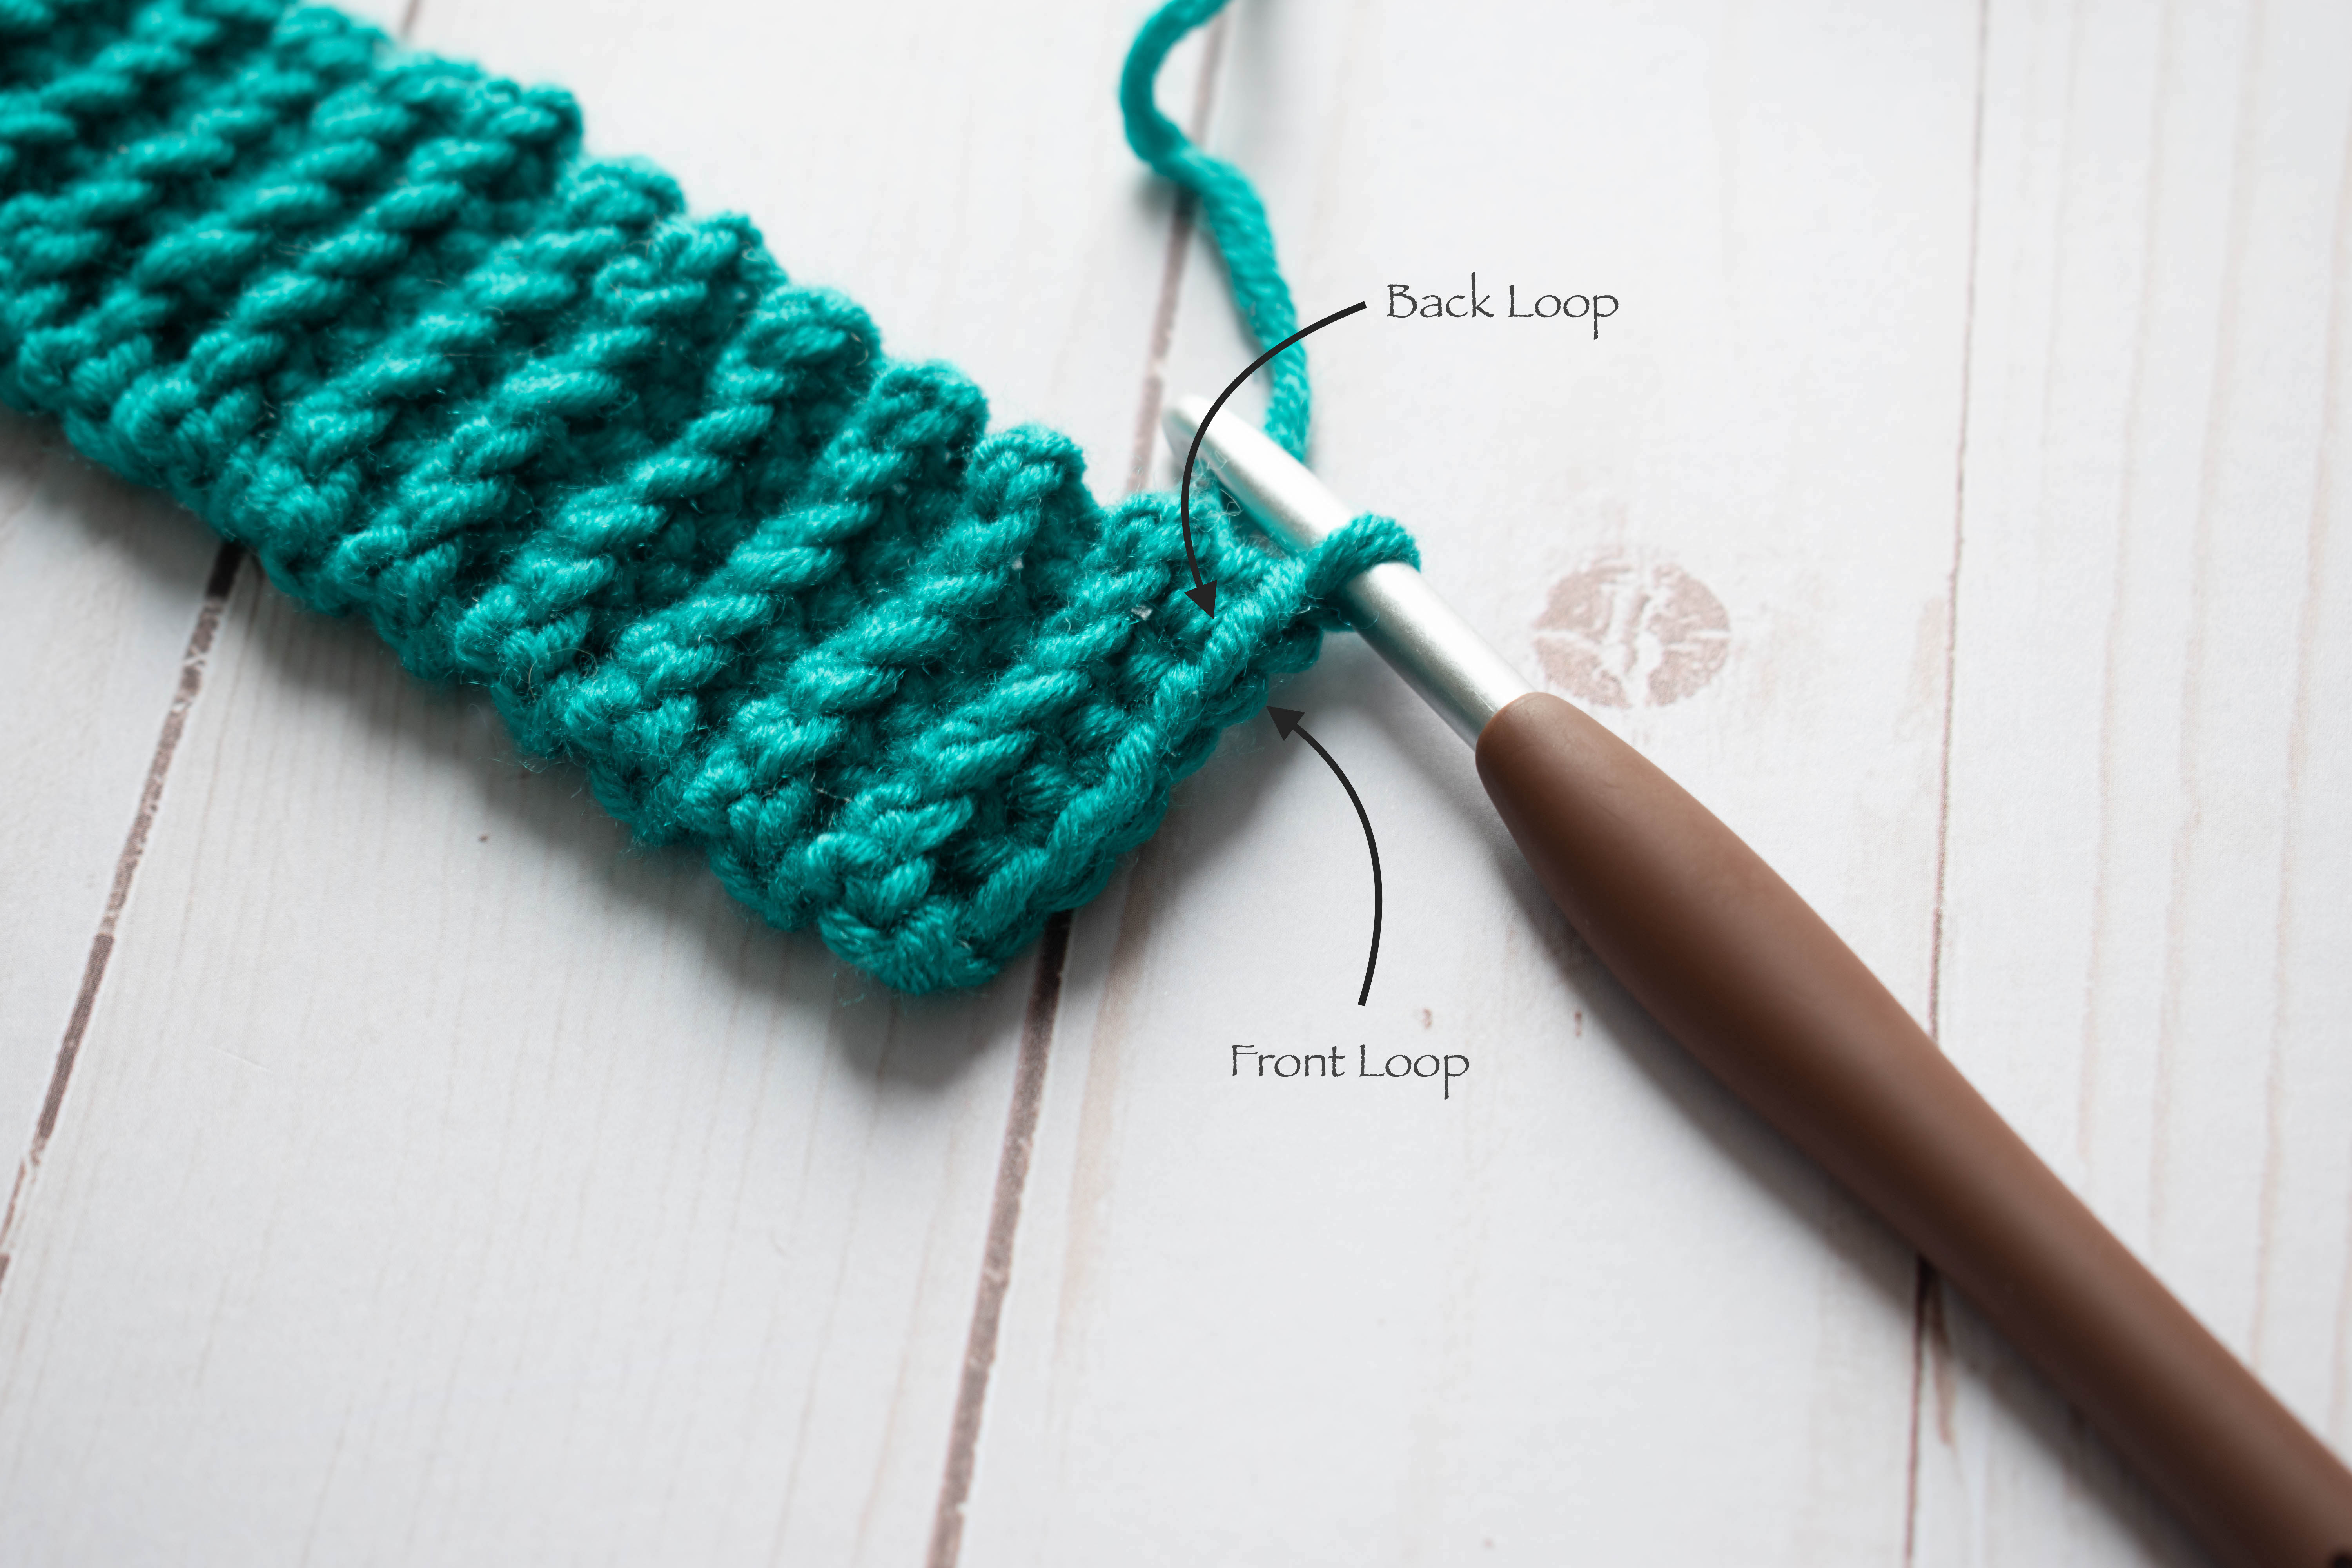
These mittens start at the brim and work upward to a close. The brim will start in your first color and will be a series of rows of single crochets worked in the back loops only.
Once you have crocheted all the rows needed, you will join the last row to the foundation in order to create a cylinder.
I like to do this by slip stitching the two ends together.


To do this, you will insert your hook into the back loop of the last row to a the corresponding stitch of the foundation, yarn over and then pull that loop through all three loops on your hook. Continue doing this all the way up and then you will pick up the second color yarn.

From here you will begin to pick up single crochet stitches around the top of your cylinder (one single crochet per row) in your second color. After the last stitch is pulled up, you will join to the first single crochet of this round.
To start the next round you will chain one, and start to follow the tapestry grid. In the pattern I have included 2 versions of this. The first version will look like this:

It goes through every single stitch of the mittens, up to the point when you will start to close up the fingers. It’s helpful to get a greater understanding how how the tapestry will turn out, but can be hard to follow it for 32 consecutive stitches and 30 consecutive rows. Therefore, I have also provided this version:
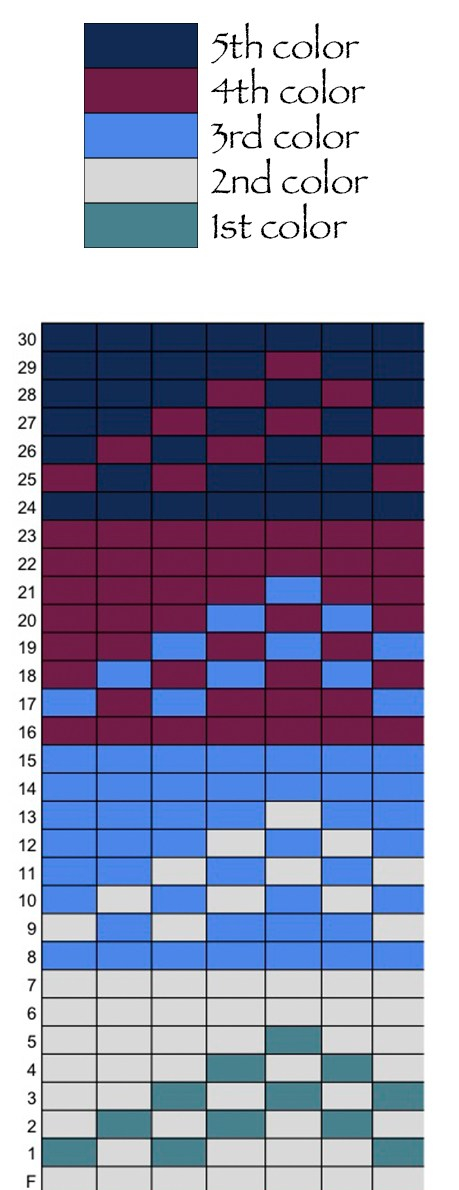
This goes through the design all the way up, to better track the yarn’s color changes, but only shows the design for each round once. To follow this grid, you would simply repeat it around. This is my preferred method of working the grid, as it’s much easier to follow along with and track where you are at in the pattern.
While working the grid, you will be using the back ground color as the main strand (or the “primary color”), carrying the color for the design (or the “secondary color”) behind each stitch, and only pulling it up as needed.
 To work the color changes you will insert your hook into the color change stitch, pull up a loop in secondary color, yarn over in primary color, and pull through both loops on your hook.


You will join at the end of each round, following the grid and changing colors as needed. When switching colors, I like to work the ends into the subsequent stitches so there are less ends to weave in at the end. (Yay for not weaving in ends!) You can do this by carrying the end tail into the stitches, as you would with the secondary color being carried.

Once you get to the 13th round, you will work the thumb hole. This is a simple matter of chaining 7 stitches, and skipping 7 stitches, working single crochets in the rest of the round. There are no color changes in this round, making it easier to work.


From here, you will continue to follow the tapestry grid through to round 30, joining each round, and continuing to change colors as needed.


Once the grid is complete, you will begin to close up the top around the fingers. While doing this, you will switch to continuous rounds (rather than continuing to join). I made this switch because even though joined rounds do have less of a jog then continuous rounds, there is still a jog, and to join in the most simple of fashions, the joins are not invisible. So if you were to continue with the join method through to completion, the jog would carry towards the front of the mittens, and no one wants to see that. 😉
So, I switched to a continuous round method. Since there are no more color changes, the jog does not matter and you will not have that obnoxious join bump in a visible area of the mittens.
To decrease these mittens, I just went with a normal decrease, but you can use the invisible decrease if you prefer. To find out more about normal and invisible decreases, check out my tutorial here.


Once decreased almost completely, you will fasten off leaving a tail. I did not do a round of decreases around (as you may typically see in patterns worked in the round that close up) because it gave the mittens too much of a point. By fastening off one round prior, you can close the hole with the tail and it give them a much softer/ more rounded closure.


Once fastened off, you will use the tail to weave in and out around the top most stitches, then pull tight to close the hole. Tie it off and weave in the end.

All that is left now is working the thumb.
You will start the thumb by picking up 15 single crochet stitches in the third color around the thumb hole.
I recommend picking up the first stitch right next to the first skipped stitch of the palm portion for both mittens. This will help the colors to align more with the colors of the palm portion.


From here, you will crochet a few more rounds in the third color, working a few decreases as you go. Once the rounds reach the height of when the 4th color comes in of the palm of the mitten, you will switch to the fourth color in the thumb.

The thumb is finished in the fourth color, working upwards and decreasing slightly as you go. I did play with switching to the fifth color at the end, but really didn’t care for it, so we just stuck with the two colors in the thumb.

The thumb is closed up the same way the fingers were, by using the tail to weave in and out around the top and tying off.
Once both thumbs are tied off, your Andes Fair Isle Mittens are complete! I hope you enjoyed crocheting these beautiful and super soft mittens along with me! 