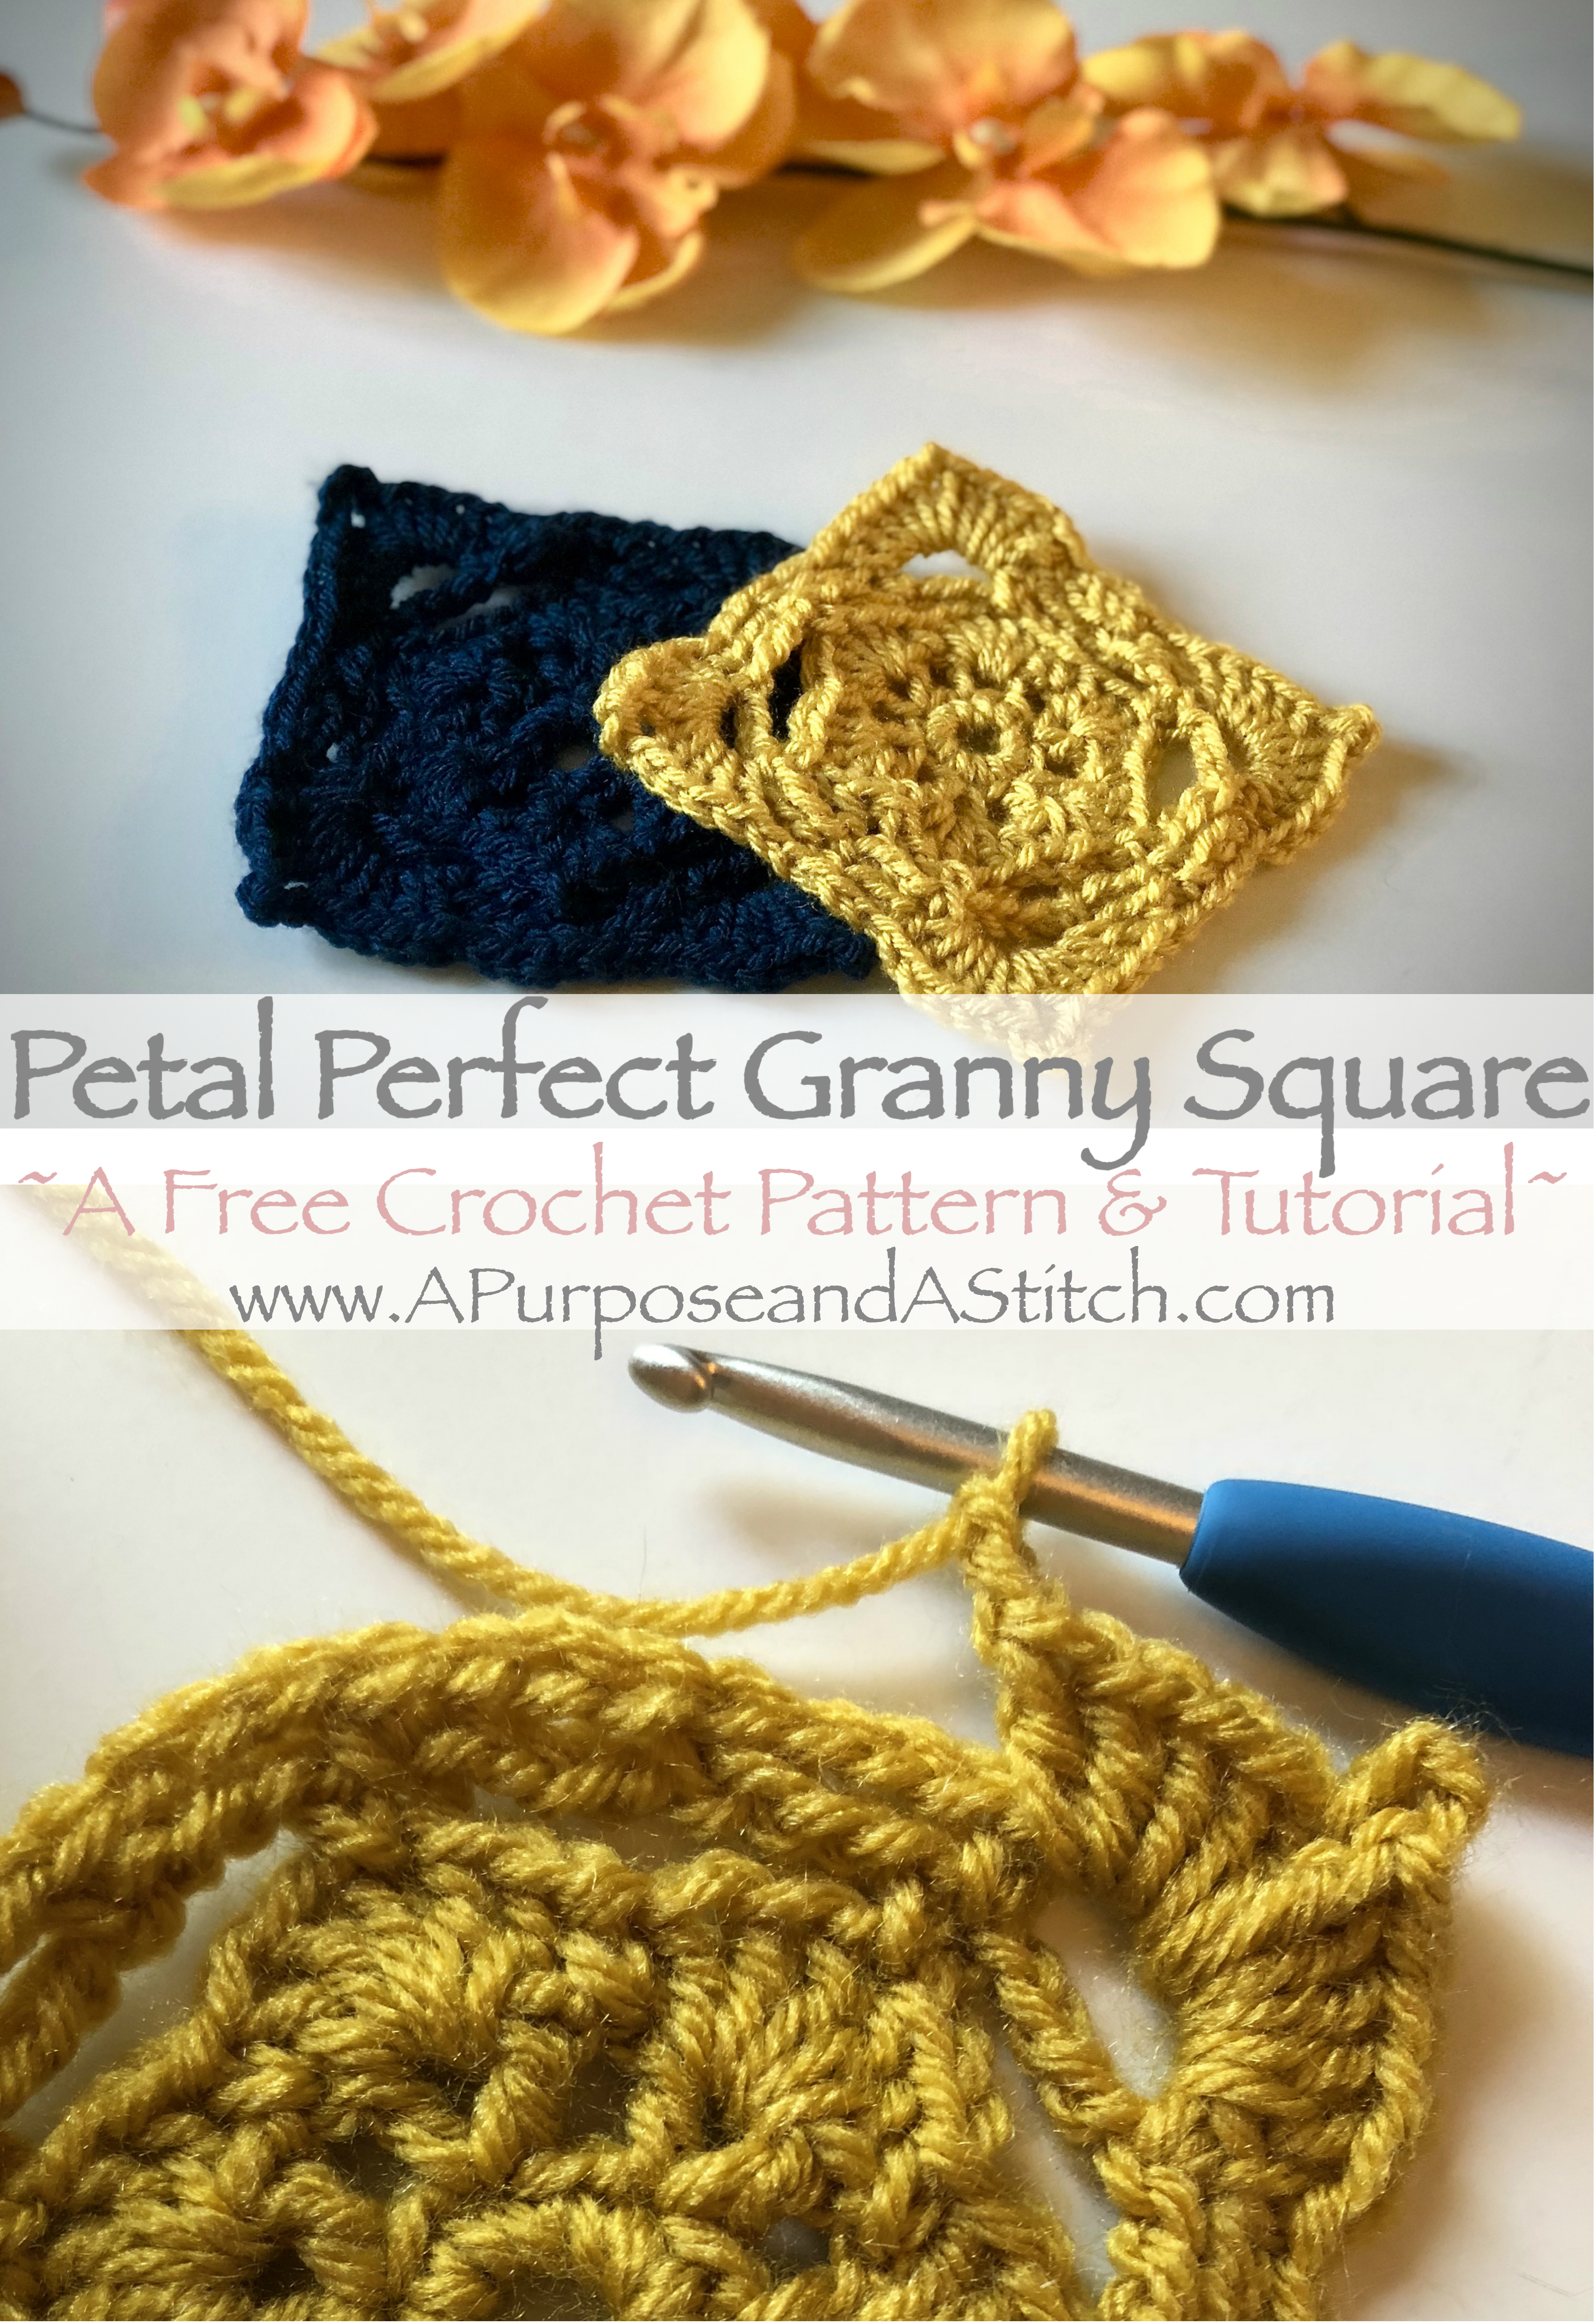
Petal Perfect Granny Square

*Please note that this pattern was updated 06/18/2020, with minor details of closing rounds 4 & 6. If you are following the pattern written differently somewhere else, but came here for the tutorial help, please continue following your pattern as written.*
I had the idea of the Not Your Granny’s Tee in my head for months before I actually made it. The problem I kept running into was that I was fixated on using granny squares for the base of it but had been unsuccessful in finding a granny square pattern I thought would work for my vision of the tee.
I loved the results so much that I’ve included this square as the base for my Not Your Granny’s Tee, as well as for some pocket details on our upcoming In The Garden Cardigan.

Please don’t misunderstand me, I think there are so many beautiful granny square patterns out there, but I want the granny square for my garment to be airy, yet stable with plenty of beautiful details and not too many large holes. Having such specific parameters was my issue. So rather then taking another’s granny square pattern and modifying it, I decided to make my own.
This is a first for me, (I have only ever swatched simple granny squares in the past for fun) so it was a very intimidating task. But I love the results and hope you do too! I actually took some things I liked from other granny square patterns and essentially put them all together to make my Petal Perfect Granny Square.
Since this is my first time writing a granny square pattern, I hope you find the pattern easy to follow along with! I have also included a video tutorial for making this square multi-colored on this page, but you can view the high-quality version on our Youtube channel here.
To start things out, you start with a chain 6. You will then slip stitch into the first chain created. This will create a circle with your chain that you will begin to work around in the next step.


What I mean by this, is that you will be crocheting into that circle, rather then into your stitches. This will give a nice clean circular center.


Once that is complete, you will move on to creating the flower portion of this square. To do this, you will start with a round of “v” shaped gaps that the petals will be worked into later.

To create these “v’s” you will start by chaining 2. This will function as the first leg of your first “v”, you will then dc into your first stitch.
 To move towards the next “v” you will chain 1, and skip one stitch then double crochet 2 into the next. Each time you double crochet 2, you will be creating another “v”, so you will just repeat from the chain 1 around.


Next comes the petals. You will start those by chaining 2, and double crocheting 5 into the first “v”. To round off the petal, you will single crochet into the chain space after the “v”. You will repeat this process for each “v” around.


To complete this round, you will be moving your starting chain. To do this, you will slip stitch starting at the base of your first petal, up to the very top stitch of that petal. This will allow you to create the border around your flower that will later become your square shape.

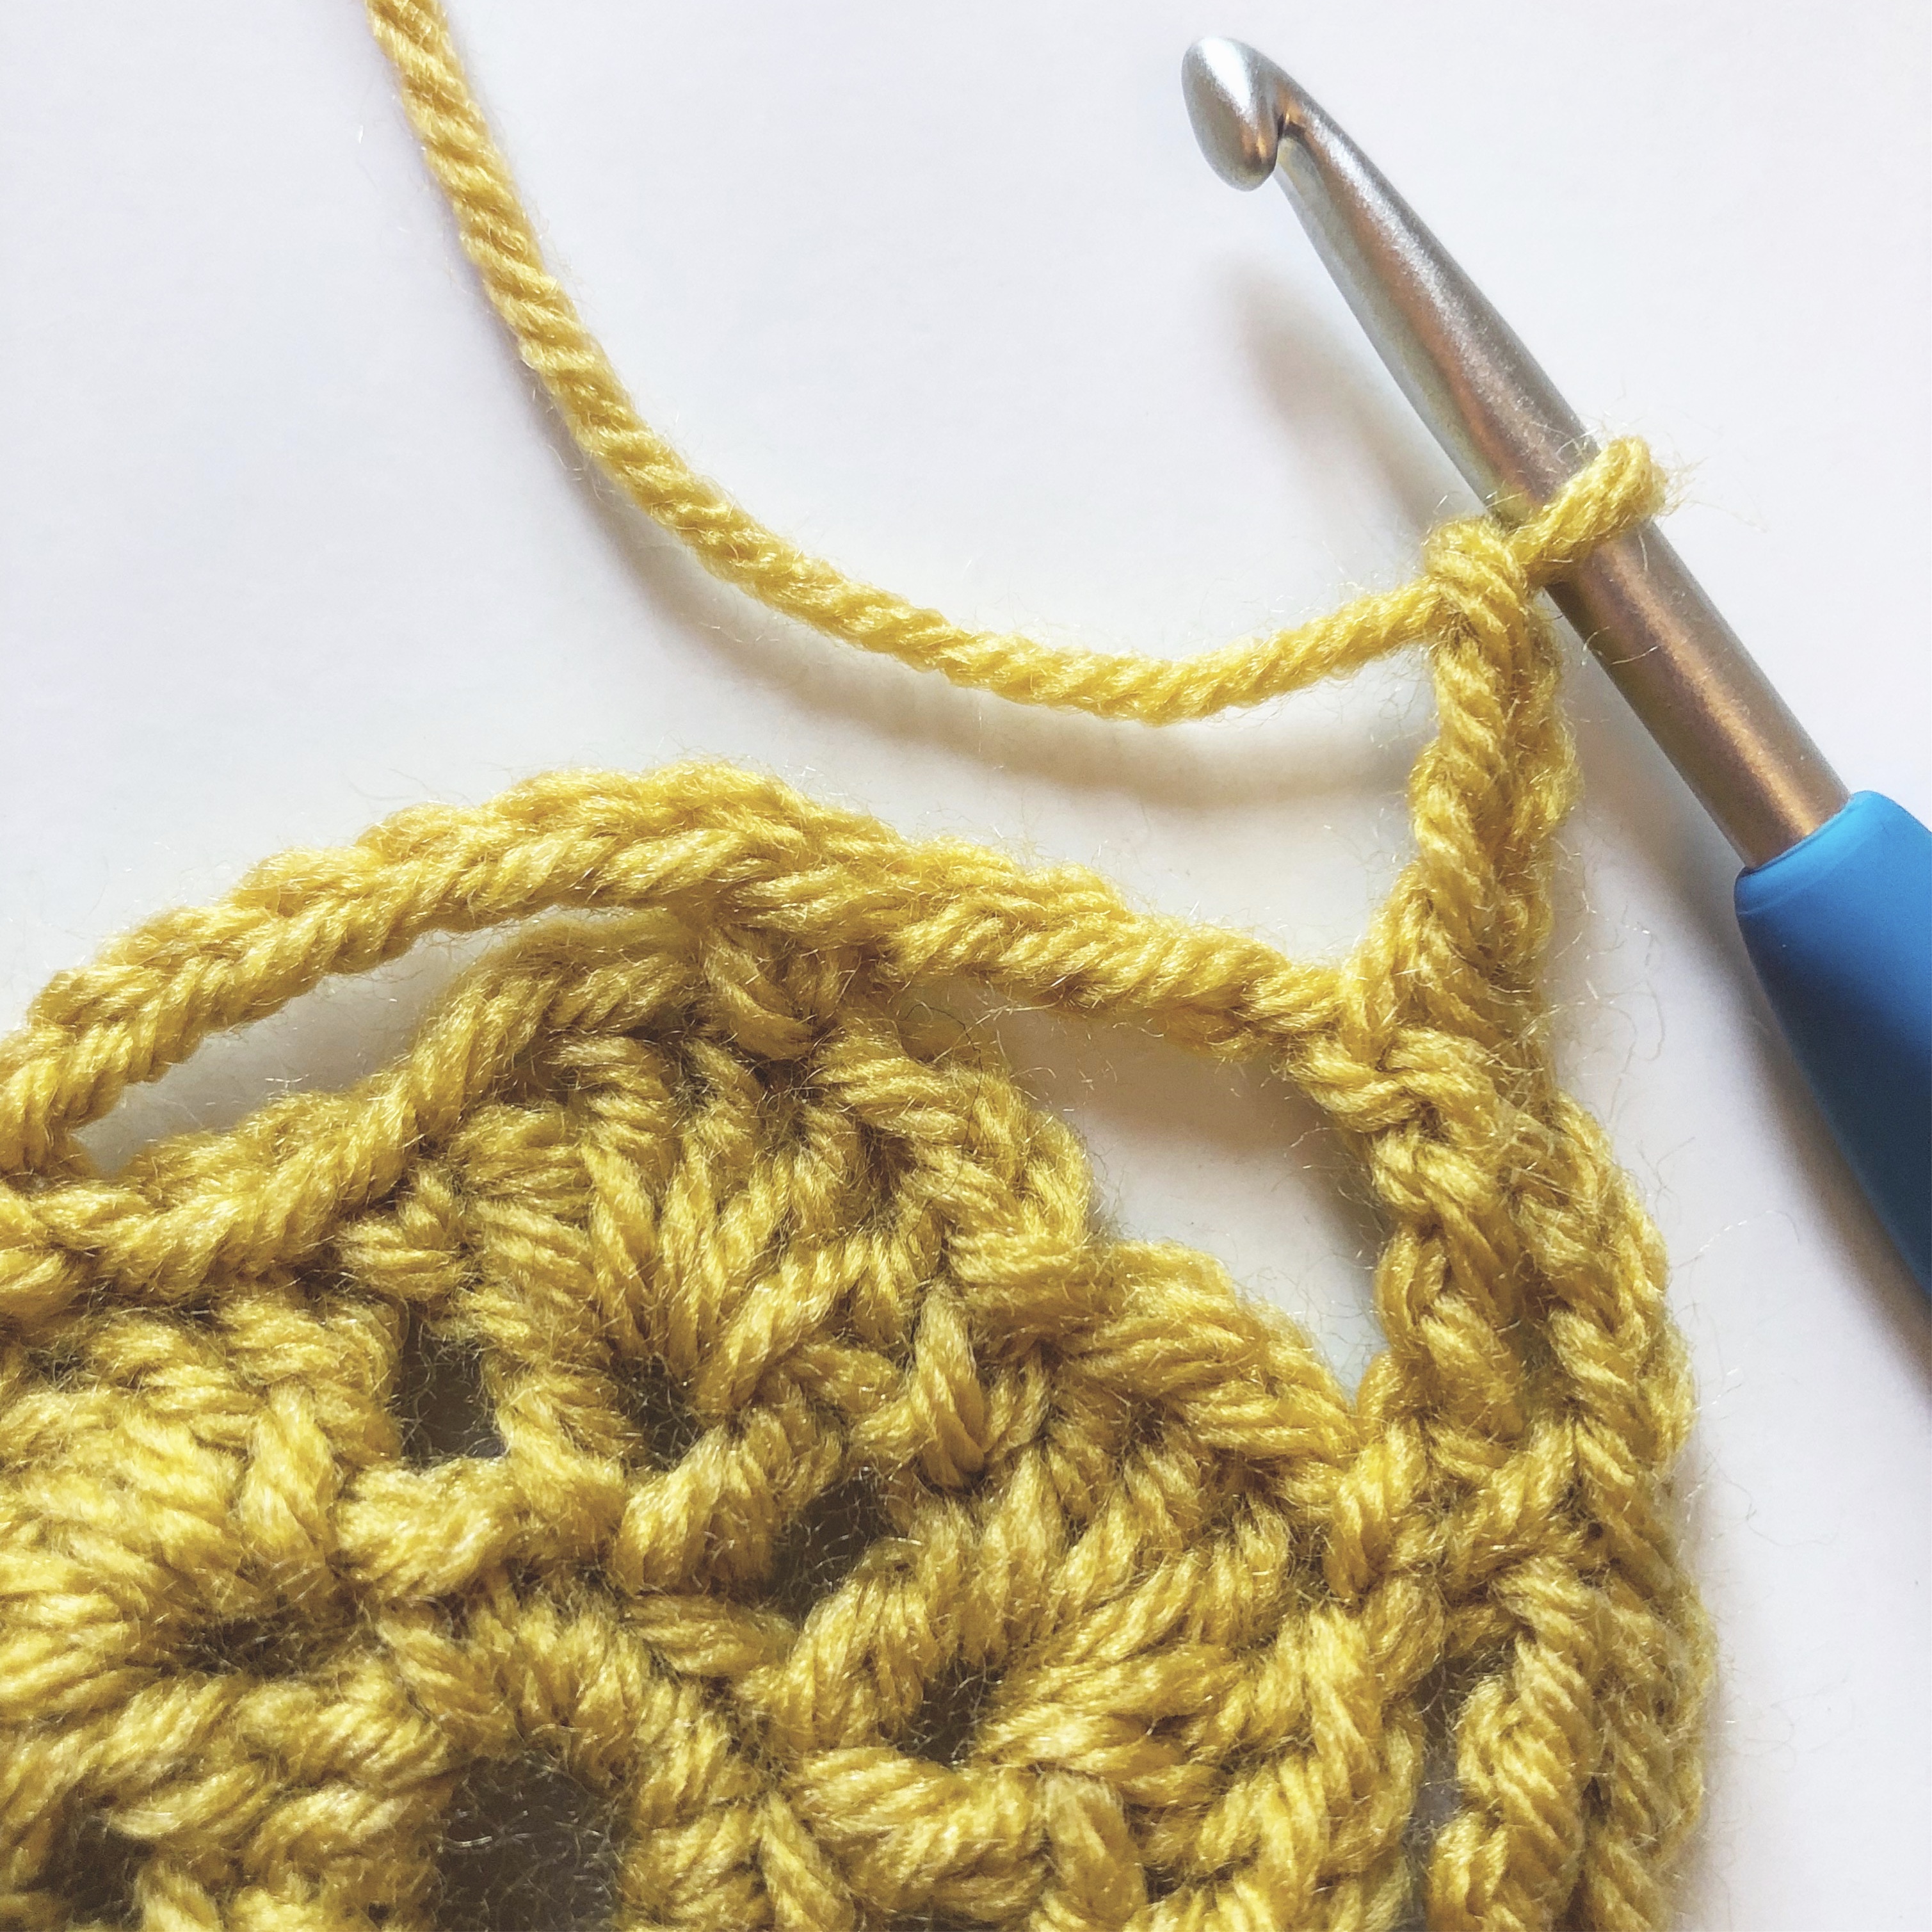
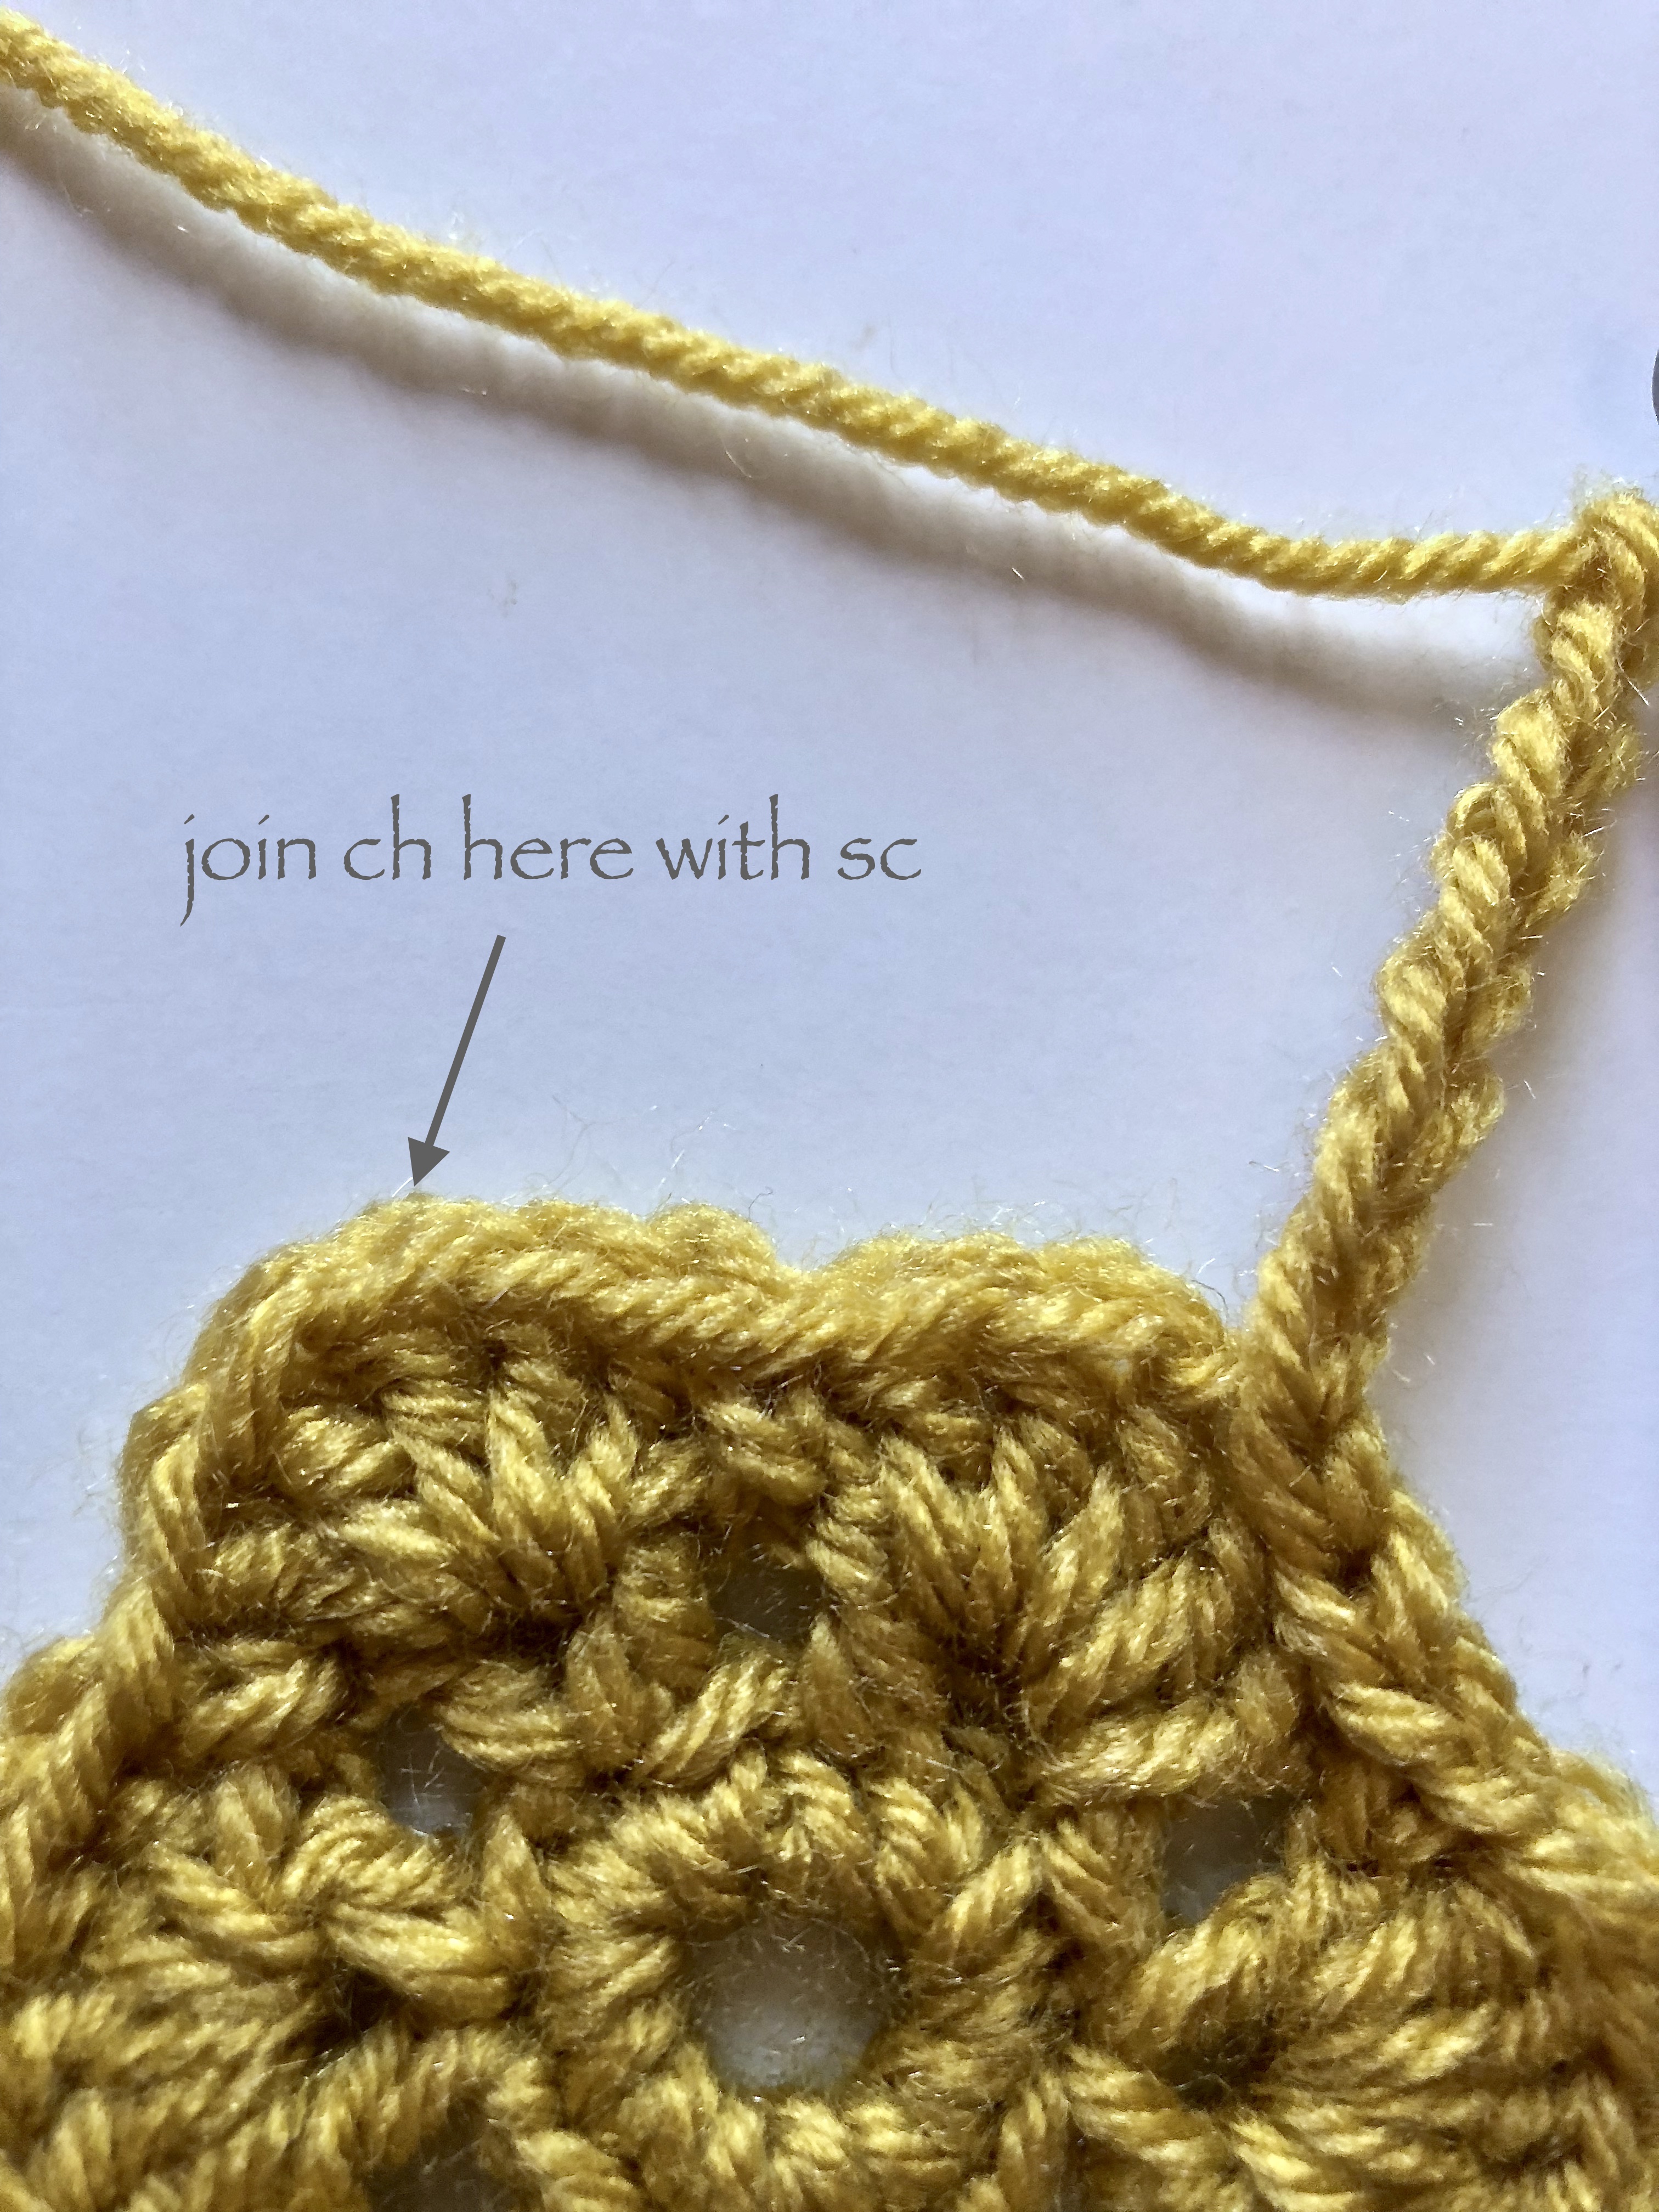
The next round will be creating said border. You will essentially be chaining around to form a circle, by attaching with one single crochet at the top of each petal. I recommend trying to use a fairly loose gauge for your chains, as you will need to work into them on your next round.


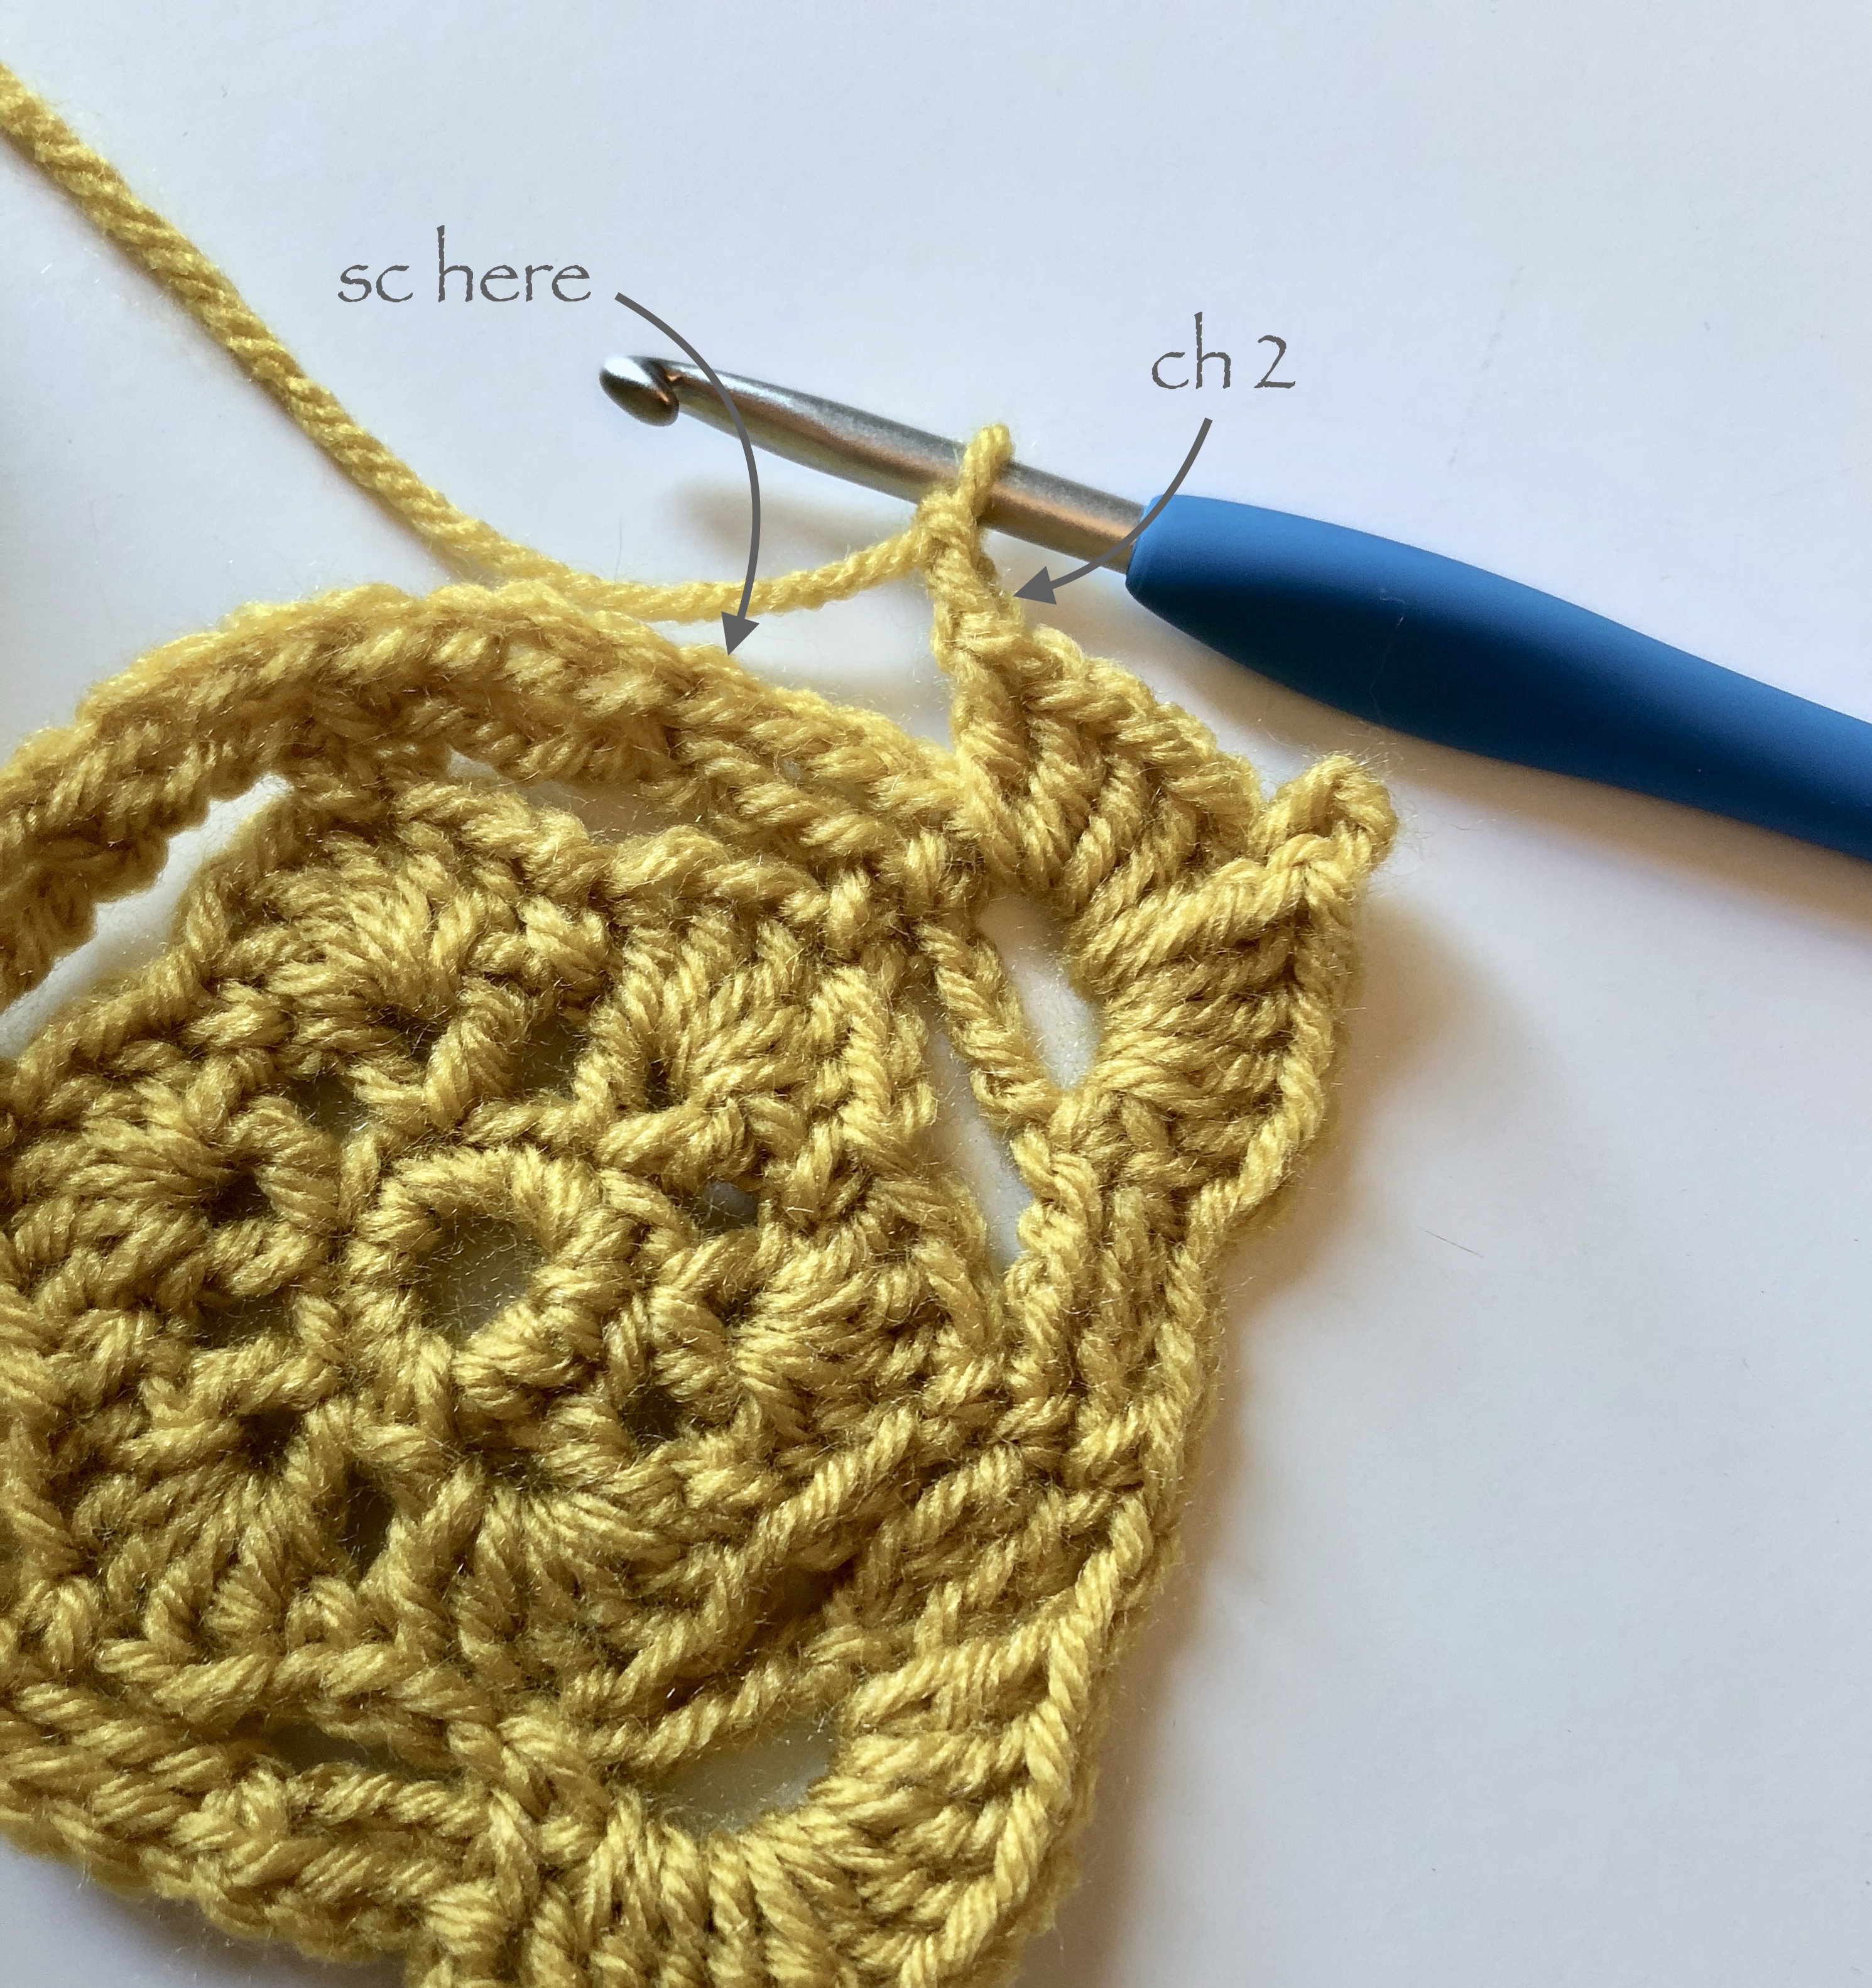
For your next round, you will be setting up the foundation for your square corners. You will begin by chaining 3 and skipping 3 from your precious round.
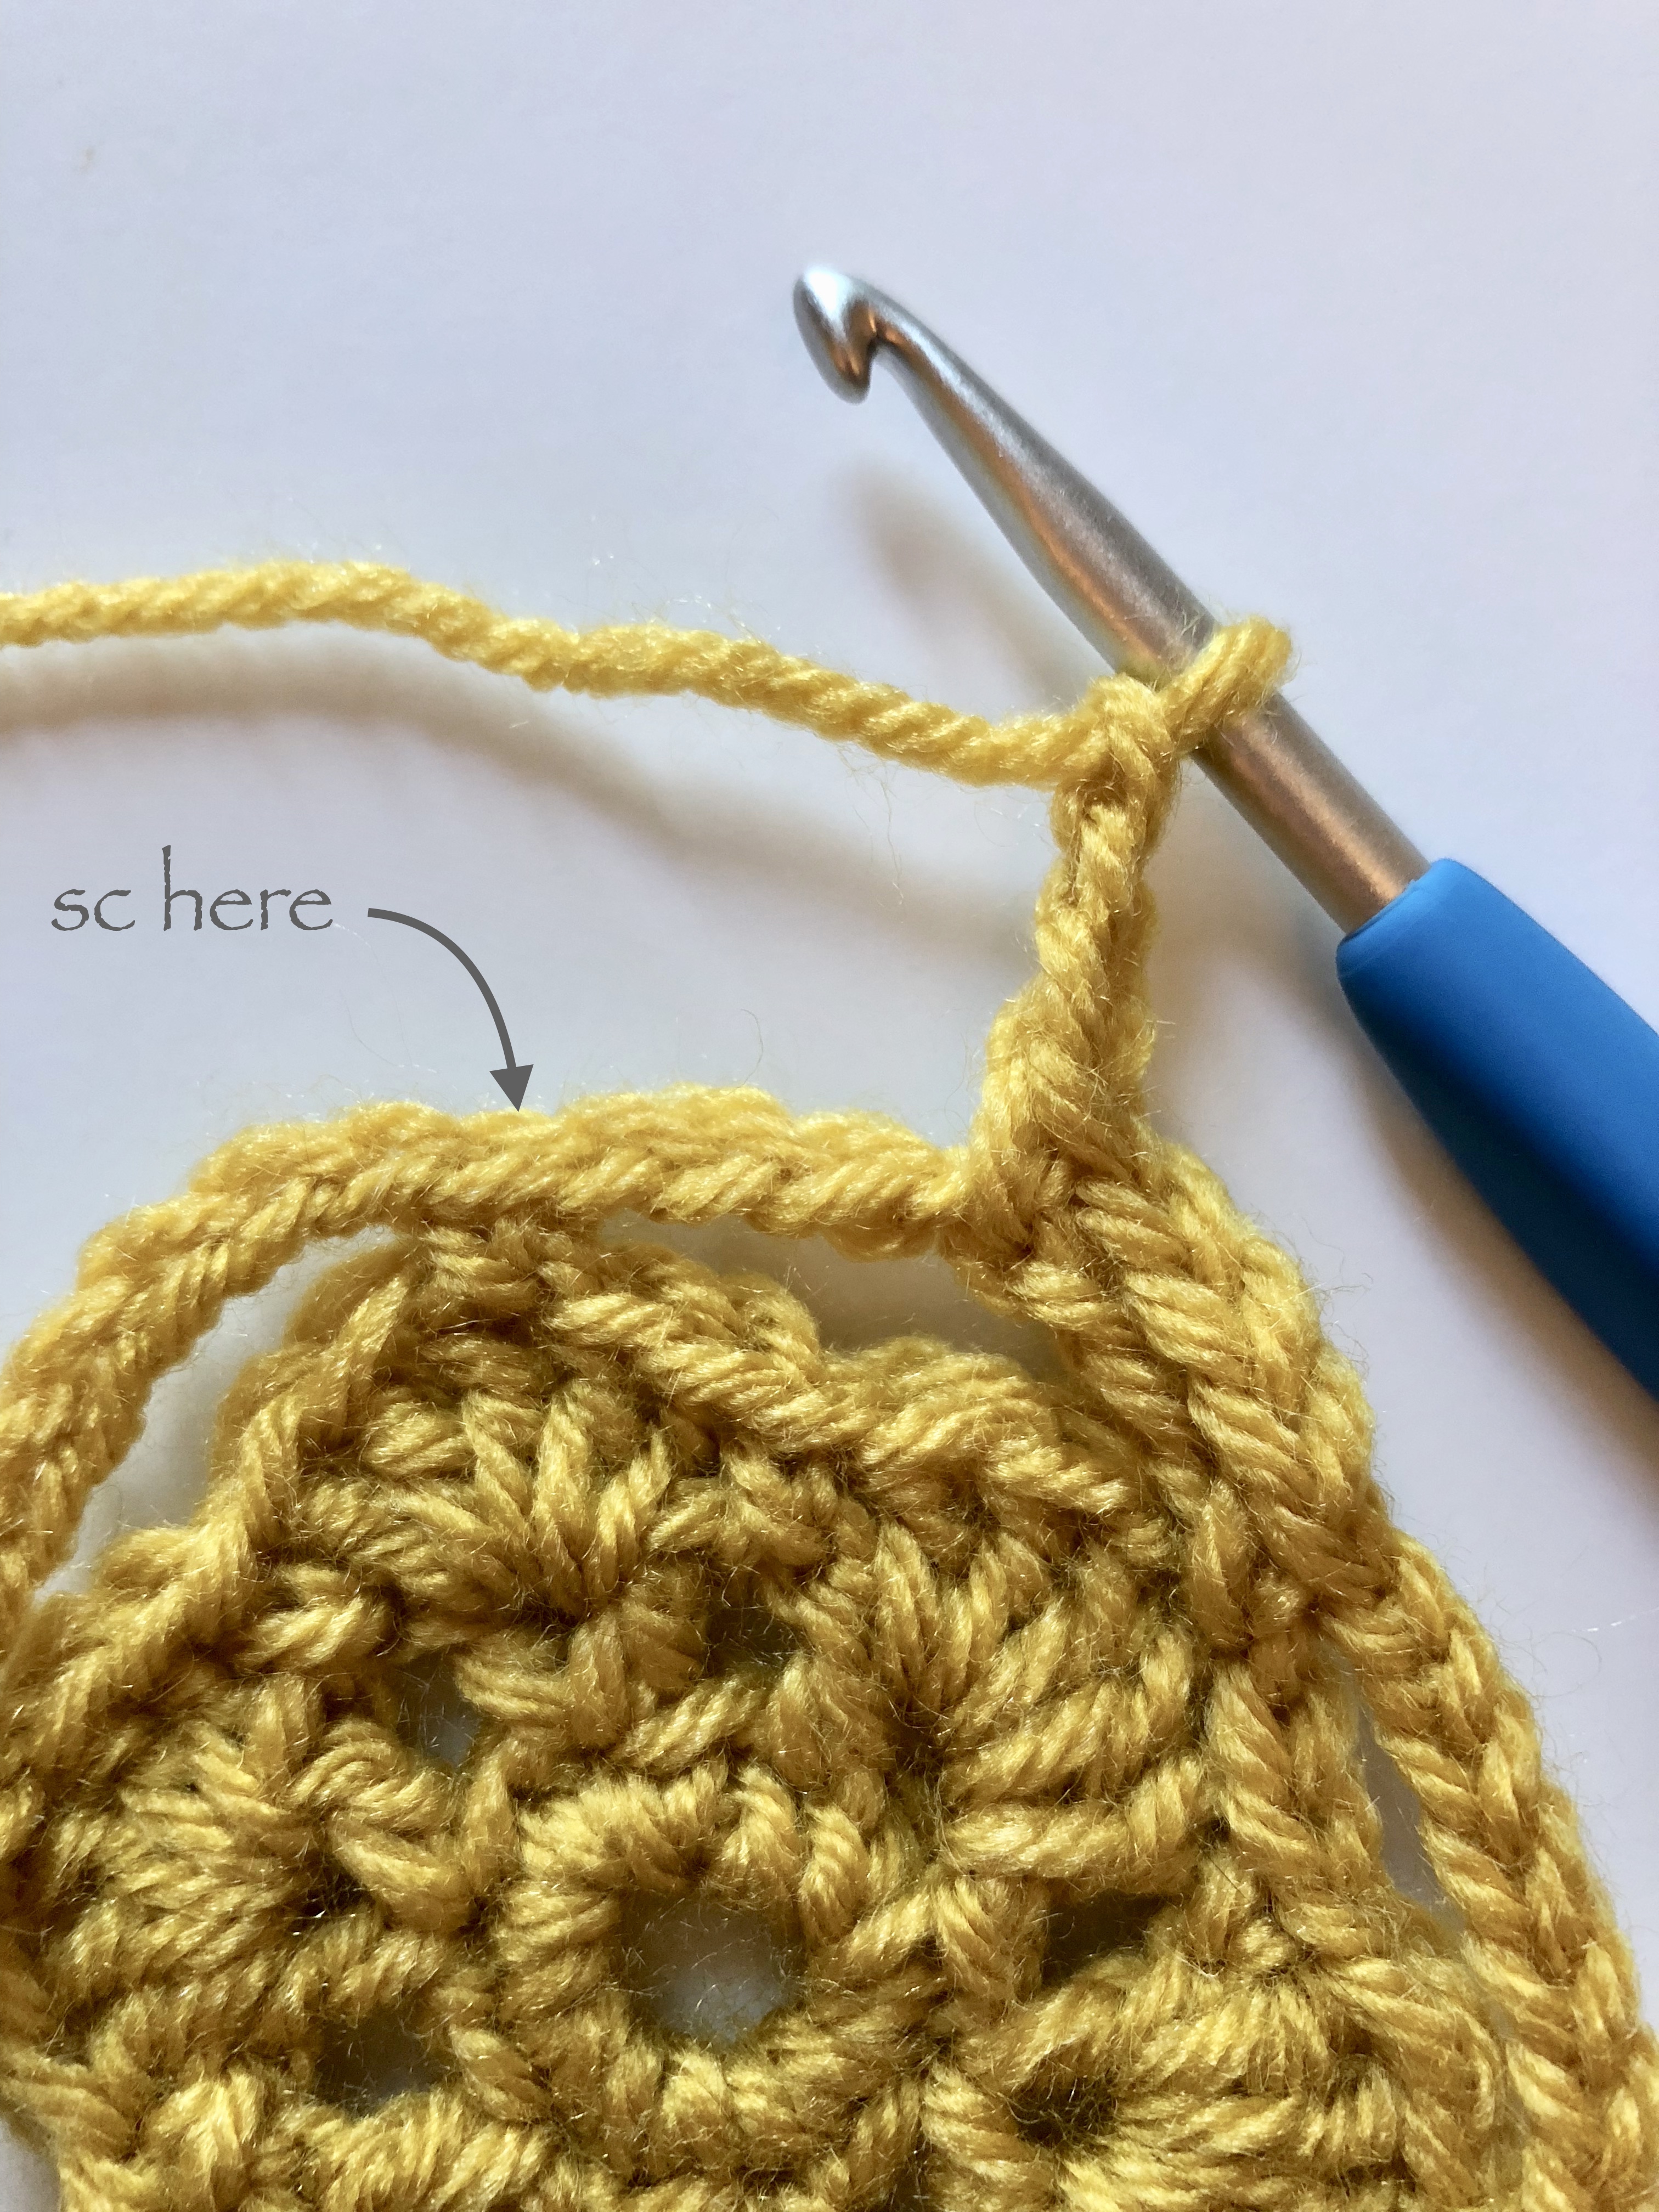
 You will then single crochet into the 4th chain space of the chain 7 from your previous round.
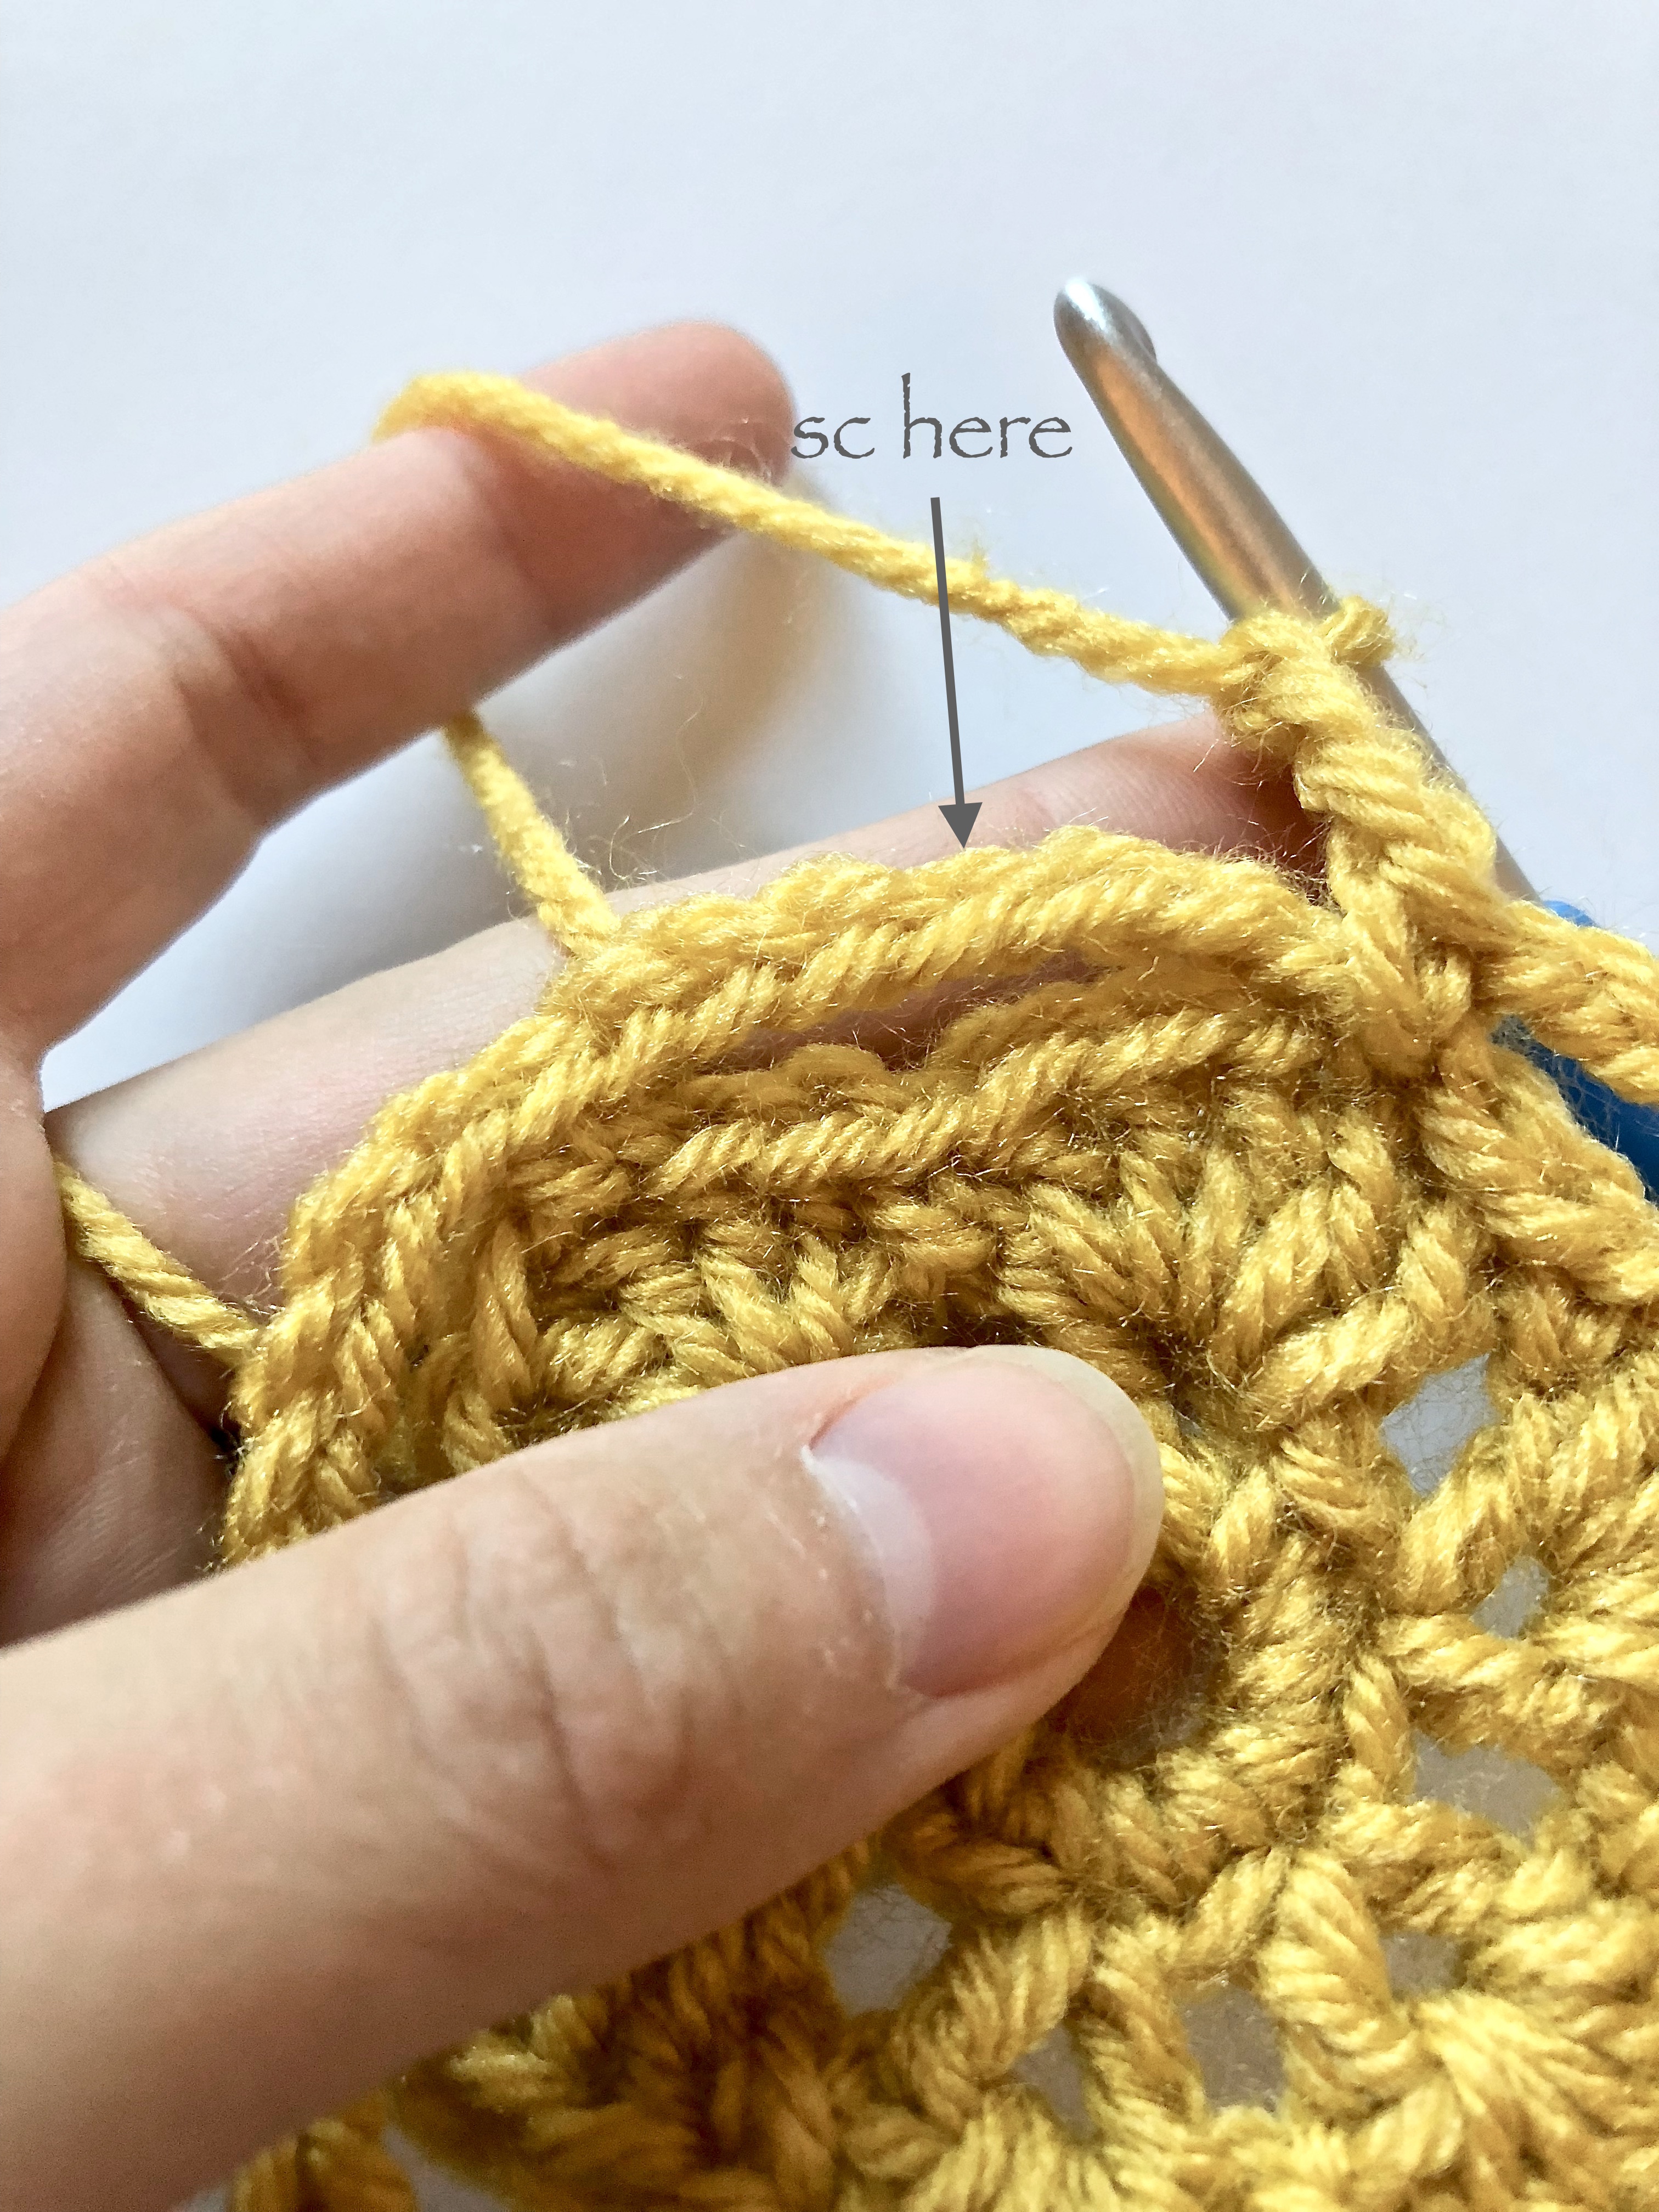
Next, you will chain 3 more and single crochet into the single crochet at the top of your petal from the previous round. You will repeat this process around creating chain spaces for each corner of your square.
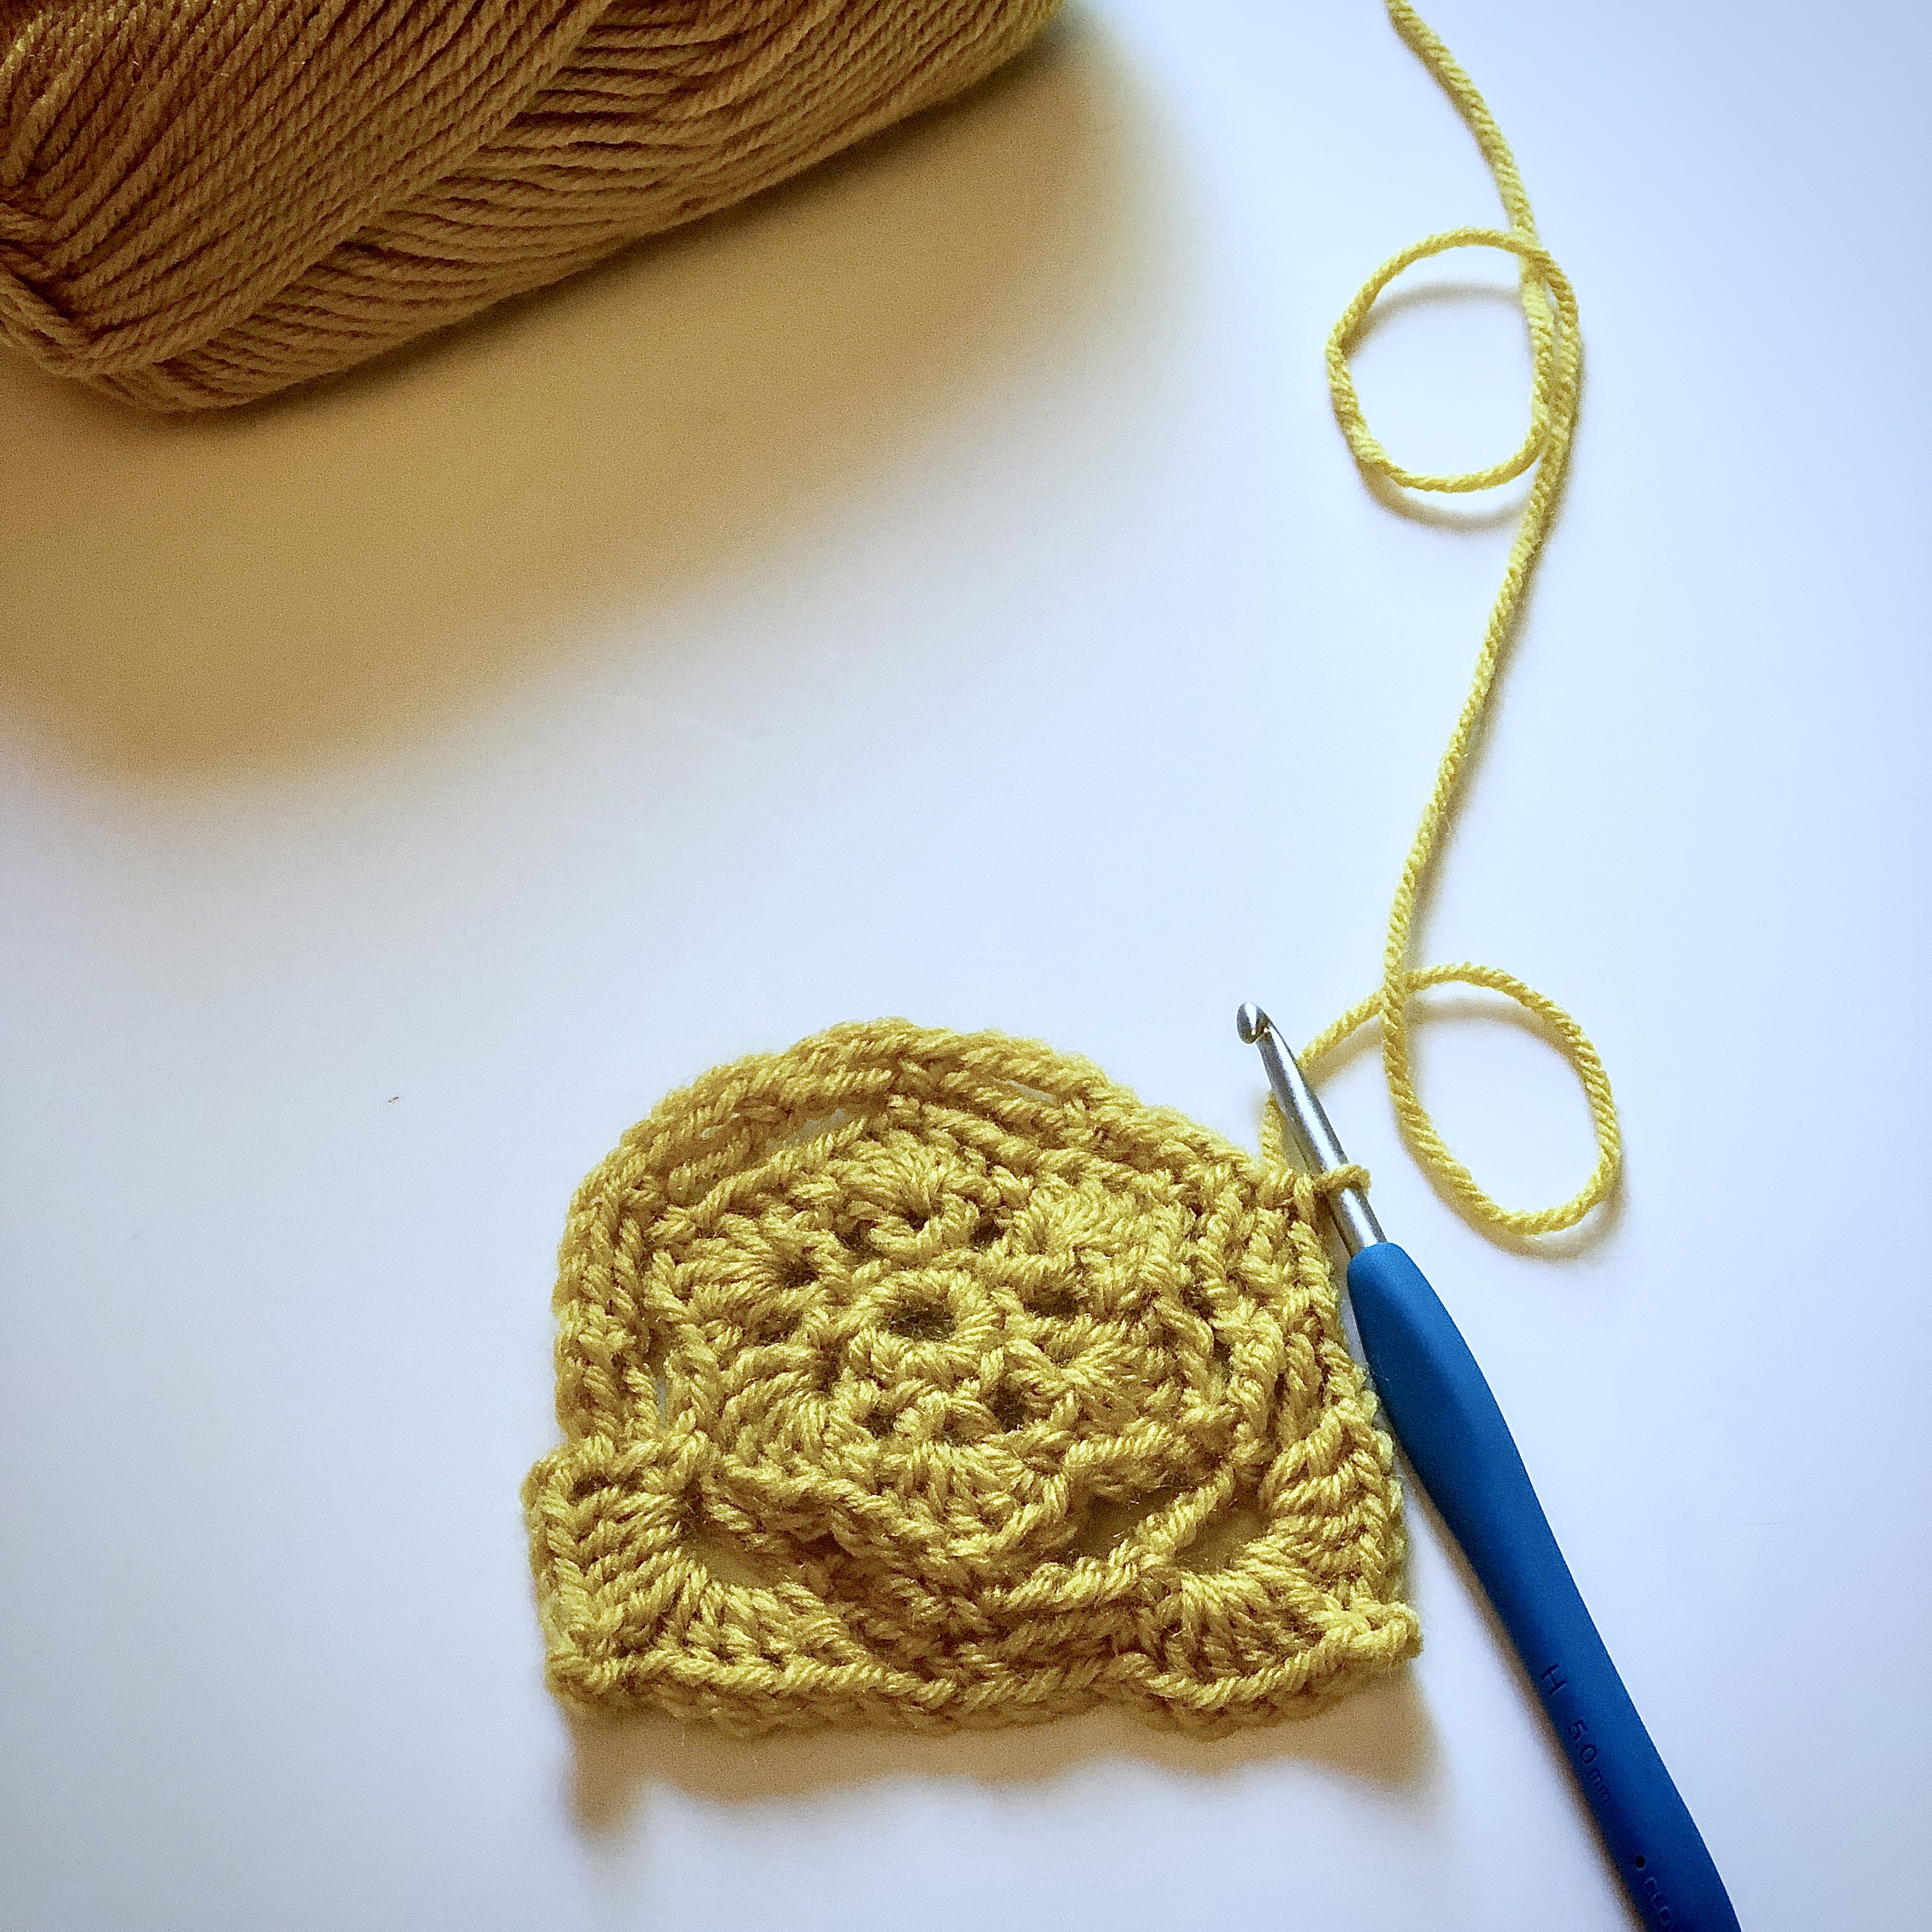
You will complete by single crocheting into the last stitch.
 Your next and final round was my favorite round to work! It adds so much beauty to this square with so little effort. To start it out, you will chain 2 and double crochet 5 into your first chain space from the previous round (your first chain 3).
  You will then chain 4 and then double crochet 5 more into that same chain space. This will create the first corner of your square.

Once that is complete, you will chain 2 and skip 3. This will tighten the edges up around your square, making it less rounded between corners. Attach your chain 2 by single crocheting into the single crochet (on top of the petal) of your previous round. Then chain 2 more and skip 3 more before attaching with another single crochet.


For the next corner, you will go straight into working 5 double crochets into the next chain space, followed by your chain 4 and 5 more double crochets. You will repeat this process for the last two corners and then fasten off. You should have 2 gaps of chain spaces between each corner.
After the very last chain 2, you will single crochet into the stitch located right before your first corner, then slip stitch into the top of the ch2 of that corner and fasten off. Weave in the ends, and there you have it!
I hope it does and that you love this super simple, super beautiful and elegant granny square as much as I do!
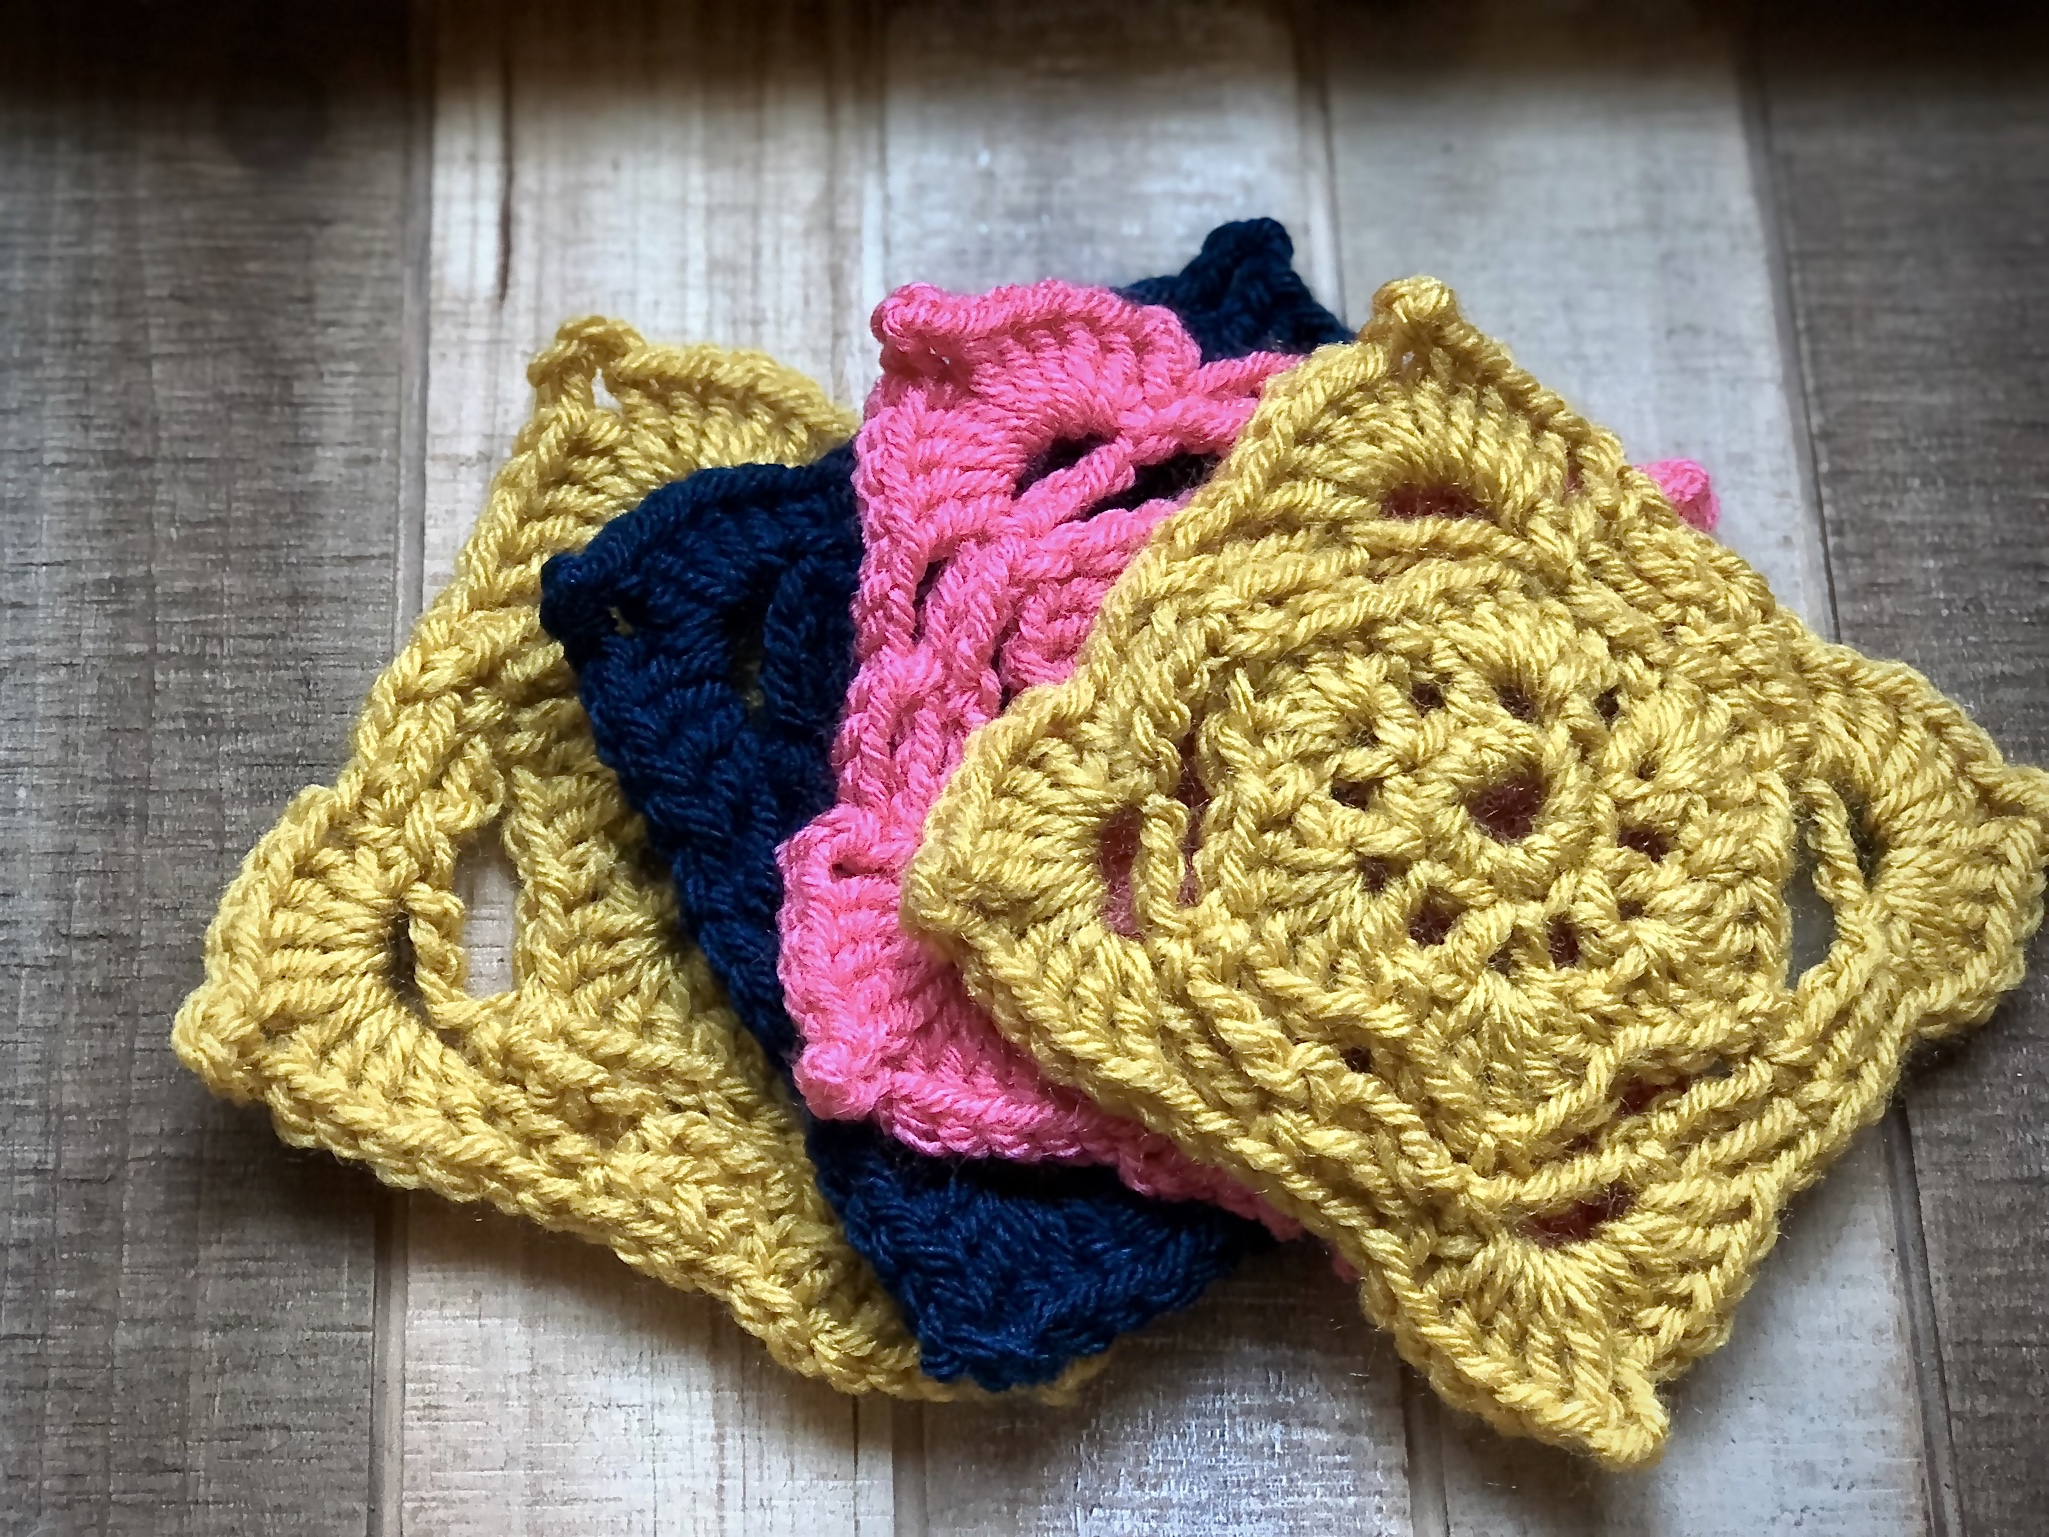
Want a good use for these granny squares, but don’t want to commit to a large project? They make fantastic drink coasters!!!

What You’ll Need
a crochet hook ( I recommend a 5.00 mm hook, but using a smaller or bigger hook will just change the size of your square)
Standard yarn (such has worsted weight 4, or fine wight 3). Using a tape, fluffy, or other specialty yarn will distort the picture of the square.
Abbreviations Used
ch= chain
sl st= slip stitch
sc= single crochet
dc= double crochet
sk= skip [stitch]
ch sp= chain space
fo= fasten off
Pattern
Foundation: Ch 6, sl st into your 1st ch (farthest from your hook)
Round 1: ch 1, sc 12 into the loop created (rather then into stitches), sl st into 1st sc
Round 2: ch 2, dc into 1st sc, *ch 1, sk 1, dc 2 into next, repeat from * around, ch 1, sl st into top of ch 2
Round 3: ch 2, *dc 5 into “v” created by your 2 dc from previous round, sc into the ch 1 space from previous round (located right after your “v”), repeat from * around, sl st into 1st dc


Round 4: sl st 2 (to get to the top of your “petal”), *ch 7, sk 5, sc, repeat from * around, ss into 2nd sl st of this round (at the top of your 1st “petal”)
Round 5: *ch 3, sk 3, sc (into 4th st of ch 7 from previous round), ch 3, sk 3, sc, repeat from * around, sc into 1st st
Round 6: ch 2,* dc 5 into ch 3 sp from previous round, ch 4, dc 5 into same ch 3 sp, ch 2, sk 3, sc, ch 2, sk 3, sc, repeat from * around right before corner, then sc into the base of the starting ch 2, fo
Your Petal Perfect Granny Square is now complete! I hope enjoyed this pattern, and as always…
Happy Crocheting!

OK-I understand everything except how it is all put together. I’ve read it over and over and viewed the “tutorial” but it doesn’t show how to put it together or did I miss something? where does the strip of stitches go that I believe you refer to as the “top”? Is that added across the top of the 5 squares? the pattern says I’m to do something vertically….what exactly does this mean?? so where are the arm and neck openings if it is stitched vertical or Is the piece turned? This part of the pattern is very confusing. would you please clarify? I’ve made lots of clothing items but I’m struggling with this one. thanks,
Hi Laurie,
Sorry for any confusion! It sounds like you’re looking to make the Not Your Granny’s tee, but since you’re commenting on the pattern page for the granny squares that make up the base for that pattern, I’m wondering if you simply missed the assembly tutorial that is on the pattern page itself. I also realized after getting your comment that some of the graphs I had originally included were no longer showing up, so I fixed that and hope it helps. The video that pops up on the pattern page here: https://apurposeandastitch.com/not-your-grannys-tee-free-pattern/ should help with with the assembly!
Warmest Regards and happy crocheting!
Bernadette
Thank you for this darling pattern. Currently I’m goofy about granny squares and I certainly plan to make a few of these. Again, thank you. Deb
Oh so happy to hear! Granny squares can be so much fun to make and it’s so nice how quickly they work up! 🙂