Greg the Steg Amigurumi

I’d like to introduce you to Greg the Steg. He’s a sweet, gentle dinosaur, sure to melt your heart! Please note that this is the blog post, with detailed step-by-step pictures and instructions on how to make your very own Greg the Steg Dinosaur Amigurumi. If you are looking for the free pattern with exact stitch counts and instructions, it can be found here. 🙂

From the first moment the idea of making an amigurumi dinosaur came to me, I knew I wanted to make a stegosaurus and I knew I wanted the head, body and tail to all be one piece. However, since amigurumi is typically worked in continuous rounds, I was having issues getting the stitches to line up the way I wanted for the tail.
As you may or may not know, continuous rounds have their advantages AND their disadvantages. The biggest disadvantage in my case was that the starting stitch jogs ever so slightly in each round made.
The way I wanted the tail to look forced me to use decrease stitches across the top of the tail, but not at the bottom and with continuous rounds, it’s a bit tricky to get those decreases in the same spot each go around. I also try to be mindful of lefties (did you know it was a lefty who taught me how to crochet initially?) when writing patterns, so the jog was creating all sorts of things to consider.
The easiest fix I could think of? Making this guy with joined rounds. A little unorthodox, but it got the job done and I couldn’t be happier with the end result.
Much like continuous rounds, joined rounds also have their disadvantages. While the jog is much less pronounced, there is a much more noticeable seam where your starting stitch is for each round. To counter this issue, I just made sure that the seam ran underneath this dino dude for less exposure.


A few quick notes about the joined method I used before I get to the details of the pattern.
First, I used a slip stitch, chain 1 method, followed by my first stitch being worked into the same stitch I slip stitched into.
Second, if you are not going to use a stitch marker, make sure you can read your stitches well. If you were to accidentally count your slip stitch or your chain 1 as a stitch, you would be adding an additional stitch to each round. Since I like to watch TV while I crochet, I used a stitch marker to keep things simple.
Third, the tighter you make your slip and chain 1 stitches, the neater the seam will be. Not always easy to do, but if you give it the extra effort, you’ll appreciate the outcome that much more.
So now, lets talk about how I made Greg the Steg.
To begin on the head/body/tail piece, I started out using a magic ring. If you are unfamiliar with this technique, check out this amazing video tutorial here.
You will finish the first round of your magic ring using the join method mentioned above, by slip stitching into the first stitch, chaining 1 and then single crocheting into that same stitch. For this first round, you will actually single crochet 2 into that first, and each consecutive stitch around.

You’ll continue on with the head by working another 2 rounds of gradual increases, followed by a few rounds of single crochets around. The neck is worked by gradually decreasing for a few rounds.


Before you decrease too much, you will want to embroider on a mouth and secure the safety eyes. I only did a smirking mouth on one side of the face, but feel free to play around with it for a different look! The eyes were placed between the 8th and 9th round on either side of the top of the head. You can also start to stuff the head with fiberfill at this point.

The bottom of the neck/body area is meant to have a more pronounced drop, while the top is meant to have a more gradual increase. To achieve this, you will start to increase across the bottom of Greg, before you start increasing around the top area. Then things flip, while the bottom of the body is meant to be more flat, the top continues to increase. Therefore, the majority of the body is worked with increases happening across the top of the body only.


Once you get to the tail, you will be decreasing across the top only, ending by decreasing around. Don’t forget to stuff your dino as you go!

Compared to working the head/body/tail piece, the rest of this pattern is a total cinch!
To make the legs, you will start out with a magic ring again. Then working in continuous rounds, you will increase around in your first round. The next round is worked in the back loops only of your circle. This helps to flatten out the bottom of the legs for a cuter, stubbier look.


The remaining rounds are simply worked around to give a little bit of length.

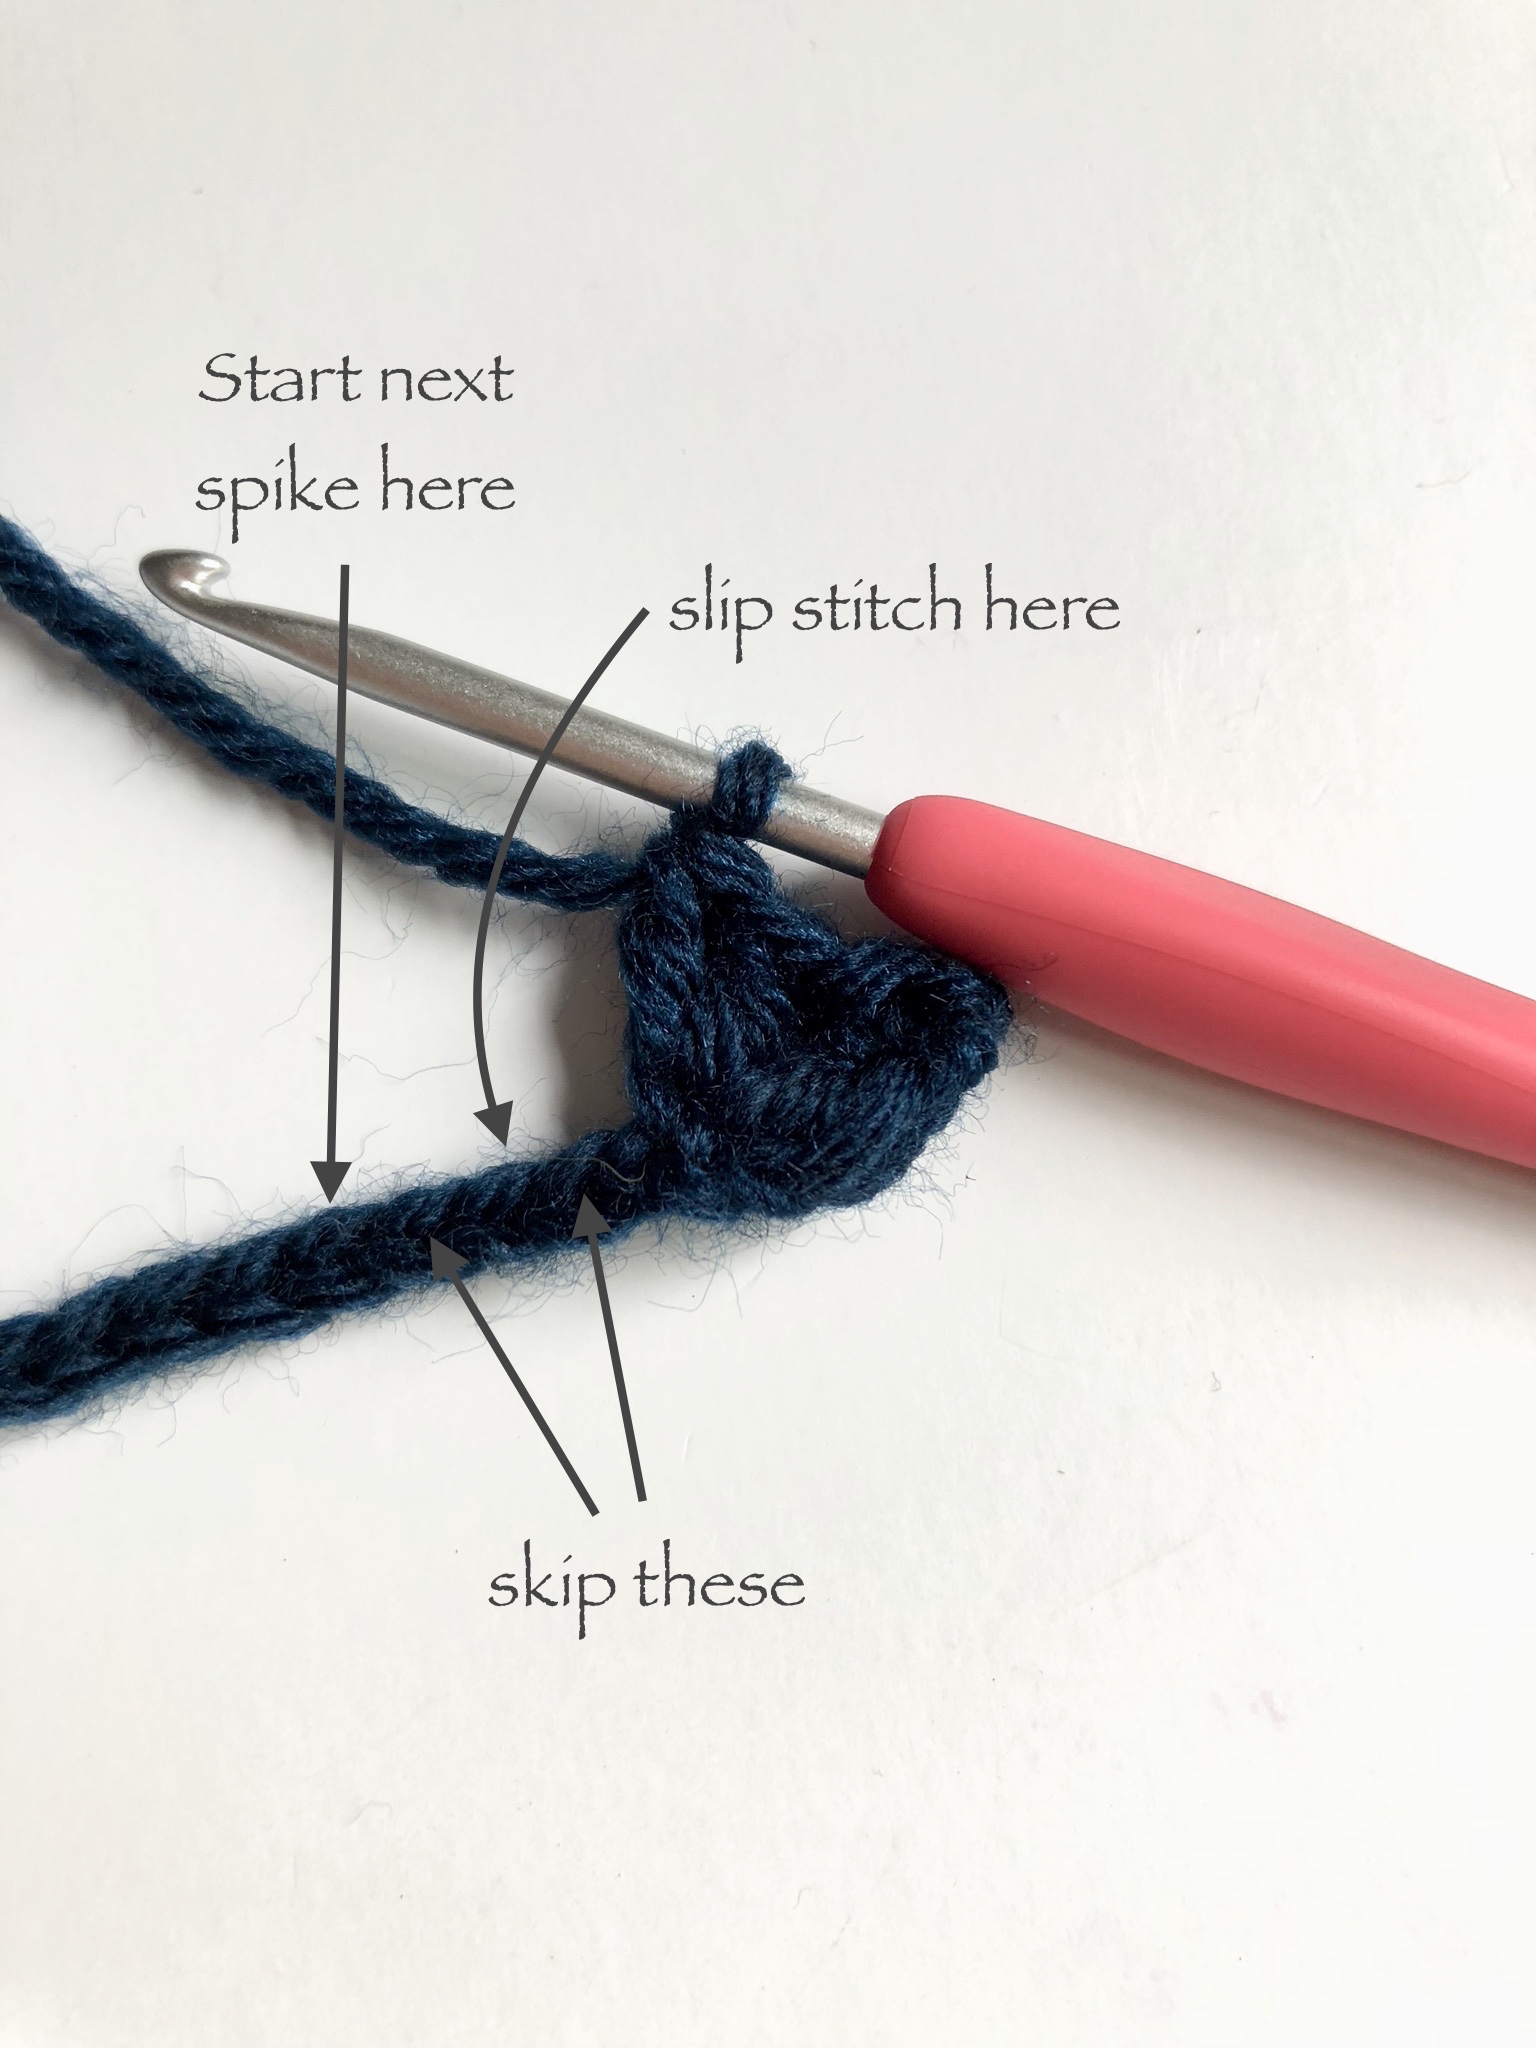
Once the legs are complete, you will be working the spikes. These look more complicated then they really are, I promise. 🙂 You start out with a simple chain row, and will begin to work across starting in the second chain from your hook.

Each spike consists of 2 double crochets, a picot and 2 more double crochets, all worked into the same stitch. to work the picot, you will chain 3 right off your 2nd double crochet. You will then slip stitch into the first chain made (at the bottom of your chains).


In between each spike, you will be skipping a stitch, slip stitching in the next and then skipping one more.
You will continue across the row, working enough spikes to cover the entirety of the back.

The very last pieces to make are the spots. I made 3 differently sized spots, all made starting with the magic ring. Then depending on the size of that spot, the next continuous round will have a certain amount of increases.

Before you start assembly, I recommend using some sewing pins to place the legs, spikes and spots where you like them before attaching into place.


You will begin by adding the legs. I used yarn and a darning needle to attach them to the bottom of the dino’s belly, trying to keep them all evenly spaced apart.
The spikes should run directly down the center of the back. Starting at the base of where the neck ends, to the base of where the tail begins. I also used yarn and a darning needle to attach the spikes.

The spots are the last and final touch. I attached these using a needle and thread, as they were a bit smaller and harder to attach to the stuffed body.
Once you have those attached, you are officially done! I hope you enjoy making this guy as much as I did! Happy Crocheting!
