Darn Good Yarn Jewelry Kit- Product Review & Tutorial

**Below you will find a complete review and tutorial to using the Jewelry Making Kit by Darn Good Yarn. This kit is a great and inexpensive way to try out jewelry making, and would make a great craft for older children. This kit is already inexpensive, being sold at $5, but if you purchase now, you can get an additional $1.50 off, making it only $3.50!**

I am so excited, because today I get to do something a little different then what I’m used to on this blog of ours; I get to do a product review and quick jewelry-making tutorial! And not only that, but rather than it being a product review on something that you might typically see on our blog- it’s a product review on something that speaks to one of my other creative outlets- jewelry making!
If you’re anything like me- your love for the yarn arts stems from a deeper love of all things crafty, so I hope you’ll give this product and review a bit of love, and maybe even pick up a new found love of a new craft!
When I first started crocheting, I was working at a popular craft store, and immediately wanted to use my employee discount to learn all the different crafts our store had to offer. I quickly dived in to painting, sewing, cake decorating, crocheting, and jewelry making.
After giving pretty much everything in our store a try, I was most drawn to painting, jewelry making, and of course: crocheting. My supply of paints, canvases, skeins of yarn, beads and jewelry findings quickly exploded, and so did my quantity of hand-made gifts 😀
So when Darn Good Yarn reached out wondering if I would be interested in trying out their Jewelry Making Kit, I got a little giddy and immediately jumped on the opportunity. If you are unfamiliar with Darn Good Yarn– go check them out. Like right now.
They’re amazing! Their whole mission is right on par with what we’re trying to do here at A Purpose and A Stitch. They work with the marginalized and underserved people groups around the world, making sure to provide fair wages and safe work environments all while providing ethically sourced materials for their consumers.

We here at A Purpose and A Stitch share that heart, and are working to utilize the crafting gifts we have to help combat modern day slavery and human trafficking. A lot of that starts at supporting fair trade companies, and purchasing ethically sourced materials. Darn Good Yarn makes that easy to do, so I hope that you will familiarize yourself with their company if you are not yet aquatinted.
Okay, so now, on to the product review and tutorial.

The kit is a modest size, but comes with a variety of jewelry findings and beads in different shapes, sizes and colors; providing ample options of jewelry to make. It would be a great starter kit, if you just want to give jewelry making a try, or don’t want to have 4 large totes of unused beads (like I have). It would also be a great kit to share with a young girl or daughter in your life, which is how I used mine!
Audrey has often asked to make jewelry with me in the past, and most of the time I just let her use my less expensive and more child-like beads and materials, but this is a kit all of her own, with her very own fancier beads and findings. She absolutely loved all the colors and options available for her of jewelry to make!

The only thing missing from this kit were the tools needed for wire-based jewelry making, but if you have a pair or two of pliers around your house, then that’s all you should need. You could also opt to use the elastic cord provided in the kit to make stretchy bracelets and necklaces, as opposed to the wire cord we used.
You could also purchase some jewelry pliers if you’re looking for a more long-term jewelry making solution. I purchased most of mine from Michaels.
I will also note, that while the kit does come with all the findings you’ll need for making bracelets, necklaces and earrings; the kit only has a small amount of crimp beads and clasps. So if you want to utilize all the beads provided, it is likely you will need to purchase more of those items eventually. Thankfully, both are easy to find at any craft store, and relatively inexpensive depending on the metal you purchase them in.
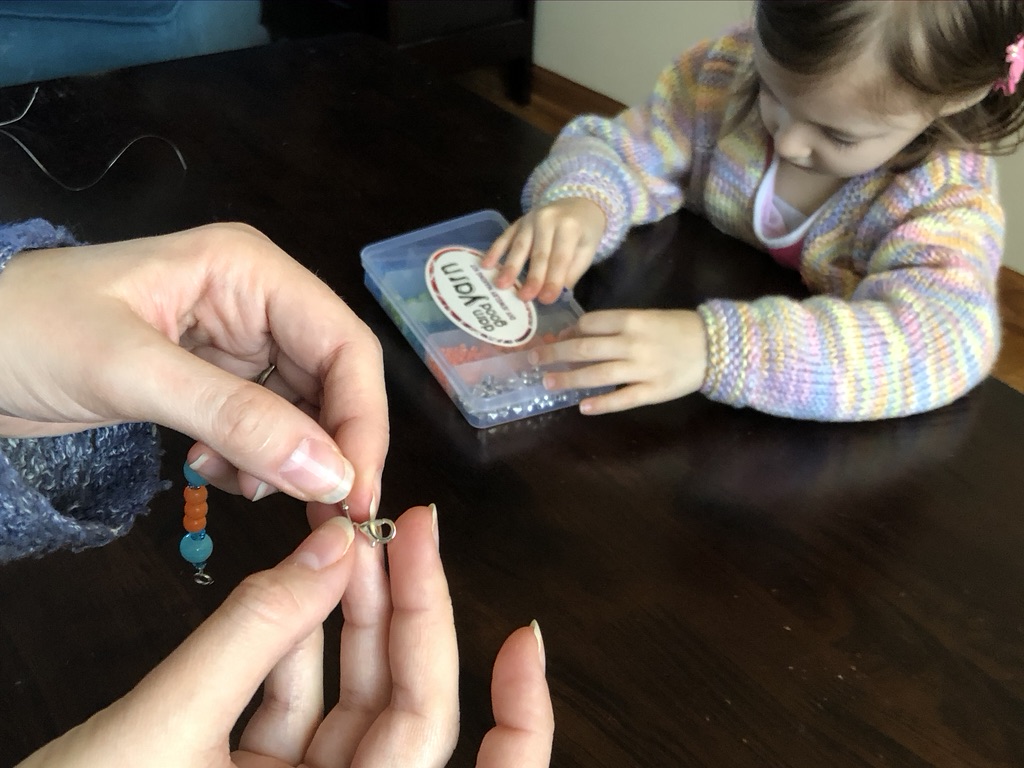
Audrey really wanted to make herself a bracelet, and a pair of earrings for me; so that’s exactly what we did. She chose to make her bracelet on the bead wire provided with some of the blue and orange beads provided. The kit also comes with step-by-step instructions to making the jewelry available, incase you have little to no experience with making jewelry.

But, I’ll also walk you through the steps we used to make our bracelet and earrings below.
For the bracelet, I started by measuring her wrist with the bead wire, giving myself about an inch of give on either end. You will then take a crimp bead and feed it and a jump ring onto one end. Take that same end and feed it back through the crimp bead (creating a loop with the jump ring in the center on one end of the wire). You will want to pull the end of the wire relatively tight to secure the jump ring, and then crimp the crimp bead down with your pliers.


You now have the foundation for which to feed your beads on. Make sure to feed the first few beads over both the main strand of wire, as well as the tail that was pulled through the first crimp bead.
We used a simple 3-bead pattern repeat, alternating between the blue and orange beads, until we had enough beads on the wire to fit around Audrey’s wrist. You should still have a good amount of wire left on the other end, you will need to use to add the clasp to. Once you have enough beads for a good fit, feed another crimp bead and a clasp onto the wire. As you did when starting out, you will now take the end of the wire and feed it back through the crimp bead (making sure the clasp is in the center of the loop created), pull tight to secure.
I like to make sure that this end is pulled very tight, so that the beads do not have a lot of wiggle room, then close the crimp bead with your pliers. You now have a tail of bead wire sticking out. I like to feed as much of this as possible back under the beads so that the tail ends beneath a bead, rather than cutting it and having a small tail hanging out. The bead wire tails can be a bit abrasive against the skin, so it is nice when it is all tucked in and cannot touch your skin.

And thats all there is to making a simple, beaded bracelet on bead wire!
To make our earrings, all we used were 2 earring hooks, 2 jump rings and 2 eye pins in addition to our beads. We first fed a simple green beaded pattern on to one of our eye pins. This part was really fun and easy for Audrey to do by herself, since the eye pins are a little stiffer and you don’t have to worry as much about the beads falling off and rolling all over the floor ;-D


Once you have the beads you want for the pain strand of your earrings in place, you will need to make sure you only have about 1/4″ of pin above the beads, so you may need to cut any excess with your pliers. Then you will take your pliers and starting at the very end of your pin wire, roll the wire down towards the beads to create a loop, making sure to add the earring hook before completely closing the loop with your pliers.
From here, we took one of our jump rings and opened it up with our pliers, adding a dangling bead to it before closing it back up around the eye of the eye pin. The last thing we did for our earrings was replace the metal bead on the earring hook with one of the small blue beads provided in the kit.

Now it’s just a simple need to repeat this process with your other eye pin to make the second earring. It’s really that simple!
All in all, we really loved this Jewelry Making Kit from Darn Good Yarn, and I hope that you’ll give it a shot as well! We can’t wait to make more jewelry with ours, and I’m so excited to use it for more craft days in the future. It really is a great and inexpensive way to get started with jewelry making, or to even just expand upon your current bead inventory with some good quality, and ethically friendly products!

My final notes on the product are more in relation to the child-friendly nature of this product. I love encouraging our kids to have a creative outlet, and love the use of fine motor skills required for jewelry making. We also had a lot of fun with the pattern process, helping to encourage additional learning while doing something fun and creative.
That being said, please make sure to take caution when working with beads and small children. Audrey is 3 1/2 and probably would not have been ready for this type of kit even just a few months ago, she still needed a lot of help from me as well, as I did not let her cut the wires or use the pliers while we worked. We also waited until her brother who is 16 months was napping to take out these beads, to prevent any chance of him trying to swallow them. So just make sure to evaluate the child you may wish to use this kit with, taking into account all aspects of this product.