Beginner Friendly Triangle Scarf- Free Pattern
**Below you will find the free tutorial and pattern for this Beginner Friendly Scarf. If you are looking for a large font, ad-free version of this pattern, you can purchase the inexpensive PDF from my Etsy shop here. **
***You can now make this pattern as just one panel (instead of the two panels as written below) by checking out the revised version of this pattern here.***
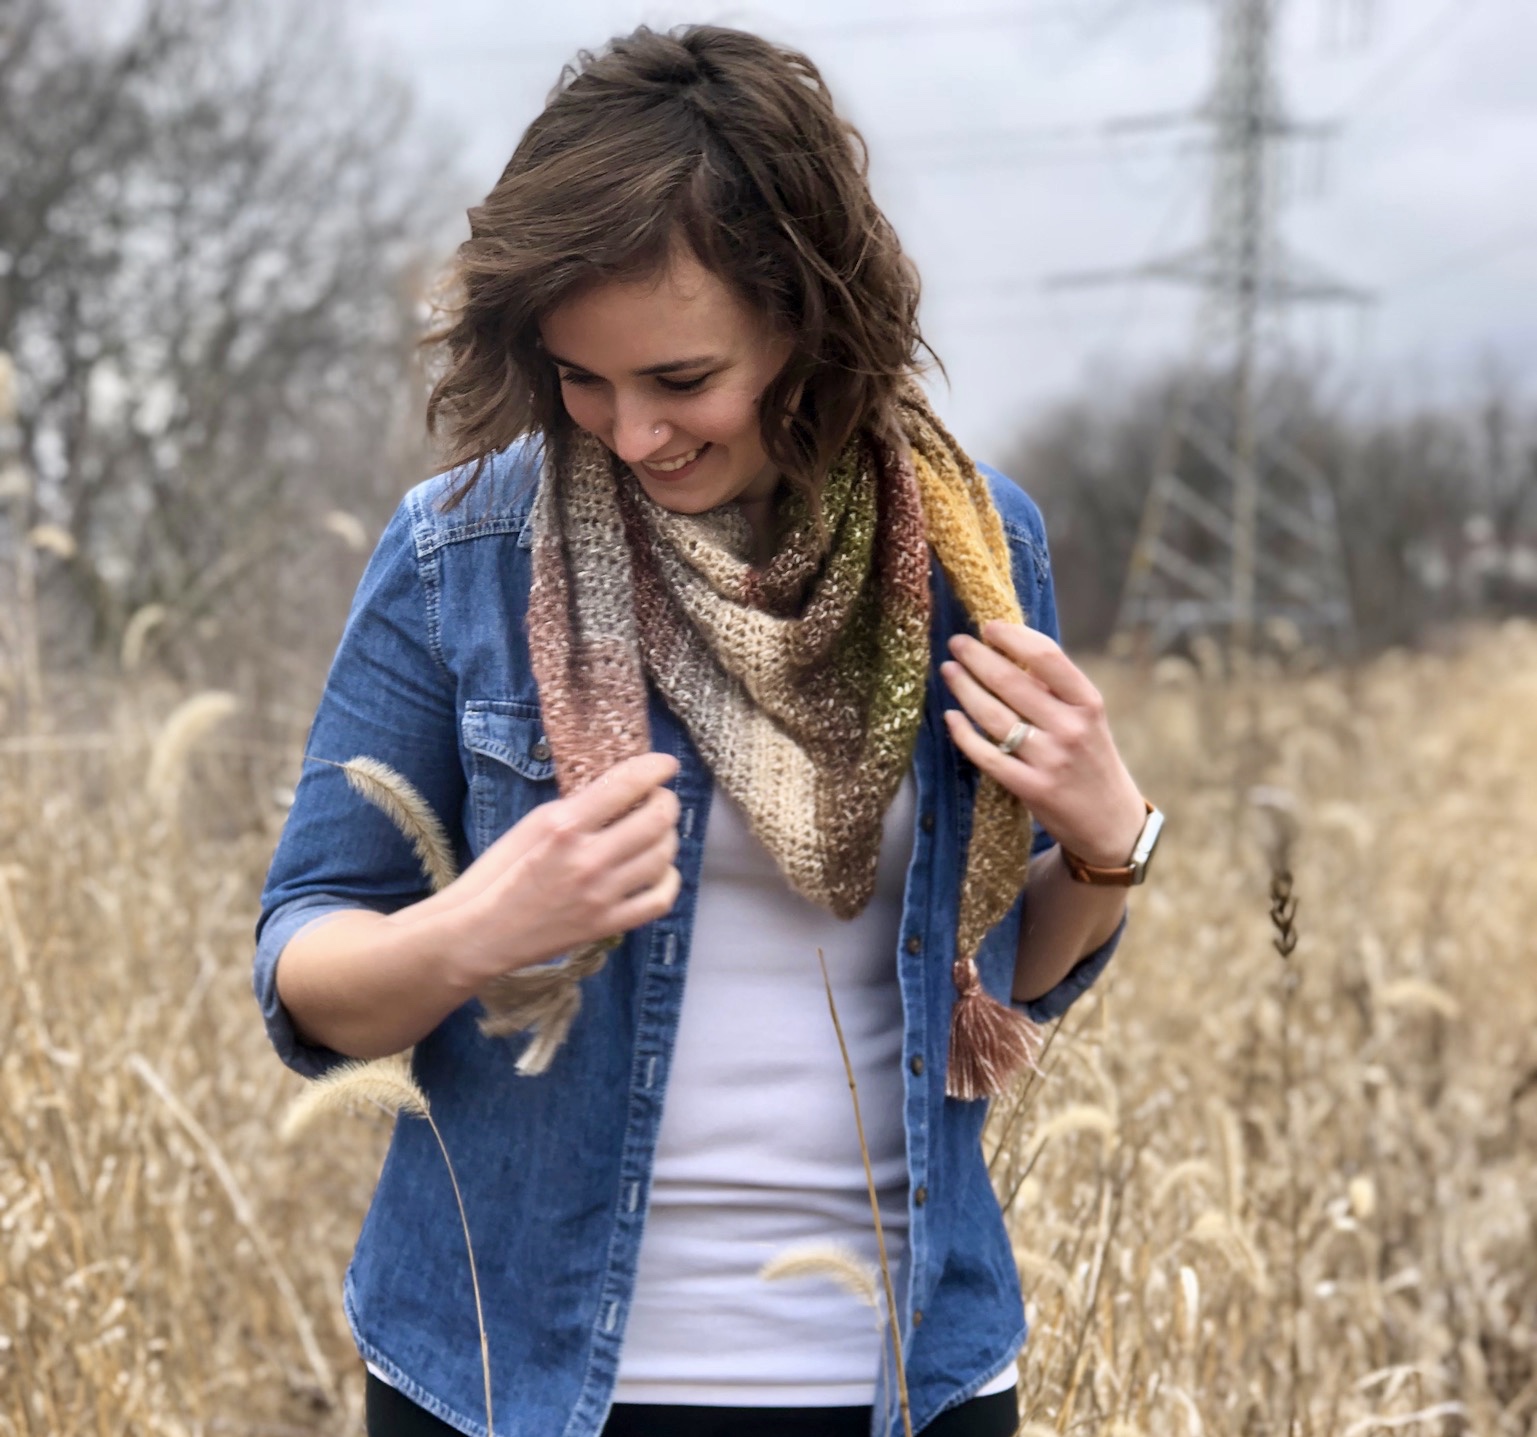
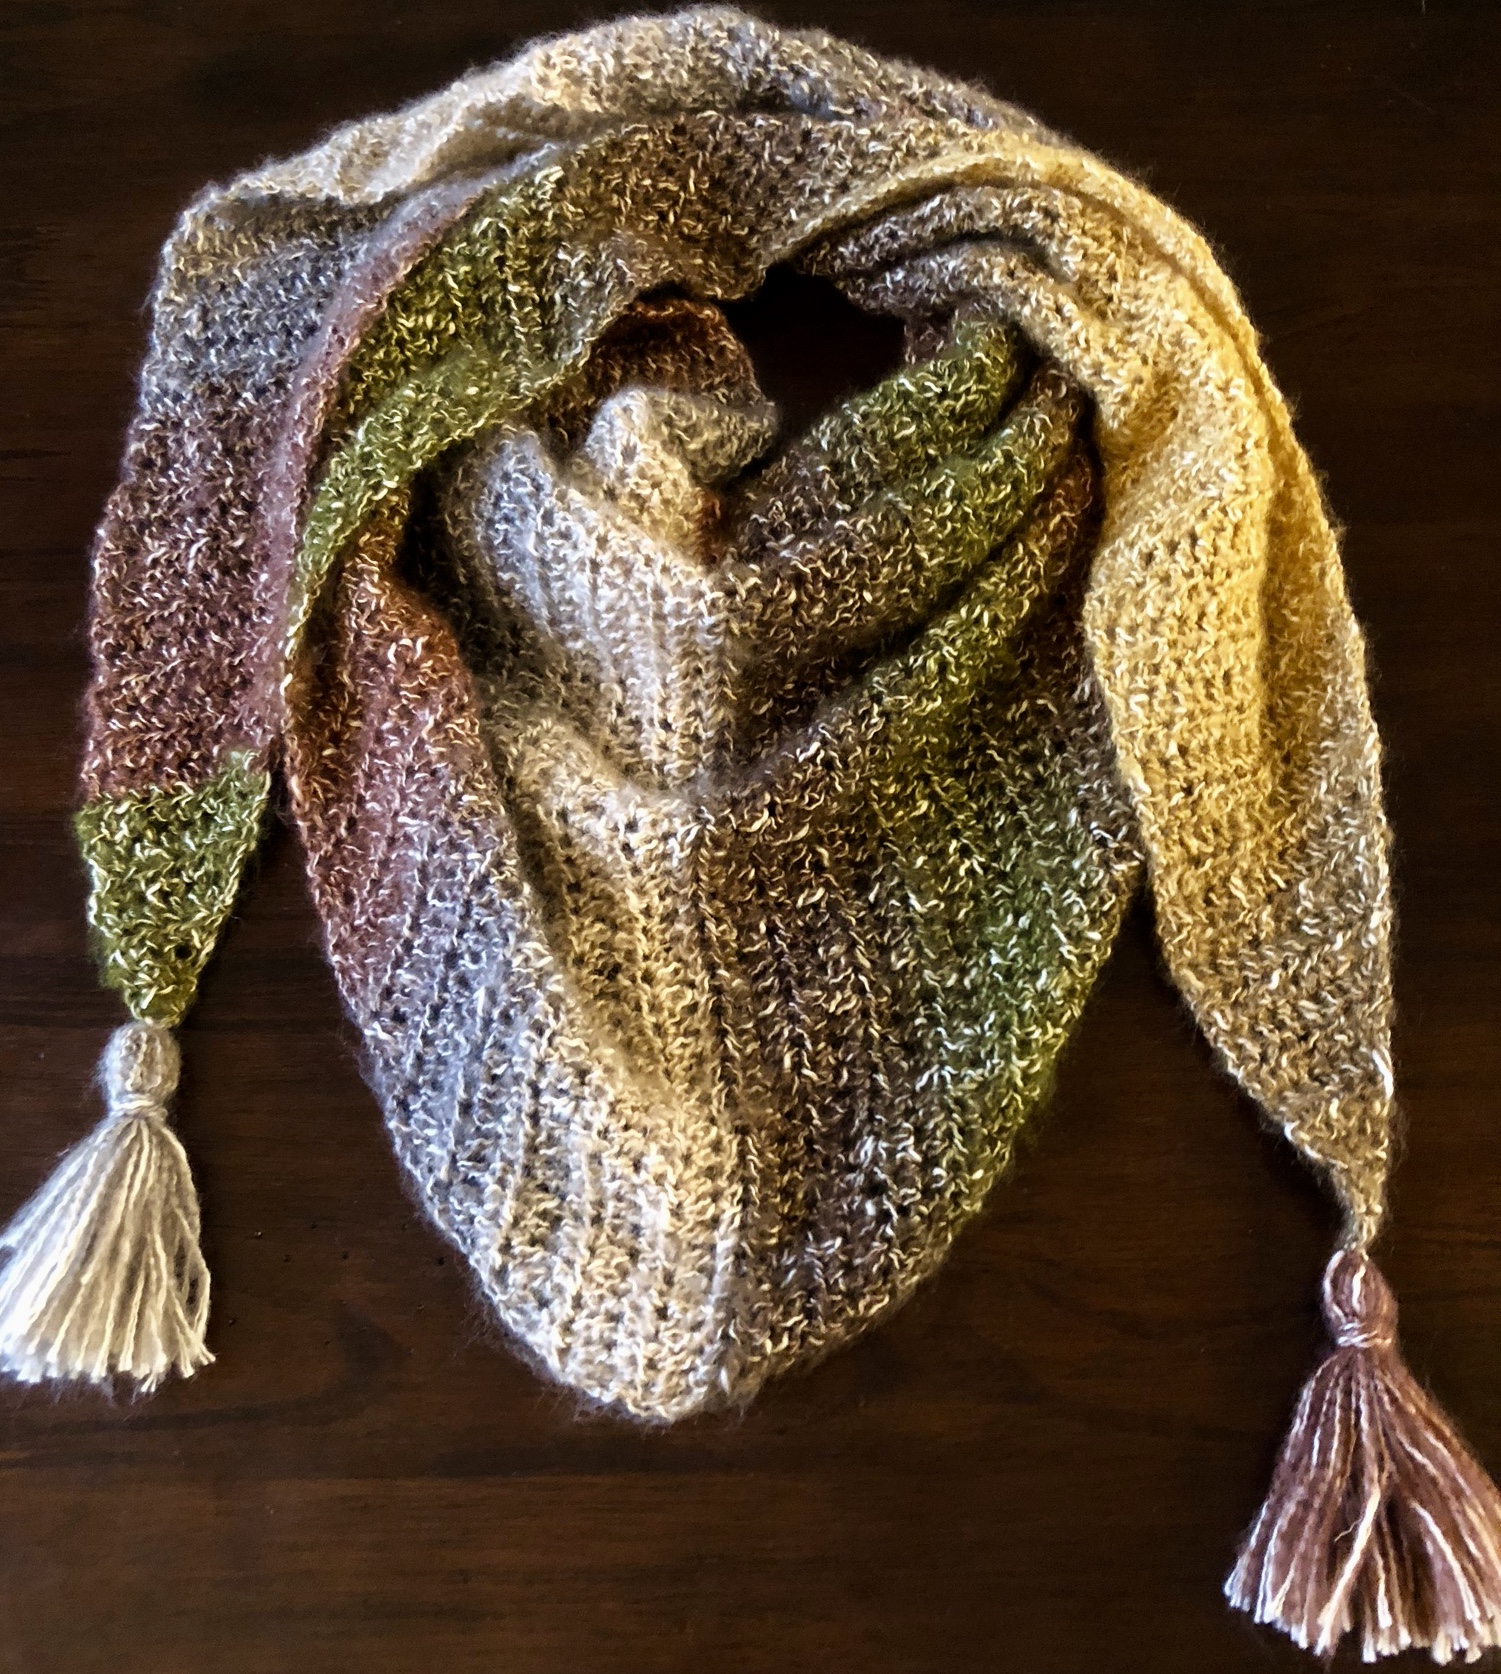
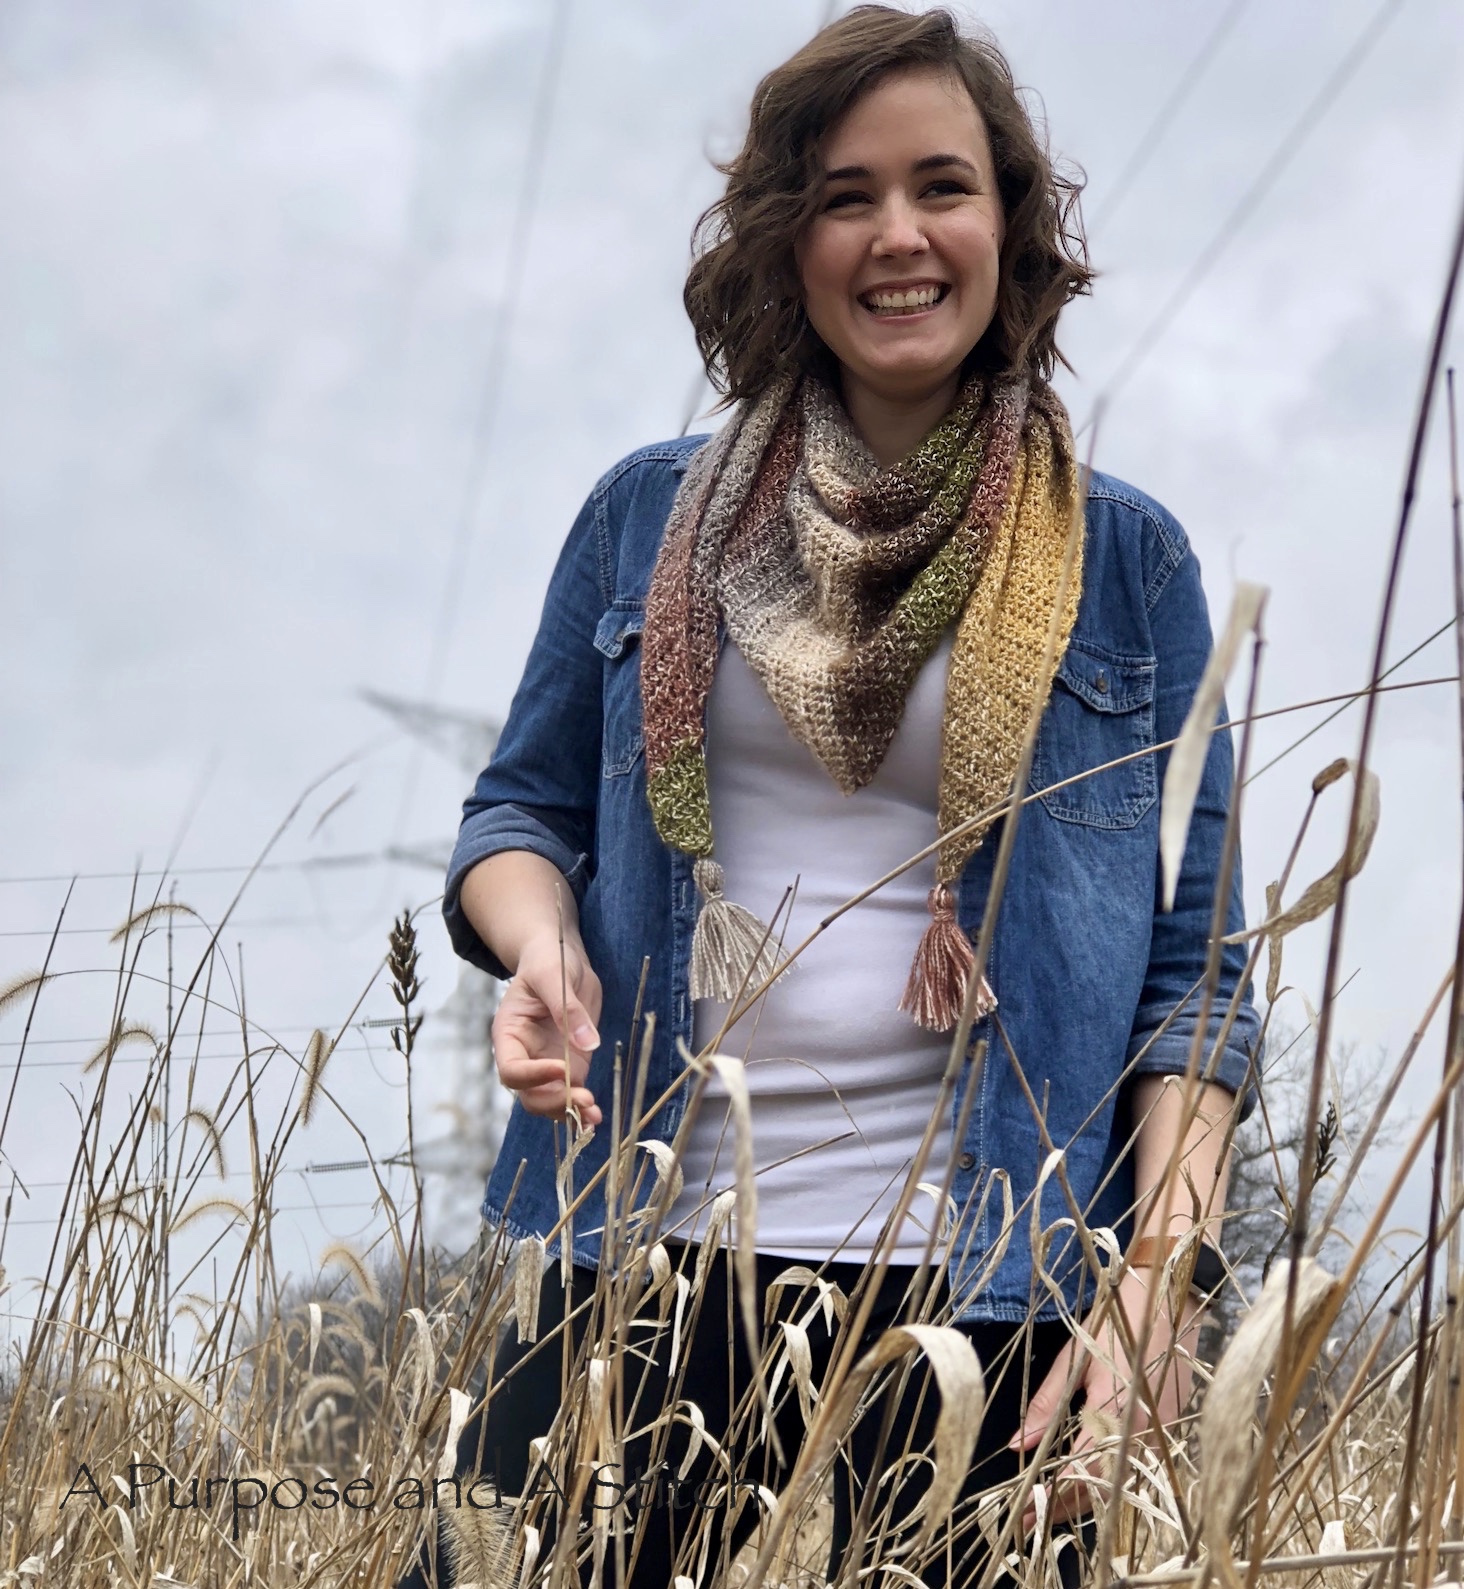
Okay guys… are you ready for this one? It’s super easy and beginner friendly, it’s super cute and versatile, it only uses one skein of yarn and did I mention that it’s super easy?!? I give you… my Beginner Friendly Triangle Scarf.
If you are new to crochet, or maybe you’ve been crocheting forever… it doesn’t make a difference, this pattern is for you 😉
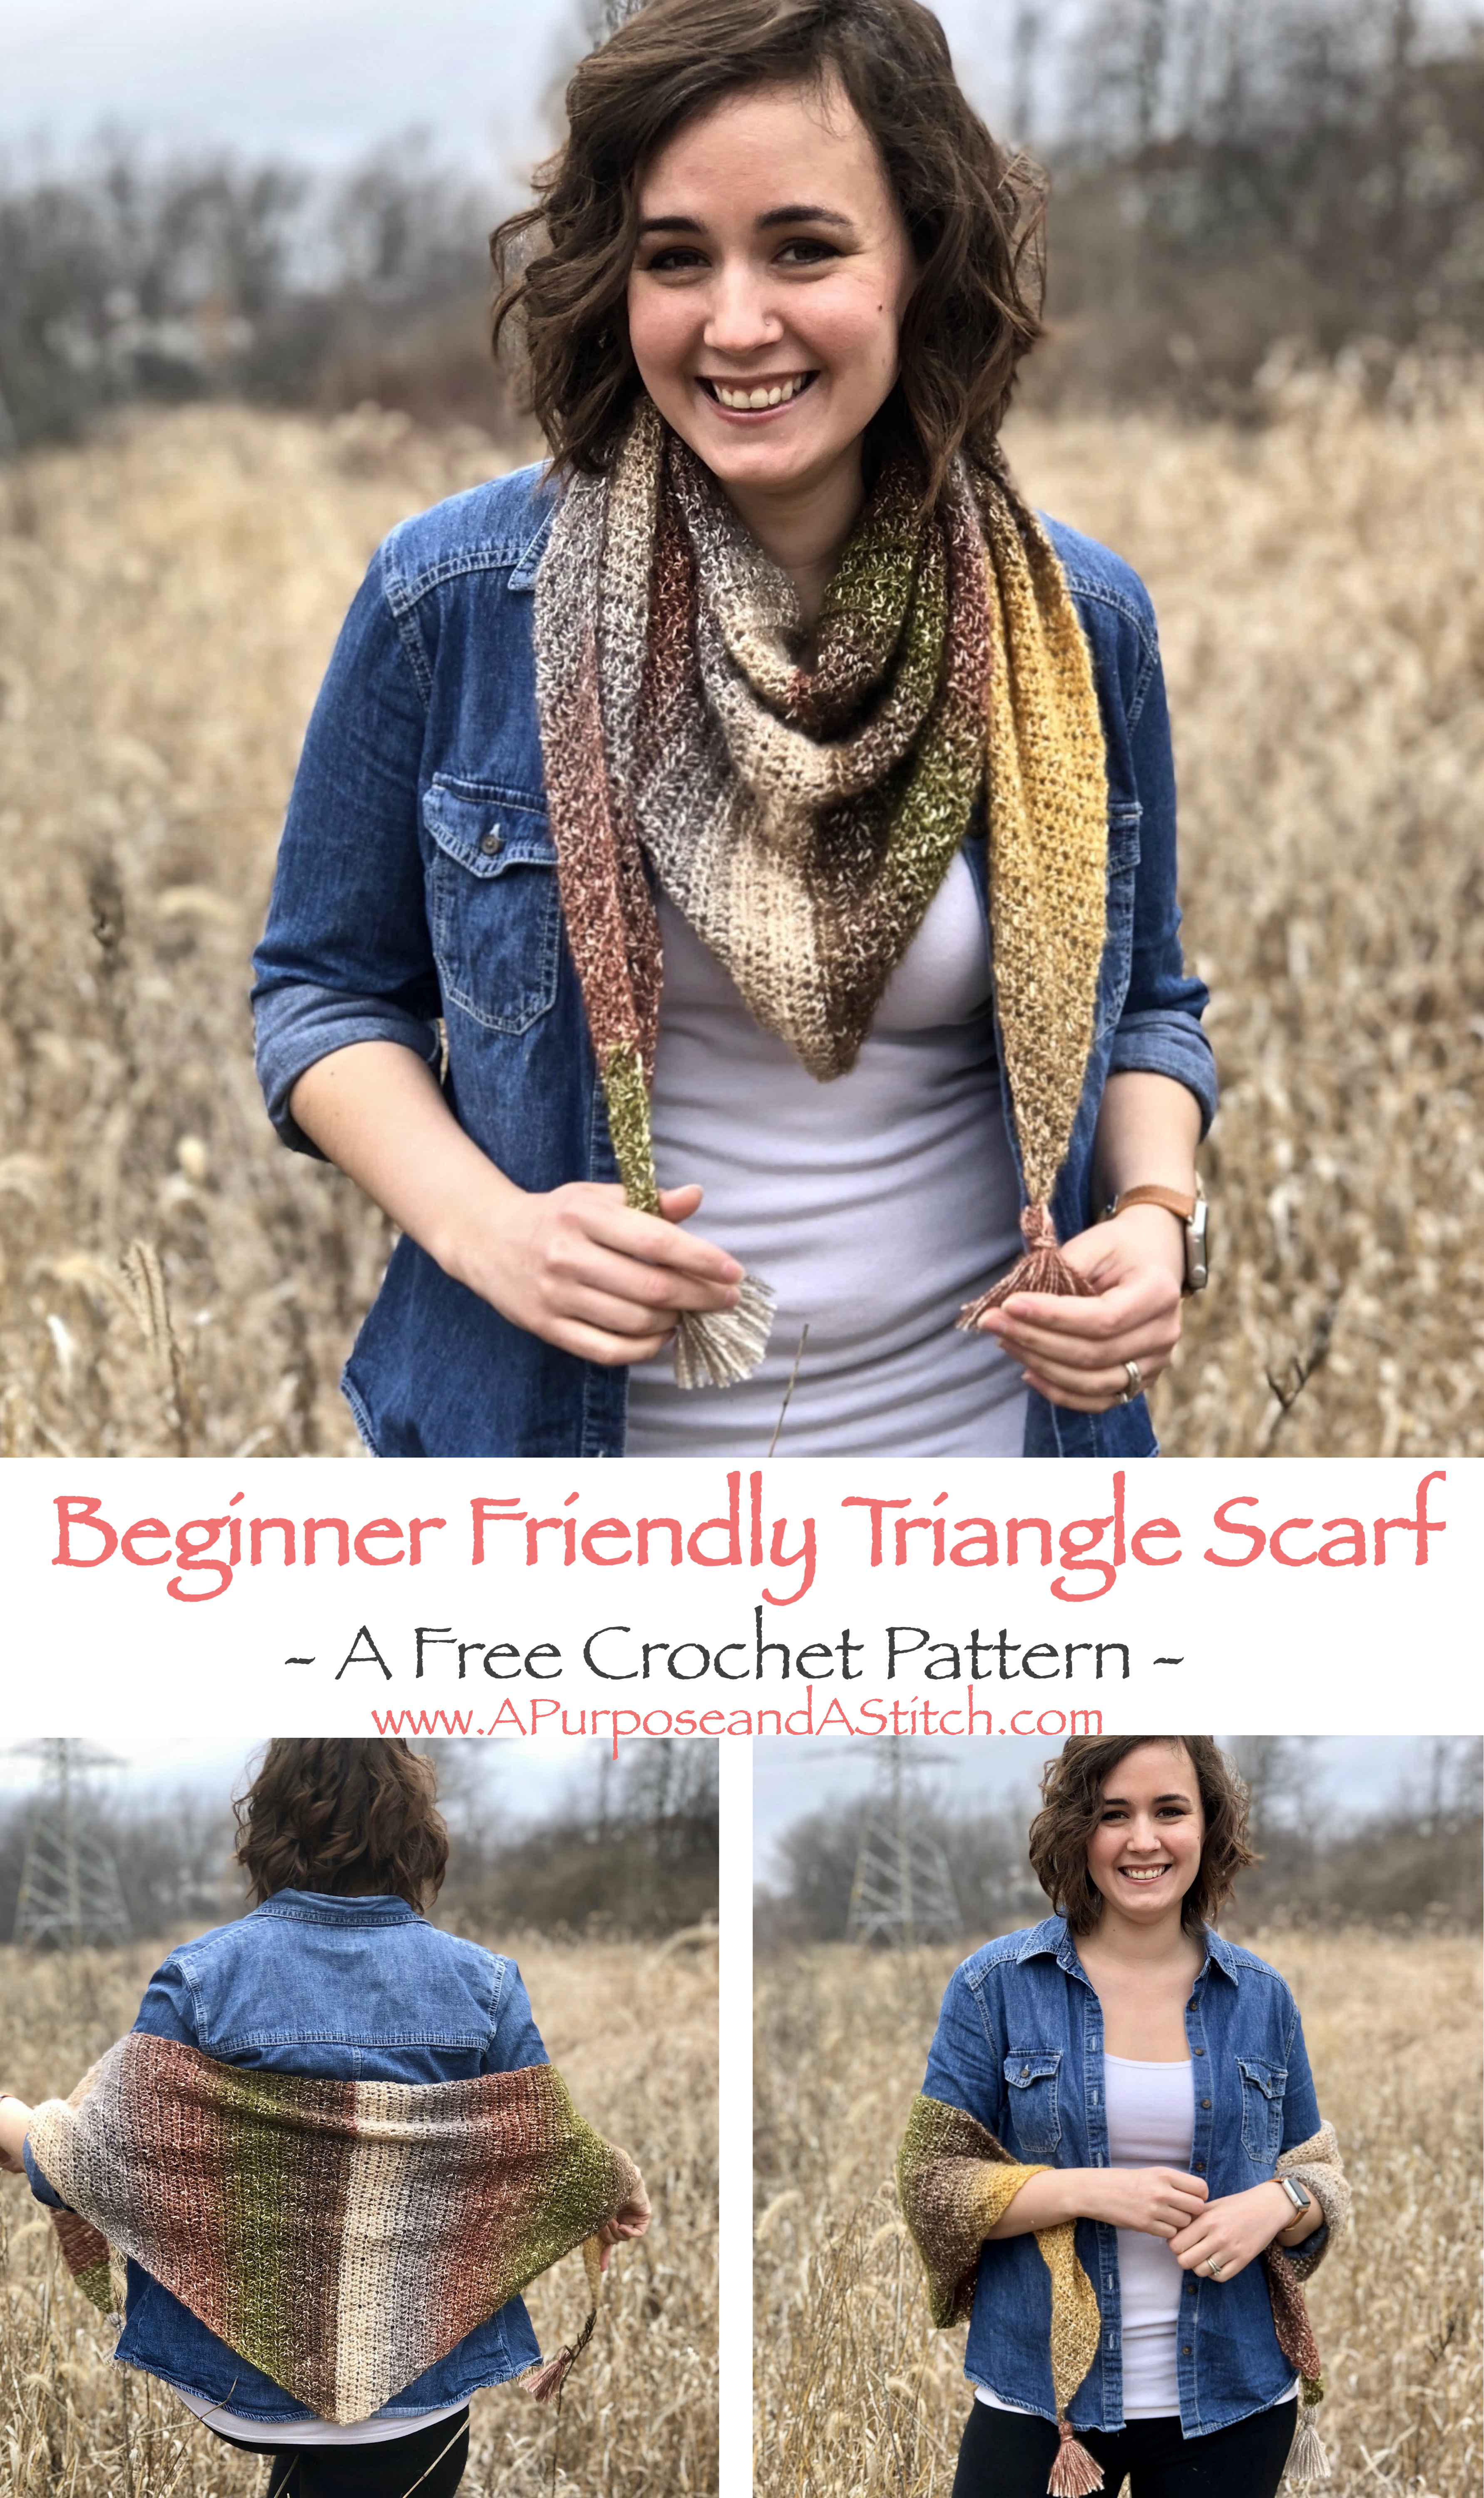
I have been loving the triangle scarf fashion for a while now and love how often they are large enough to function as a shawl as well. I decided it was high time I make my own version and knew I wanted to keep things simple and fun.
 All this pattern requires is a basic knowledge of how to half double crochet, increase and whip stitch. So grab yourself a 5.5 mm crochet hook, a skein of Lion Brand’s Shawl in A Ball and get ready for your next Netflix binge worthy crochet project!
I chose to use the color-way Peaceful Earth, but boy oh boy are there some fun color-ways available in this line that were not available at my local Michael’s store. I cant wait to see what color-way skein you choose!
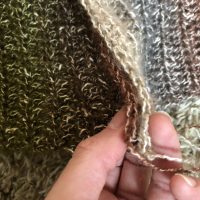
This scarf is made up of 2 panels, each resembling an 90º triangle. Once both panels are created, you will whip stitch them together and add 2 tassels on either end. Thats all there is to it!
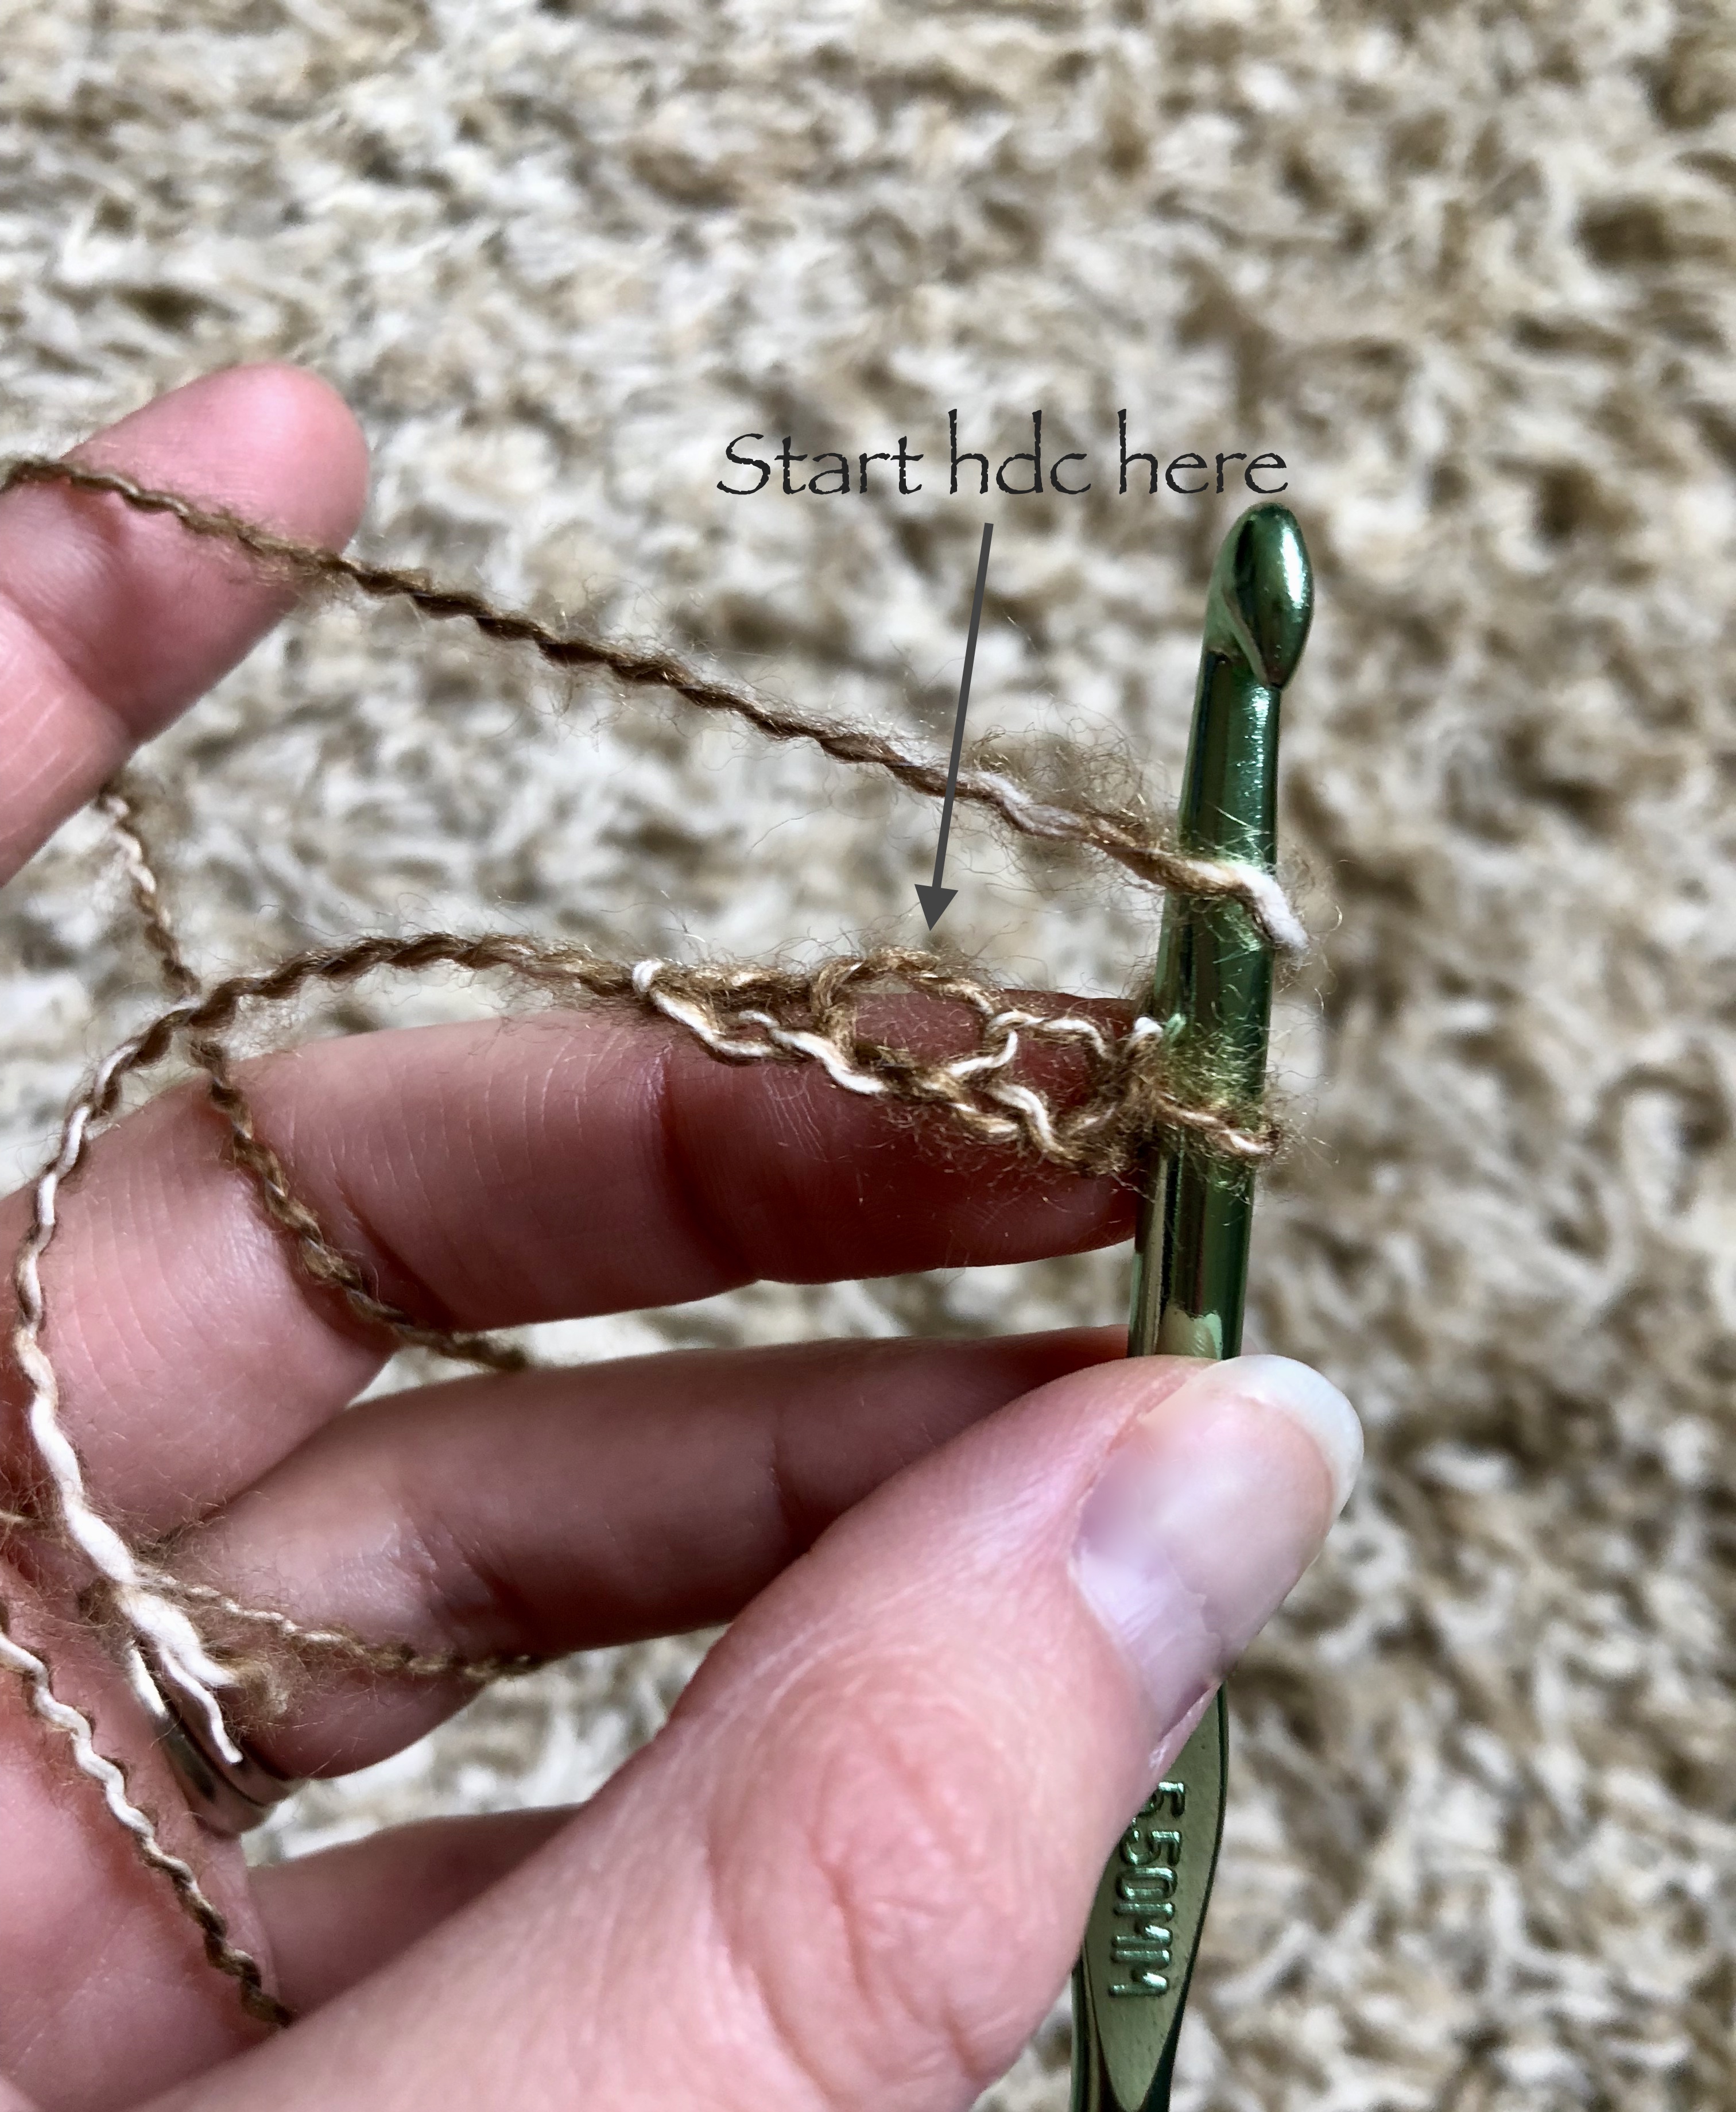
To start things out, you will begin with a very short foundation row by chaining 4. You will begin to half double crochet in the 3rd chain from your hook and will half double crochet 2 in the next (and last) chain of this row giving you 3 total half double crochets in your foundation row.

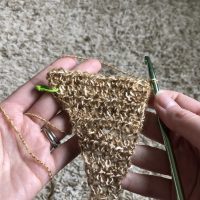
I highly recommend grabbing yourself a stitch marker here and placing it in that 3rd half double crochet you just made. This will designate which side of your scarf you will be increasing along. From here you will turn your work, chain 2 and increase again along that same side of your triangle.
You will continue this way for the entire panel, increasing once in each row. The increase will either happen in your last, or in your first stitch of each row, depending on where your stitch marker is. This is what gives you that triangle shape. Pretty cool, eh?

You will do this until you gain the length needed for each panel. Once you have your first panel complete, you will begin your second one.


Once your second panel is complete, you will fasten off leaving a long tail for whip stitching the two panels together. 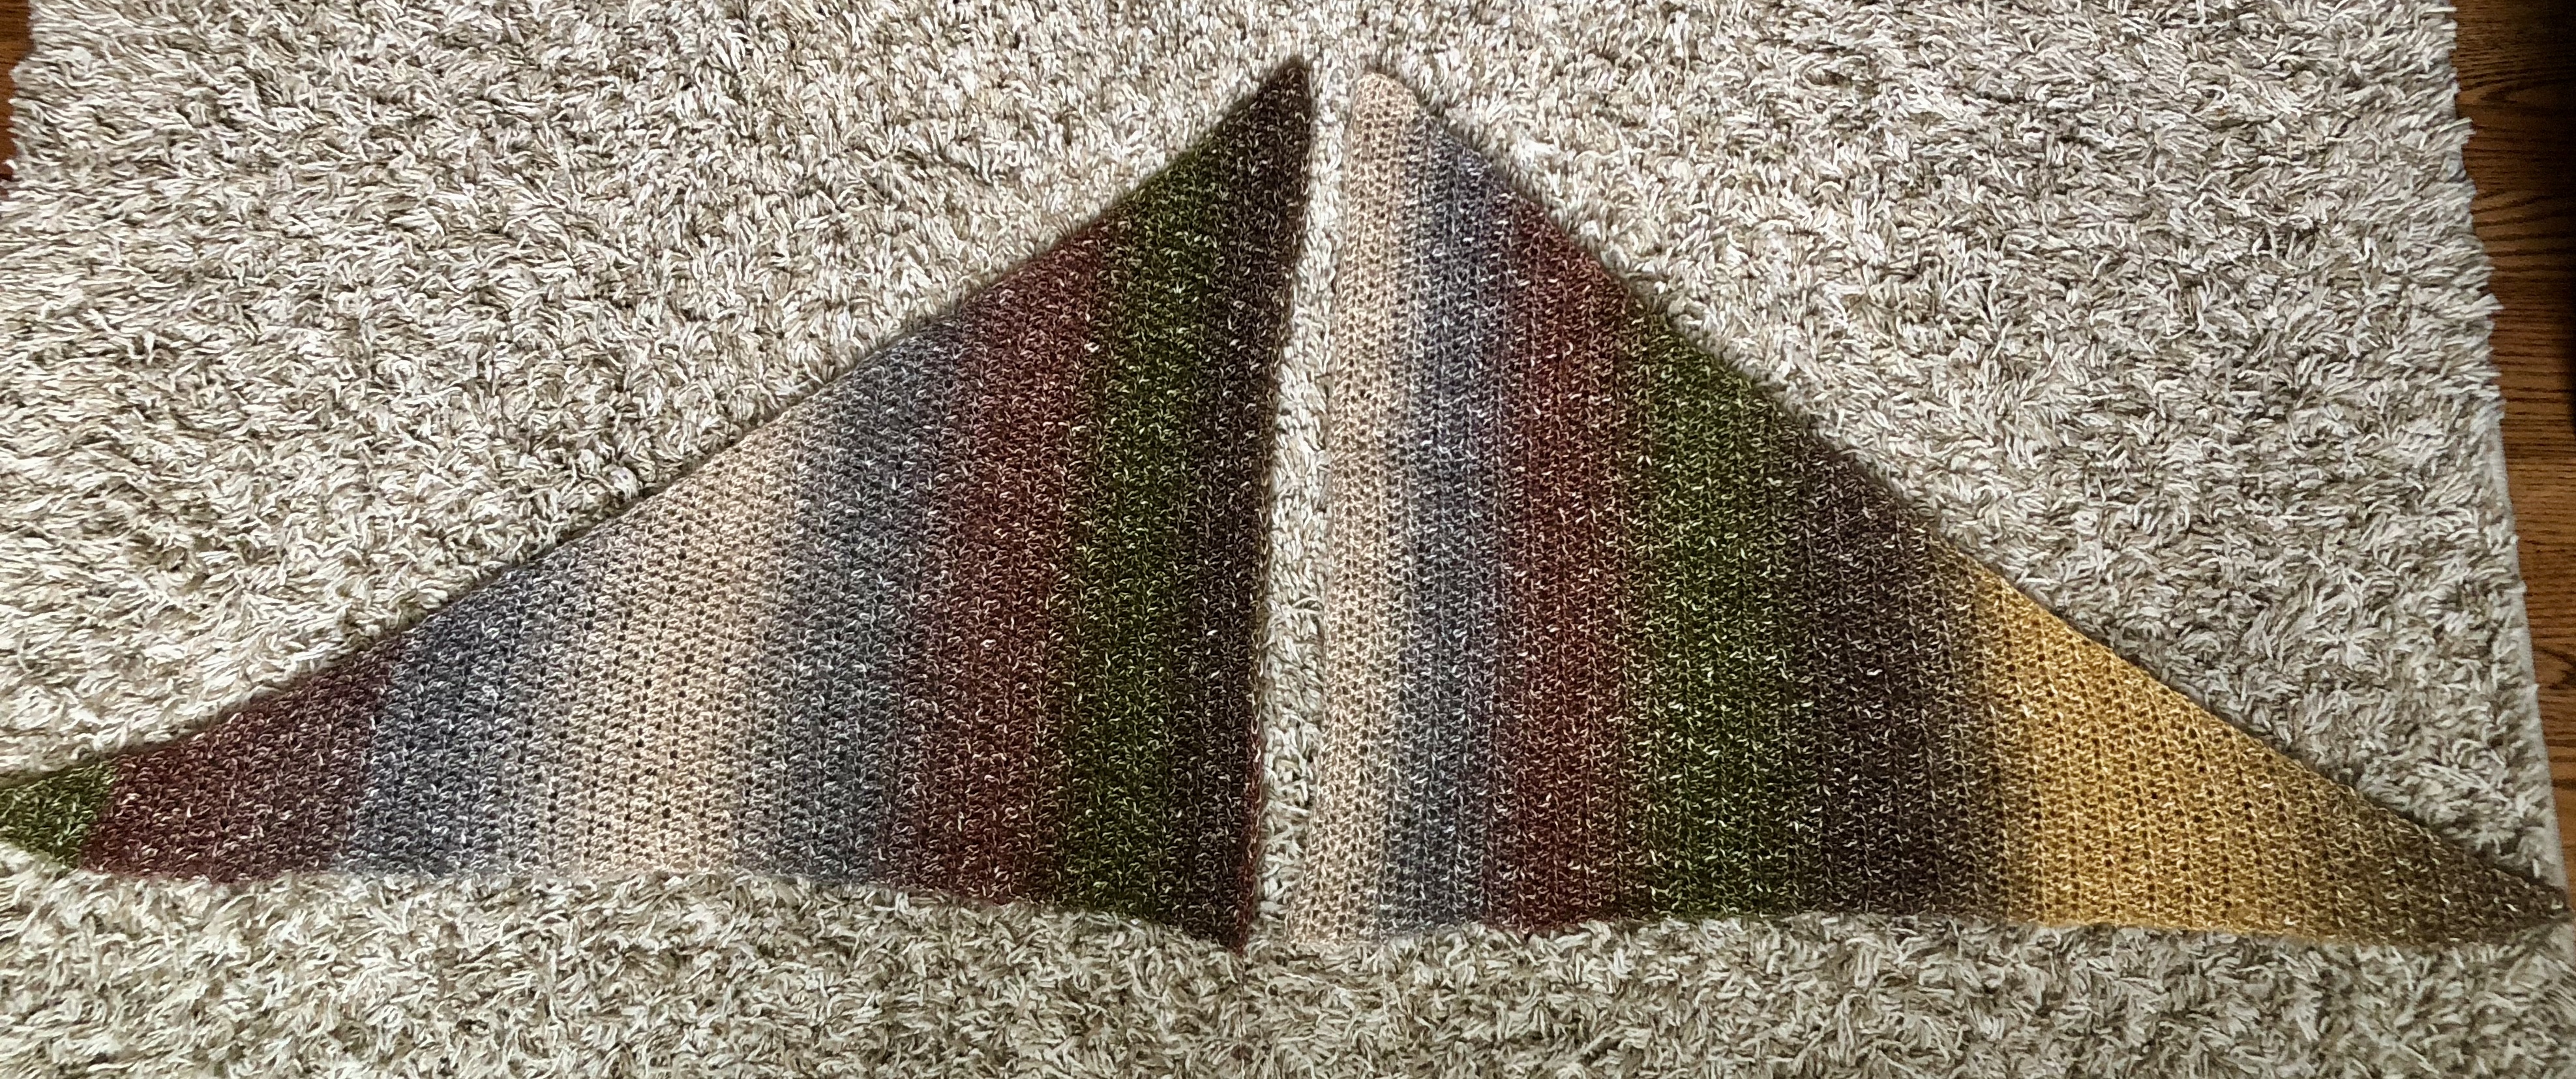
I lined my panels up before I began to whip stitch in order to ensure that the join would not make the scarf lopsided.

Now that your scarf is complete, all that’s left is to make some tassels and add one to each end of your scarf. You can get a free tutorial of how I made my tassels here.
And that’s all there is to it! I told you it was simple! ;-D


What You’ll Need
1 skein of Shawl in A Ball by Lion Brand (I Used Peaceful Earth)- or approximately 481 yards of another similar yarn
1 5.5 mm crochet hook
A stitch marker
My Amazon Picks
Completed Measurements
62″ wide (without tassels), 20.5″ long
Gauge
14 hdc= 4″
9 Rows= 4″
Abbreviations Used
hdc= half double crochet
ch= chain
Special Stitches
Increase: half double crochet 2 into one stitch
Pattern Notes
The pattern written below is for two 90º triangles that you join together at the end for one large triangle. For the same style scarf written as a pattern with just one large triangle (no joining required), check out the free revised pattern here.
Pattern for Each Panel (make 2)
Foundation: ch 4, starting in the 3rd ch from your hook, hdc, increase in next, turn (3)
Row 1: ch 2, increase, hdc across, turn (4)
Row 2: ch 2, hdc across, increase in last hdc of the row, turn (5)

Row 3-66: repeat rows 1 & 2 (making sure your increase in each row is on the same side of the panel. I used a stitch marker to identify the side I would increase on)
Row 67: hdc across, fasten off. Leave long tail for whip stitching on one panel. (70)
Assembly
Line up each panel along the 67th row. Using your tail from the one panel, whip stitch the panels together making sure to keep the stitches lined up as you go. 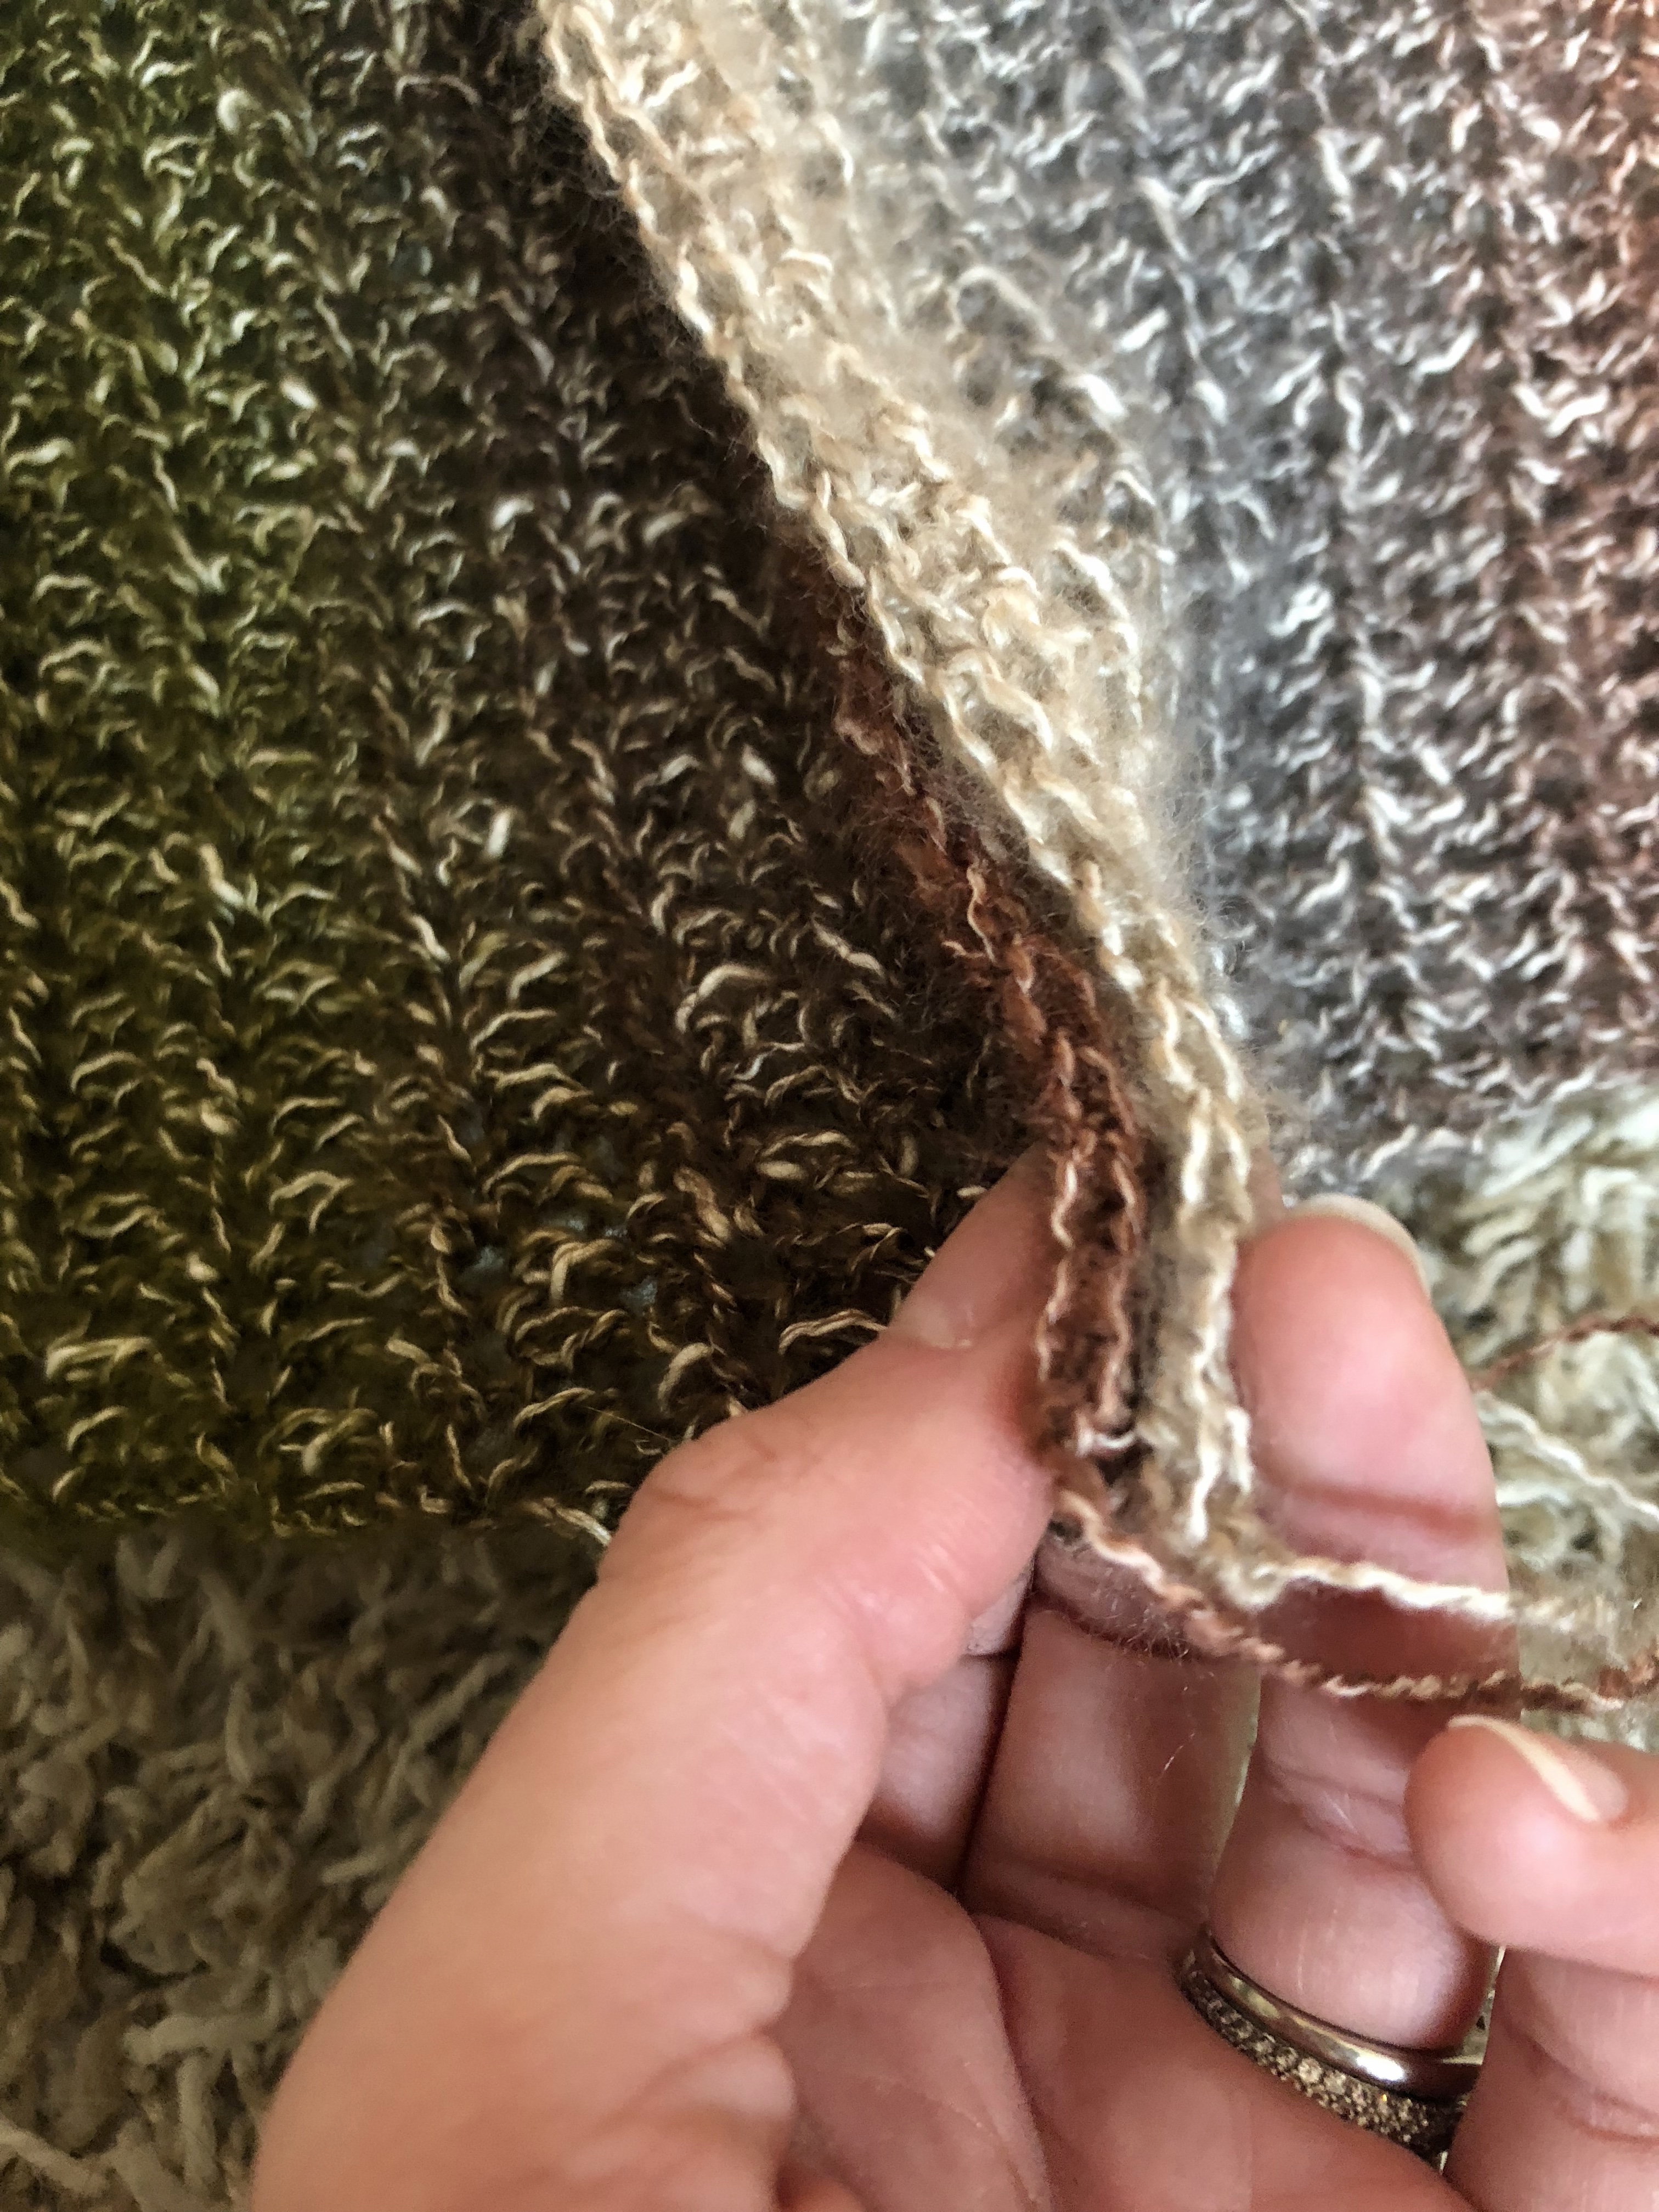 Fasten off and weave in ends. Make 2 tassels (check out my free tutorial on how to make yarn tassels here). Attach one to your foundation row of each panel end.
I love this scarf so much and can’t wait to get continued use out of it. I especially loved being able to watch The Office while making it! haha! If you get the chance to make this wonderful accessory, make sure to share your pictures!
Happy Crocheting!

I think I figured it out but, does the ch 2 at the beginning of each row count as a stitch or not? I’m working it as if it doesn’t count and instead of ch 2 at the beginning of the row, I’m working a ch 1 so that I don’t get confused about whether or not I’m missing a stitch. Also, I’m guessing each row increases by 1 stitch each time? Somehow I miscounted somewhere and managed to make it increase by 2. Oops!
Hi Heidi,
Thanks so much for reaching out! You are absolutely correct, the ch 2 does not count as a stitch and yes, each row should only have an increase of 1. 🙂
Love it!!! Starting tomorrow 😊
Yay! I hope you have a blast making it! 😁
Hi.. I’ve been working on this a few days now. My scarf is sooooo long! I’ve increased at the end of the same side and again increased at the beginning of the next row (same side). The triangle shape is there and it’s beautiful.. but I am far beyond 66 rows but have not gotten to 50 let alone 70 stitches across and yet the scarf is very long. When I look at your picture.. mine is going to look like a cat in the hat scarf.. hahaha. I have followed the pattern.. but feelmit is not going to work out the same ☹️
Hi Elle,
I’m so sorry you’re having a hard time getting this to work out for you! The only thing I can think of is that your gauge for the row height is taller than mine (do a google search on the Golden Loop to learn more about this common issue). Each panel should measure approximately 31″ by 20″. If you’ve already hit the 31″ long (across the rows), then you could just stop and work the same amount of rows for the other panel. It may result in a shallower shawl, but at least that way it won’t be too obnoxiously long. 😉 If you have any other issues, feel free to contact me and I’d be happy to try and help you more.
-Bernadette