Beginner Friendly Triangle Scarf- A New Angle

** Below you will find the free pattern for the Beginner Friendly Triangle Scarf- A New Angle. If you prefer, you can purchase the inexpensive, ad-free PDF from our Etsy shop here. This pattern includes the original and updated version of this beautiful scarf!**
If you’ve been following along on this crazy little blog journey of ours for any amount of time, you may be familiar with the Beginner Friendly Triangle Scarf.
One of my favorite wearables to date and one of our most popular patterns, this scarf has popped up quite a bit on our social media feed since its pattern release back in March.

I’d wager that it being super easy to make, and only requiring one skein of yarn are up there on the list of reasons why this particular pattern is so popular.
That all being said, I have received more feedback regarding this pattern’s design than any of my other patterns. The common theme amongst all the feedback has been that people wish it was just one panel (instead of two that are joined together at the end).
When I originally wrote this pattern, I did consider making it as one panel instead of two, but chose to write it as I did for two reasons.
The first was that I wanted the center of the scarf to have a color contrast that would not have been achieved with the color gradient of the yarn I was using. By working two panels from the outer edge in, I ended with one panel in dark burgundy and the other in tan. I loved the way the two colors collided in the center, rather than there being a soft flow of color across the whole triangle.

The second reason was that I was trying to make this as beginner friendly as possible. In order to make the triangle just one panel requires a lot of half double crochet decreases. While decreases are technically considered a “beginner” level technique, I personally think it’s easier to increase than it is to decrease. I also think it’s easier to whip stitch than it is to work decrease half double crochets specifically, so two panels joined together it was.
Now, several months and comments later, I have decided to add an option for working this as just one panel. I couldn’t keep this humble little business going without the support of my readers, so I strive to take every comment, suggestion and request to heart. Every time someone makes a suggestion of a new pattern, I literally add it to my list of ideas for future patterns (that’s actually how Ellie the Elephant was born). I realize it may get to the point where I just don’t have the time to meet every request, but until then, I’d like to try. It’s worked out well for me so far, so why stop now? 😀
The biggest change to this pattern is, as mentioned above, that you can now work the triangle in one panel without needing to join anything at the end.

To do this, you will begin as before, by increasing at the end of each row, along one side of the scarf only (see the Beginner Friendly Triangle Scarf Pattern post here for step-by-step pictures).
Then when you reach the largest part of your triangle, rather than fastening off, you will begin to decrease once in each row, along the same side of your triangle as the increases were on. For the first row of decreases, you will work regular half double crochets across until you get o the last 2 stitches in your row.
Half double crochet decreases can be worked in several different formats, but I chose a method that I’ve found to have the least amount of bulk.
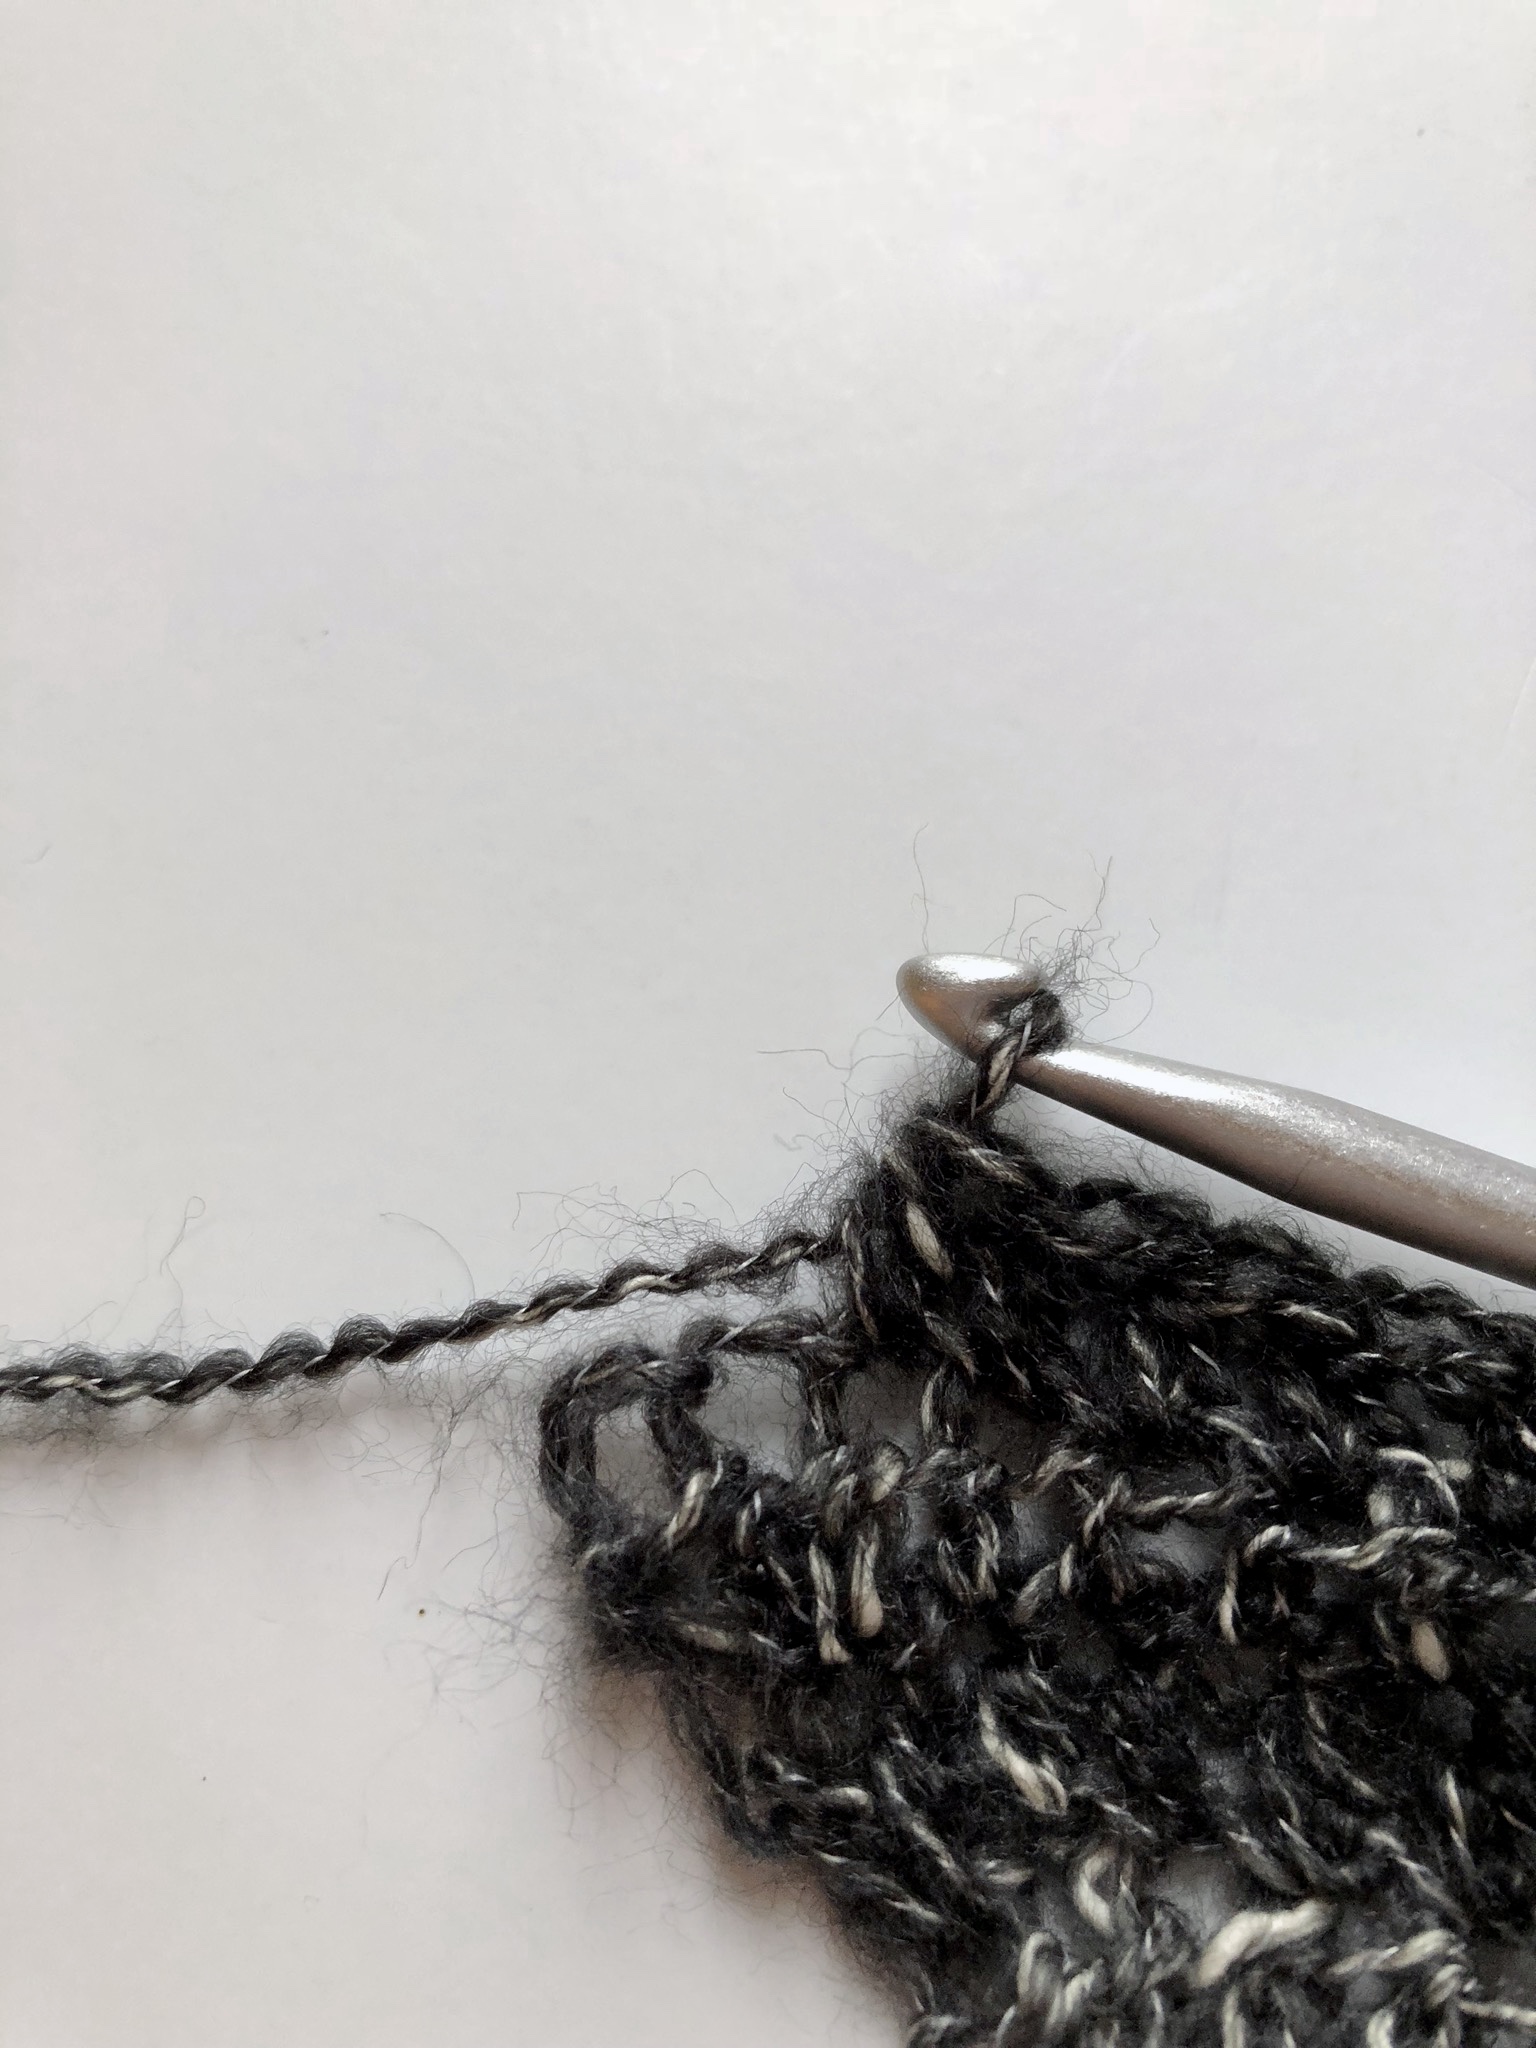
To work this particular method, you will yarn over, insert into your first stitch, and pull up a loop,

then insert your hook into the second stitch, yarn over and pull up a loop (4 loops on your hook). You will then pull that last loop through all the loops on your hook (as you would a slip stitch).


And that is literally all there is to it. Chain 2, turn your work and start off with a decrease in the next row. Repeat the process until you have worked the scarf down to 3 stitches in the last row and fasten off. Attach tassels, and enjoy your new triangle scarf!


I’m super excited about this slight tweak to the pattern, and hope you all enjoy it as well!
What You’ll Need
1 skein of Shawl in A Ball by Lion Brand (I Used Peaceful Earth)- or approximately 481 yards of another similar yarn
1 5.5 mm crochet hook
A stitch marker
My Amazon Picks
Completed Measurements
62″ wide (without tassels), 20.5″ long
Gauge
14 hdc= 4″
9 Rows= 4″
Abbreviations Used
hdc= half double crochet
ch= chain
Special Stitches
Increase: half double crochet 2 into one stitch
Hdc Decrease: yarn over, insert into your first stitch, and pull up a loop, insert your hook into the second stitch, yarn over and pull up a loop (4 loops on your hook). Pull last loop through all loops on your hook (as you would a slip stitch).
Beginner Friendly Triangle Scarf -1 Panel Pattern
Foundation: ch 4, starting in the 3rd ch from your hook, hdc, increase in next, turn (3)
Row 1: ch 2, increase, hdc across, turn (4)
Row 2: ch 2, hdc across, increase in last hdc of the row, turn (5)
Row 3-66: repeat rows 1 & 2 (making sure your increase in each row is on the same side of the scarf. I used a stitch marker to identify the side I would increase on).
Row 67: ch 2, hdc across, turn (70)
Row 68: ch 2, hdc across until 2 stitches remain, hdc decrease in last 2, turn (69)
Row 69: ch 2, hdc decrease, hdc across, turn (68)
Row 70-136: repeat rows 68 & 69 (making sure your decrease in each row is on the same side of the scarf. I used a stitch marker to identify the side I would decrease on). fasten off at the end of row 136.
Assembly
Make 2 tassels (check out my free tutorial on how to make yarn tassels here). Attach one to each end of your scarf.

Hi! Which yarn did you use for the black/gray version pictured here? It’s gorgeous!
Hi Leslie,
I used the Shawl in a Ball Feng Shui Grey colorway for the black/gray version and thanks so much! I love it too!
Thank you so much for such a great, easy, free pattern! I have looked for at least a year for an easy triangle scarf pattern. This one is perfect!!
You just made my morning! Thanks so much for sharing, glad you like it! 🤗
Oh, I’m sorry, you meant the SIDE of it !! Now I get it! 😂
Lol! Sorry it was a bit confusing, glad you figured it out 😉
I’m confused too. Do I continue increase at beginning and end (row 1&2) or just one side. Thank you
Hi Kathy, sorry for any confusion! You only increase at the beginning of row 1 and only increase at the end of row 2 (which will place the all the increases on 1 side of your scarf). You’re essentially working the triangle starting at the one tail end and working to make one side bigger, then decreasing to make it skinny again for the other tail (as opposed to working from the middle tip corner of the scarf towards the long end that will wrap around your neck). Hope this helps!
You say to make sure to increase on the same side, but you have an increase in both rows 1 and 2. So, starting with row 3, which rows do I increase on?