How to Make Yarn Tassels

Last week I posted the free pattern for my Beginner Friendly Triangle Scarf. This is the first pattern on my blog that uses tassels as an accent piece, and I loved how much they added to the scarf!
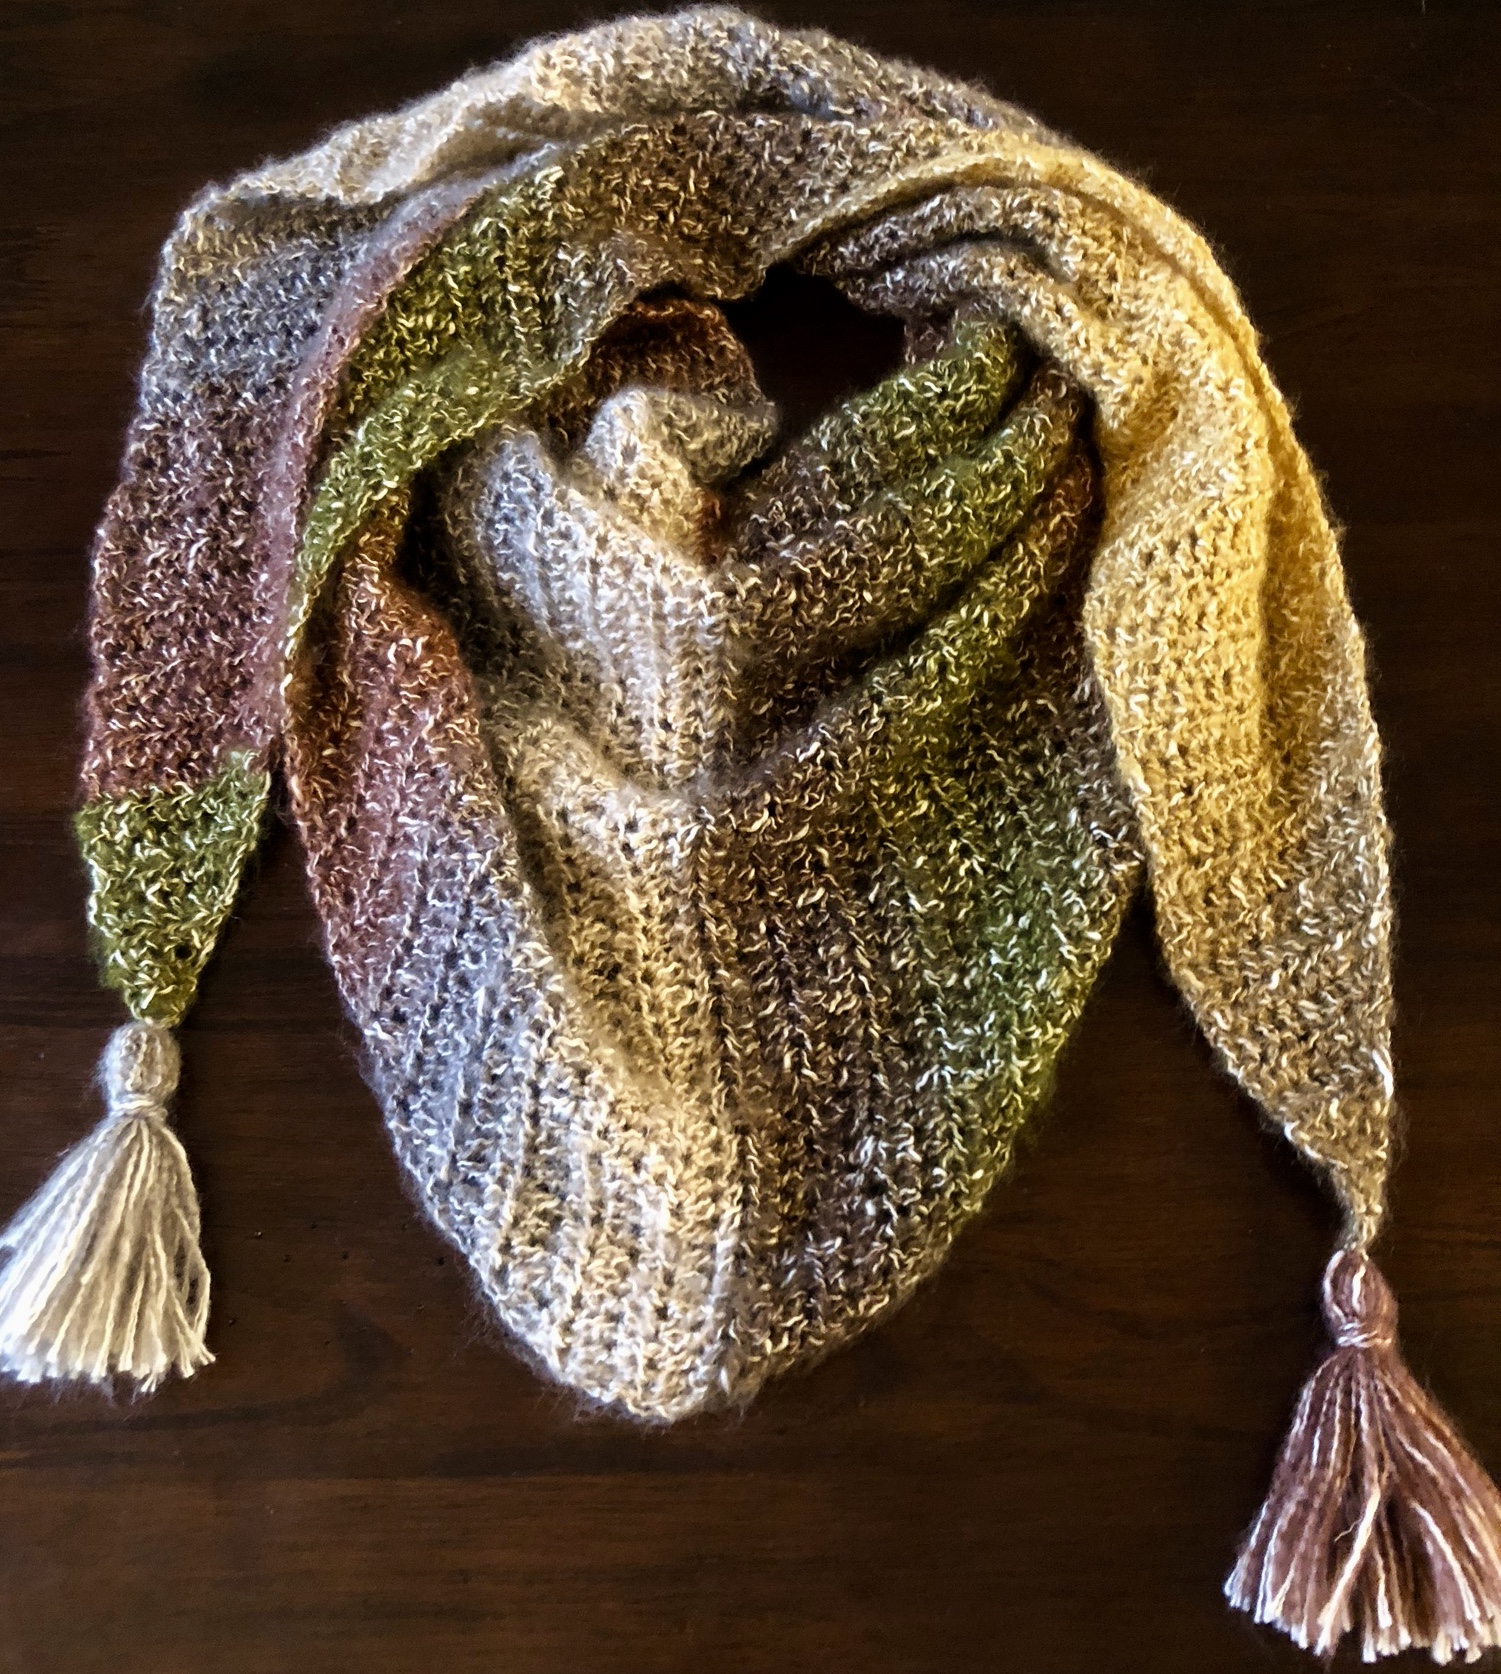
I see plenty more tassels in my pattern writing future, and thought it might be helpful to some of my readers if I provided a quick and simple tutorial on how to make tassels from yarn.
I had initially taken a lot of pictures using the yarn for my Beginner Friendly Triangle Scarf but after editing, I came to the realization that maybe it was too difficult to see said yarn against my very similarly colored area rug. Had the editing proved more fruitful, I would have liked to have posted this tutorial along side the pattern for the scarf.
But thats life, and so here we are a few days later with a tutorial showing a very vibrant colored yarn to make sure you guys can see all the details needed 🙂
What You’ll Need
Yarn of choice
A sturdy, flat, rectangle or square shaped object (I used a super dope magnet but a piece of cardboard or thin plastic would also do the trick) Note: The longer this object is, the longer your tassel will be
Scissors
Instructions
- You will first want to decide how long you would like your tassel to be. I used an awesome Darlek Magnet my cousin got me that measures at 3″ long. (Shout out to any Doctor Who fans reading this!)

- You will wrap your yarn around your sturdy, flat object several times. The more you wrap the yarn around the fatter your tassel will end up being. I wrapped my yarn around my magnet 30 times


- Trim the yarn so that the beginning and end pieces are even with the rest

- Cut a piece of yarn for the top tie. I used a piece of yarn that was about 8 inches long. Weave this piece under the rest and tie off at the top end. (I used a crochet hook to get the yarn under but you can use any method that works for you.) Just make sure the tie is under all your strands of yarn.


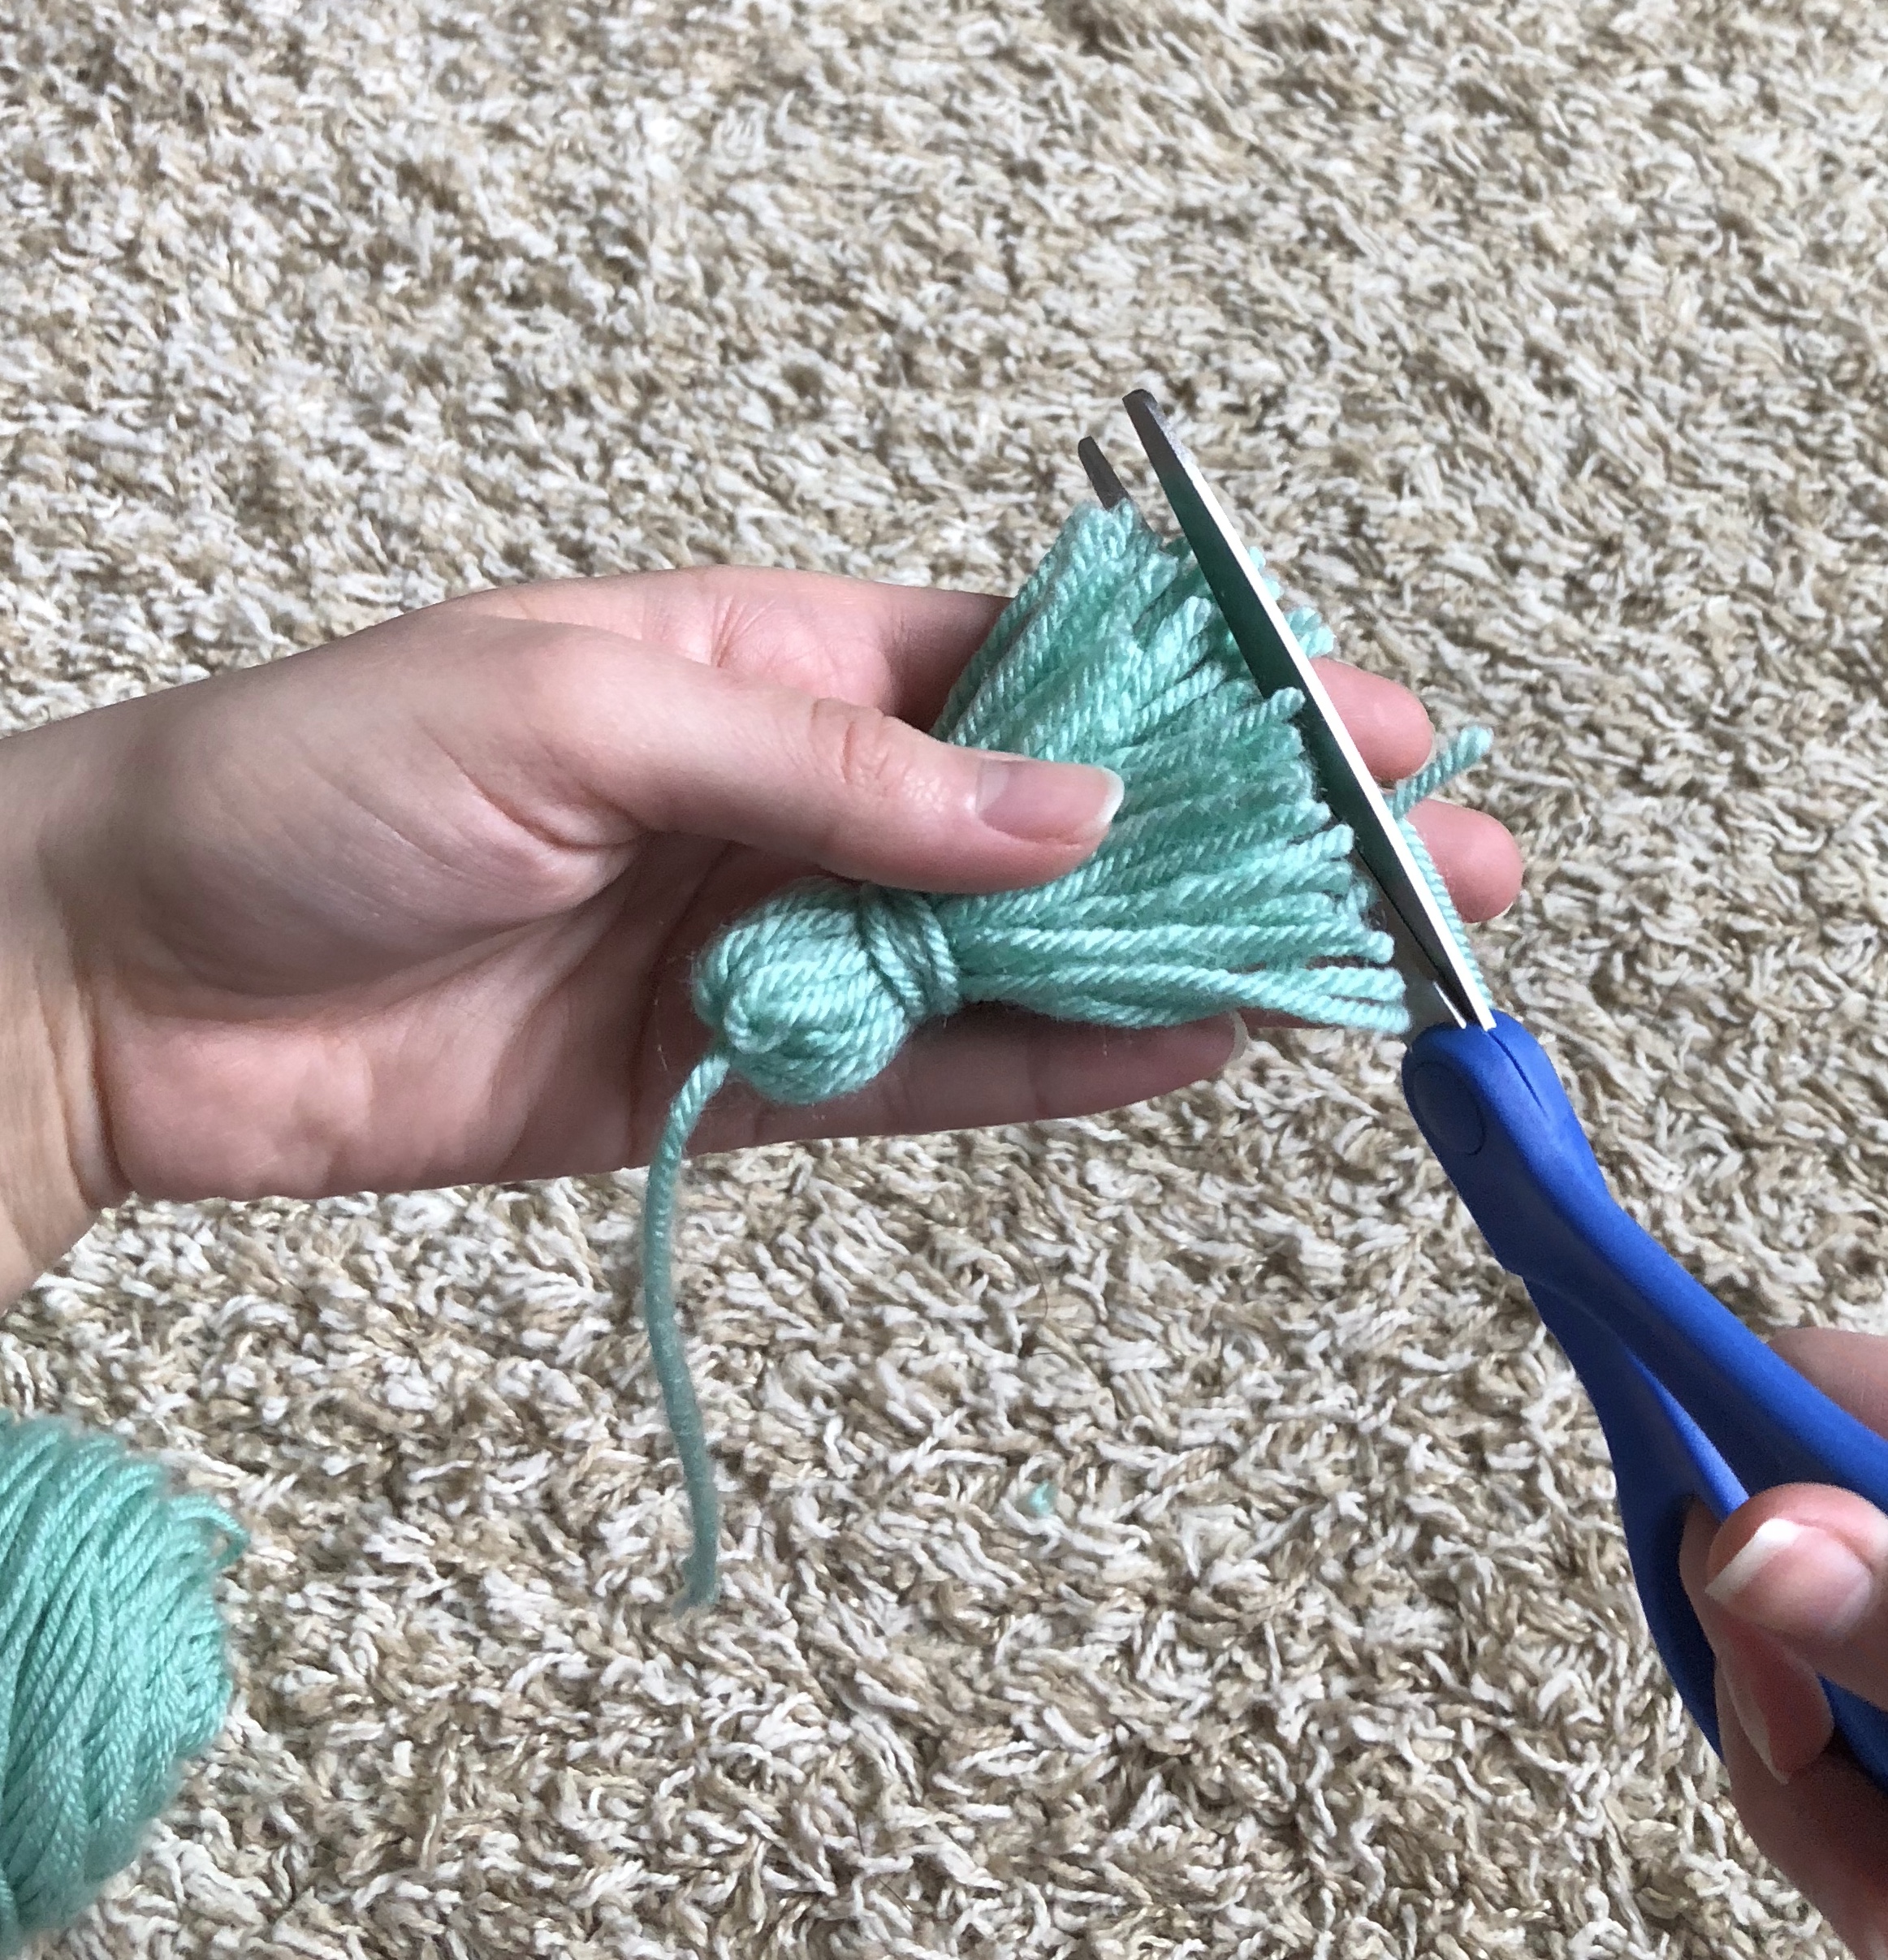
- Now that your yarn is secure with the top tie, you will insert your scissors under the strands of yarn and cut at the bottom.


- Once your tassel is free from the object you used to wrap it around, you will cut another piece of yarn for extra securing of the strands. I also cut this piece about 8″ long. You will want to wrap this around the body of your tassel towards the top, leaving some space to create the head of your tassel.


- The first pass around I tied my strand of yarn pretty tight. From here you will just wrap each strand around several times a little looser then the first pass. Just wrap it around until you achieve the thickness you like. The very last pass around you will want to double knot tightly towards the bottom of all the other wraps. You will then tuck that under the looser passes of yarn so that knot is hidden.


- The very last step is to trim the strands so they are all even lengths.
 And there you have it! A super easy yarn tassel in under 10 steps, with very little materials needed. All that’s left is to attach to your newest crochet or knit project!
  I hope you found this tutorial both informative and helpful! What do you plan on attaching your tassels to?