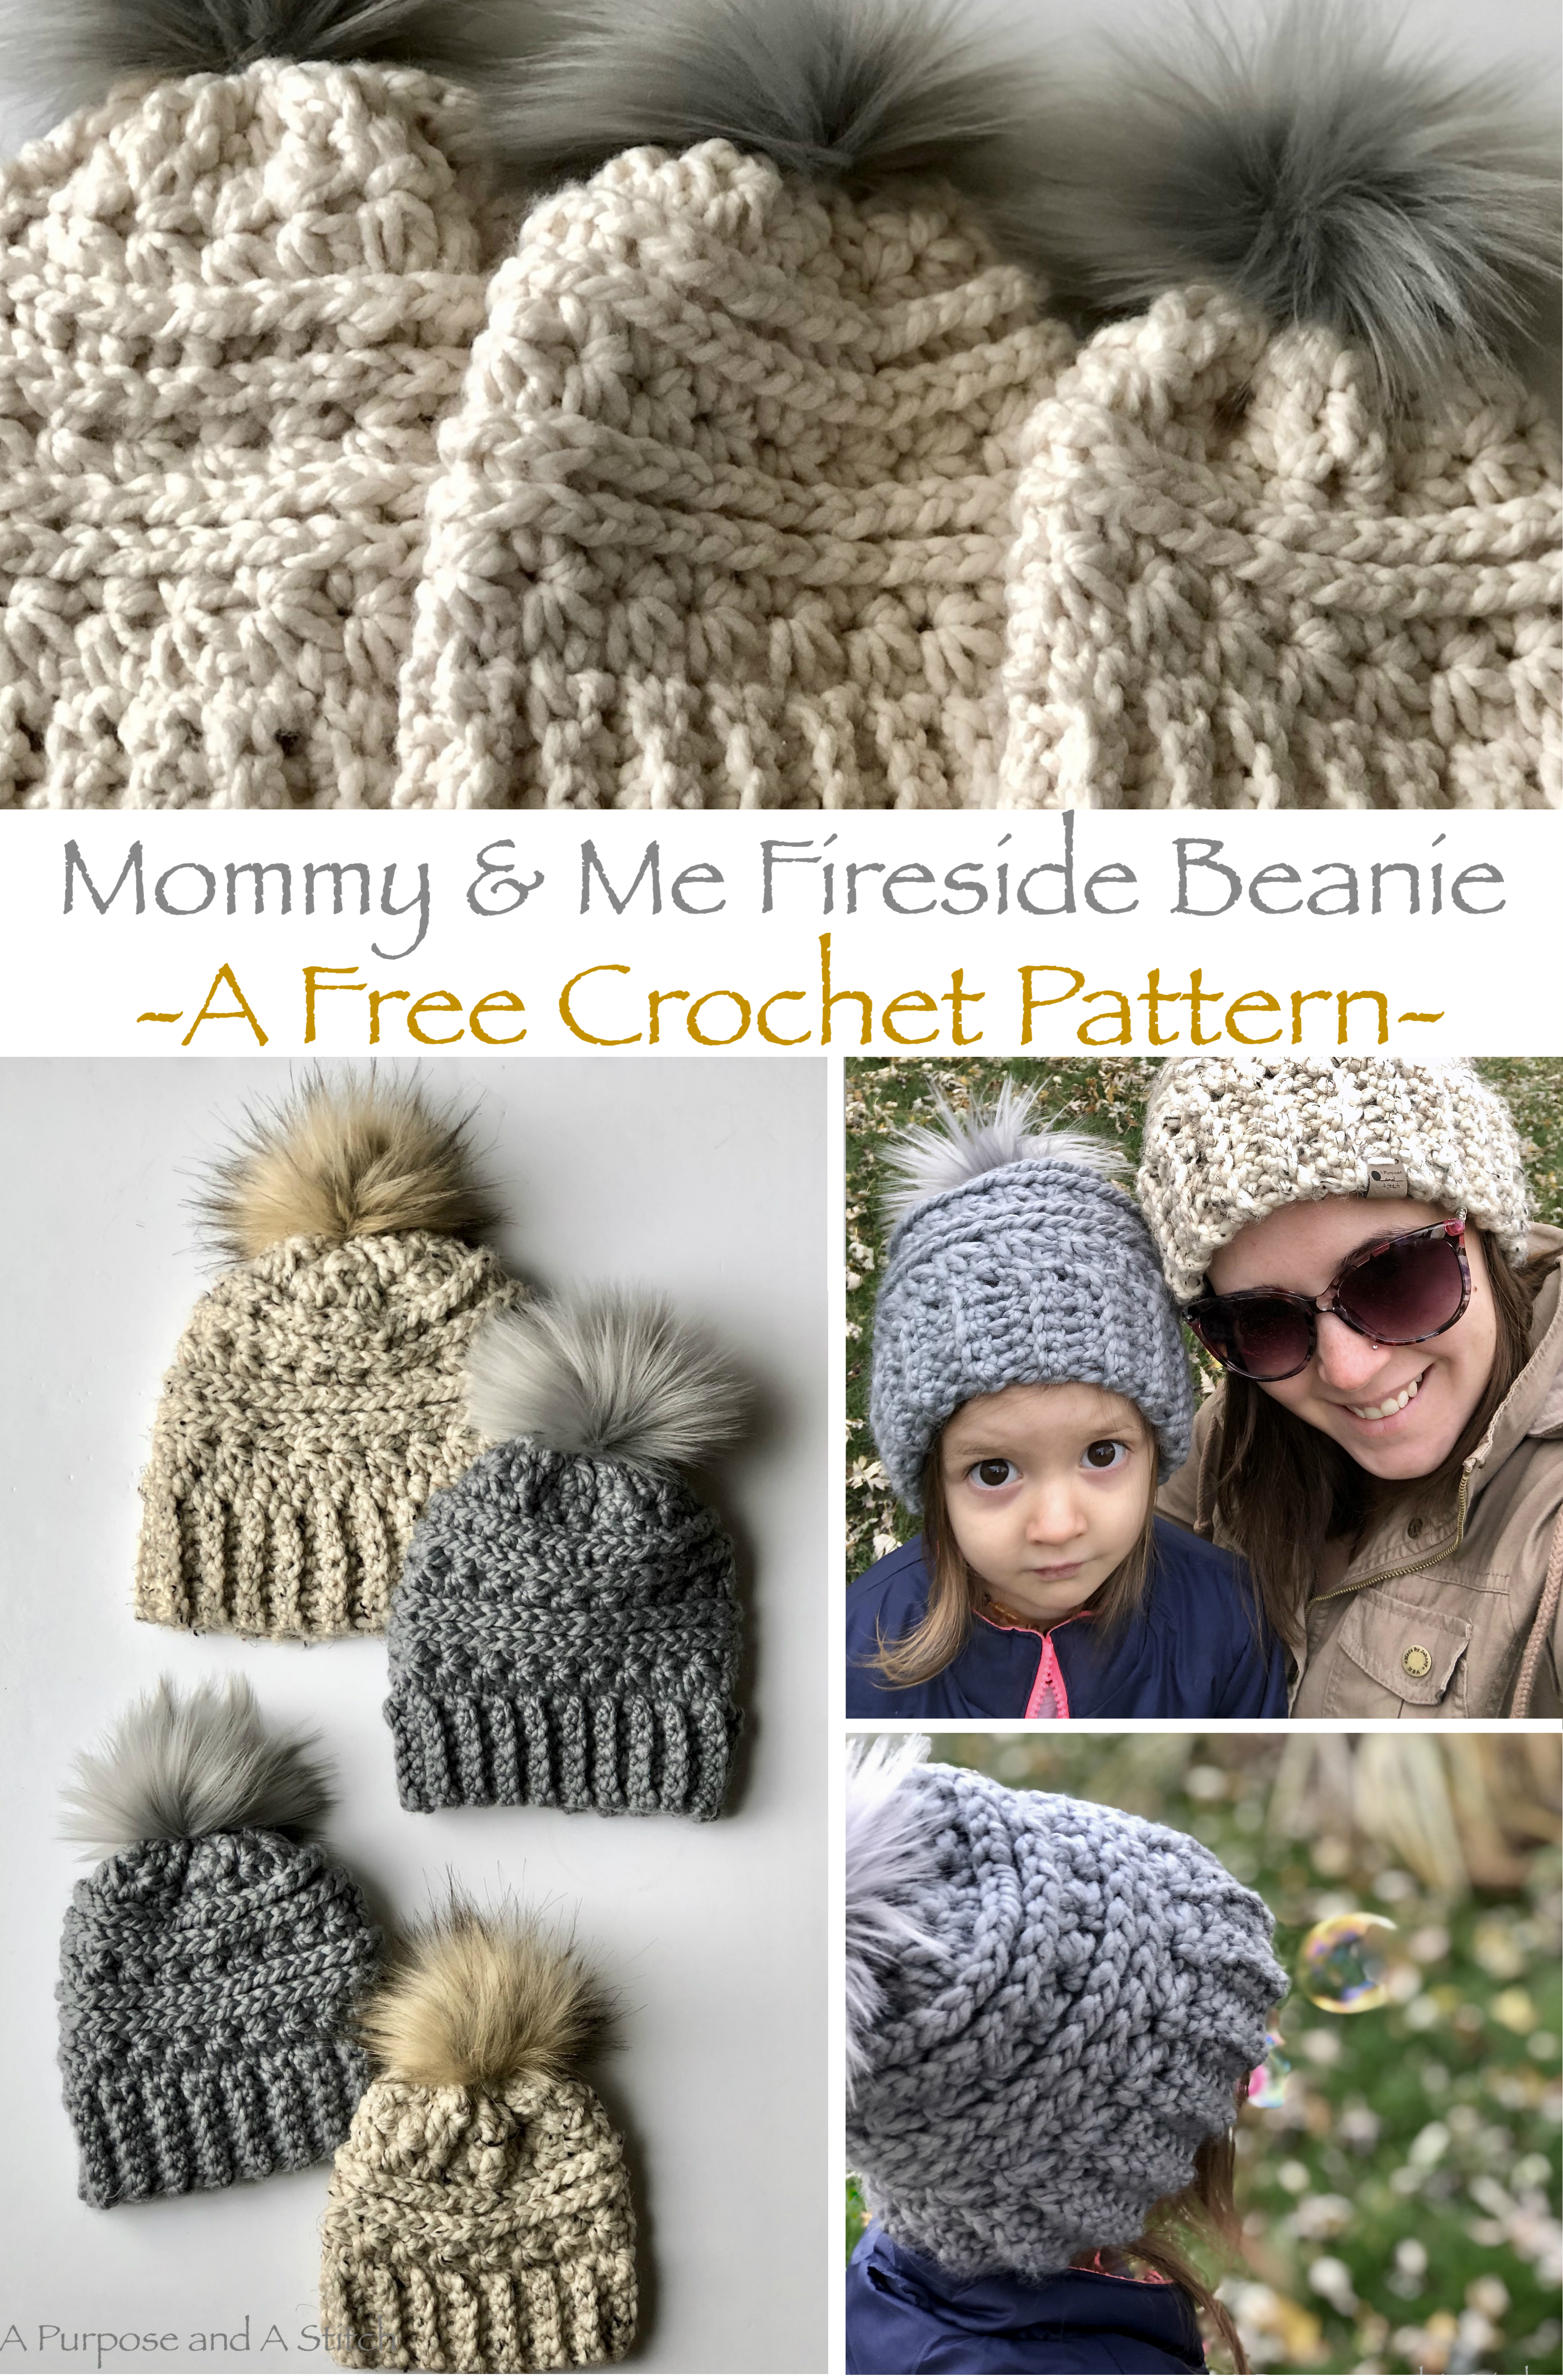
Mommy & Me Fireside Beanie

Our sweet little girl, Audrey is a huge inspiration for me when it comes to creating patterns.
 Her love for all the things I make is also a huge reason that I keep doing what I do. A few months back when I first created the Fireside Beanie, she got extremely excited to wear one with me.

A bit too big for her little head, it looked more ridiculous than anything but it was all I needed to convince me to make a size that would be perfect for her.
So here we are with 3 additional sizes (in baby, toddler and child) of the Fireside Beanie, making it the perfect pattern for a Mommy & Me set.
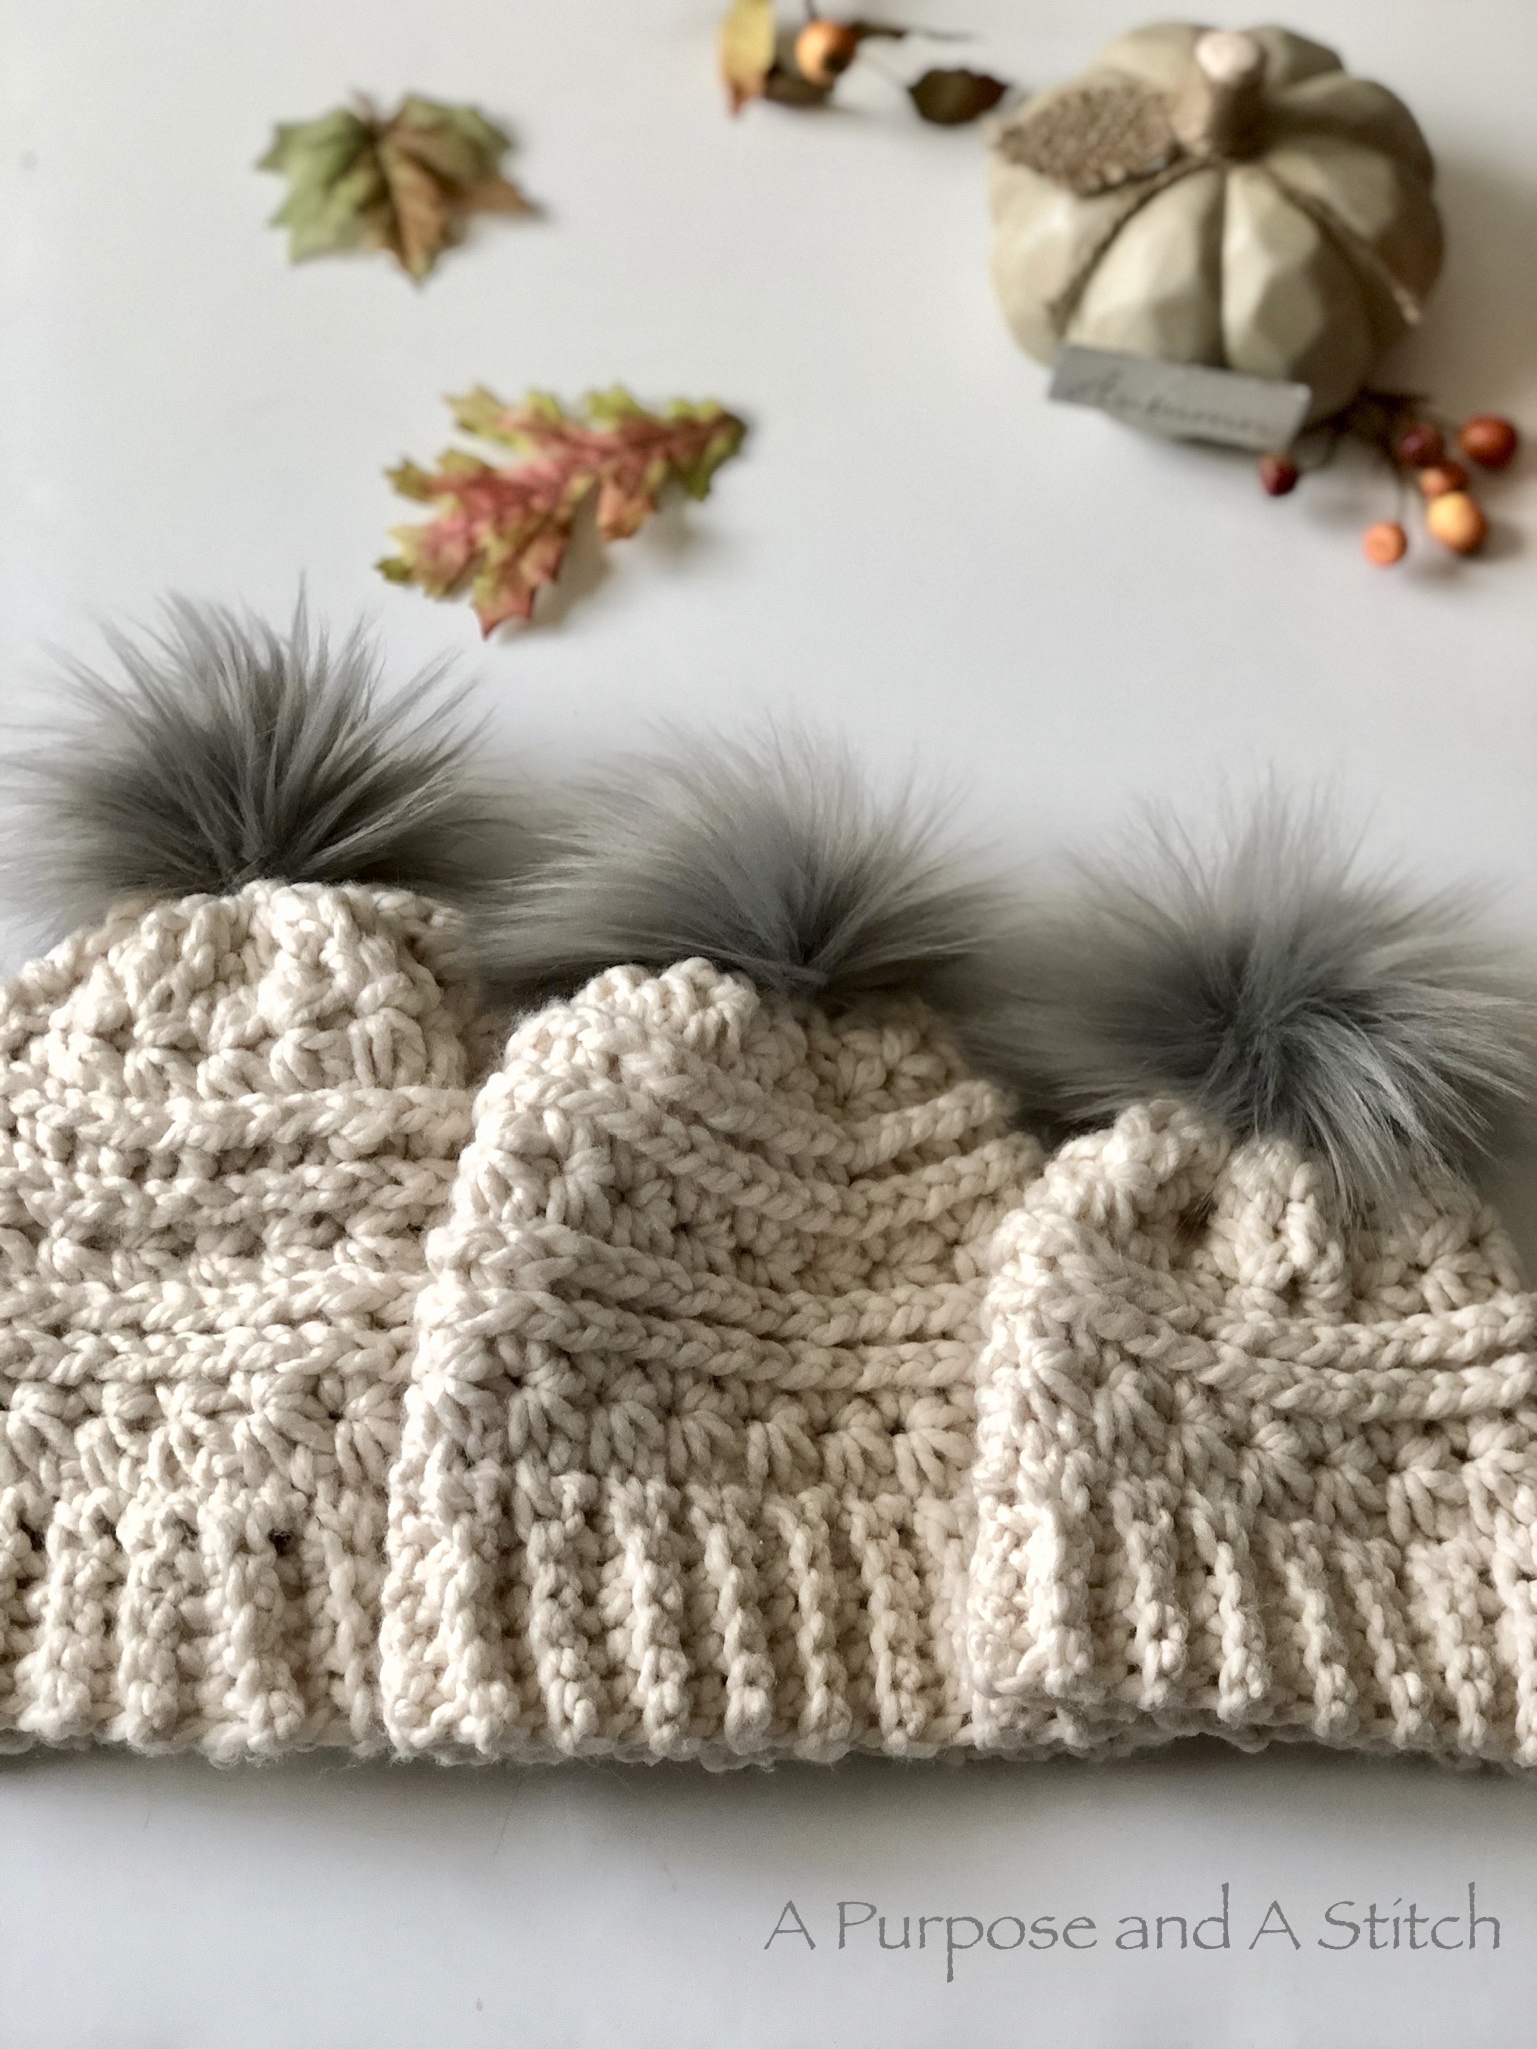
For additional help on creating these hats, check out the free step-by-step picture tutorial on our blog post here. It also gives a break down of how to work each stitch used in this beanie.
**If you’re interested, you can also purchase the ad-free, inexpensive PDF of this pattern (which includes all 4 sizes: baby, toddler, child and adult female) on our Etsy shop here. **
What You’ll Need
10 mm crochet hook
1 skein of Lion Brand’s Wool-Ease Thick and Quick yarn- approximately 57, 70, 84 yards
1 faux fur pom
scissors
embroidery/ darning needle
My Amazon Picks
Completed Measurements
Baby Size: Circumference= 14″ & 6 1/2″ tall
Toddler Size: Circumference= 16″ & 7 1/2″ tall
Child Size: Circumference= 17 1/2″ & 8″ tall
Gauge Used
10 sts= 4”
7 rows= 4”
Abbreviations Used
ch= chain
sc= single crochet
blo= back loops only
fo= fasten off
p/u= pick up
sl st= slip stitch
hdc= half double crochet
st= stitch
yo= yarn over
pu=pull up [a loop]
Special Stitches
Star stitch: ch 3, insert hook in 2nd ch from hook, yo, pu (2 loops on hook), insert into 3rd ch from hook, yo, pu (3 loops on hook), insert into 1st st, yo and pu (4 loops on hook), insert into next st, yo and pu (5 loops on hook), insert into next st, yo and pu (6 loops on hook), yo pull through all 6 loops, yo and pu creating the “eye” of the star (1 loop on hook: first star created). *insert hook into “eye” of star yo, pu (2 loops on hook), insert into last spike of the star, yo, pu (3 loops on hook), insert hook into same st as last spike, yo, pu (4 loops on hook), insert into next st, yo and pu (5 loops on hook), insert into next st, yo and pu (6 loops on your hook), yo and pull through all 6 loops, yo and pu (1 loop on hook: second star created). Repeat from *. End last star stitch by working last yo and pu into the top of the ch 3 that started the round.
Camel Stitch: hdc into 3rd loop of previous row’s hdc
HDC Decrease: yo, insert hook into next st, yo, pu loop (3 loops on hook), yo, insert hook into next st, yo and pu loop (5 loops on hook), yo and pull through all 5 loops.
Pattern Notes
The Pattern is written in the baby size with adjustments for toddler and child sizes to follow in: baby, toddler, child format.
Brim Pattern
Foundation: ch 6 (7,7)
Row 1: starting in 2nd ch from hook, sc in blo across, turn (5,6,6)
Row 2-32 (36,40): ch 1, sc in blo across, turn. fo at end of row 32 (36,40) leaving tail (5,6,6)
Using tail, mattress stitch first row to last row to create a cylinder.
Beanie Pattern
Foundation: p/u sc stitches in each row around, sl st into first stitch (32, 36, 40)
Round 1: star stitch around (16, 18, 20 stars created)
Round 2: ch 1, hdc 2 into each “eye” around, sl st into ch 1 (32, 36, 40)
Round 3: ch 1, Camel stitch around, sl st into 1st st (32, 36, 40)
Round 4: Work star stitch pattern into 3rd loops of the hdc sts from previous round- creating the camel stitch look (16, 18, 20 stars created)
**Round 5 (for Baby size only): 2 hdc in each “eye” around. Skip rounds 6-8 and complete by following instructions in round 9.
Round 5- 7 (for Toddler and Child sizes): repeat rounds 2-4
Round 8: ch 1, hdc 1 into each “eye” around, sl st into 1st ch 1 (18, 20)
**For Toddler size, fasten off at the end of Round 8 and follow assembly directions to complete**
Round 9: ch 1, hdc decrease around, fo leaving tail. (16, 10)
Assembly
Using embroidery/ darning needle, weave tail in and out of every few stitches around, pull to close top of beanie. Weave between any gapping and tie off. Attach Pom Pom to top of beanie. Weave in all ends.
if I substituted homespun yarn for thick and quick how do think that would impact the pattern? thanks for sharing it!
You could certainly give it a go! Homespun won’t offer as detailed stitch definition and you may need to mess around with hook sizes more to meet gauge since it’s a different weight yarn, but if you’re able to meet gauge and you like the look of homespun, I can’t wait to see how it turns out!