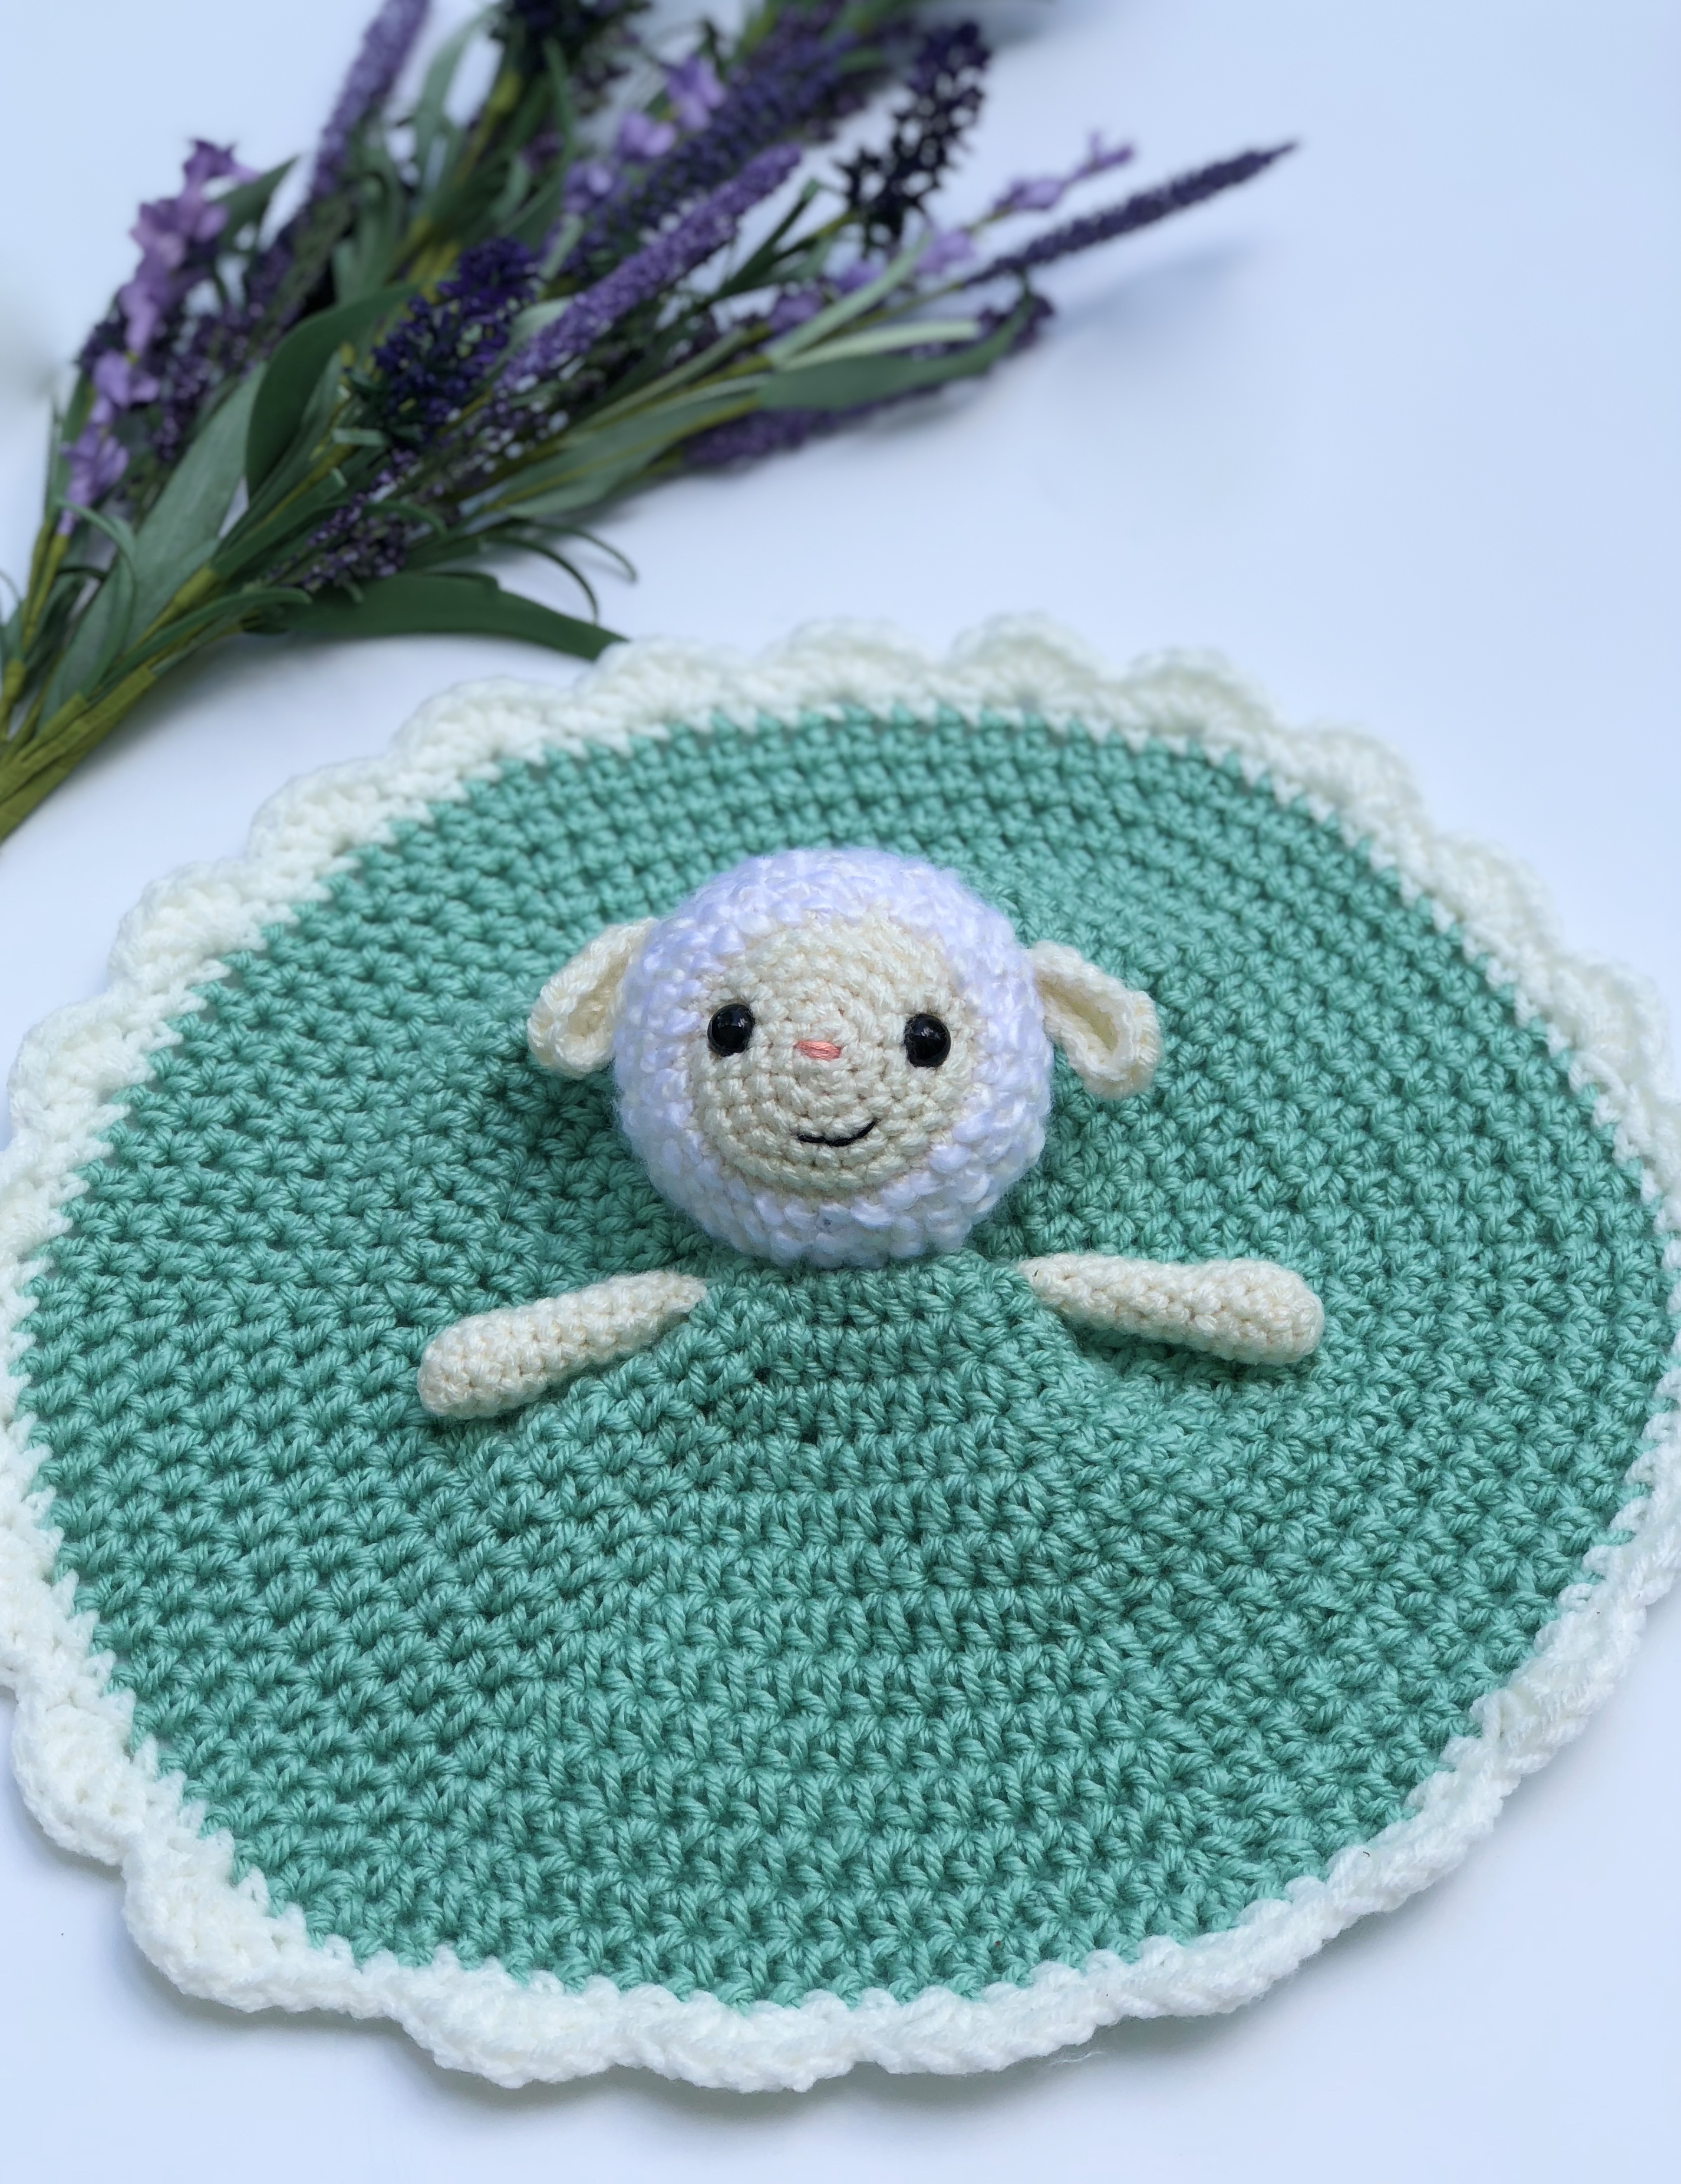
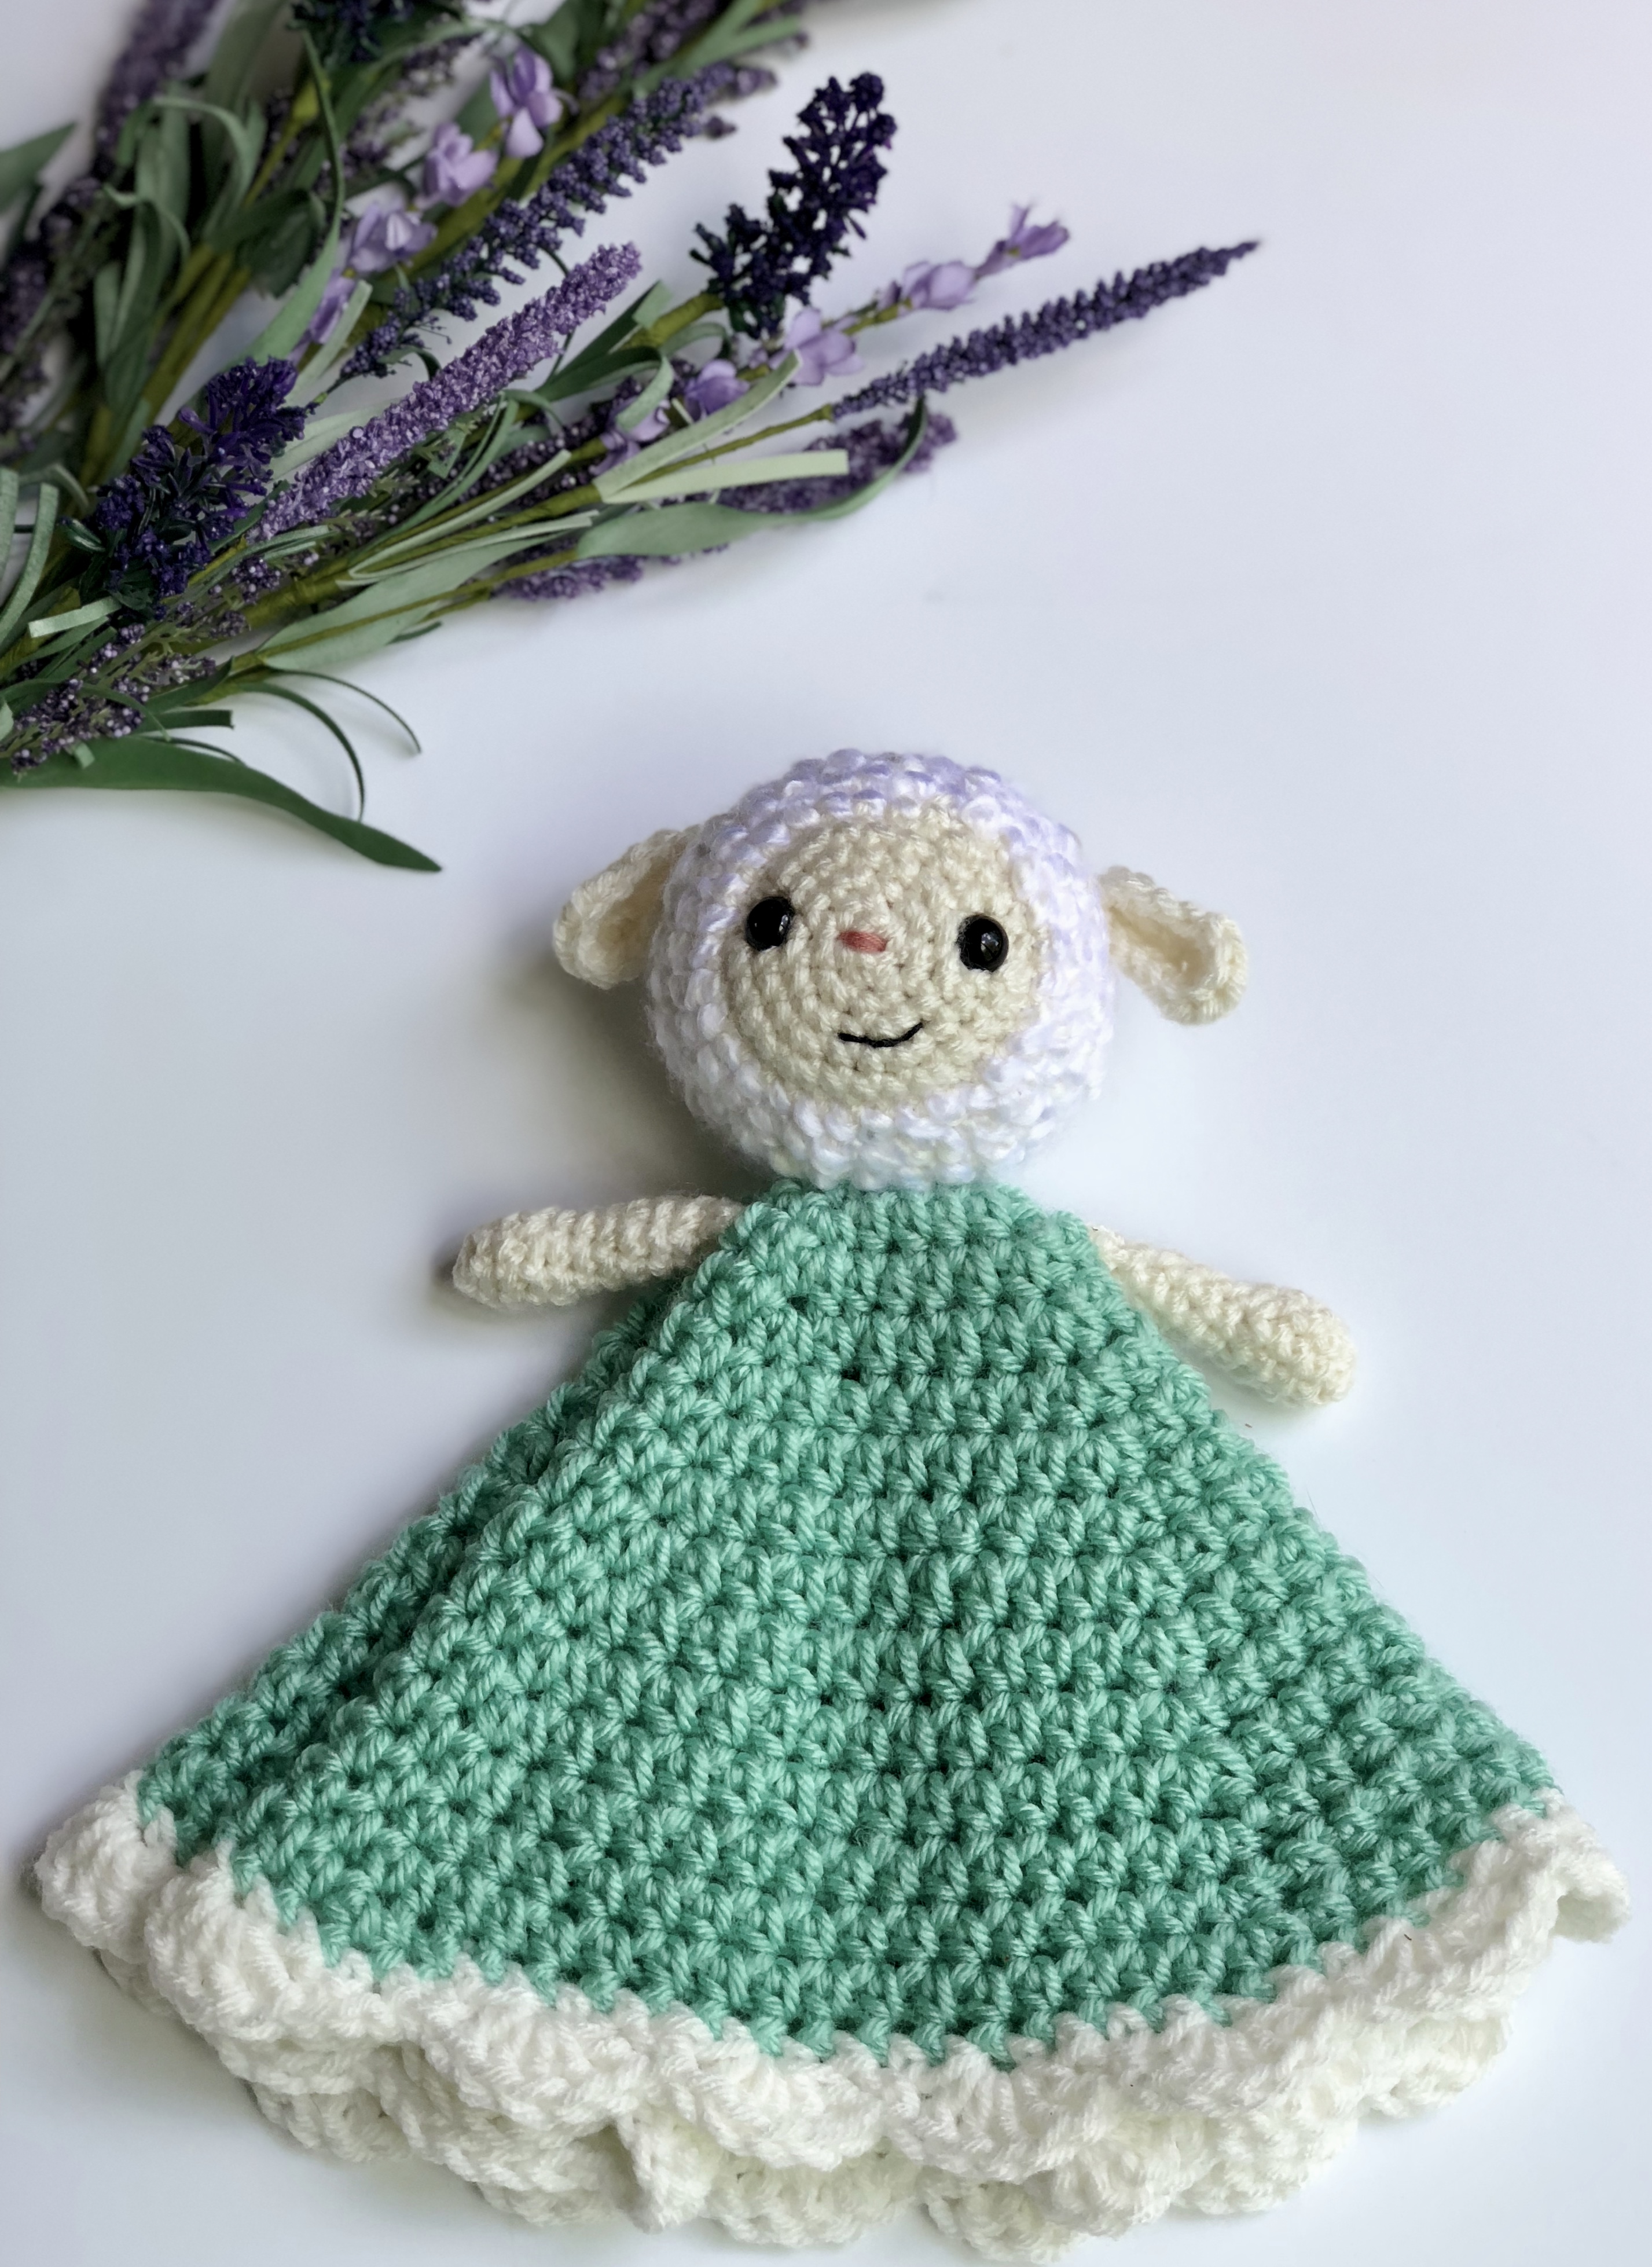
Lambie the Lovey

Lambs make the cutest baby toys, don’t they?
Brain storming a baby toy for a friends newest family member was no easy feat. Especially since I feel like I have been cranking out baby toy, after baby toy, after baby toy for all the babies in our lives right now!
After going through my idea book, it finally came to me. A few months ago I had sketched an idea of an amigurumi lamb rattle. I took that idea and morphed it a bit into a lamb lovey.
You can get the free pattern here! It’s quick and easy to work up, with an option to use fabric as the blanket for an even quicker work up. Yay for simplicity! 🙂


To start making your very own, you’ll make the head first. Using an off white or cream colored yarn, you will be working the face in a very slight oval shape. Rather then using a magic ring (as you would for an exact circle), you will use a chain row and single crochet increase around into the front and back loops of your chain.


From here you will continue to gradually increase for a few rounds.


Once you have a good surface for your face, you will work one round of slip stitches.
The slip stitches will give a slight indented border between the smooth face and fluffy head. Try to work these slip stitches a little looser then your normal gauge to ensure an easier time working your next round. After the round of slip stitches, you will switch to your fluffy white yarn and return to working single crochets for several rounds without any increases or decreases.
 Before you start decreasing, you will add the details of your lamb’s face.
I used embroidery floss for the nose and mouth and safety eyes for the eyes, feel free to use yarn if that’s your preference! I placed my eyes in between rounds 4 and 5 of the cream colored yarn on either side of the nose, which was placed directly over the first chain round.
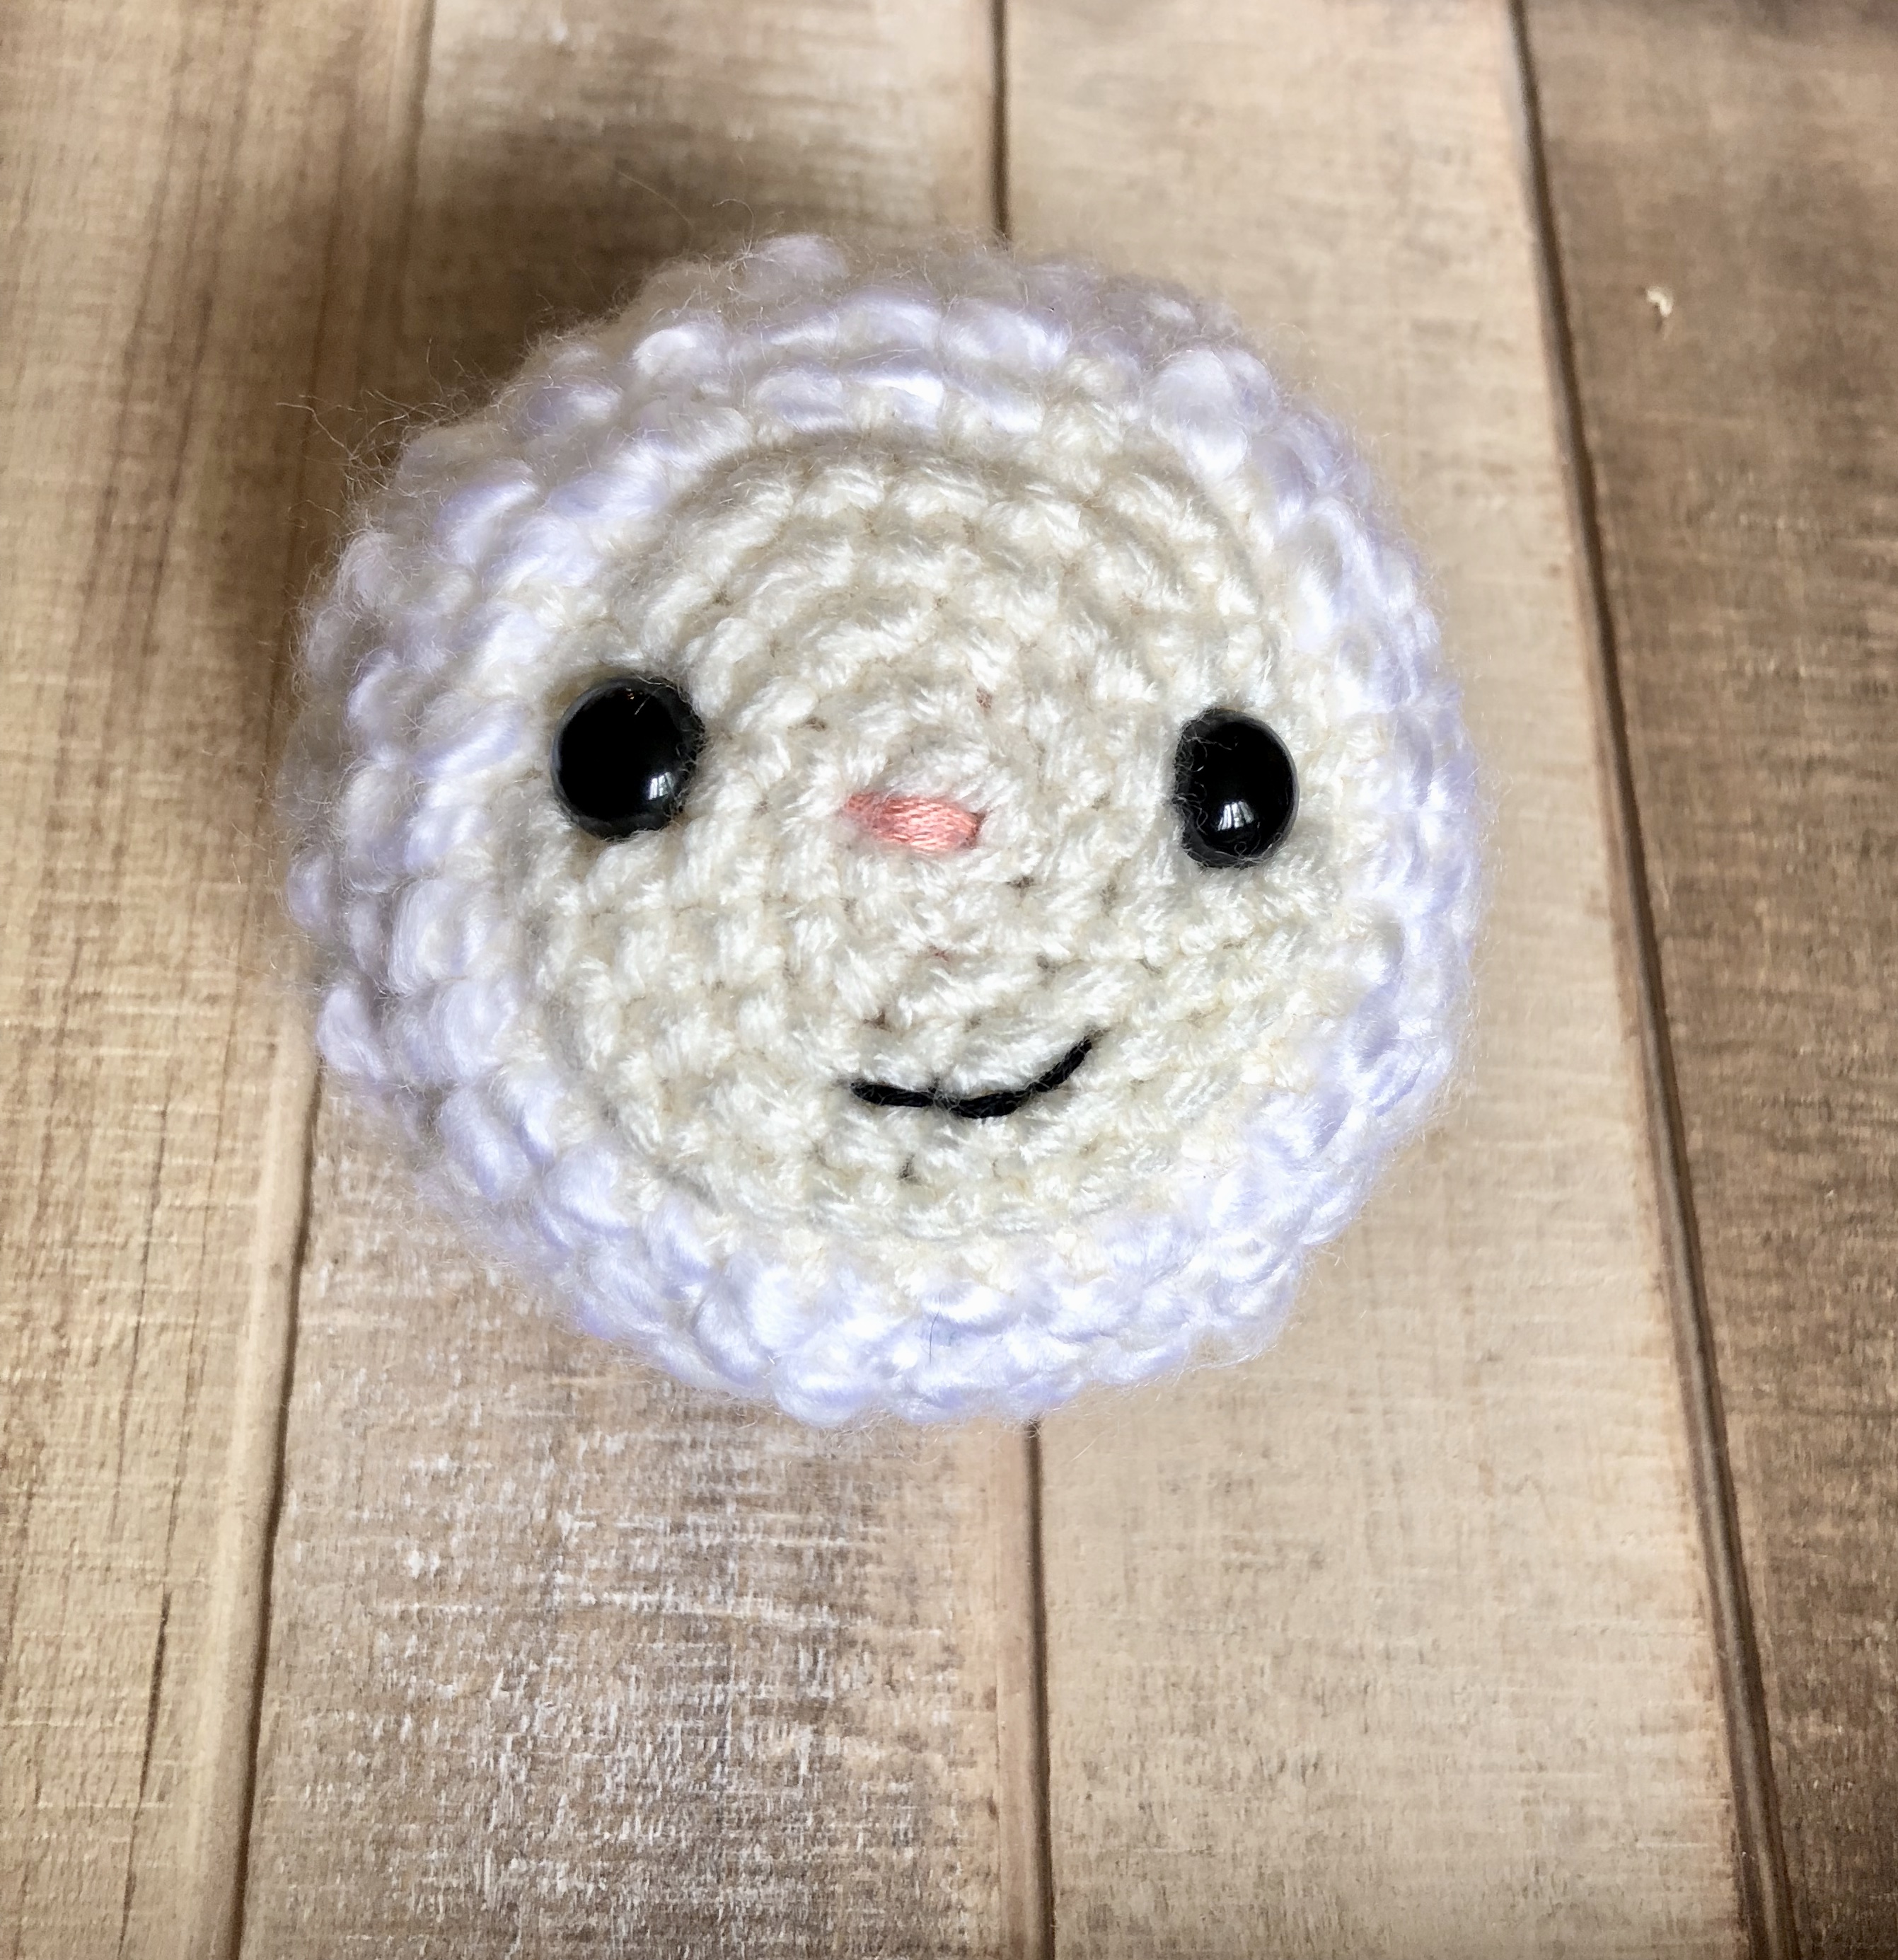
After you have a face you’re happy with, you will continue by gradually decreasing the next few rounds to close the back of the head, stuffing as you go with fiber fill.
After your very last round you will fasten off leaving a tail. Then using your tail, you will weave in and out of the 6 stitches remaining and pull tight to close. You will then fasten off again to secure the close.
Now you have an adorable little lamb head, it just needs some ears!
The ears are crocheted in a teardrop shape, and folded towards the top before attaching to the head. They start out similar to the head, in that you will crochet a chain and be working around, in the front and back loops so you’re starting out with an oval.


The second round of the ears is when the teardrop shape becomes pronounced. You’ll start out by slip stitching, then switch to a single crochet, then switch again to half double crochets. For the base, and fattest part of the teardrop, you’ll work a few increases of half double crochets, then gradually decrease the other side by reverting to a few half double crochets, single crochets and slip stitches at the very top.


To make the arms, you will start things out with a magic ring. If you are unfamiliar with this technique, I highly recommend this tutorial found here.
You’ll make a small increase to create the hands, followed by a round of decreasing and several rounds of single crochets around to grow the length of the arms.
The next part is the part I had the most fun with… the blanket! Now, I did play with the idea of using a super soft piece of double sided fleece, but I could only find this fabric in a soft pink or soft blue color. I bought it anyways so I could show you how it looks, but was really wanting the blanket to be mint green so I went with a crocheted blanket instead.

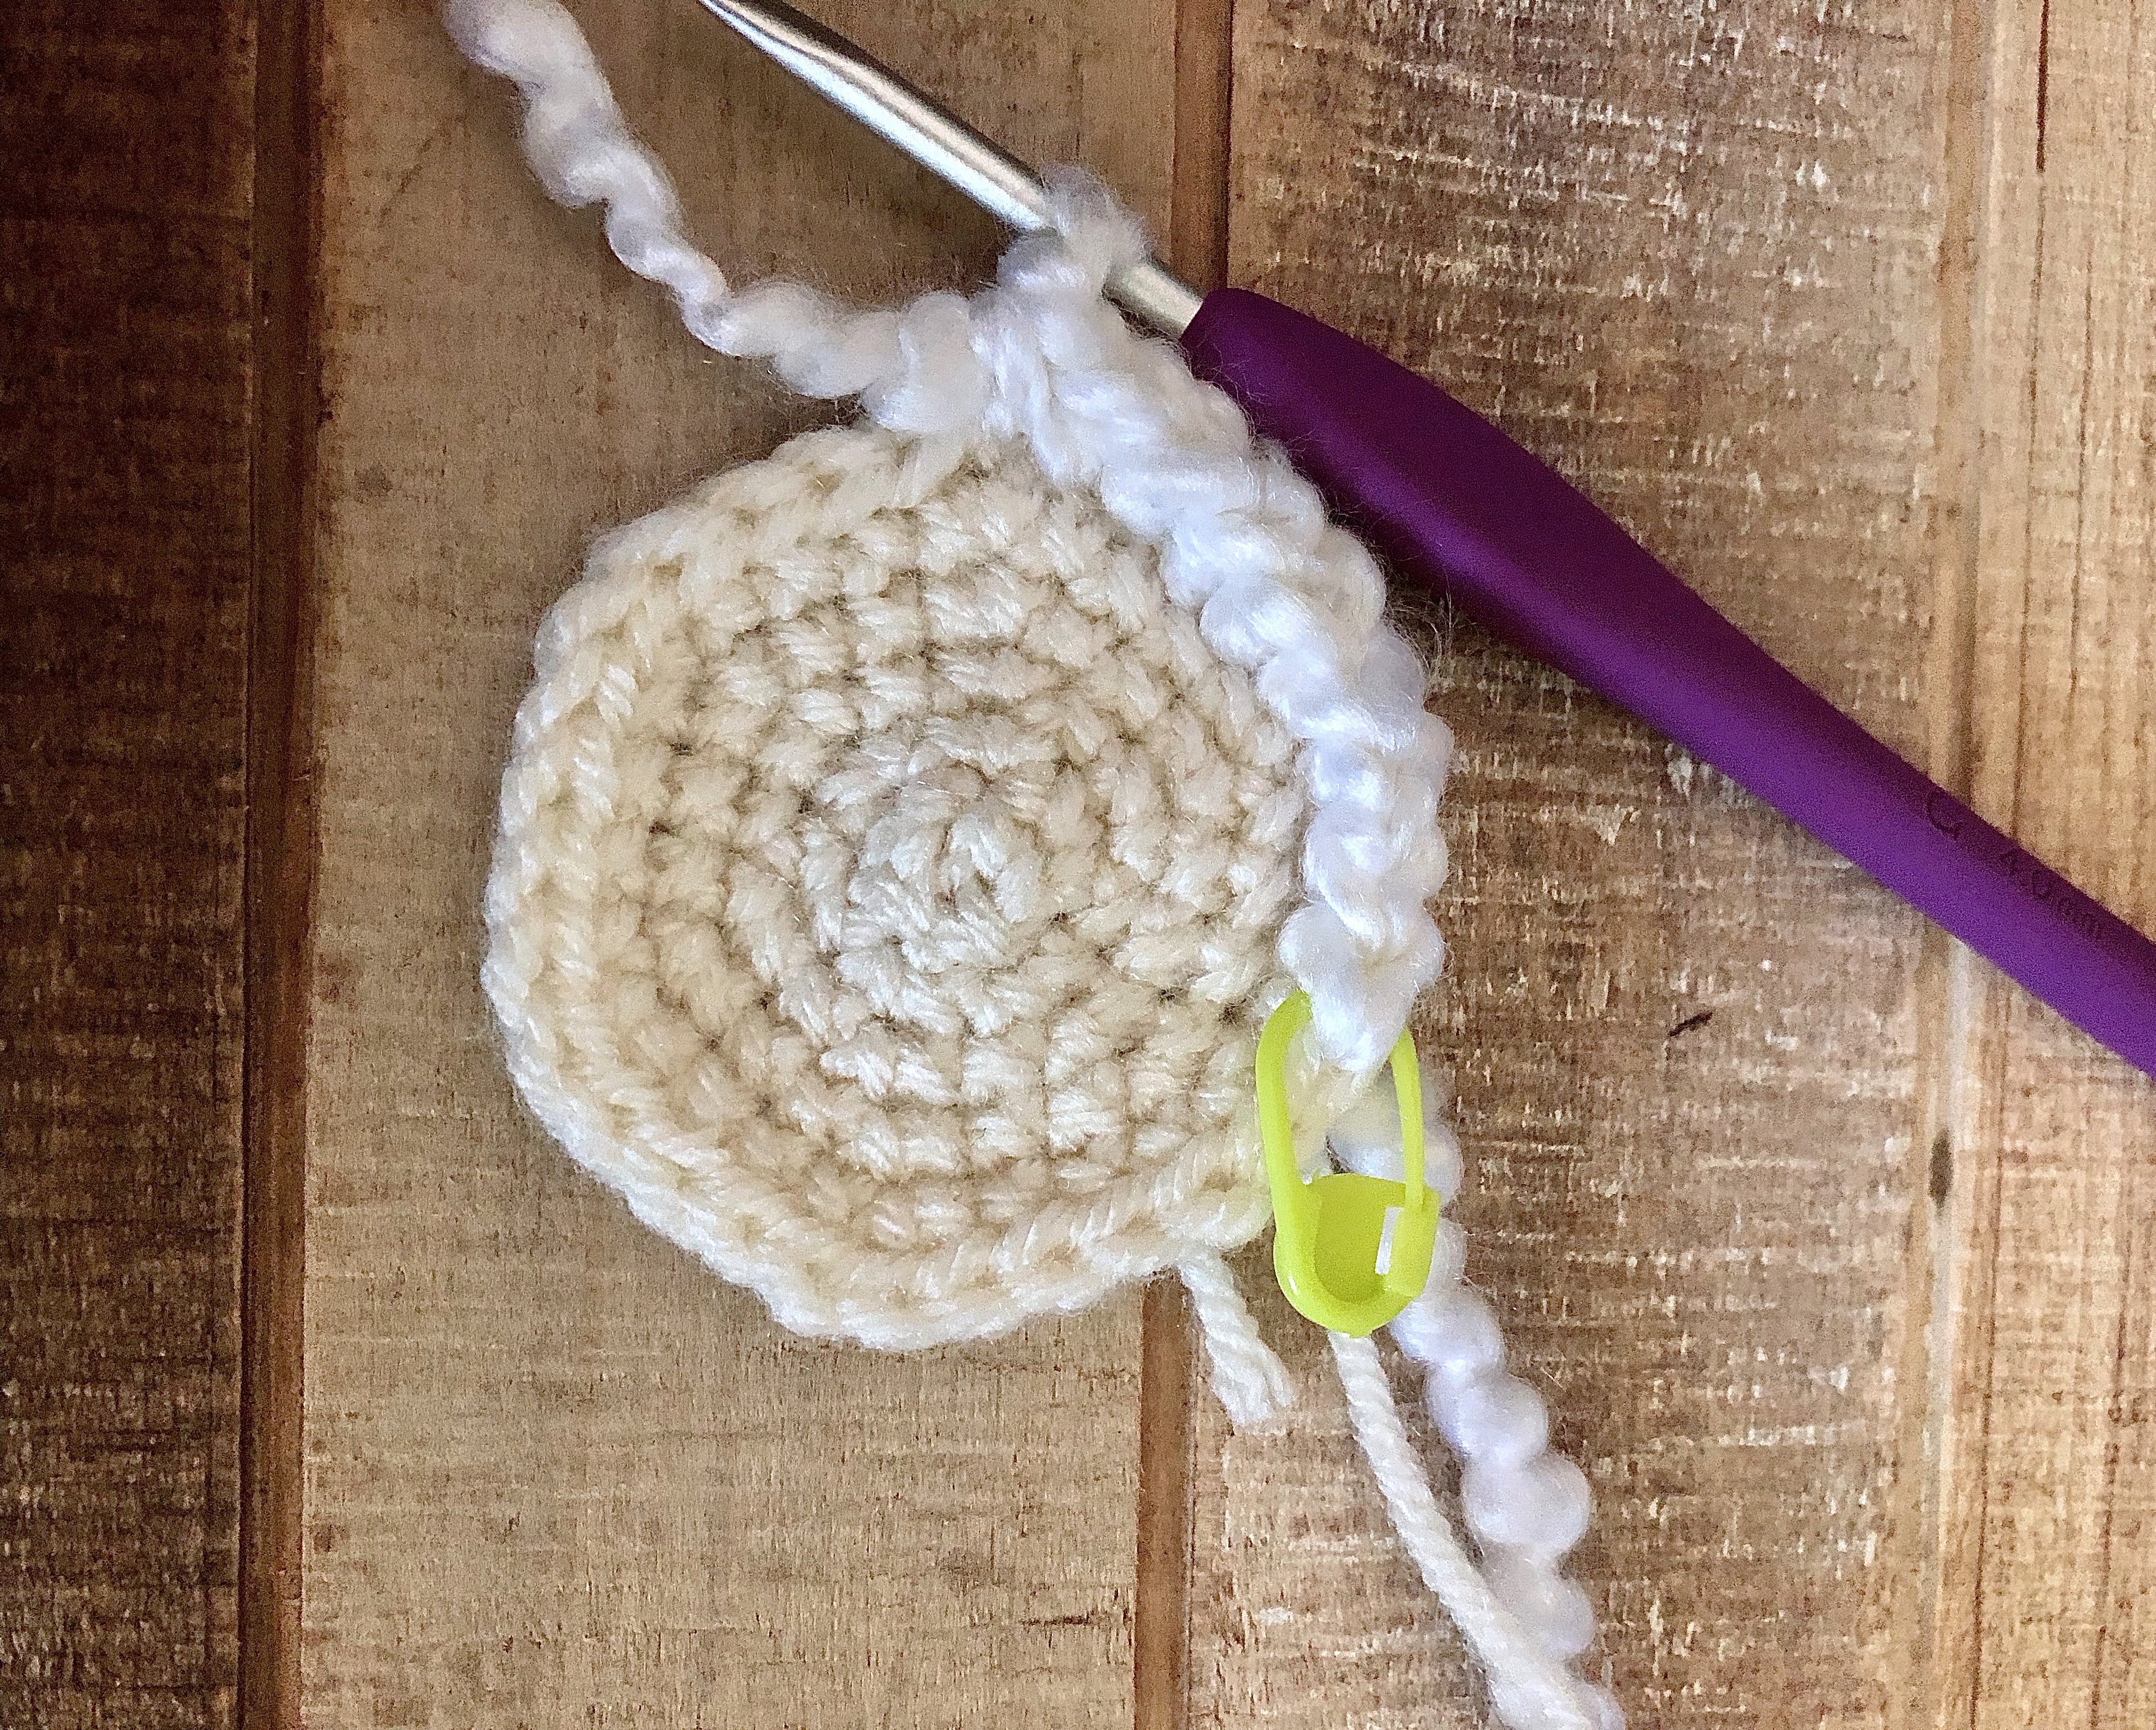
To start the blanket out, you will be using the magic ring again.

You will be single crocheting and slightly increasing for a few rounds, then switching to half double crochets for the remainder of the blanket. I liked the idea of using half double crochets as they are a bit looser of a stitch, offering a more flexible blanket, but are smaller then double crochets which baby fingers may get caught in.

I worked half double crochets for the remained of the rounds, using half double crochets to increase with as well, until the second to the last round. When you reach this point, you will switch to a shell/ scallop edging.

I changed colors to white for the shell edge giving the blanket a pretty contrast. Working shells for a border are super fun and easier then you might think! Before working the shells, you will work one round of single crochets around.

To start the shell pattern you will single crochet once, skip one stitch, and start to double crochet in the next.


You will work 5 double crochets total into that one stitch.


You will then skip the next and single crochet in the next.


You will then work 5 double crochets in the next stitch, skip one stitch, single crochet in the next stitch and repeat that process around. You will complete the blanket by slip stitching into the last single crochet and fastening off.

I attached the base of my head to roughly the 4th round of the blanket using an embroidery needle and a strand of my mint green yarn. This will not be an exact match up since the base of the head does not have rounds running parallel to the blanket rounds, but as long as you try to keep each stitch as even as possible on all sides of the head and blanket, it’ll turn out fine!


Once you attach all the way around the head and blanket, you will turn your work inside out so that you can fasten the starting part of the strand to the end and weave in ends.

Once the head is secured to the blanket, you will attach your lamb’s arms. Before attaching my lamb’s arms, I laid the lovey flat so that the blanket fell under the head in a triangle shape. I attached the arms to the front most fold about 1 round down from the head on either side.

Once the arms and head are attached all you have left to do is weave in any straggler ends.
You now have your very own Lambie the Lovey! I hope yours gets much loving and that you enjoyed making it as much as I did!
Happy Crocheting!