Galway Girl Glittens- Blog Post
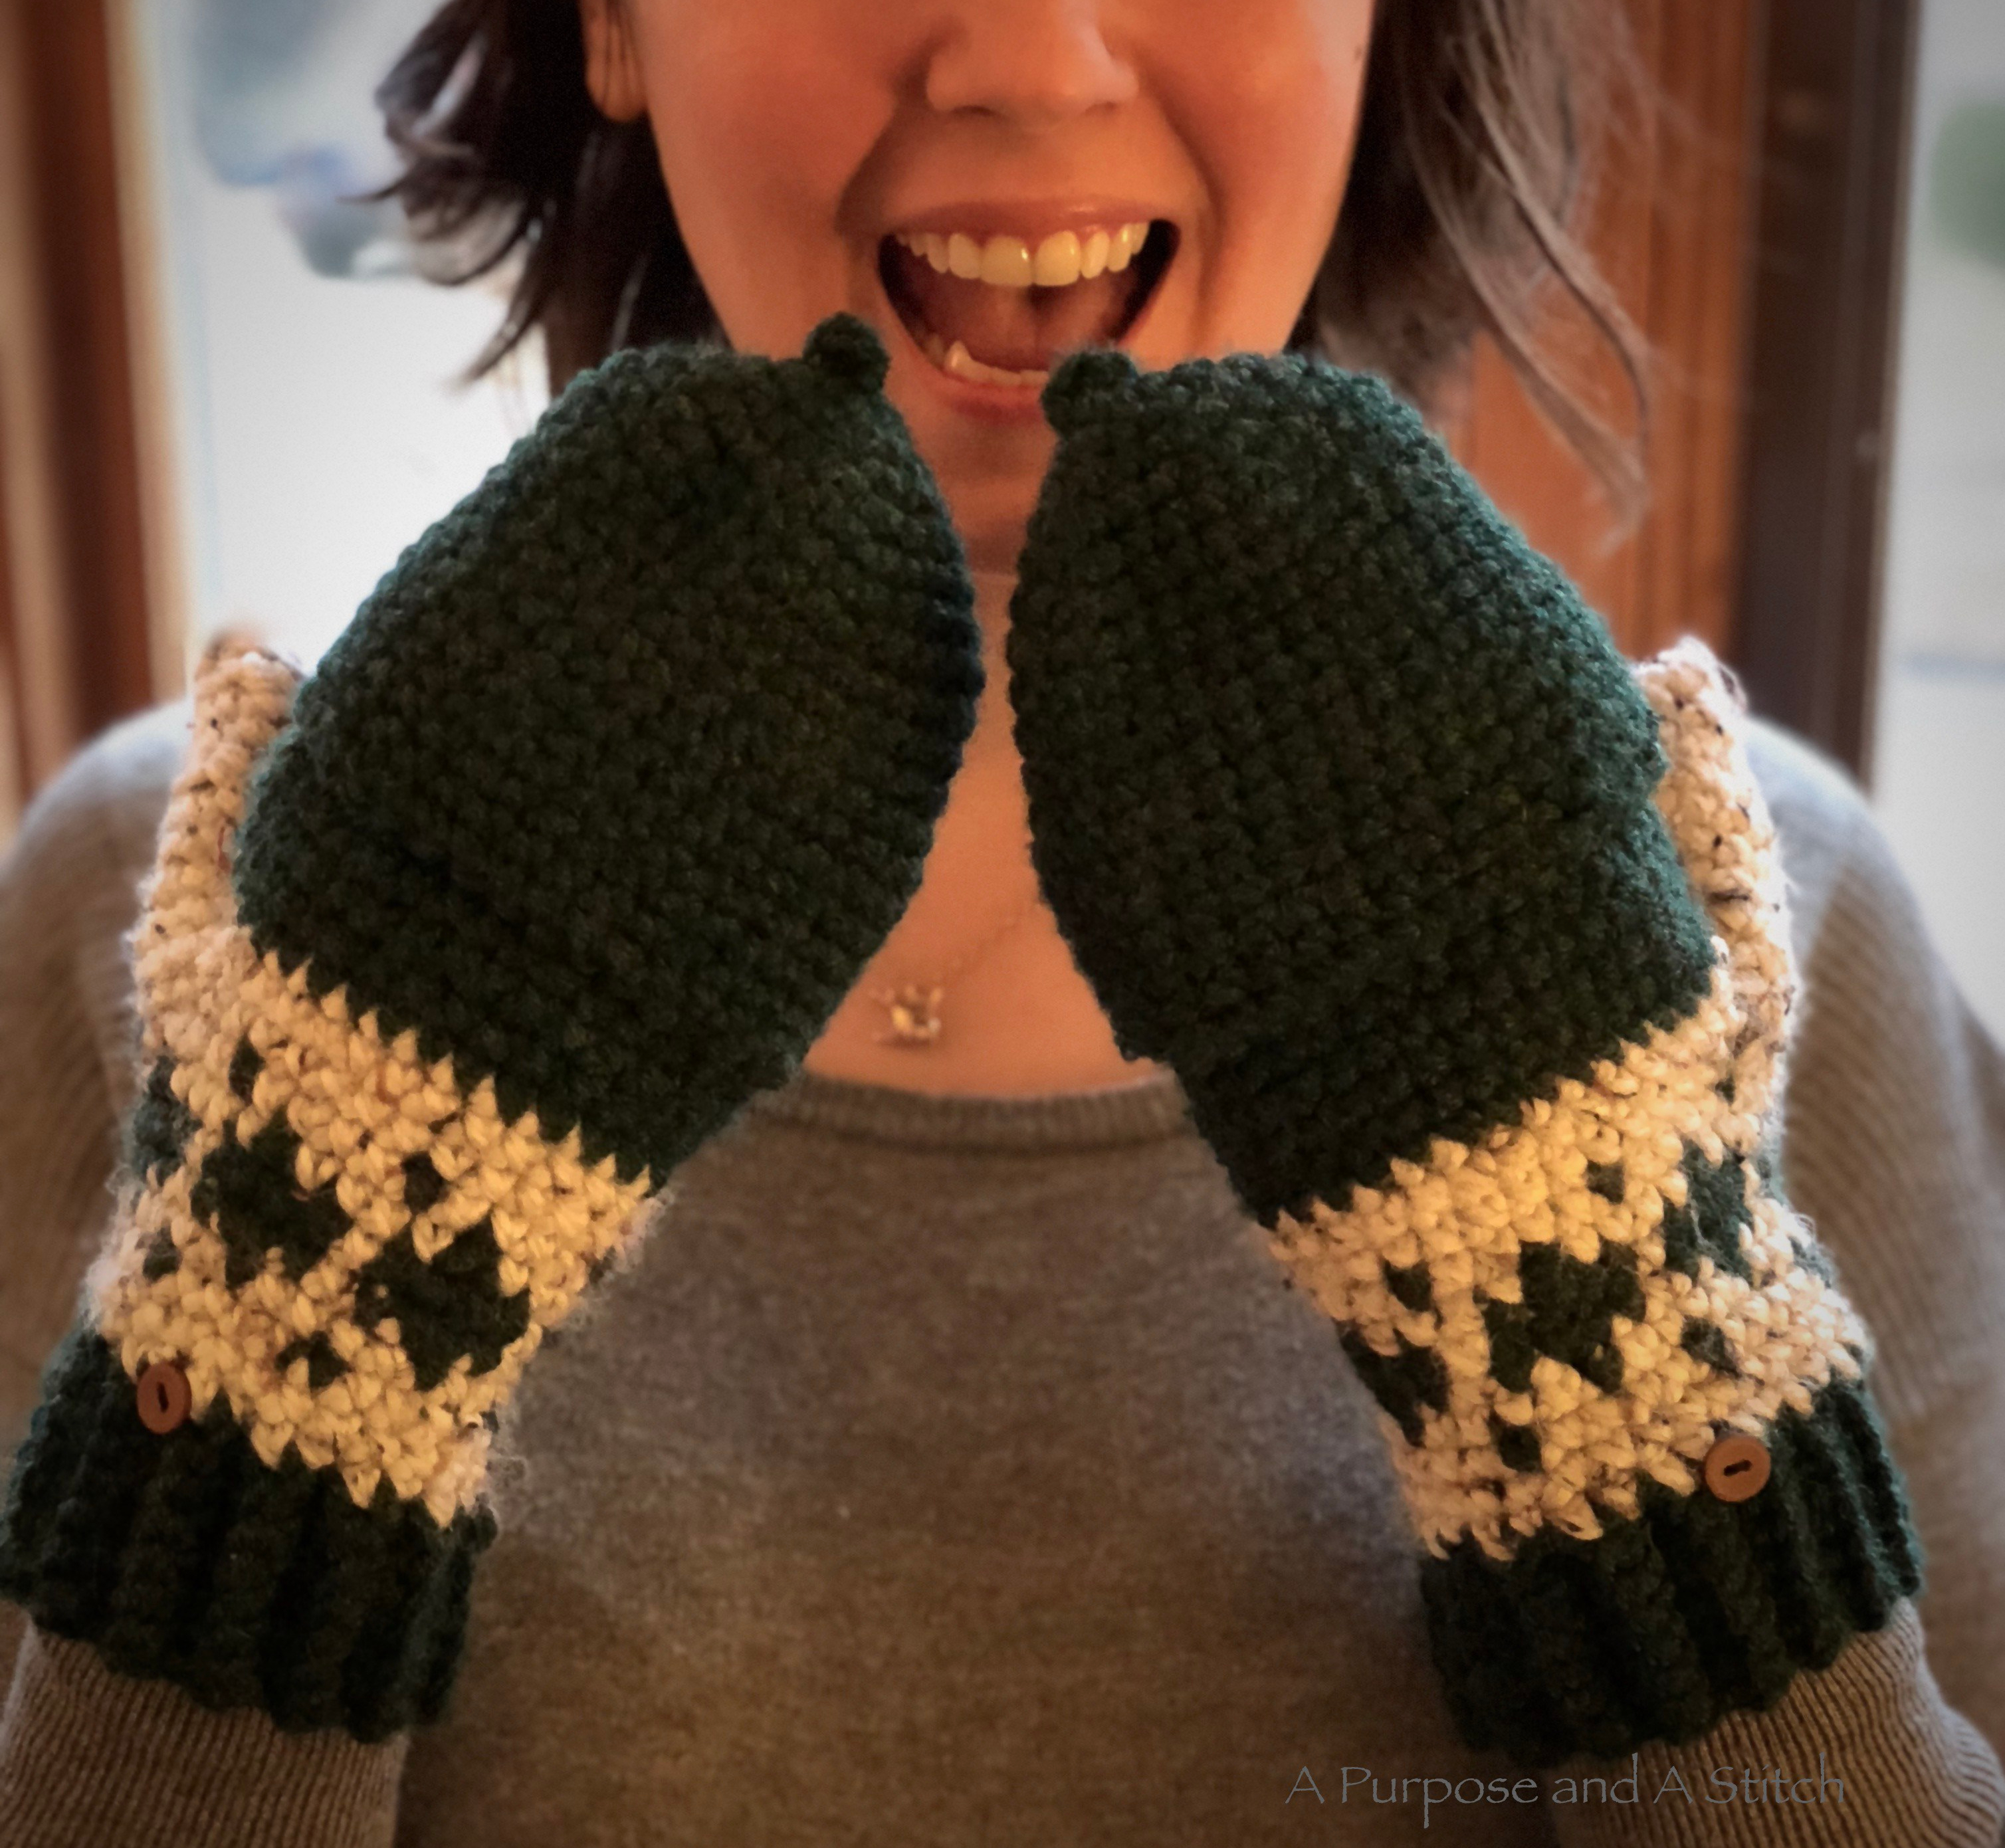
I love, love, LOVE glittens. You may be asking yourself, what the heck are glittens?


Simply put, glittens are a cross between gloves and mittens. They are fingerless gloves with a cap to keep your fingers warm when you want, but that can easily remove when you don’t. I’m always shocked when people ask me what they are, but it seems to be a very common question. The frequency of this question has actually lead me to wonder if they have a more official name, but I have always known them as “glittens”, so that’s what I’m sticking with. 🙂
I have been wearing glittens since high school and gone through a many a pair since then but have always wanted to make my own pair. My favorite kind are the chunky ones with cool designs, hence the pattern I have made for these ones.
The pattern on these Galway Girl Glittens are made using a tapestry crochet technique. This may seem daunting to you, but since I’m only using 2 colors for this pattern, it’s a lot easier then you might think.
Tapestry crochet is not a great Netflix technique, it does require some concentration, but so long as your are paying attention you can do it! I also over compensated for a lack of video tutorials with LOTS of pictures and instructions.
As previously stated, you will be using 2 different colors for this pattern. In this post and in the pattern, I will be referring to the green yarn as my primary color and the white yarn as my secondary color.
To start things out, you will be making a ribbing for the wrist by single crocheting in the back loops only for several rows, using your primary color.

Once you have the length you need, you will join the ends together, creating a ring.


From here, you will switch to your secondary color and single crochet around the top of the ribbing. Since there are no stitches to work into, you are just working into spacing trying to keep each single crochet evenly spaced apart.


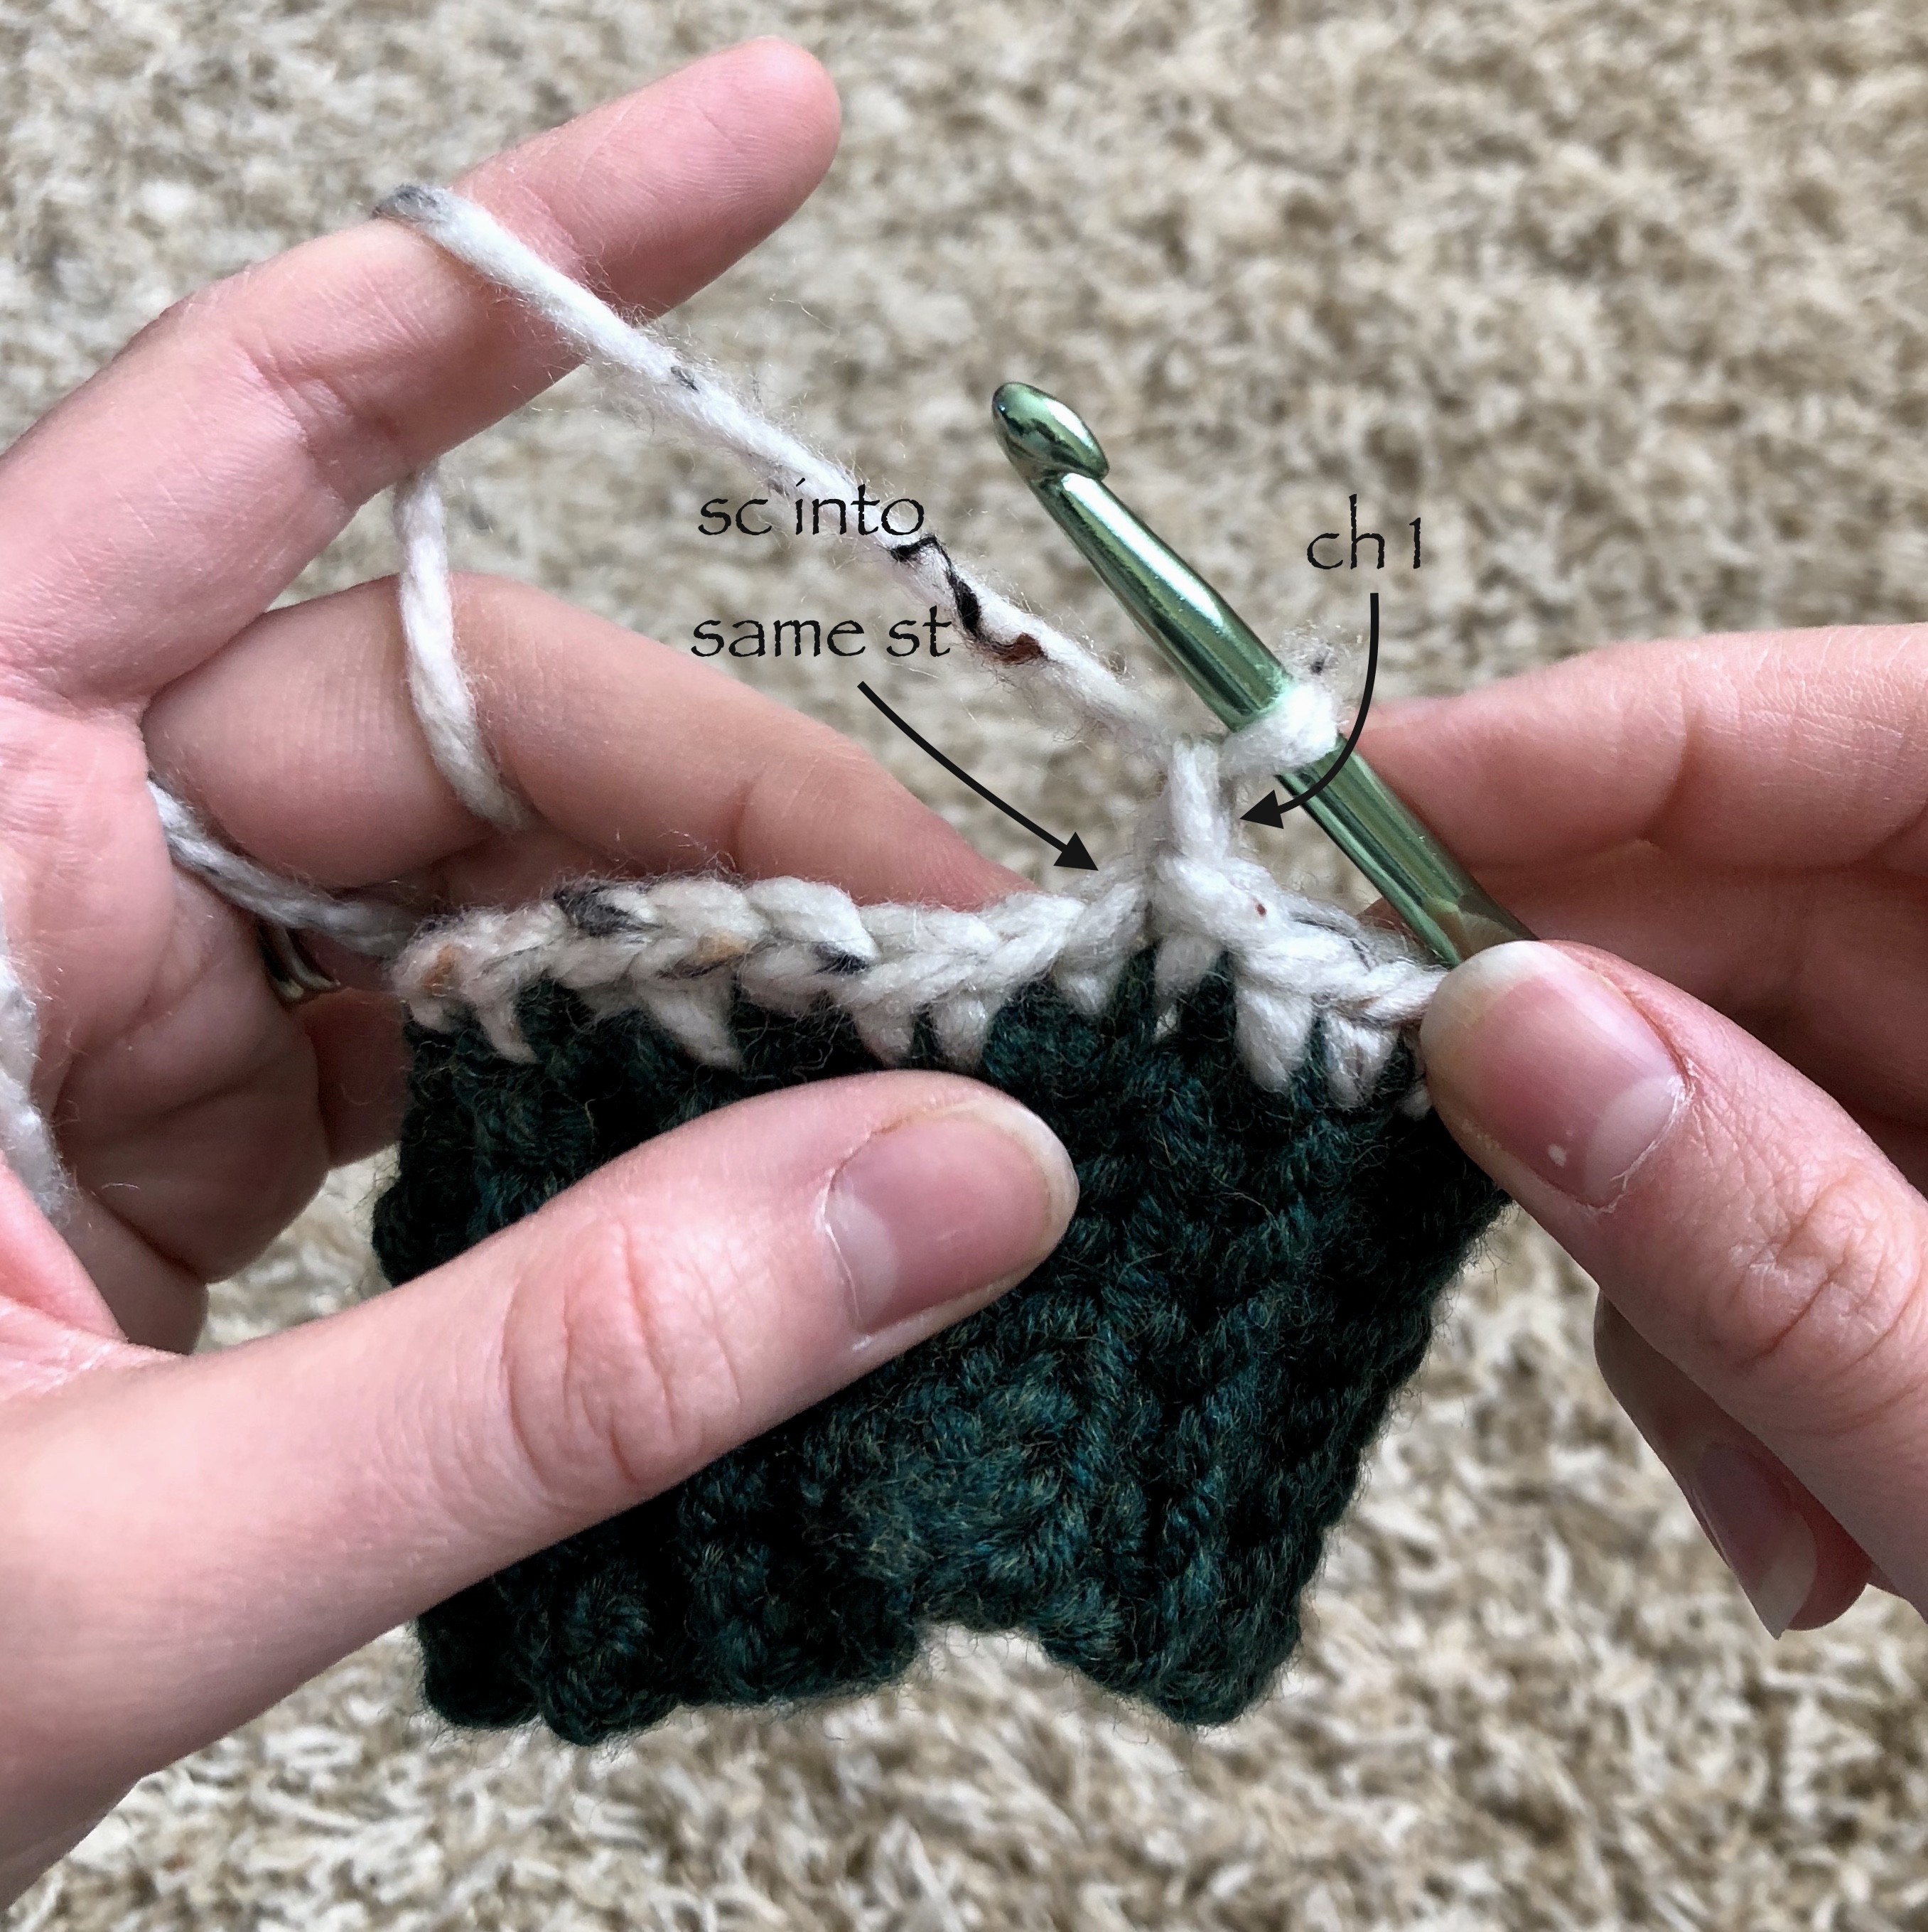
The key to making each round jogless is to finish each round with a slip stitch and to start each row with a chain one, followed by working your first single crochet into that same stitch. This is called a joined round and is often used when color changes are involved. This will become even more helpful on your first color change of the tapestry design.
Take care to not accidentally add in an extra stitch at the end of each round while using this method. There will look a stitch there from your slip stitch, this is a false stitch and will throw off your count if you work into it.
For the tapestry portion of the palm I followed the pattern shown below. You will notice that the pattern looks a little different then the completed garment. This is because tapestry crochet in the round has a natural shift (towards the right if you’re right handed, and towards the left if you’re left handed). I adjusted the original design to compensate for this. Here is the original design, as well as the compensated graphs for both right and left handed crocheters.

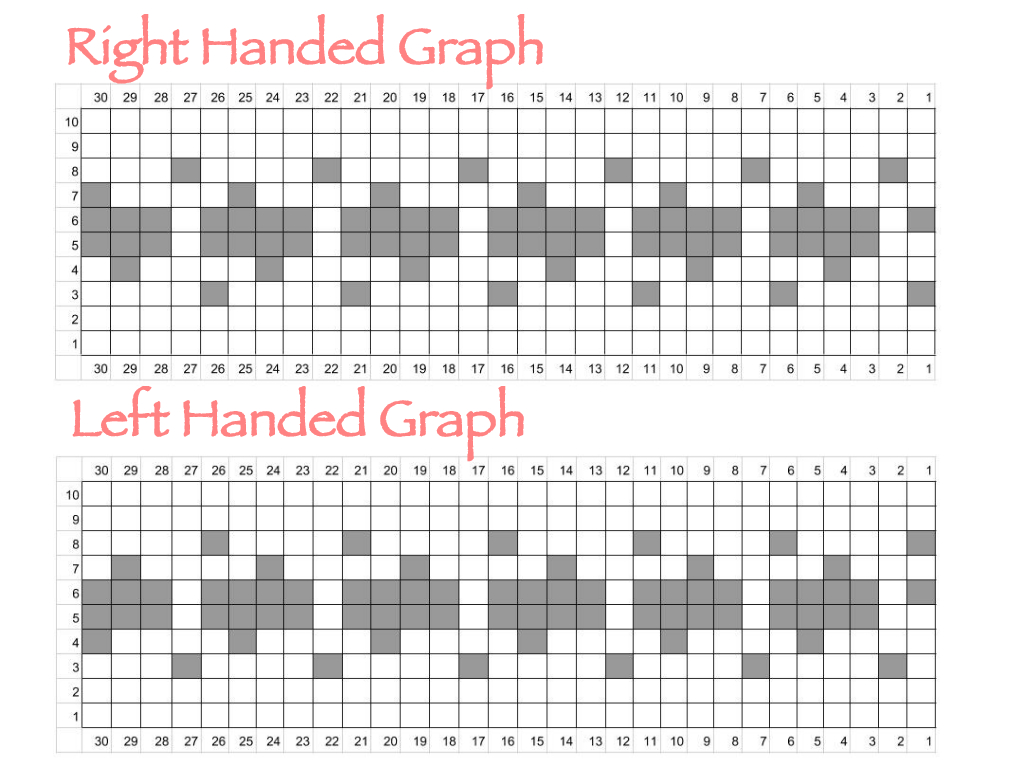
Pretty cool, huh?
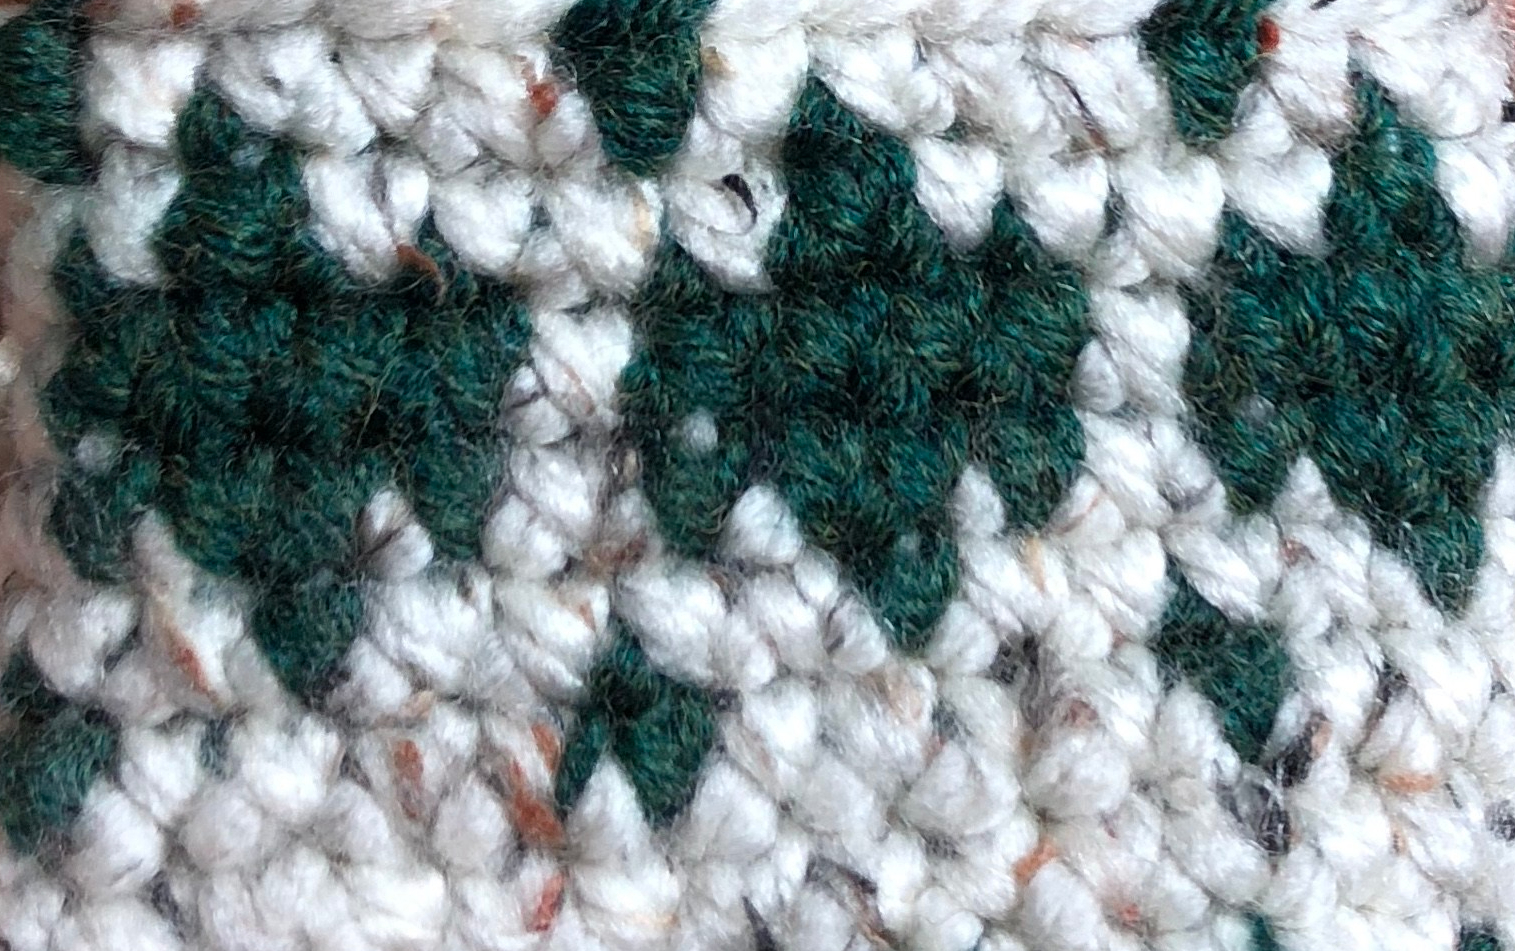
I worked the tapestry portions by crocheting around the secondary skein as I went (as opposed to working in a fair-isle fashion where it would be carried behind). In this picture I am switching to my primary color and you can see how I am working the secondary color into the stitch
 Here is another shot where you can see my primary color being carried and my secondary color working around it.

When switching between colors, you will use the same technique as you do to switch colors seamlessly. What that means is that you will begin switching colors in the stitch prior to the color change. So think of a normal single crochet. You insert your hook, yarn over, pull up (2 loops on hook), then yarn over and pull through both loops on your hook. To switch seamlessly, for your last yarn over, you will use the color you are switching to and pull that up.
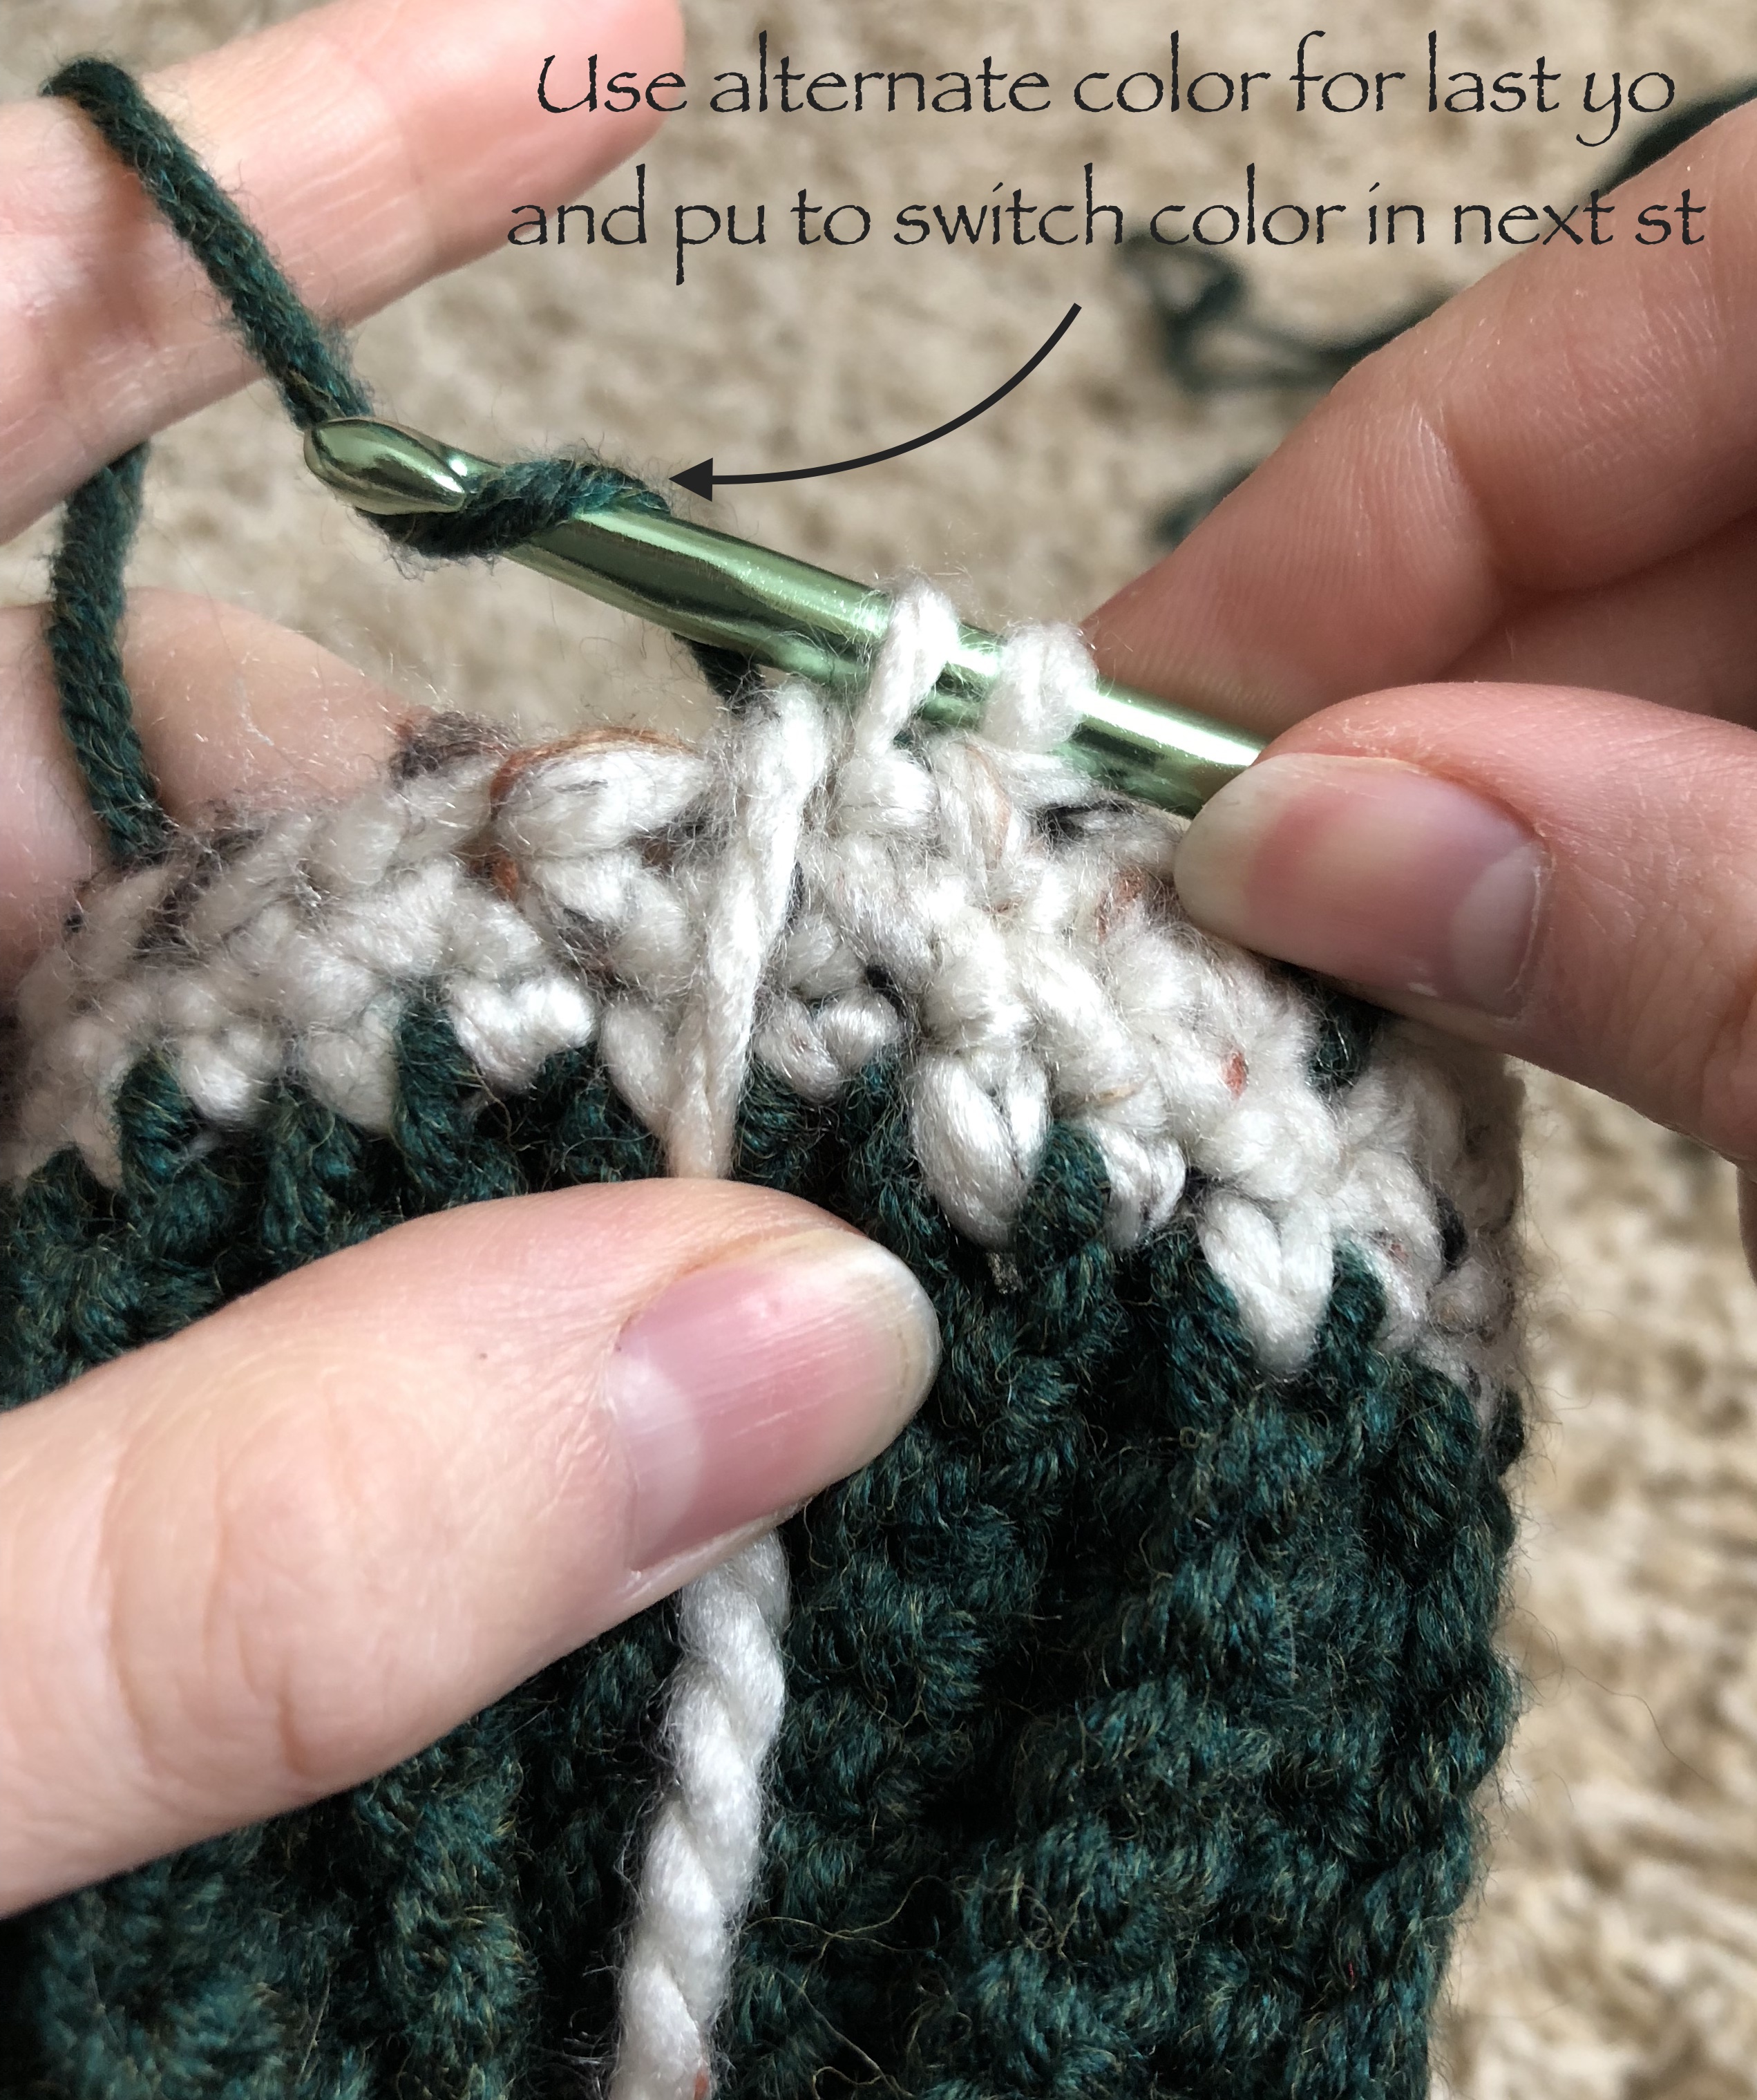
You will also notice in this picture, that I have dropped the secondary color to the front while switching colors. The biggest tip I can give for not tangling up the 2 skeins of yarn is to keep one in the front of your project, and one behind.
For this project, I kept my secondary yarn (the white) to the front, and my primary color (green) towards the back. So every time I switched to white, I would drop my green yarn towards the back, and every time I switched to green, I would drop my white yarn to the front. This is just applied to your last yarn over in the stitch proceeding the color change. After this you will bring your front yarn back to be carried into each stitch as normal.
Here is how a single stitch color change will look


It should also be noted that if you are right handed, like myself, your 3rd round (6th and 8th if you are left handed) will be starting with a stitch in your primary color. You will end your previous round in your secondary color, and slip stitch with that color. When you chain 1, you will switch to your primary to set up for the next stitch.
Your 3rd, 4th, 7th and 8th rounds will consist of rounds that have single primary color stitches.

In the 5th and 6th rounds you will be working 4 primary color stitches in a row with just one secondary stitch in between.


Due to the layout of the design, you will be carrying the last stitch of the image of round 5 into round 6, as outlined below.

Since the last stitch of the image is already worked in round 6, you will skip the last primary color stitch of round 7. To do this you will use your secondary color as your chain 1 and sc into the 1st st of round 7.


Round 8 is your last color changing round, so before starting round 9, I recommend dropping your primary color. You can either carry it into the 1st stitches of round 9 and 10 for easy pick up in round 11, or you can cut it and work the tail into the first few stitches of round 9, securing it in place.
Round 9 is where you will be adding your thumb hole. To do this you will single crochet 3 for the left hand and 20 for the right, followed by skipping 7 sts and chaining 7, rejoining and then finishing the round.


Once you finish your thumb hole and sc around in your secondary color once more, you will switch back to your primary color for a few rounds. Again you can either carry your secondary color yarn up into each first stitch, or you can cut it off and rejoin later.
To prepare for working the fingers, I switched back to the secondary yarn for one round then fastened off. I personally liked having the fingers in the secondary color a little more, but feel free to work your fingers in your primary color if you prefer!
You will be working each finger with a new strand of yarn (sorry guys!). I highly recommend using stitch markers to find the starting place for each finger before beginning, just to ensure proper placement of each starting stitch.

Once I got my first single crochet in, I left the stitch marker in the loop on the opposite end of where I started so I would also know where to stop crocheting for that finger.
Each finger will be worked like a tube upward with a few chain stitches to separate each one. Below you will find a quick step-by-step for each finger worked on the right hand.


Now your fingers are all complete! YAY!

It’s finally time to work your thumb. The pattern is similar to your fingers, but you will slowly be decreasing as you work up finishing by completely enclosing your thumb.
To start, you will pick up a stitch towards the center of the back side of your thumb hole and work single crochets around the thumb opening. Finish by working a few more rounds, decreasing as you go.


Once your thumb is complete, you only have the Finger Cap to complete and then it’s assembly time! Wahoo!

For the Finger Cap, you will begin with a magic ring, slowly increasing as you go for a few rounds.


From there it is a simple matter of single crocheting around to achieve the length needed. After getting the height and width needed to completely enclose your fingers, you will single crochet 1 row on the back portion of the cap only. You will use this extra length for stitching your cap in place.


The very last step is to add the button hole. This is a simple matter of making a small chain and tying it around the very top of your Finger Cap. Easy Peasy Lemon Squeezy!


Congratulations! You have successfully made it to assembly!
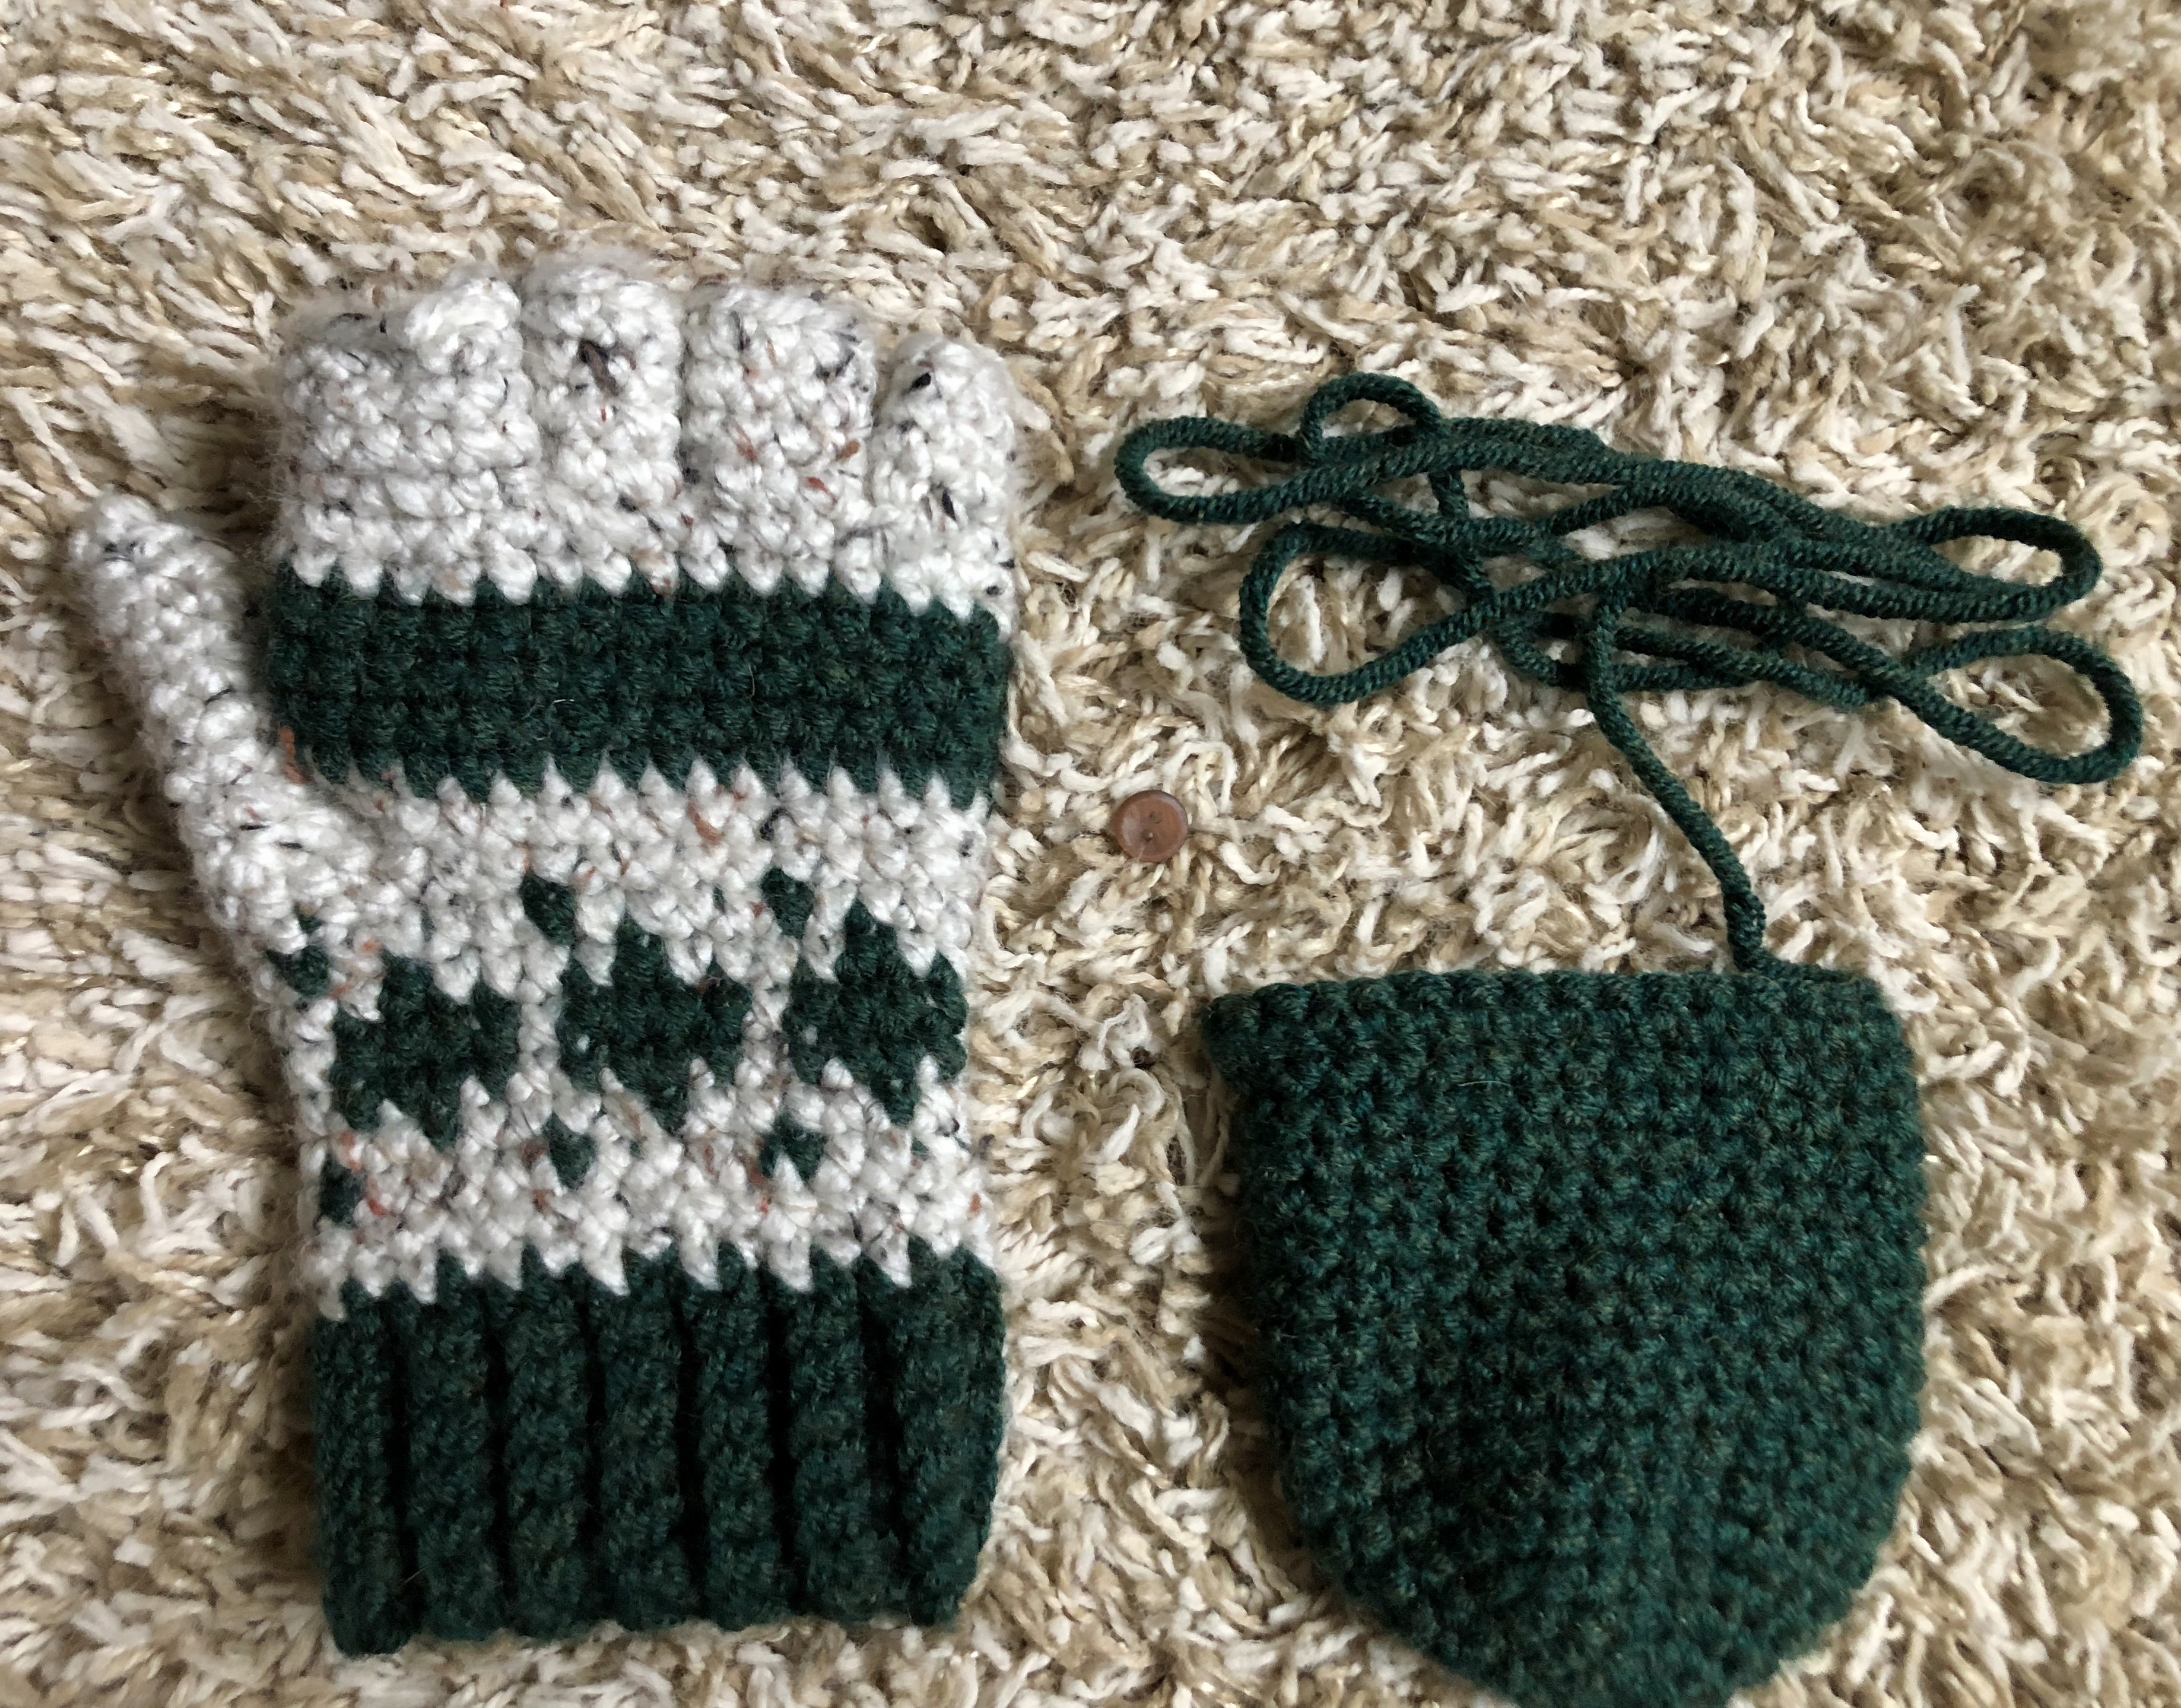
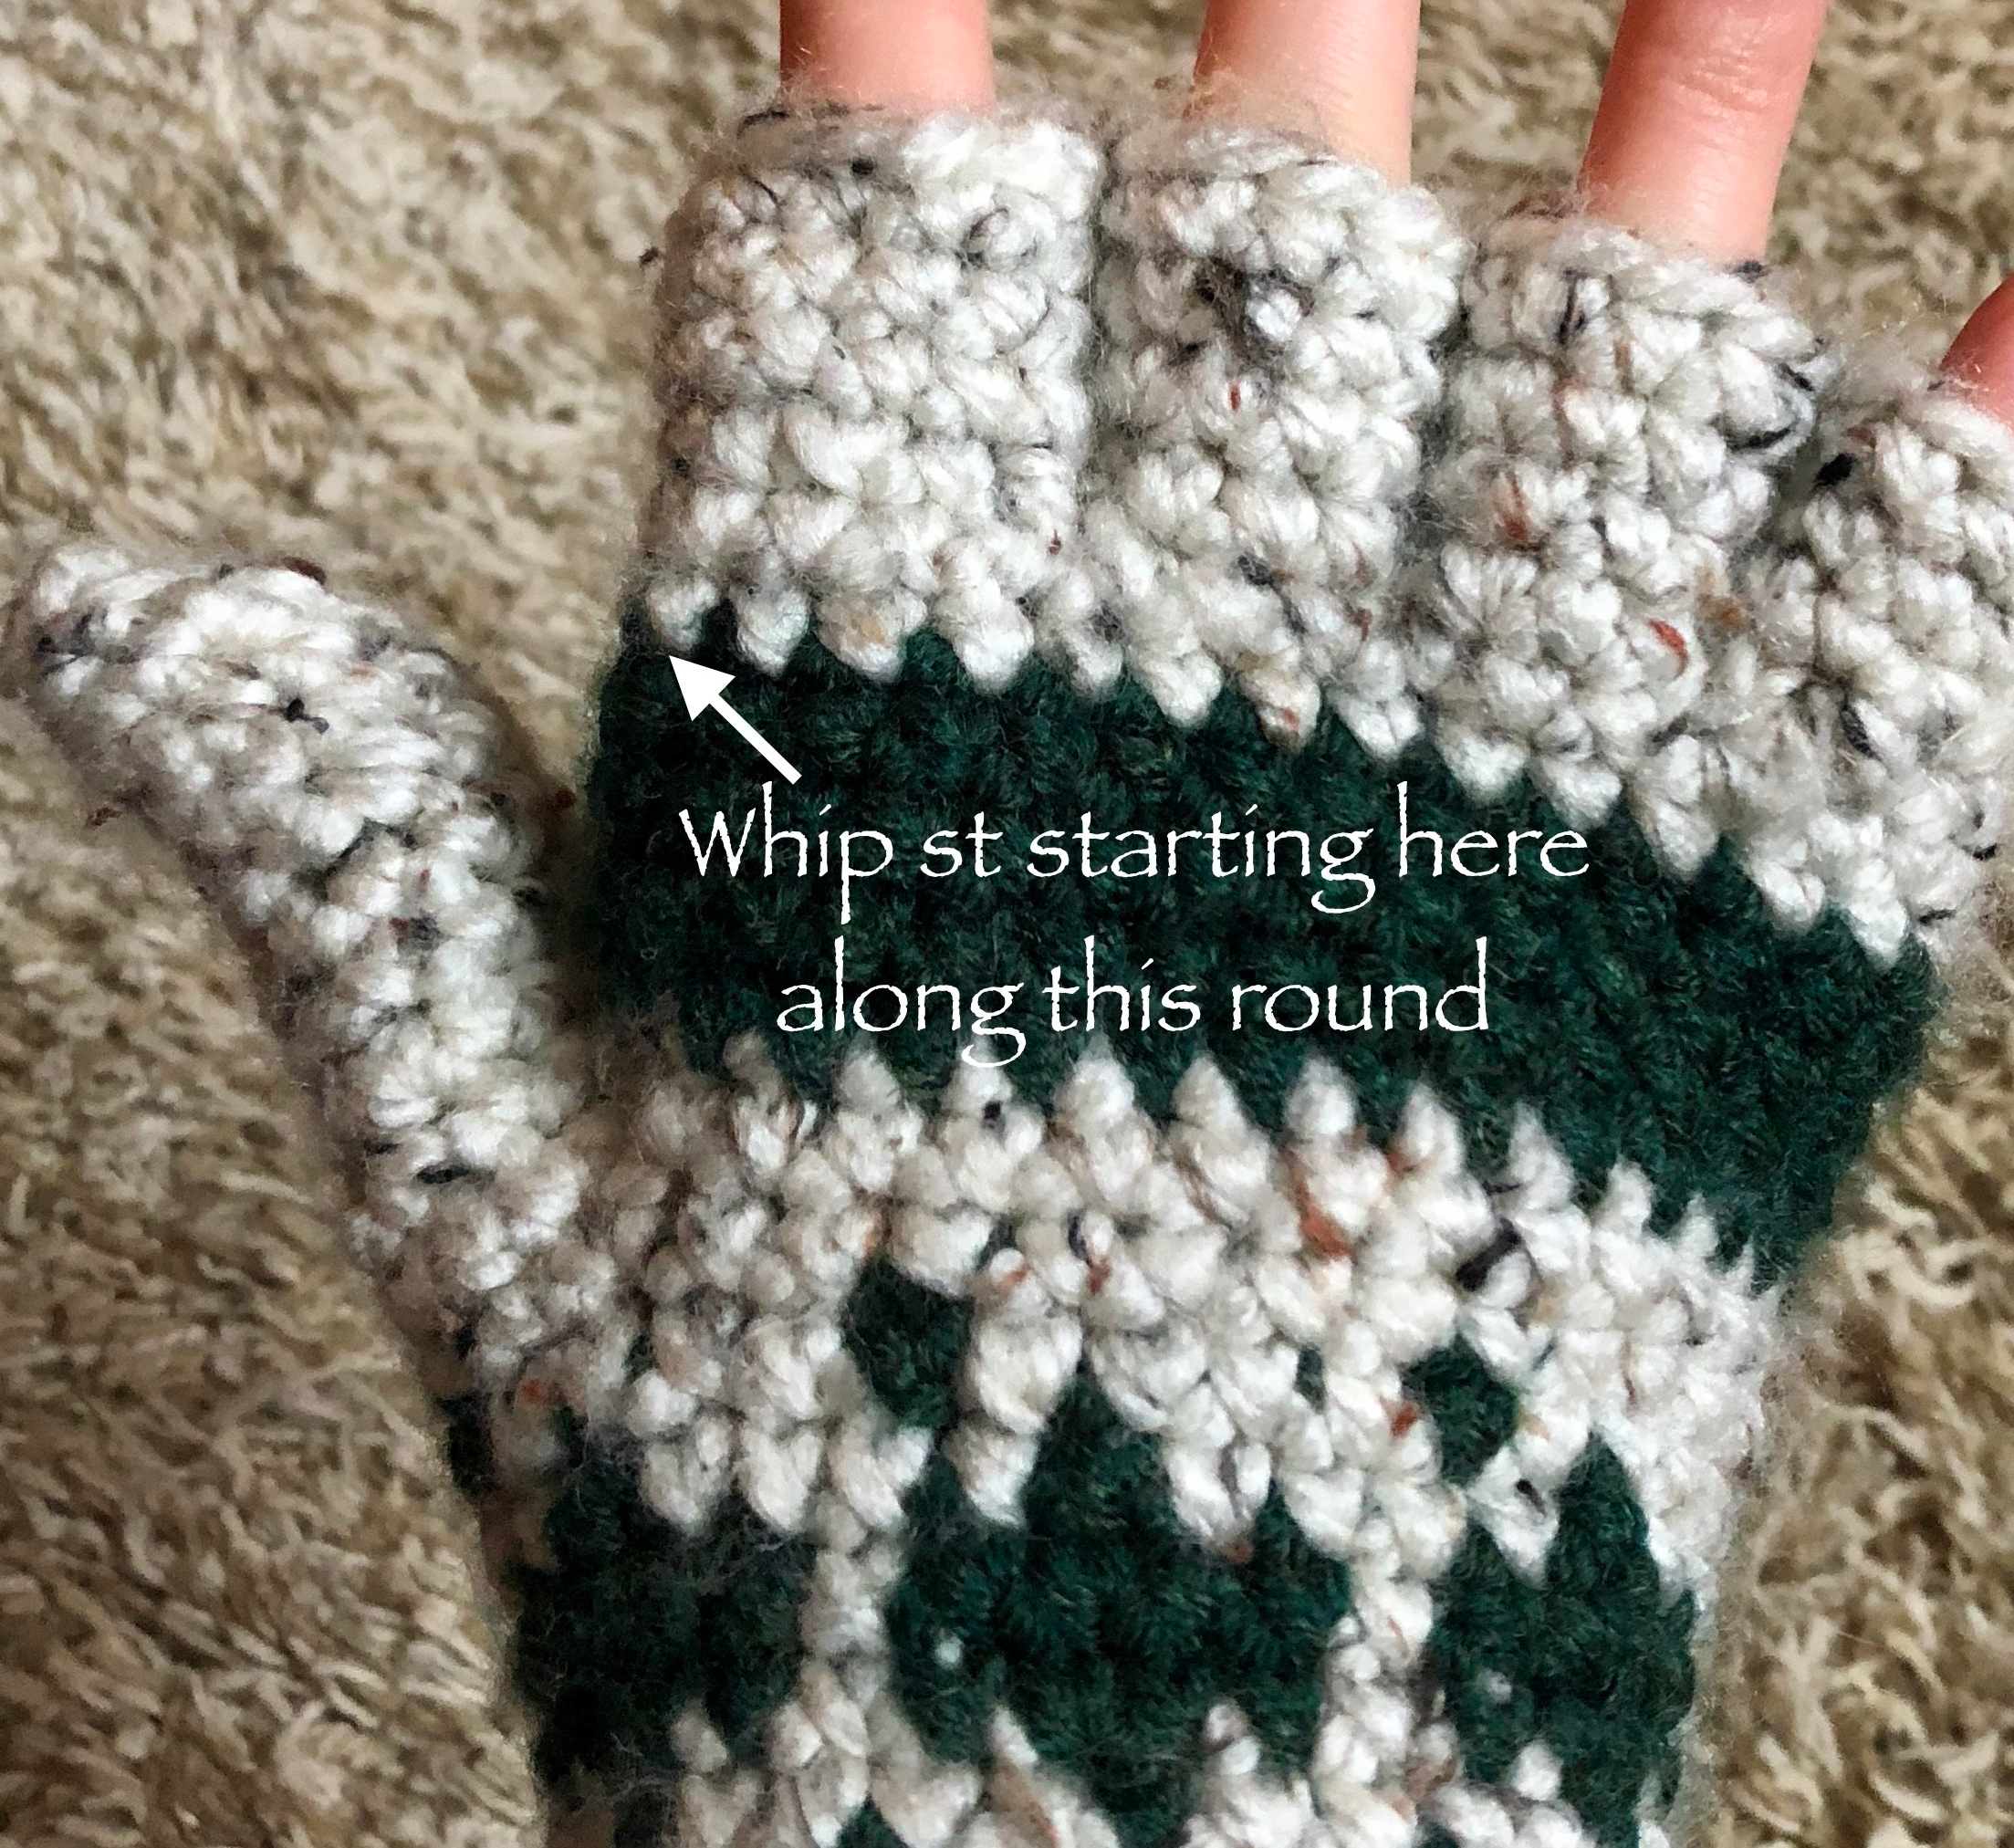
The assembly is super easy, as all you need to do is sew on the Finger Cap and a button. You will want to whip stitch the longer side of the cap into the last primary round of the palm section on the front of your glitten, making sure that the finger cap goes across all 4 fingers (excluding your thumb).
You will want to sew your button towards the very top of your ribbing as close to the center as possible on the back side of your glittens.

WHEW! I know that was a lot! At least it felt like a lot writing it all, but I hope that it was all helpful to your understanding of how I made these wonderfully soft and beautiful Galway Girl Glittens!
Everywhere I’ve lived these are called convertible mittens; very popular with delivery people and photographers, like my dad. 😉
That name makes so much sense! I love using them while I’m photographing outside too! I should make a male size 🤔 my husband is also a big fan of them. 😊