Bryales Cardigan- Free Pattern
About The Design
First new pattern in 5 months- who dis?!?
Yeah, sorry about that y’all! I took a few months off of designing to focus on updating our website, growing our yarn shop (new update also drops there today, btw 😉) and raising 3 littles then thow the first summer after COVID restrictions lifted, the start of homeschooling our eldest, a run in with Hand Foot Mouth Disease and yet another COVID crisis in the mix and I’m excited to have anything to share with y’all let alone a new garment pattern!
Can I get a “yippie!” [all the peeps say “Yippie”]

I started designing this pattern late last year knowing full well that I wanted to make a second sample during testing and that I had all this other stuff planned for the start of the year… I finished that second sample 2 days ago, just for the record. 😂.
Actually, that’s false. I ORIGINALLY started designing this pattern mid 2019, put it on time out about 4 times over and finally hammered through all the details starting late last year. I’ve always loved the look of the moss stitch, especially with what it can do when using multiple colors- but wasn’t quite sure how to get the gauge to match a raglan style design (which you may or may not know is my ultimate favorite garment style).
All that to say- there has been a lot of love, time, dedication and effort put into this pattern, and I do hope you love it as much as I do!
About The Fit

If you follow along on Instagram– then you may have seen me working on the Dotty Cardigan by Stephanie over at All About Ami. It’s an oversized knitted cardigan and my first ever knit garment that is ALLLLLMOST completed.
Stephanie is my biggest #bloggergoals and I love everything she designs, so it should come as no surprise that I felt a strong desire to have this cardigan mimic the fit of her Dotty Cardigan.
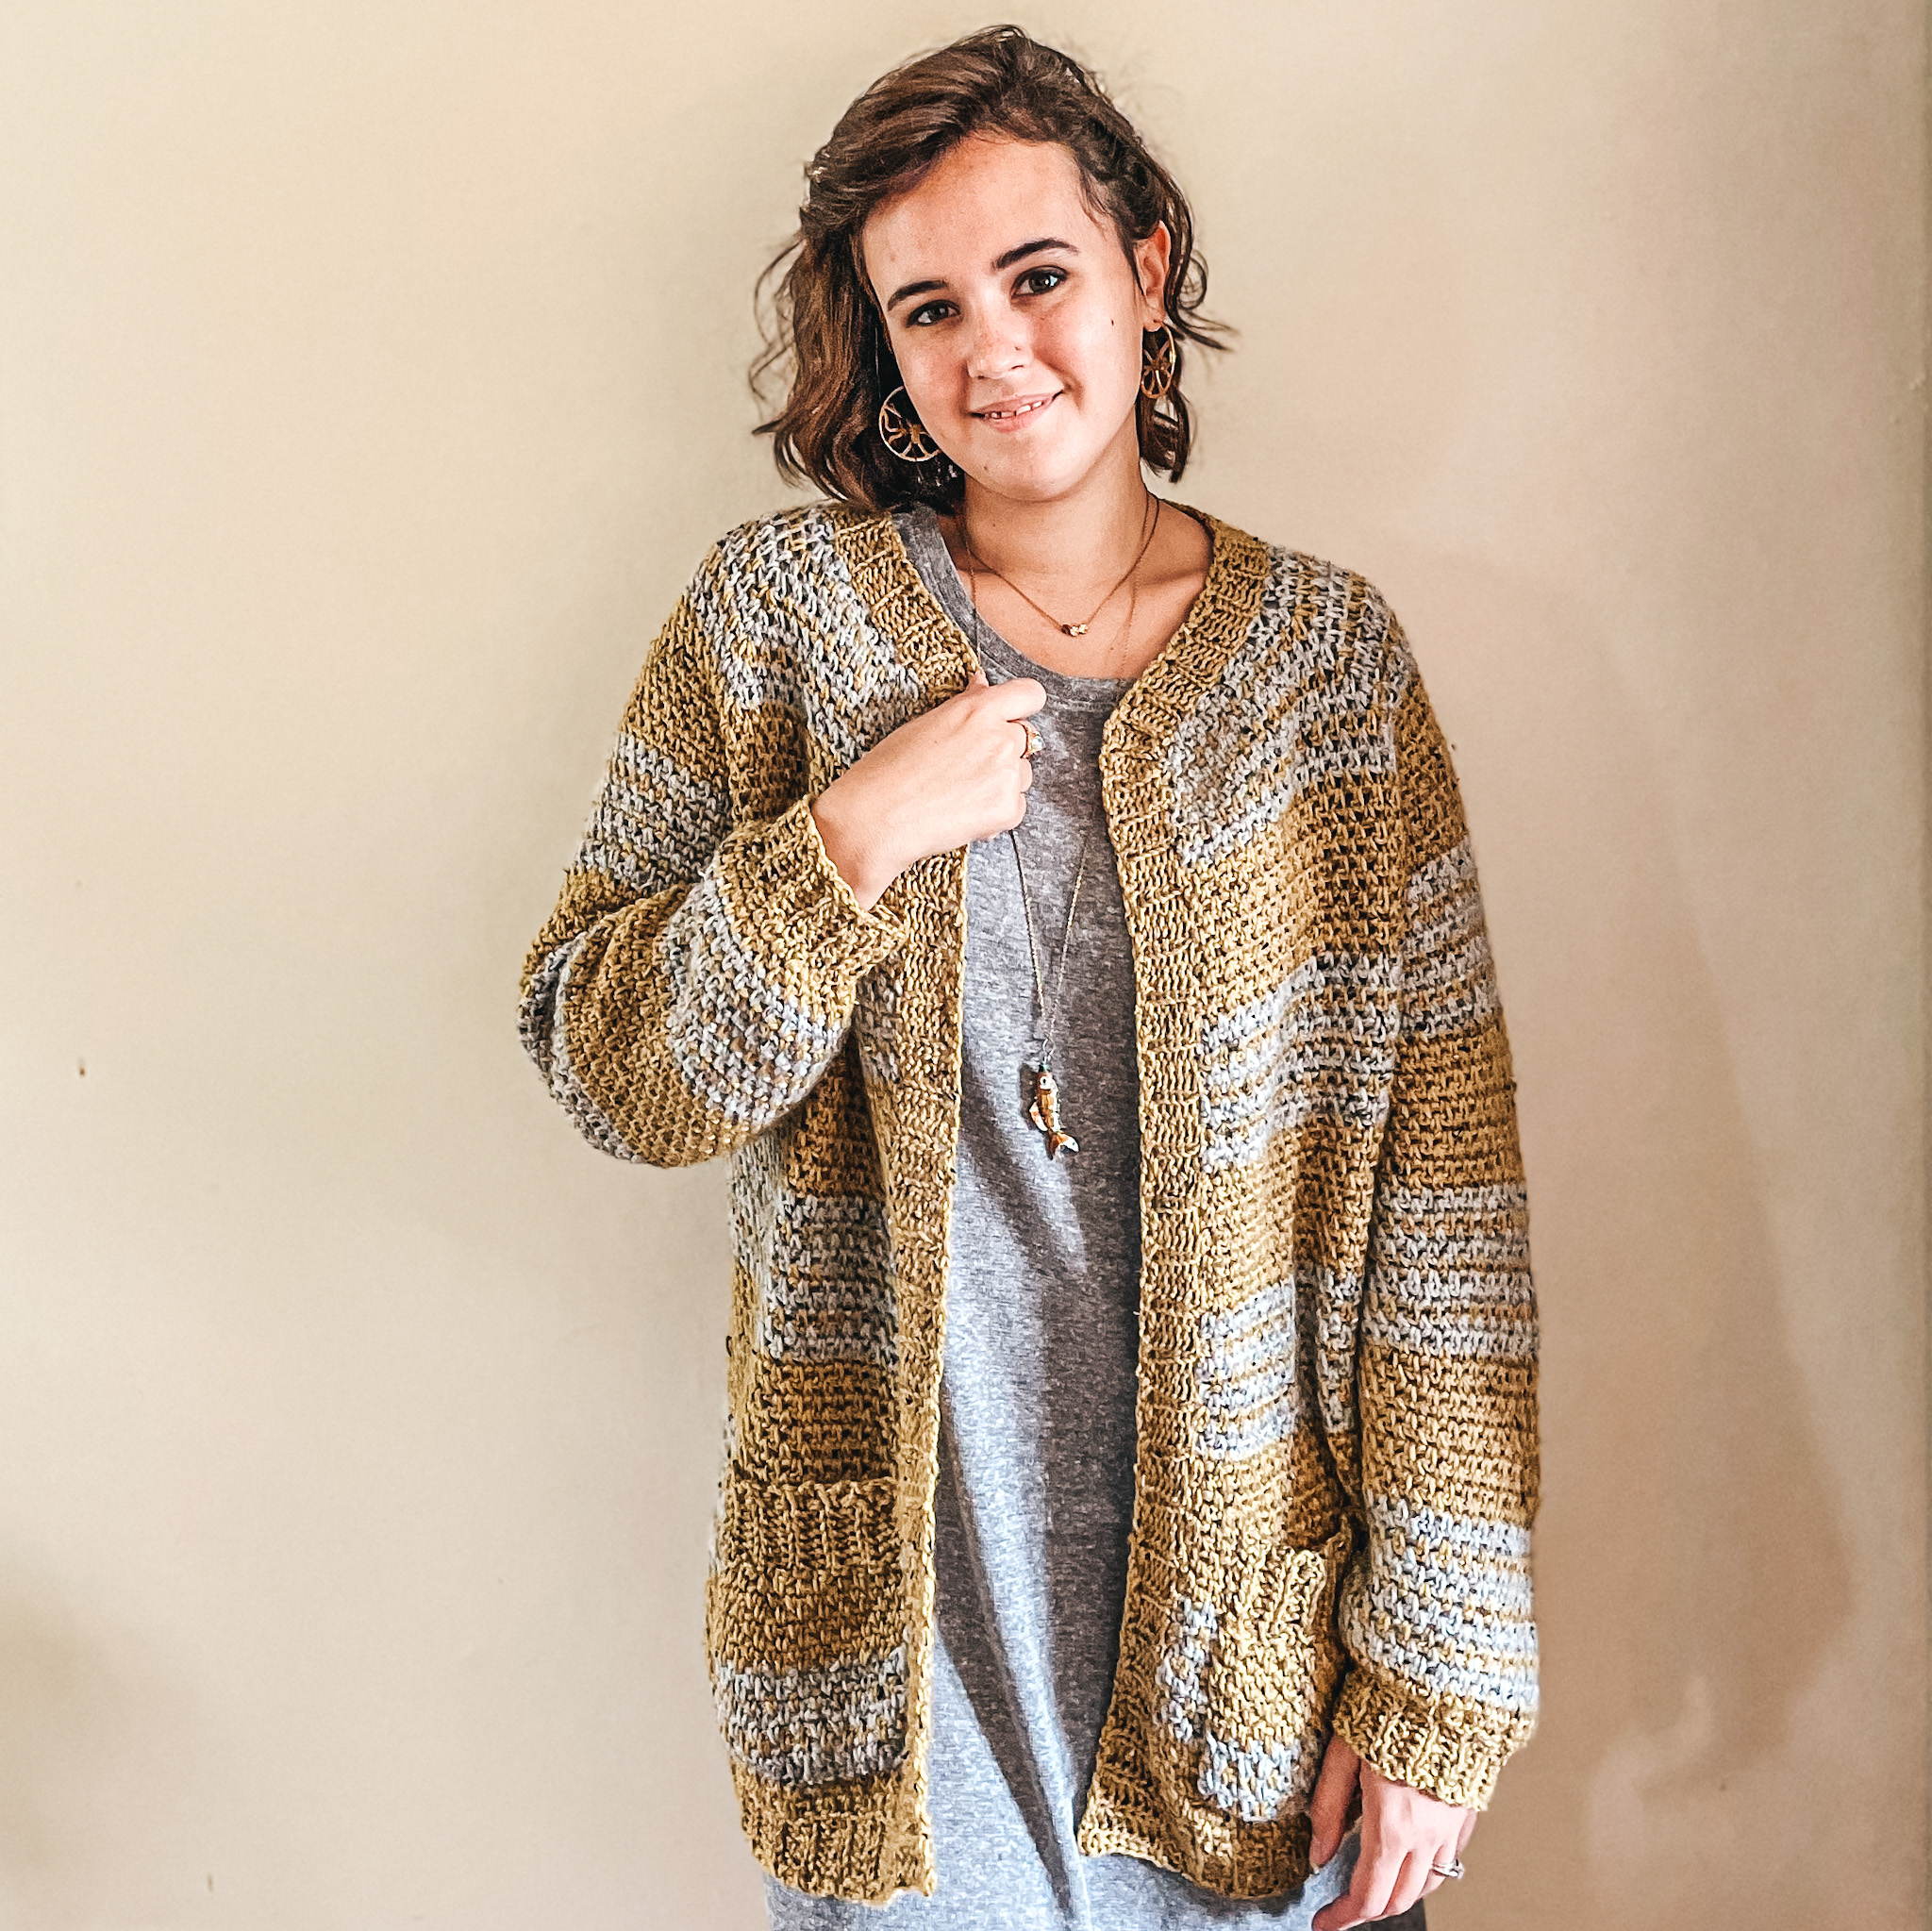
For that purpose, this has a whole lot of positive ease, oversized sleeves and some nice pockets for extra functionality.
If you’re looking for something a little more form fitting, I would recommend sizing down- but make sure you check the size chart before you begin to determine which size is best for you! I’m 5’7 with a 39″ bust so I usually fall between a medium and large. For the cardigan on the left I am wearing a small, the cardigan on the right is the medium.


To determine the size with the best intended fit you’ll want to take your bust measurement and add 4-7″ and find the size that has the closest bust to that- that’s the size you’ll want to make.
(As a little aside, this will be our last garment pattern with standard US size indicators. Moving forward, I will be listing sizes as numbers to try and depart with some of those negative connotations that can accompany size names.)
Another note on the sizing- since this is a top down style garment- the sleeve and body length are customizable. I actually had a few testers go for a more warm season feel with short or half length sleeves and they turned out fantastic!
About The Pattern
Which brings me to my next point- this pattern is very versatile and I will not be honked off or offended in the least if you want to mix things up when you make yours!
Though initially designed to be a cold winter, color work, oversized garment- a few small changes can give you a totally different feel while still resulting with a fantastic finished piece.

For a spring/ summer cardigan- simply work with a DK or drapier worsted and go with short sleeves. (Just note that the recommended yarn yardage is for long sleeve, so you will not need as much for short sleeve)
Mix up the colors- mix up the color combination! Use 5 colors for your CC like I did in my first sample, or stick with just 1. For more color combination ideas, make sure you check out our instagram page to see all the tester versions!
Go with a more form fitting by sizing down or go extra oversized and size up! The sky is the limit y’all- go hog wild!
The last note about this pattern is that it is an Advanced-Beginner/ Intermediate level pattern. If you have never made a garment before- I’m hoping I’ve given you enough tools to make this for yourself, but please know that raglans are trickier in nature and I complicated that by adding some color work, so you this may take a minute to figure out. That being said, I had several testers make this who had never made a garment before, and I don’t think a single sweater turned out bad. They all looked amazing!
About The Yarn

Part of the reason I really wanted to make a second sample was because the yarn I had purchased back in 2019 when I originally started designing this had since been discontinued. 😫
I used Caron x Pantone Bamboo and it was such a disappointment when they got rid of that beautifully colored and drapey yarn! But alas- it happens to even the best of yarns, so I turned to one of my new favorite yarn companies, WeCrochet, for my second sample.

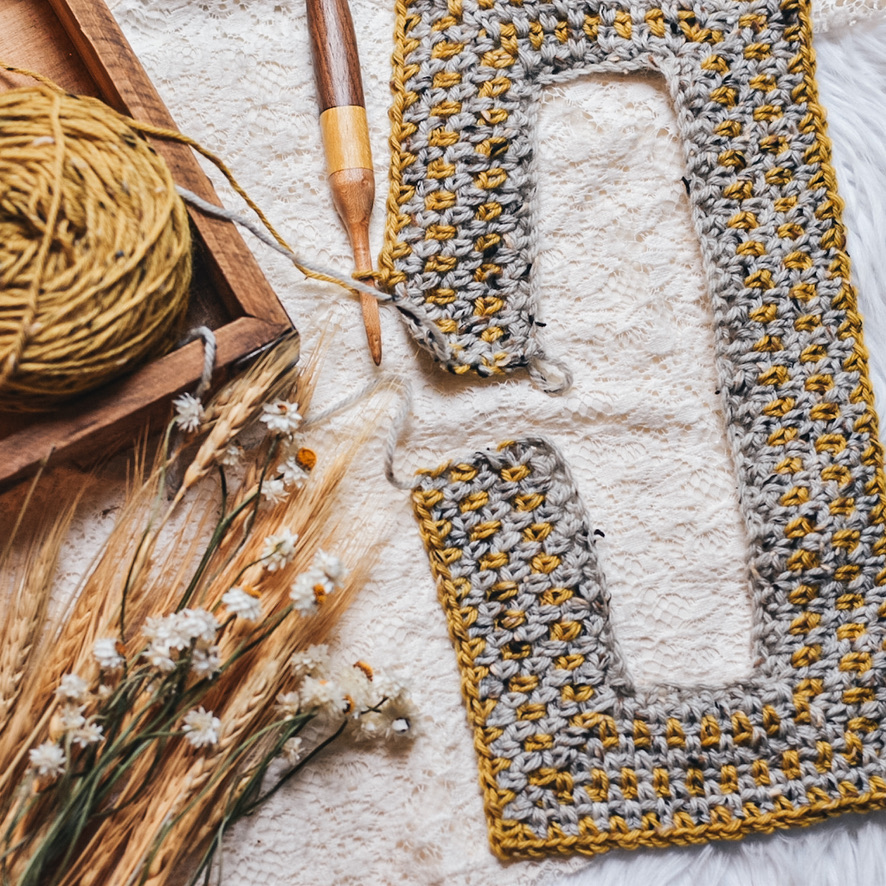
On the second go I used WeCrochet’s/ Knitpick’s Wool of the Andes Tweed in down heather and olive heather which resulted in a much warmer, but still super drapey (thank you moss stitch!) cardigan.

Both yarns are made in 100% natural fiber which made them ideal for blocking and thus ideal for this cardigan. If you’re looking for a good yarn substitution from the wool recommneded- I highly recommend going with a wool alternative natural yarn like cotton, bamboo or alpaca. Blocking is imperative for this garment, and synthetic yarns (like acrylic and nylon) wont block as well as a natural fiber will.
which brings me to my last point…
Some Additional Notes
There were 3 main things my testers commented on throughout the test of this cardigan and I want to quickly go over those in a little more detail (than I did in the pattern) here.
- The color work will seem confusing and overwhelming- but I promise it’s not. I would always rather over explain something to answer all questions up front than under explain something for the sake of simplicity. But if you’re like me- all those notes and explanations can cause you to over-think things and lead to confusion. I have gone in to probably TOO much information about how the color work is done in this pattern, but if you read through the entirety of the pattern before you begin- you should be good. Rather than writing out the exact color changes for each of the 8 sizes this was graded for- I have given you a color work pattern to follow over the course of this whole pattern. I have also started the working pattern out following those color change indicators to help you get the hang of it. When you split the yoke- I will omit the color changing indicators in the actual working pattern and refer you to follow the color work pattern. Since every size splits at a different row on the pattern, every size will split at a different row of the color work pattern. Do you get what I’m saying? Have I gone and over explained myself again? 🤦🏻♀️ If all else fails, just refer to the pictures of my cardigan to see how the color work looks, that should help. In whole my testers said that after they got the hang of it, and reread the notes- the color work pattern was fine and much easier to do than originally expected.
- The ribbing up the front is attached to a total of 4 rows of the body of the cardigan per 2 rows of the ribbing. Jigga what? I’m sure that makes NO sense right now- but when you start adding the ribbing as you go to the body of your cardigan- come back here and reread that. 😉 Adding the ribbing as you go created 2 problems. The first is that the front opening is added to rows instead of to the stitches. But as long as you make sure to work over enough rows, it won’t be an issue. Pretty much if your ribbing looks too long and bulky in the front- you worked too many rows of ribbing. The second is that it can puff up the corner spots because it’s tighter ribbing. This is remedied 3 ways. The first is by working more ribbing rows into the top two corners where the collar meet the front opening (you’ll see pictures of that below). The second is by blocking your finished garment and the third is time. All ribbing stretches with time. I have yet to figure out a ribbing that doesn’t- so I try to prepare a head of time for this when writing patterns.
- The sleeves are oversized and can be annoying to some. Most of the testers appreciated and enjoyed the extra roomy sleeves, but if you’re going long sleeve and want it to be more fitted- simply start the decrease process a little earlier on and work a few more decrease rounds as you go.
- Did I say 3 main things? I meant 4. 😜 I actually didn’t have any testers comment on this- but I found it an issue after blocking my second sample. Low key- I’ve never blocked a whole garment before. Sure, I’ve blocked a pocket or quickly steamed blocked for pictures. But never really needed to do a good wet block…plus I’m good ole fashioned lazy. But I should have taken into account (especially with 100% wool) that that baby is going to grow. Which is fantastic for the body- but not so great on the sleeves. My sleeves grew almost 3″ each from blocking, so keep that in mind when determining the length of your sleeves as you work.
Phew, thanks for bearing with me on that guys! Hope those extra notes are helpful if my 2 pages worth of notes in the pattern don’t end up being enough! LOL!

Purchase The Inexpensive PDF
Below you will find the full written pattern (with some step-by-step pictures). However, if you prefer PDF version with all the same pictures and more comprehensive sizing instructions- you can purchase that in our Etsy shop here or Ravelry shop here.
This PDF comes pre-color coded for easier follow along with the multiple sizes, it’s ad-free and printable! But probably best of all- 50% of all pattern sales are donated to eradicating modern day slavery.
The Free Pattern
| What You Need |
|
| Approximate Completed Measurements |
 |
| Gauge Used |
| 9 sc stitches of gauge pattern= 4”
16 rows of gauge pattern= 4” |
| Gauge Pattern |
| Row 1: ch any even number. Starting in 4th ch from hook, *sc, ch 1, sk 1*, repeat from * to * across, sc in last, turn.
Row 2: Ch 2, turn, *sc in first ch-1 sp, ch 1, sk 1*, repeat from * to * across, sc in ch-2 sp, turn.
Repeat 2 row for pattern.
*See bullet 2 in the pattern notes section for an alternate option to making a gauge swatch |
| Abbreviations Used |
| blo= back loop only
CC= contrasting color (I used multiple) ch= chain Ch-1 sp= chain 1 space Ch-2 sp= chain 2 space dec= decrease hdc= half double crochet fo= fasten off MC=main color (I used Tan) p/u= pull up [loop or stitch(es)] RS= right side [of work] sc= single crochet sk= skip [stitch] sl st= slip stitch sm= stitch marker WS= wrong side [of work] yo= yarn over |
| Special Stitches |
| Moss Stitch= ch 1, sk 1, sc in ch-1 sp of previous row/round.
Dec (decrease)=insert hook in first ch-1 sp, yo, p/u loop, sk 1 sc, insert hook into next ch-1 sp, yo, p/u loop, yo, pull through all 3 loops on hook. Decrease made. Half double crochet slip stitch (hdc sl st)= yarn over, insert hook into designated stitch/loop and pull up a loop. Pull loop through 2 loops on hook. |
| Pattern Notes |
|
| Pattern Composition |
This is a seamless, top-down style pattern. You will work in the following order:
|
Color Work Pattern (follow throughout working pattern except for ribbing) |
| Row 1- 2: follow pattern in CC
Row 3: follow pattern in MC Row 4-11: repeat rows 1-3 Row 12-22: follow pattern in MC For the remainder of the pattern, repeat color changes of row 1-21. |
Begin Cardigan Pattern
Yoke Pattern
Foundation: Starting in CC, ch 98
Row 1 [RS]: In the 4th ch from your hook sc, continue to work the moss stitch across.(48)
Place sm in the 9th ch-1 sp from starting st, place another sm in the 5th ch-1 sp away from that, place another sm in the 20th ch-1 sp away from that and place another sm in the 5th away from that. ((sm placed in the: 9th, 14th, 34th, 39th ch-1 sps))

Row 2 [WS]: Ch 2, sk 1, sc, moss st to 1st sm, *(sc, ch2, sc) in ch-1 sp with sm, moss st to next sm*, repeat from * to * across, working the last sc in the ch-2 sp, changing to MC in last yo, turn. (52)
Row 3: [in MC] ch 2, sk 1, sc, moss st to ch-2 sp, *(sc, ch2, sc) in ch-2 sp, moss st to next ch-2 sp*, repeat from * to * across, working the last sc into the ch-2 sp, changing to CC in last yo, turn. (56)
Row 4: [in CC] ch 2, sk 1, sc, moss st to ch-2 sp, *(sc, ch2, sc) in ch-2 sp, moss st*, repeat from * to * across, working the last sc into the ch-2 sp, turn. (60)
Row 5: [in CC] ch 2, sk 1, sc, moss st to ch-2 sp, *(sc, ch2, sc) in ch-2 sp, moss st*, repeat from * to * across, working the last sc into the ch-2 sp, changing to MC in last yo, turn. (64)
Row 6-11: repeat rows 3-5
Row 12-22 (26, 30, 34, 38, 42, 46, 50): repeat row 3, continuing to follow the Color Work Pattern indicated at the start of this pattern.
(132, 148, 164, 180, 196, 212, 228, 244)
Splitting The Yoke
Row 1 [RS]: ch 2, sk 1, sc, *moss st to ch-2 sp, sc in ch-2 sp, ch 1, sc in the next ch-2 sp, ((sk 26 (30, 34, 38 , 42, 46, 50, 54) sts between ch-2 sps)*, repeat from * to * one more time, continue to moss st to end, turn. (82, 90, 98, 106, 114, 122, 130, 138)

Body Pattern (continued from “Splitting The Yoke”)
Row 1 [RS]: ch 2, sk 1, moss st across, turn(82, 90, 98, 106, 114, 122, 130, 138)
Repeat row 1 until you reach the desired length, following the color work description throughout. If you end on the WS, turn. If you end on the RS, do not turn.
Do NOT fasten off and proceed to “Body Ribbing Pattern”
Body Ribbing Pattern
Foundation [in MC on RS]: ch 9
Row 1: starting in 3rd ch from hook, hdc sl st in blo across, sl st into next 2 ch-1 sps of last row of the body, turn. (7)
Row 2: hdc sl st in blo 6, hdc in last, turn.
Row 3: ch 2, hdc in 1st, hdc sl st in blo 6, sl st into next two ch-1 sps of last row of the body, turn.
repeat rows 2&3 across the entirety of the last row of the body opening.

You will now begin to work the ribbing around the front opening of the cardigan. Turn and ch ch 9, repeat steps in row 1, sl st into the bottom st of the last row of ribbing, sk 1 st and sl st again into the next, continuing up to the body portion.
Continue to work up and around the front opening by repeating rows 2&3, working the sl sts in row 3 into every other row (rather than ch-1 sps).
When you get to the top two corners where the collar and opening meet you will work a total of 4 rows of ribbing into that one space (repeating rows 2&3 twice). Continue to repeat rows 2& 3 around the collar and down the other side of the opening until you reach the foundation row at the bottom of the body, fo and weave in ends.
Sleeve Pattern (repeat on both sides)
[continuing color change pattern through the sleeve cuff pattern]
Round 1 [RS]: P/u yarn in ch-1 sp to the right of the bottom ch-2 sp, ch 2, sc in next ch-1 sp, moss st around, sc in last ch-1 sp, sl st to top of starting ch-2, turn. (28, 32, 36, 40, 44, 48, 52, 56)
Row 2-28: ch 2, sk 1st sc, moss st around, sl st to top of starting ch-2, turn. (28, 32, 36, 40, 44, 48, 52, 56)
Row 29 [Decrease Round]: ch 2, dec, moss st around, to last 2, dec, sl st to starting ch-2, turn. (26, 30, 34, 38, 42, 46, 50, 54)
Row 30-35: ch 2, sk 1st sc, moss st around, sl st to top of starting ch-2, turn. (26, 30, 34, 38, 42, 46, 50, 54)
For XS & S sizes:
Row 36- 56: Repeat rows 29-35 for a total of 3 more times, until you have (20, 24) sts. Continue repeating row 2 until desired length is acquired. (Rows 36, 43 & 50 will be decrease rows)
For all other sizes:
Row 36- 63: Repeat rows 31-37 for a total of 4 more times, until you have (24,28, 32, 36, 40, 44)sts. Continue repeating row 2 until desired length is acquired. (Rows 36, 43, 50 & 57 will be decrease rows)
Do NOT fasten off and proceed to “Sleeve Cuff Pattern”
Sleeve Cuff Pattern
Foundation [in MC on RS]: ch 9
Row 1: starting in 3rd ch from hook, hdc sl st in blo across, sl st into next 2 ch-1 sps of sleeve, turn. (7)
Row 2: hdc sl st in blo 6, hdc in last, turn.
Row 3: ch 1, hdc in 1st, hdc sl st in blo 6, sl st into two ch-1 sps of sleeve, turn.
Repeat rows 2&3 around the entirety of the sleeve opening. Sl St each stitch of the first and last rows together, fo and weave in ends.
[Optional] Pocket Pattern (make 2)
Foundation: Starting with CC, ch 26.
Row 1: Starting in 4th ch from hook, *sc, ch 1, sk 1*, repeat from * to * across, turn. (12)
Row 2: Ch 2, sc in first ch-1 sp, ch 1, sk 1, moss stitch across, changing to MC in last sc, turn.
Row 3 [in MC]: ch 2, sk 1 st sc, moss st across, changing to CC in last sc, turn.
Row 4 [in CC]: Ch 2, turn, sc in first ch-1 sp, ch 1, sk 1, moss stitch across, turn.
Row 5-7: repeat rows 2-4, change to MC in last st of row 4, turn.
Row 8-15 [in MC]: ch 2, sk 1 st sc, moss st across. Sl st to top of starting ch-2, turn.
Do NOT fasten off and proceed to “Pocket Ribbing”
Pocket Ribbing
Foundation: ch 9, turn pocket and starting in 3rd ch from hook, hdc sl st in blo across the ch sts, sl st into next 2 ch-1 sps of the pocket, turn
Row 2: hdc sl st in blo 6, hdc in last, turn (7)
Row 3: ch 2, hdc in 1st, hdc sl st in blo 6, sl st into two ch-1 sps of pocket, turn.
repeat rows 2&3 across the entirety of the last pocket row, fo and weave in ends.
Finishing
For best results- wet block your sweater and pockets. Pay special attention to the top front corner areas or any other spots that have some puckering due to the ribbing.
Using the mattress stitch (or seam method of choice), attach the pocket, ribbing side up, to either side of the cardigan opening, about .5” in from the innermost edge of the ribbing and about 2” up from the bottom. Start on one side, working down then across the bottom and back up the other side (leaving the top ribbing section unseamed), fo and weave in ends. Repeat on the other side.


