Andy’s Stocking- Blog Post

Last year I made this beautiful cabled stocking for Audrey, that I am still very proud of to this day.

The details are out of this world and can we talk about the sparkle of that yarn? I used a pattern by Red Heart that you can find here. When I made her stocking I also bought half a dozen skeins of the tinsel white yarn I used so that I could make matching stockings for our future children.
A year and one more kiddo later, I have kept to my goal and made another stocking. It is probably very clear that I drew a lot of my inspiration for this second stocking from the design of the first. However, I did make a lot of changes to the body of the stocking, as one of my goals in writing patterns is to keep things simple and not too complex.
This stocking is worked as two matching panels (a front and a back) that you join together at the end and top with the cuff.

The back of the heel requires no shaping, and the foot of the stocking requires very little. The design of the cabling is the most complex, but even then, it is only made up of a variation of some front post, back post and 2 special stitches on repeat. After the foot is complete and the shaping is done, the leg of the stocking works up incredibly quick.
The ribbing around the cuff is fairly simple as well, and I took a few tricks I learned from the first pattern to make it fold more naturally.
To start on the first panel, you will make a foundation chain and then double crochet in each stitch across.


From here you will start the foundation of the cabling by working a series of back post double crochets between regular double crochets. If you are unfamiliar with working post stitches, here is a picture identifying the post of a stitch.

You will simply wrap your hook around the post and work the double crochet as normal. For a back post double crochet, you will work the post stitch by inserting your hook on the back side of your work around the post.

Once you reach the end of your row, you will turn and begin working on the right side of your work. All post stitches worked on this side will be front post double crochets. Worked very similarly to the back post double crochets, but instead of working behind into the post you’ll be working (you guessed it…) in the front of your work.

This row is also the first row that the cabling design starts to come to life, and where you’ll be working those two special stitches I mentioned earlier.
The first special stitch you’ll create is worked after you skip 2 stitches, double crochet 2 and then front post double crochet into the 2 skipped stitches, by working in front of the 2 double crochets. For sake of the pattern, I short handed this stitch to 2FPF (or 2 Front Post in Front).


After completing the first special stitch, you will skip 2 more, front post double crochet 2,


then work the second special stitch by double crocheting 2 into the skipped stitches behind the 2 front post double crochets. I short handed this stitch as 2DCB (or 2 Double Crochets Behind).


The fourth row will be similar to the second, just that the back post double crochets will be located at different spots (thanks to those cool special stitches). Because the stitches have essentially shifted, they can be a little more tricky to see. So I caution to make sure you count your stitches, and pull your work as you go to help straighten out the stitches a bit.
The fifth row is similar to the third row, but the 2DCB and 2FPF stitches have been flip flopped in the order that you work them.
Rows 2-5 will pretty much be on repeat throughout the foot portion, the only change to each row being where the shaping of the toes happens.

The shaping of each foot occurs when by slowly increasing, then decreasing along one edge of your work (depending on the panel and right or wrong side).  All increases and decreases will be as double crochets except for in row 13 where you will decrease in single crochets (to shorten the height).
After Row 13, the foot is complete, and the subsequent rows are all repeating the cabling design (by this point you will only have 2 cable designs per row, as one ended in the foot) until you have adequate height for the leg.


For the 14th row of the back panel, you will be working slip stitches at the start of your row. Rather than fastening off at the end of row 13 and reattaching towards the leg, the slip stitches will get you back to the start of the leg, without adding too much height. 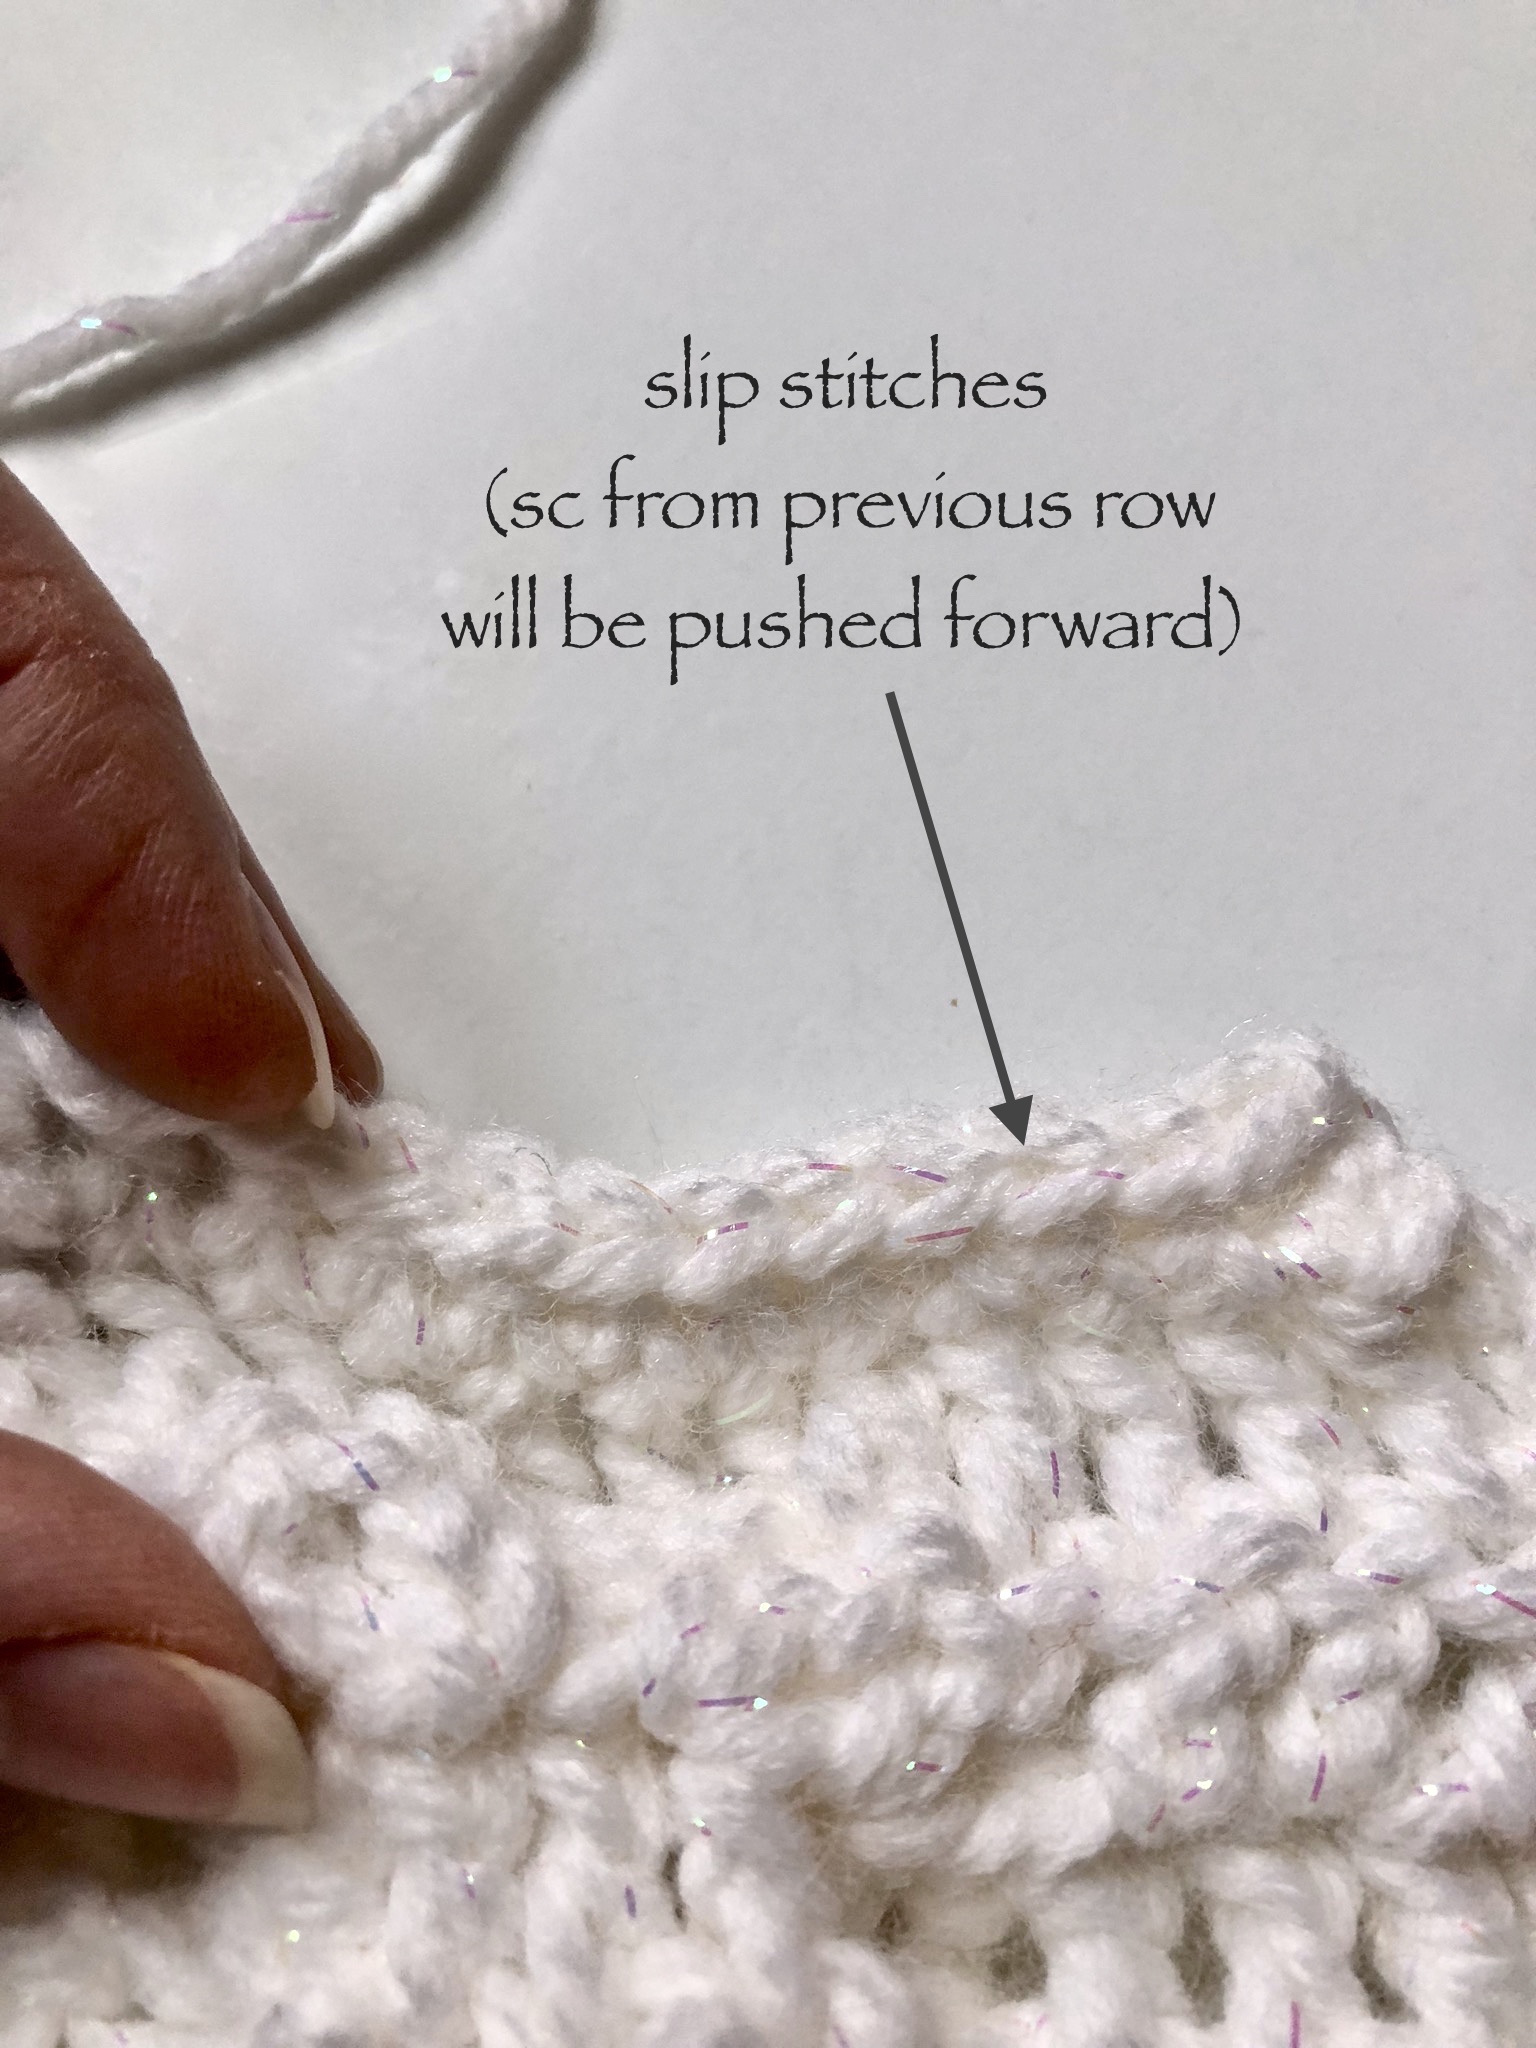
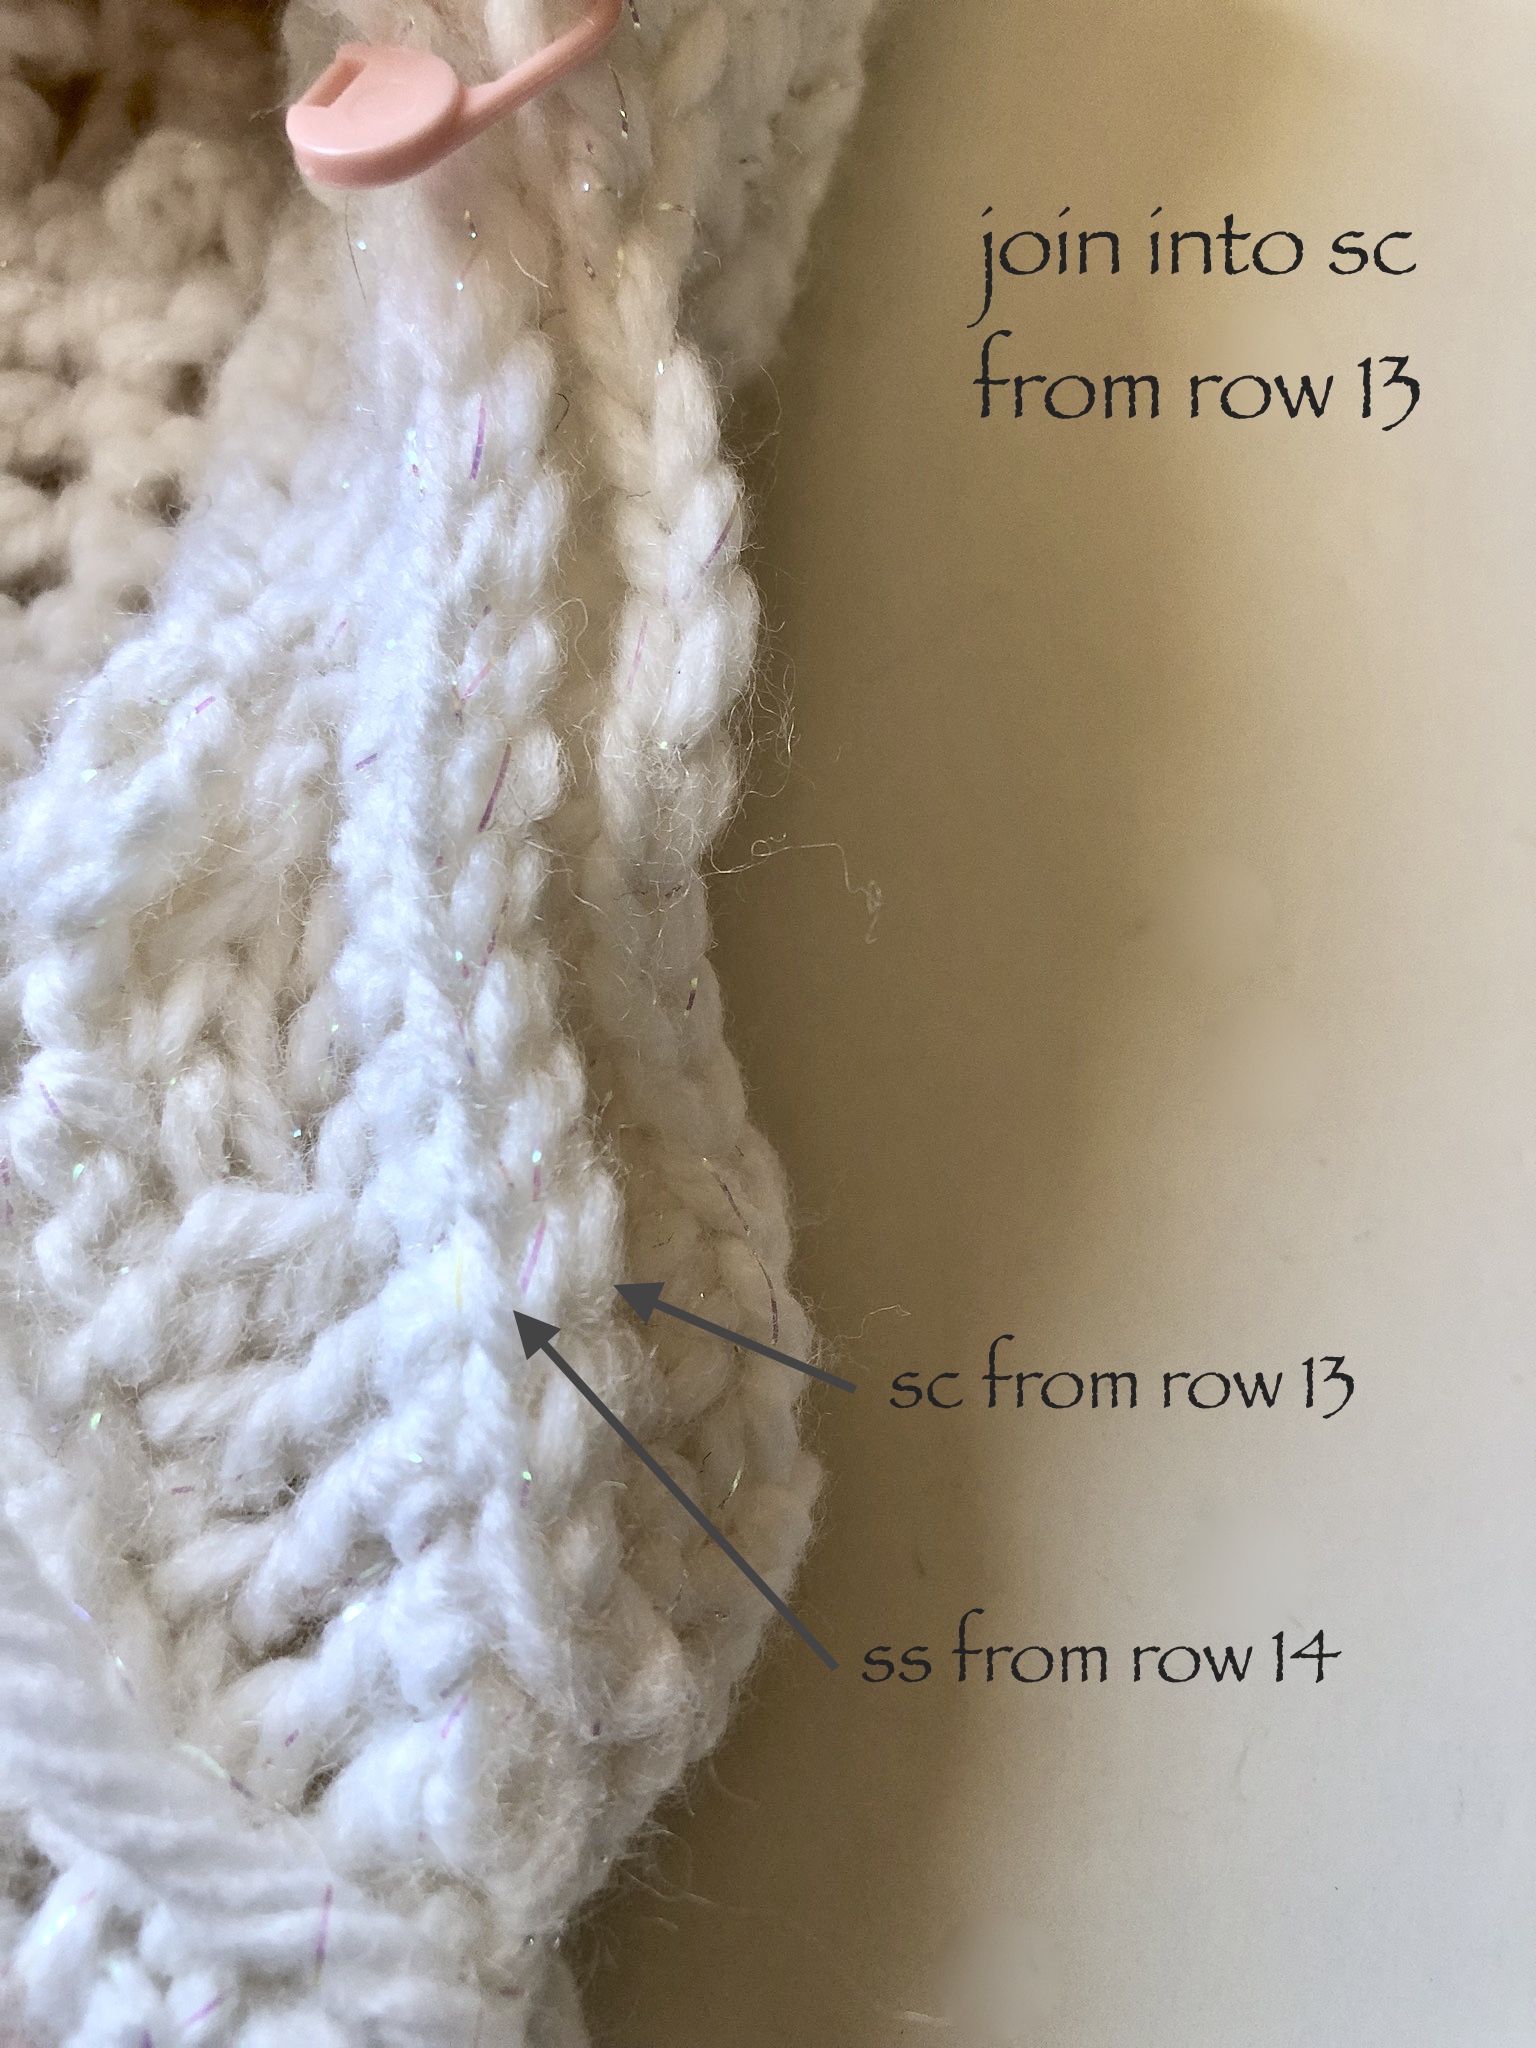
Since slip stitches push the stitches of your subsequent row towards the front of your work, when you join the two panels together you will ignore the slip stitches and join into the single crochet stitches from the 13th row of each panel.
To join the panels, you will line them up row per row, with the wrong side facing you (and the cabling design facing each other). I used a mattress stitch to join, but feel free to use any joining stitch that you prefer.


You will join along the back side of the leg towards the heel, around the bottom of the foot, up the toes and then up the front side of the leg. The only portion that should remain open and unjoined is the top.

Once it is all joined, you will turn it right side out. Almost done!

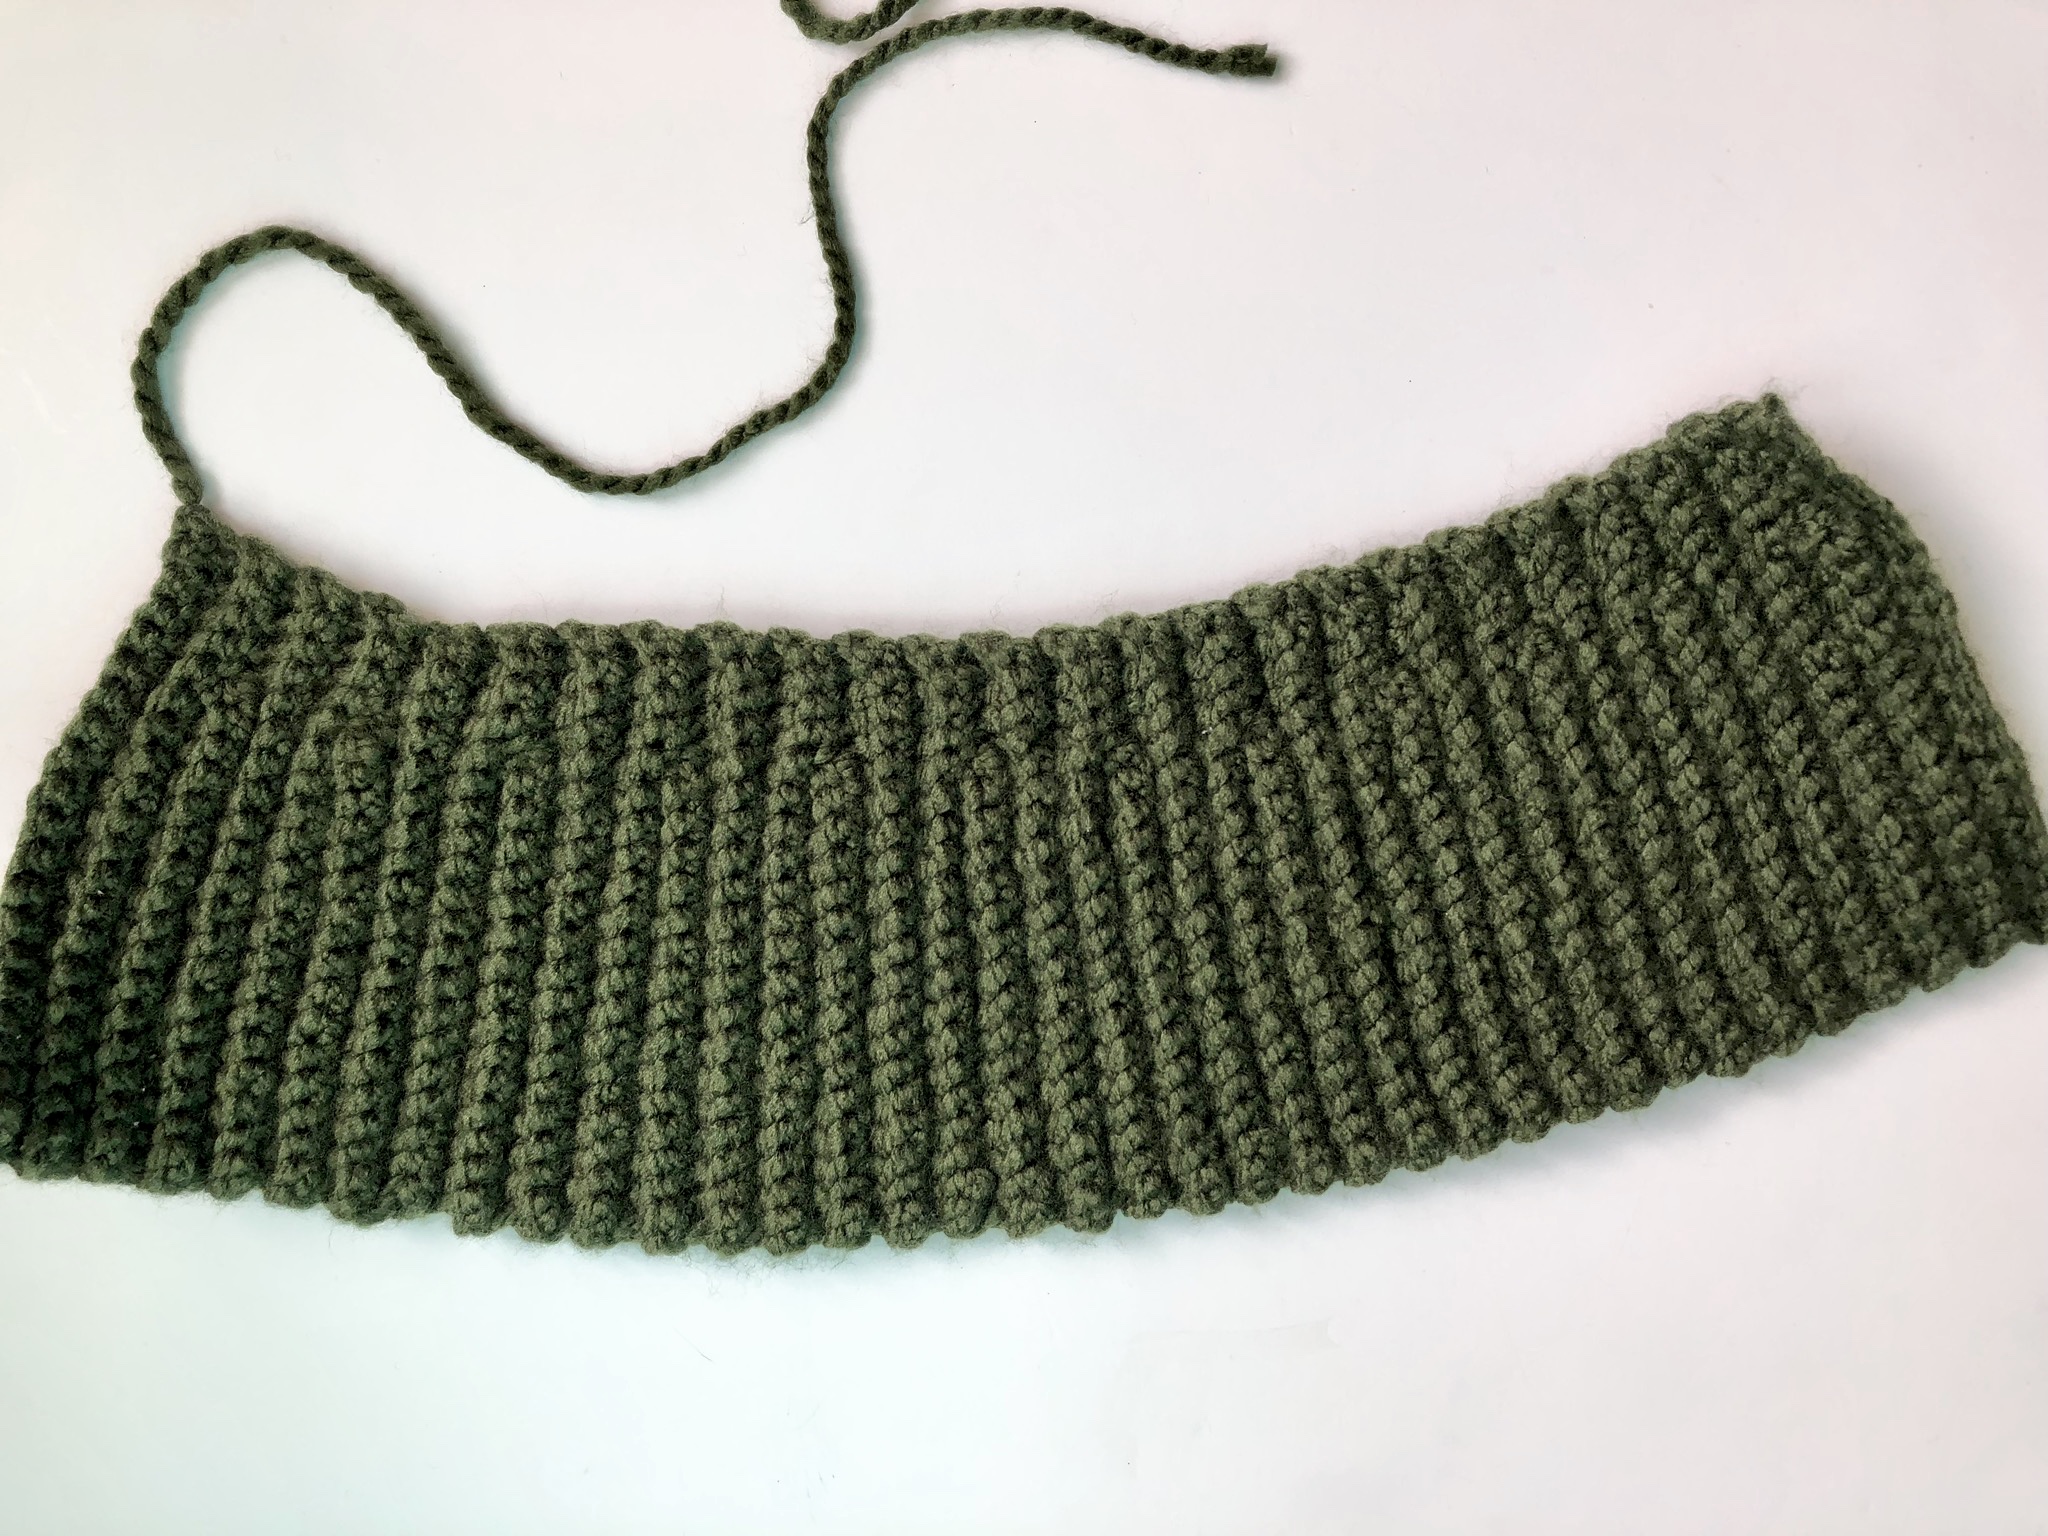
To work the cuff, you will be working a series of single crochet stitches in the back loops only. This will give a ribbed look to the cuff.
For every 3 rows worked across, you will work 2 shorter rows.
For these shorter rows, rather than working all the way across the previous row, you will stop 4 stitches short, turn your work and work across back to the end of the row.


In the next row, you will continue working across every stitch again, including into to 4 skipped stitches from 2 rows prior.


By doing this you are fanning out the cuff a bit which will create a natural fold when you attach it to the stocking.
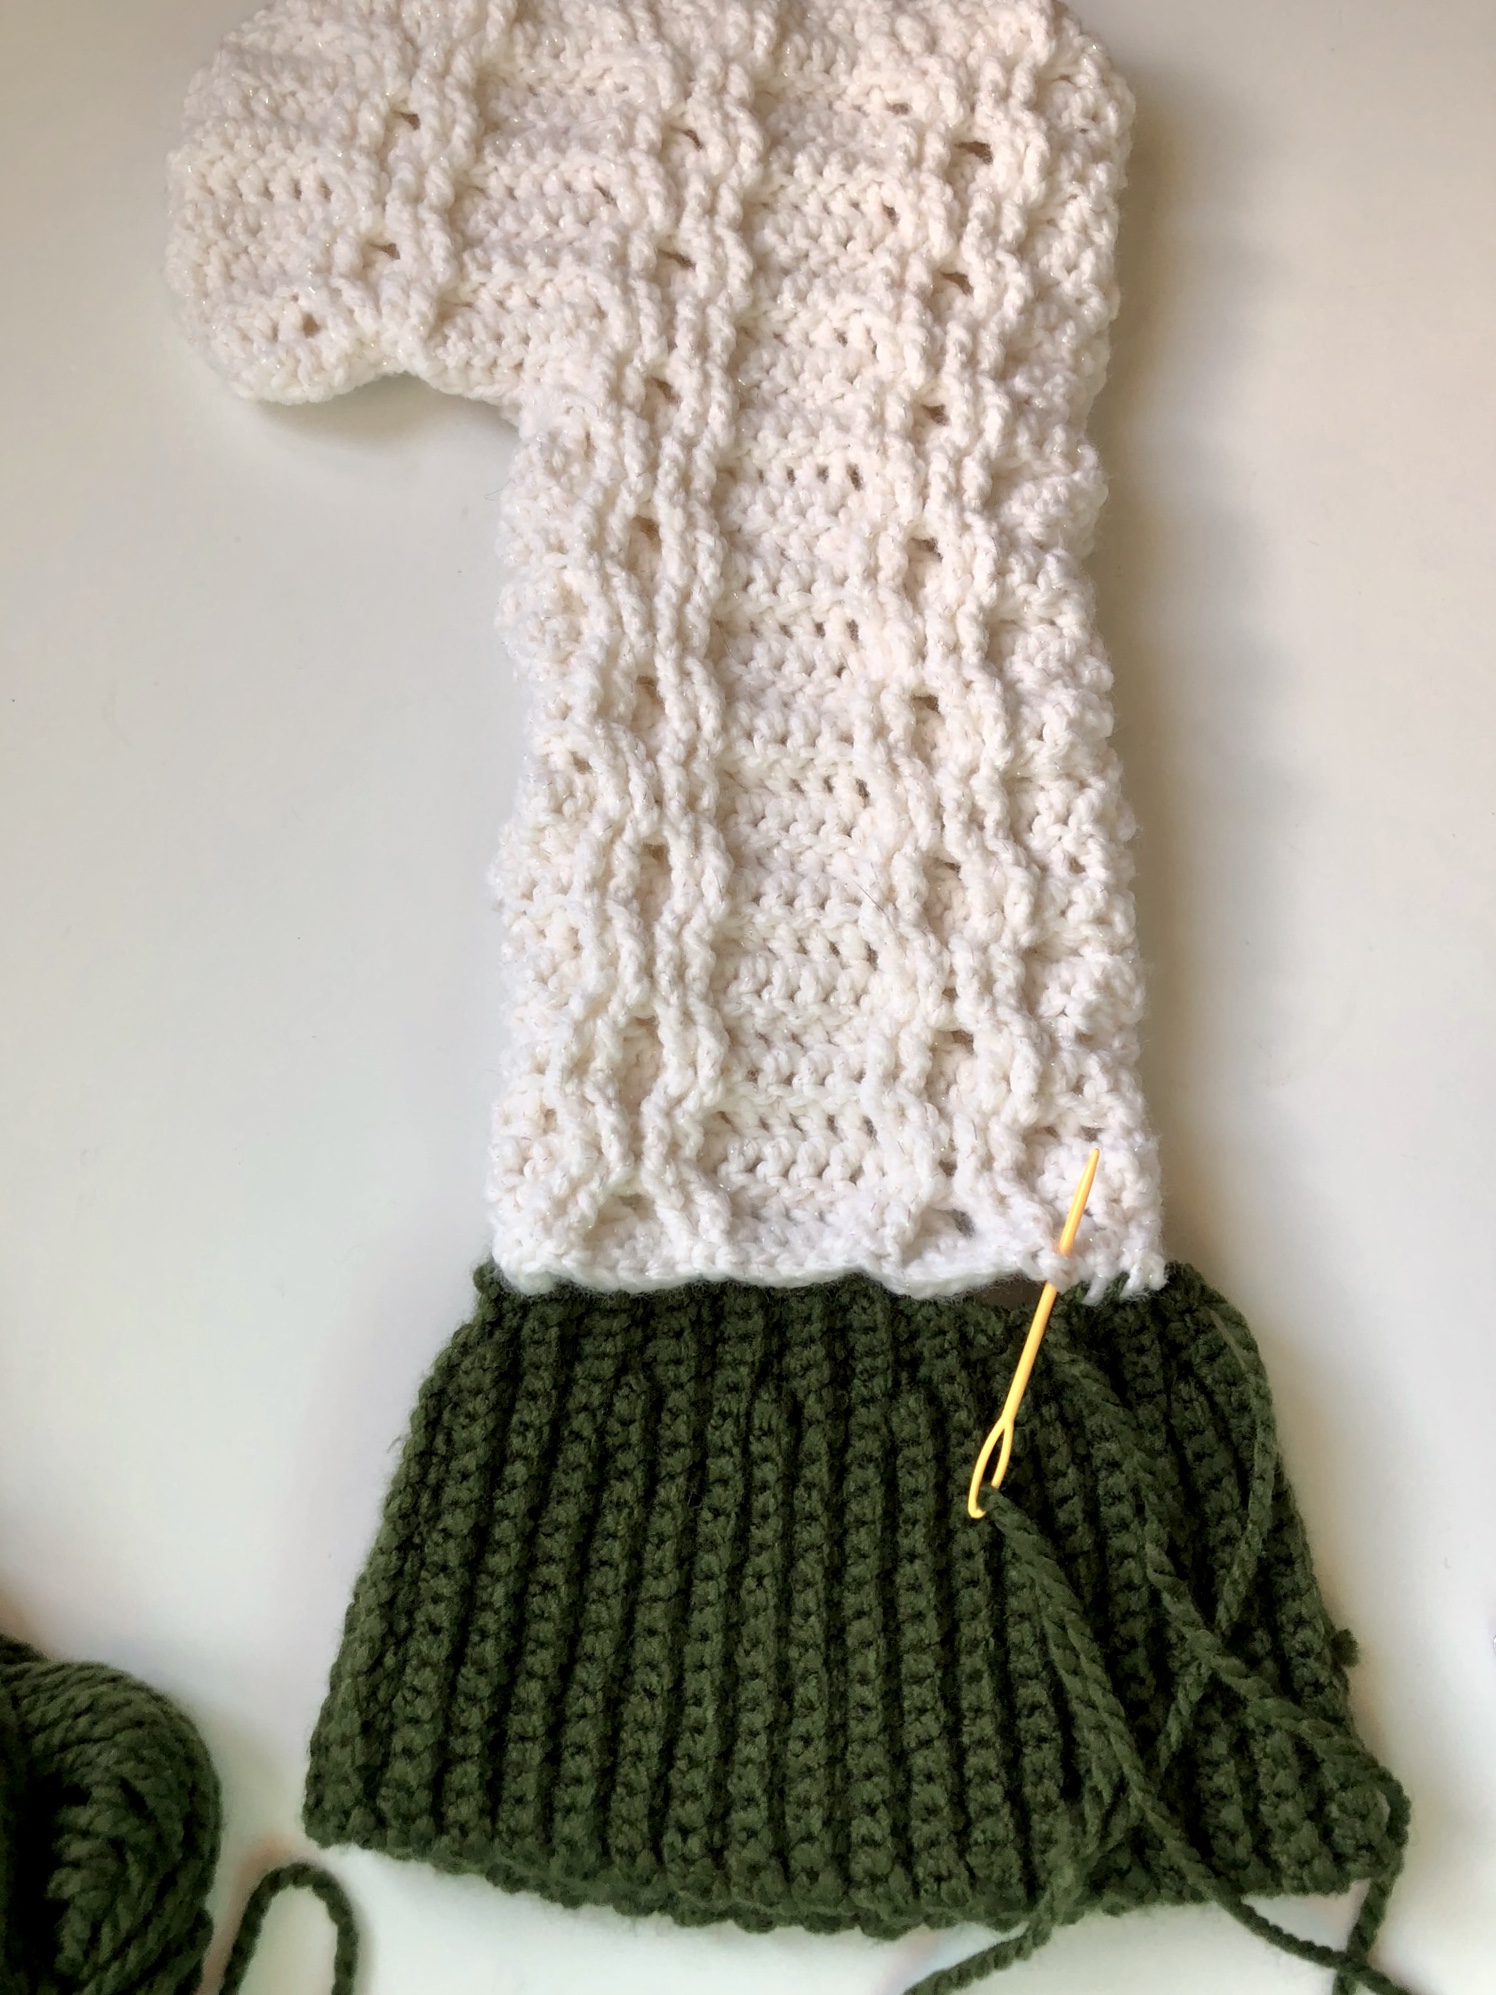
After completing the cuff ribbing, you will join the first and last row together with a mattress stitch.
 Before attaching to the top of your stocking, you will want to turn the cuff inside out and then attach around the top of the stocking.
 Fold the cuff over and weave in the ends.
The final step is to add the hook for easy hanging. This is a simple chain row attached to the inside of the stocking cuff on the leg side.


And thats all there is to it! For the stocking I made last year, I also added 2 yarn pom poms, which I may end up doing to this one as well.
If you’d like to add that additional pop of detail, all you need to do is make yourself 2 yarn pom poms, and a long chain row. Weave the long chain row through the stocking under where the cuff covers. Tie it in a not (to secure in place) and attach a pom pom to either end.
I hope you all enjoyed making this beautiful and modern stocking!
