Amigurumi Spring Bird- Free Pattern

** Below you will find the step-by-step picture tutorial and free written pattern. **
Spring is my absolute favorite season of the year! I love the warmth after the dead of Winter. I love the smell of fresh rain, the new life popping up all around, birds chirping and bunnies and squirrels running all around. I was anxious to ring in the new season with a fun and colorful pattern that just makes you happy inside when you look at it.
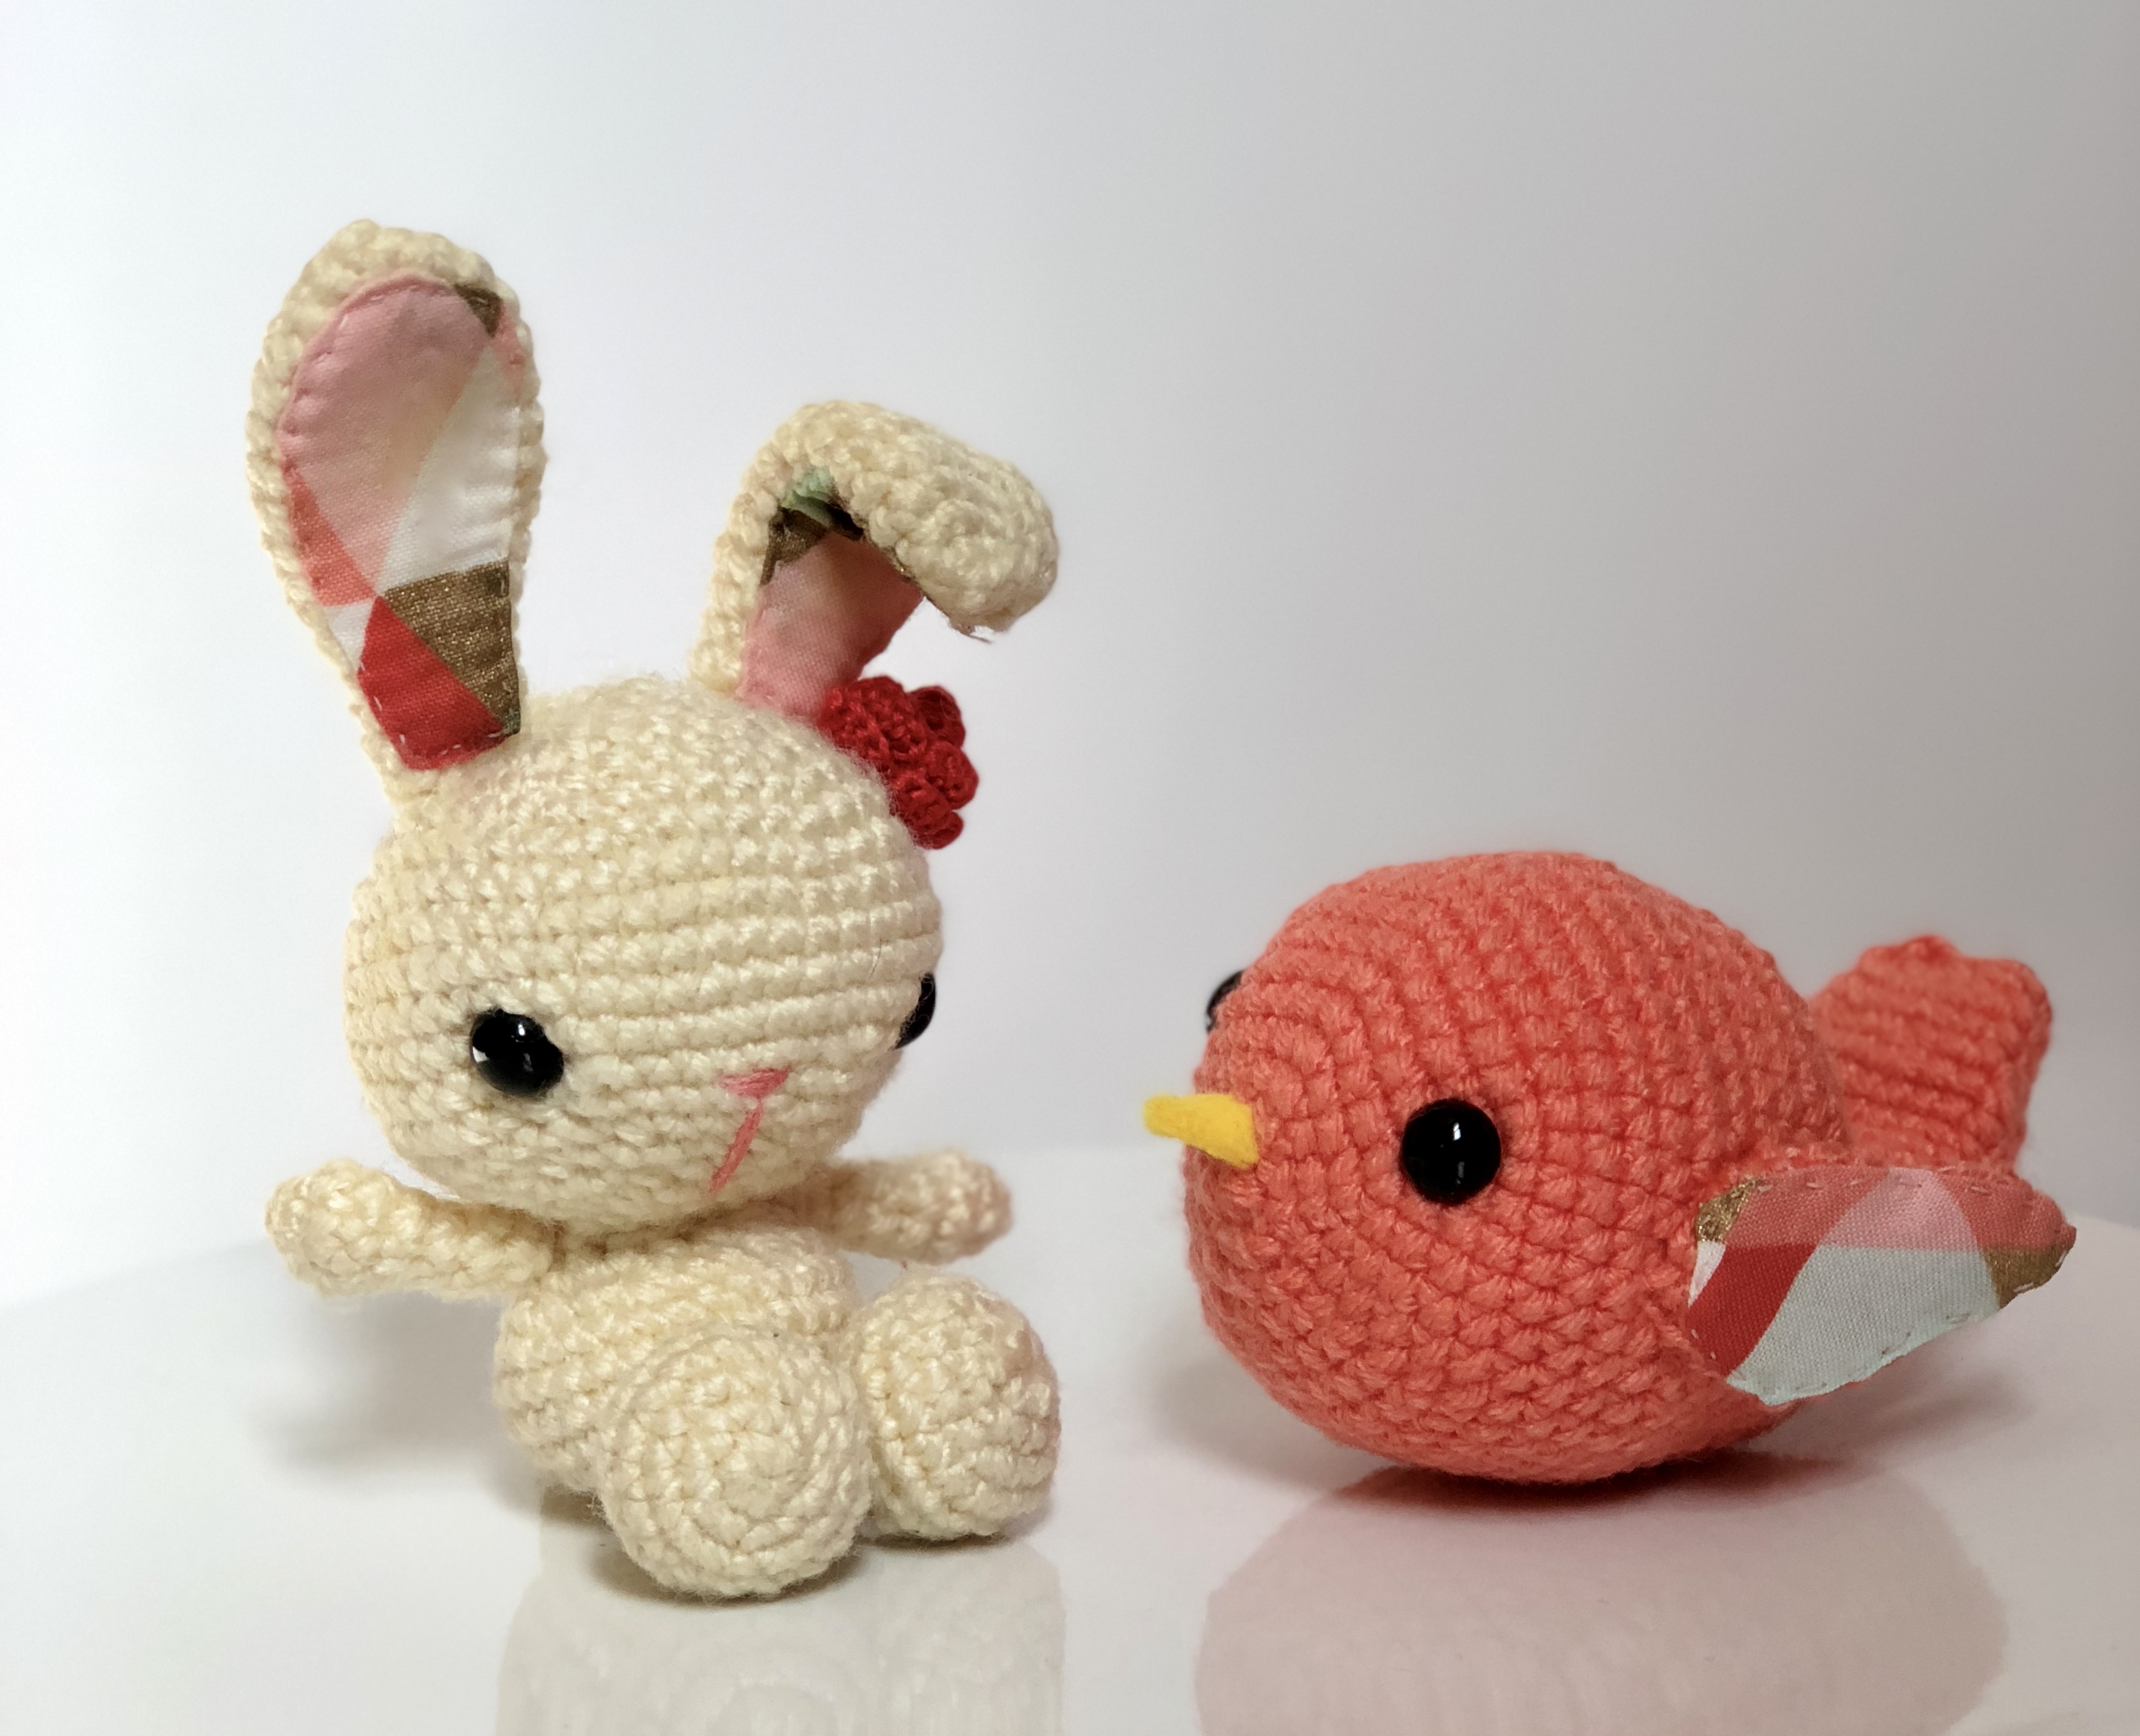 Last Easter, I made Audrey this super cute Spring Bunny (you can get the free pattern here) and had some of the fabric I used on the ears left over. After I came up with the idea of making a Spring Bird, I couldn’t wait to use some of that left over fabric for an accent on the wings.
After making the Baby Squirrel Girl, I wanted to scale things back a bit and make an easier, more beginner friendly amigurumi pattern. The whole pattern is just the body and 2 wings.
I started things out with a magic ring. If you are unfamiliar with how to work use this technique, I recommend this helpful video tutorial here.
**I cannot recommend using a stitch marker enough for this pattern. I always recommend using one, especially when working in the round, but it is especially crucial for completing this pattern. Don’t have one? I’ve used paper clips, safety pins, and scrap pieces of yarn in the past. 😉
After completing the magic ring, I gradually increased each round until I reached the circumference I wanted for the head.


The next 5 rounds are all worked by single crocheting around. From here, I started to gradually decrease and started to shape the tail.
In the 21st round, you will be decreasing on one side of the round only. This will become the top of your bird, and is why your stitch marker is so important. I rotated my bird so that the decreases are at the top. These decreases help transition from head to tail and naturally curve the tail upwards. Adjusting the bird so that they are on top helps to ensure that your eyes and beak will be inline with this curve.
After completing the 21st round, I added the eyes and beak. The eyes will be placed towards the top on either side of the head (I placed mine between rounds 6&7)

To make the beak, I cut a small square from a piece of yellow 2mm felt. I then pinched the top and stitched it into place above the first round. You can also feel free to glue it in place if thats easier for you.


Once the face was on, I began stuffing the head and continued to work the tail, inserting a pipe cleaner along the way. The pipe cleaner helps to give a more drastic curve to the tail once everything is completed.


The remainder of the tail is just more single crochets around and gradual decreases. I did not decrease enough to close the tail in a circle, as I wanted the end to be a straight line instead of a point. Once I had the length I wanted, I fastened off and stitched the tail closed.


**Notice how I stitched pinching the tail closed so that the straight edge was horizontal to the head instead of vertical

From here, all that is left is to make the wings. I also started these out with a magic ring followed by a few rounds of gradual increases. Once I achieved the width I was looking for, I began to work in single crochets around for a few rounds. To finish them off, I gradually started decreasing followed by 2 consecutive rounds of decreases to create the end point.


I played around with a few different sized wings, but liked them best when they were petite rather then large.

All that is left from here is a quick assembly. I stitched my spring pattern fabric to the outward facing side of each wing only, then attached each wing to the body. I used a strand of yarn to stitch just the first few starting rounds of each wing in place on the body (rather then the whole wing).

I place my wings so that the starting round of each wing lined up between rounds 12 & 13 of the body and had a slight point upwards.

And that’s all there is to it! I love this sweet little Spring Bird and Audrey did too! She could hardly wait for me to finish to start playing with it.


What You’ll Need
2.00mm crochet hook
1 skein of spring colored yarn (I used ‘I Love This Yarn’ from Hobby Lobby in Mango)- approximately 46 yds or 26 g
1 piece of yellow 2mm felt
1 pipe cleaner
Fiberfill/ Polyfill
Spring Patterned Fabric
2 10mm safety eyes
Completed Measurements
9″ around
4″ long
Abbreviations Used
sc= Single Crochet
sc2tog= single crochet two together
Special Stitches
Increase: single crochet 2 into one stitch
Decrease: single crochet 2 together (insert hook, yarn over, pull up, insert hook into next stitch, yarn over pull up, yarn over and pull through all three loops on hook.
Pattern for the Head/Body
**Please note that this entire pattern is worked in continuous rounds (vs. joined rounds)**
Round 1: work 6 into a magic ring (6)
Round 2: 2 sc in each around (12)
Round 3: *sc, increase*, repeat from * around (18)
Round 4: *sc 2, increase*, repeat from * around (24)
Round 5: * sc 3, increase*, repeat from * around (30)
Round 6: *sc 4, increase*, repeat from * around (36)
Round 7: *sc, 5, increase*, repeat from * around (42)
Round 8: *sc 6, increase*, repeat from * around (48)
Round 9-13: sc around (48)
Round 14: *sc 6, decrease*, repeat from * around (42)
Round 15-17: sc around (42)
Round 18: *sc 5, decrease*, repeat from * around (36)
Round 19-20: sc around (36)
Round 21: *decrease, sc*, repeat from * 5 more times, sc 18 (30)
With your decreases from round 21 at the top, place safety eyes on either side of the head (I placed mine between rounds 6&7). Stitch on nose right above your first round.

Round 22-26: sc around (30)
Begin to firmly stuff head with fiberfill
Round 27: *sc 3, decrease*, repeat from * around (24)
Round 28-29: sc around (24)
Add more fiberfill to the head. Fold your pipe cleaner so it is a quarter of its original size. Insert towards the top of the tail so that it is secured by the fiberfill of the head and continue to work around it.
Round 30: *sc 2, decrease*, repeat from * around (18)
Round 31-32: sc around (18)
Round 33: *sc, decrease*, repeat from * around (12)
Lightly stuff the bottom portion of the tail with fiberfill.
Round 34: sc around, fasten off leaving long tail. whip stitch ends together so the tail lays flat and is wide across the top and bottom (not from the side view). (12)

Pattern for the Wings (make 2)
Round 1: work 5 in magic ring (5)
Round 2: sc 2 in each around (10)
Round 3: *sc, increase*, repeat from * around (15)
Round 4-6: sc around (15)
Round 7: *sc, decrease*, repeat from * around (10)
Round 8-10: sc around (10)
Round 11: sc2tog around, fasten off and weave in ends. (5)
Cut a piece of your spring fabric to roughly the same size and shape of your wing and then stitch it on to the side of each wing that will face outwards (I made my fabric piece a little larger than each wing so that I could sew the cut edges inward to avoid fraying). Attach wings to either side of the body stitching only beginning rounds of the wings to the body.
**I placed my wings so that the first round of each wing was between rounds 12 & 13 of the body
And thats all there is to it! Hope you had a blast making this super sweet and adorable Amigurumi Spring Bird!
