


One of the things I was looking forward to most about having a baby was making baby hats for them to wear. When I was half way through my first trimester with Audrey, I came across this incredibly adorable Baby Panda Outfit created by Stephanie at All About Ami. You can find her free pattern here. As with all of her patterns, this was an amazingly adorable and easy to follow pattern and I highly recommend checking it out.
I ended up just making the hat portion and tweaked it slightly by using a basic hat pattern instead of one with ear flaps as Stephanie did. Here is Audrey at 2 months old rocking said hat for her first Halloween.


…Still melts my heart. Unfortunately, like most babies, she outgrew it far too fast for my liking and I couldn’t wait to make her another hat.
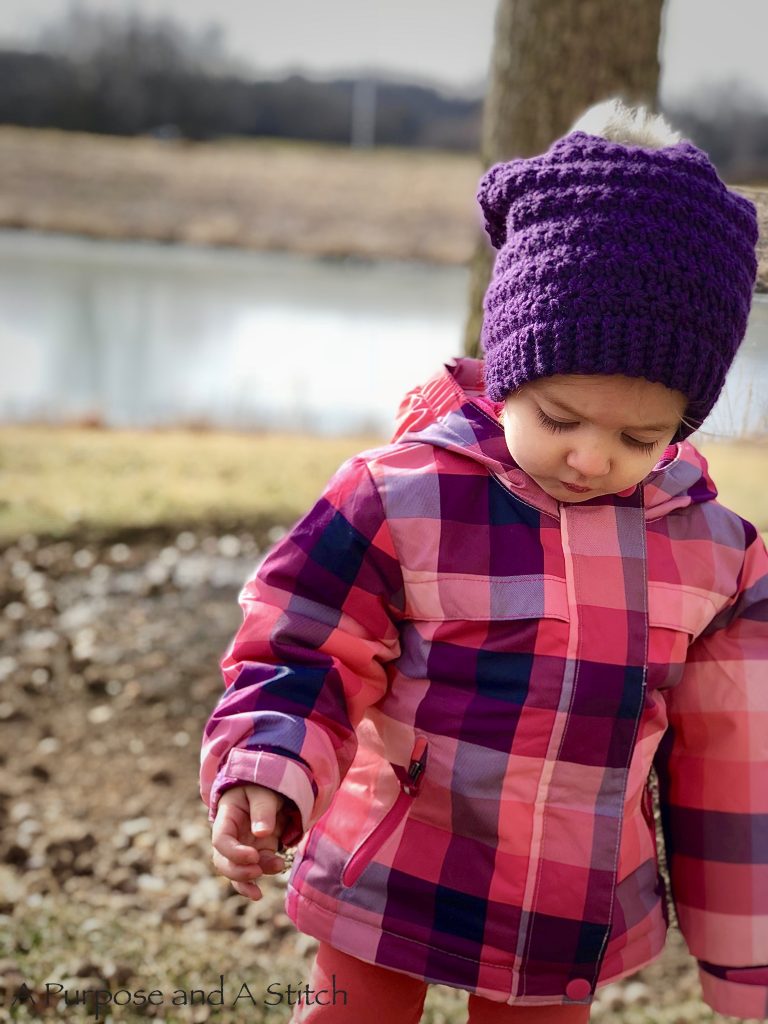
As soon as September rolled around this year, I set to work on a new design for this year’s hat. I’ve been sporting slouchy beanies as my preferred hat of choice the past few years and thought it would be adorable to make a toddler sized one for her.
I had already become obsessed with the star stitch by this point and decided that would be the highlight of this design.
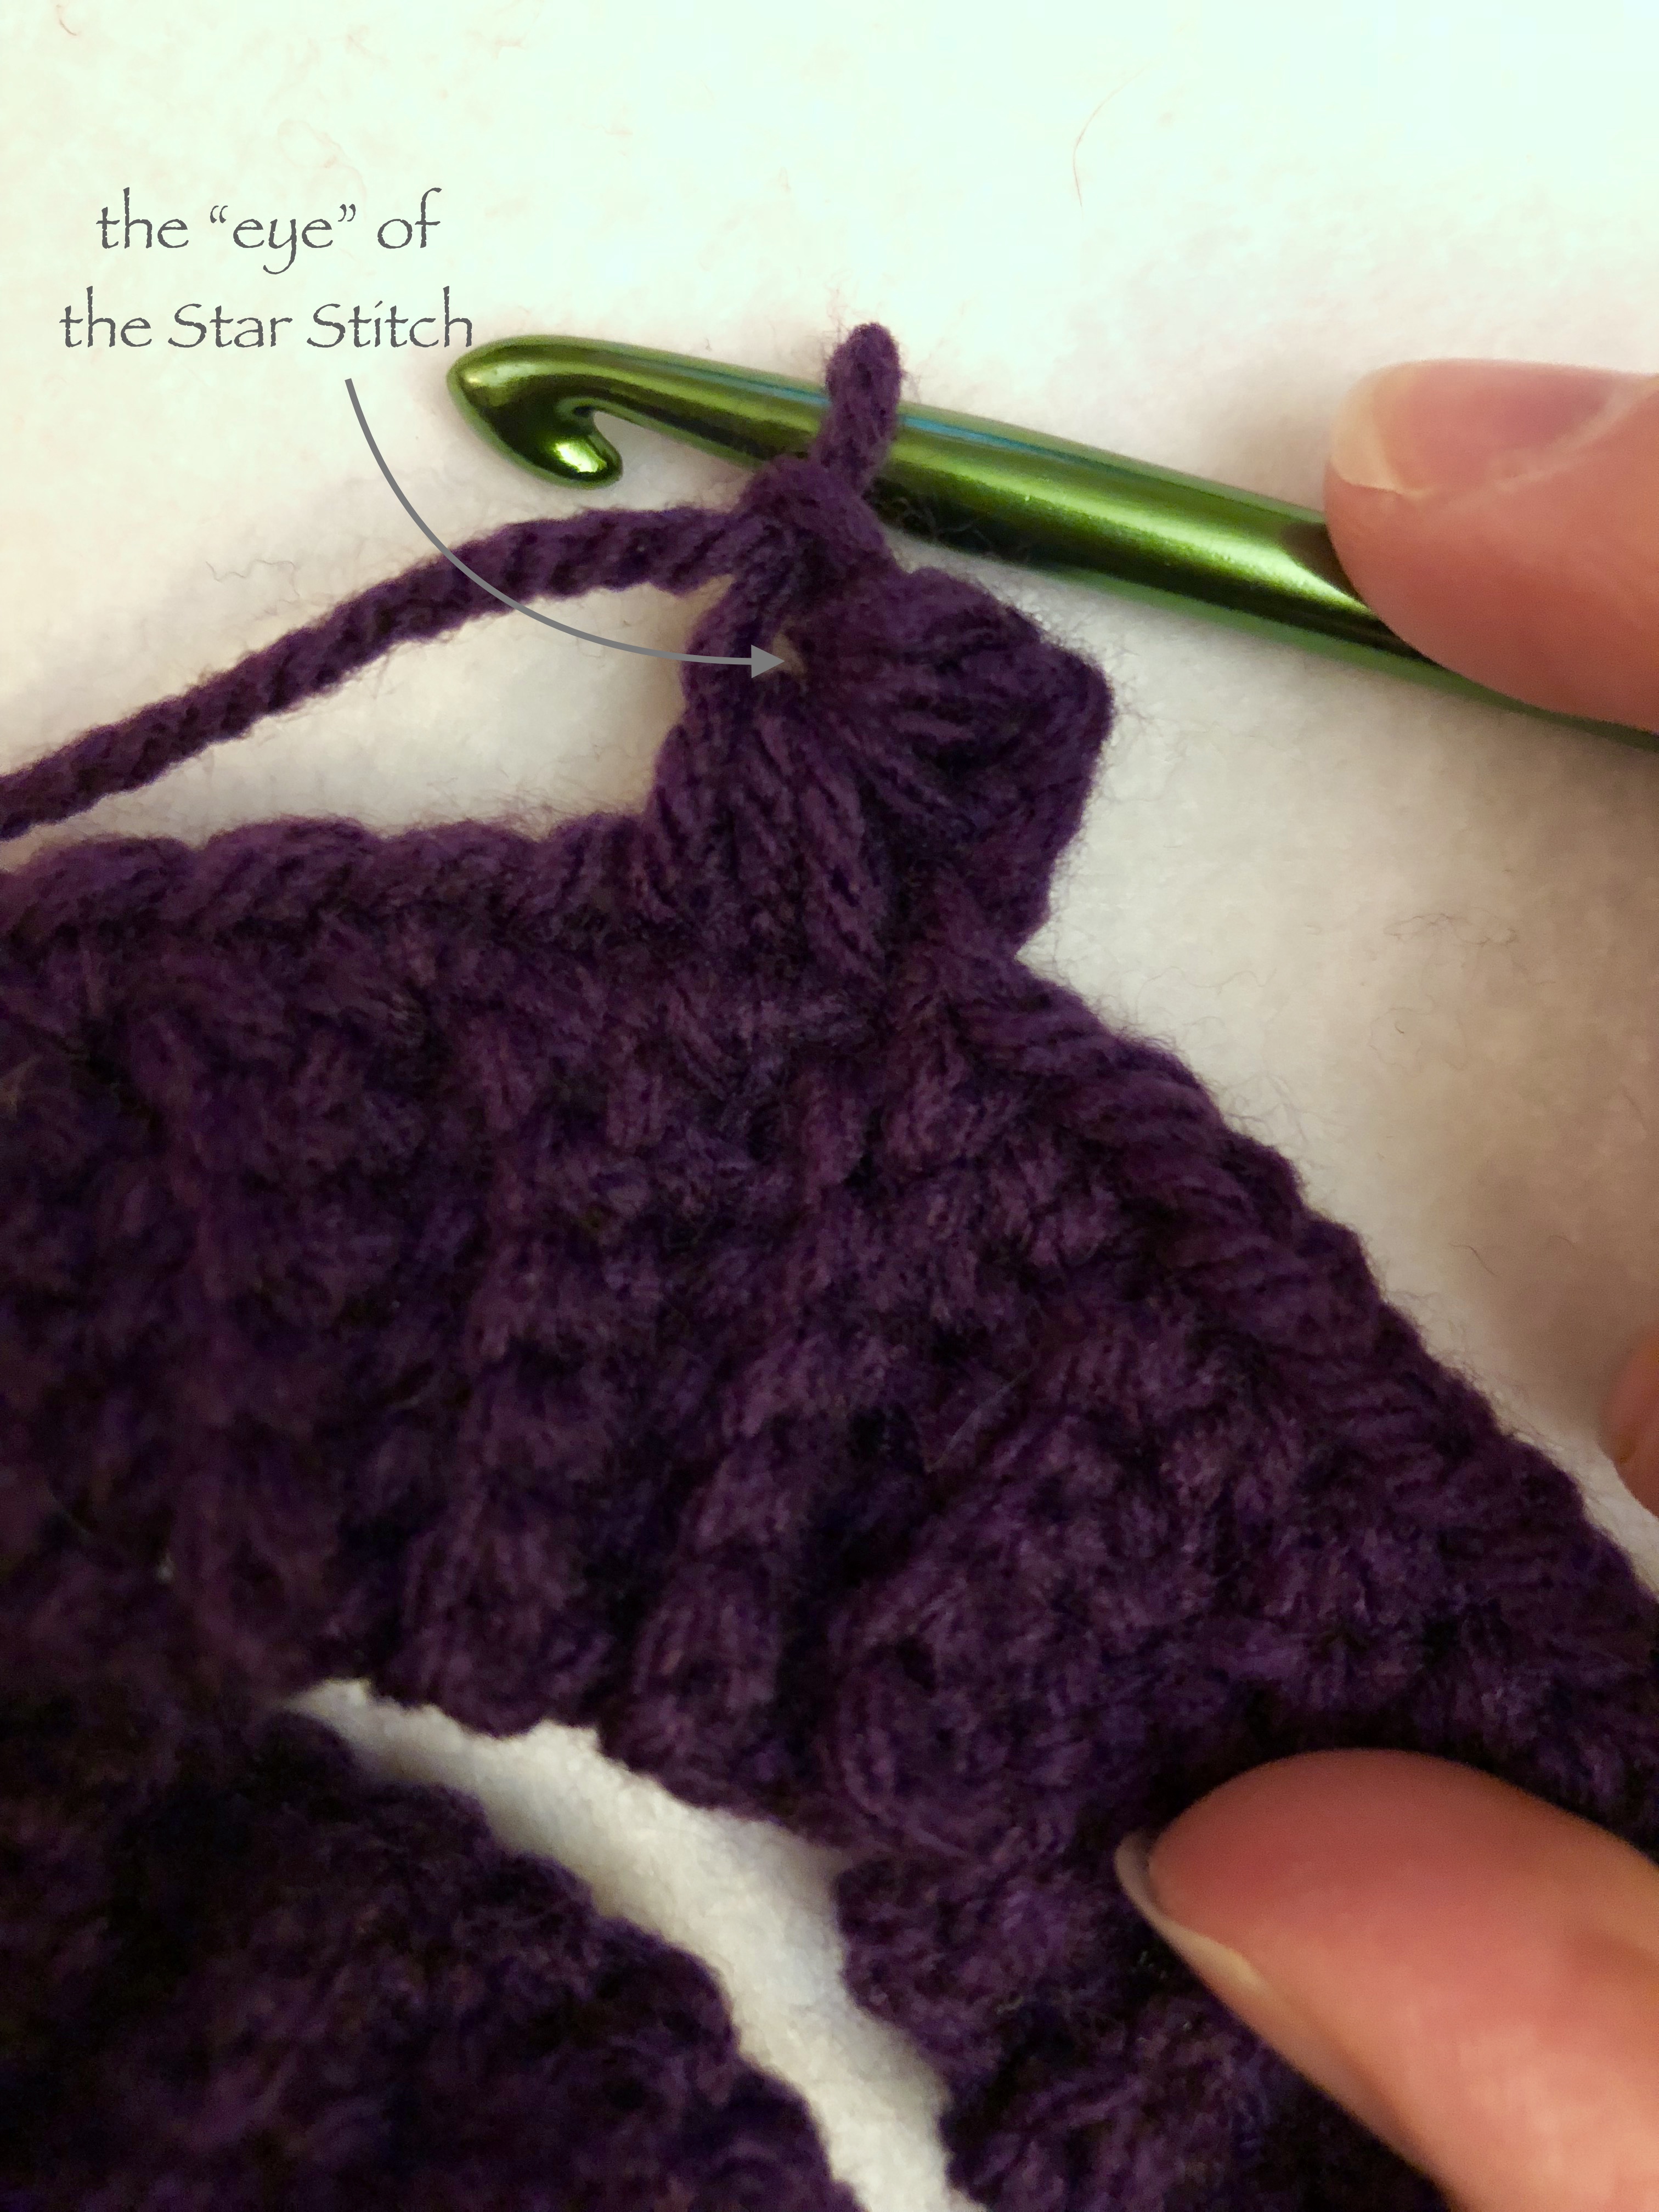
I’ve included a step-by-step of how I worked the star stitch for this pattern below. If you’d like to see more on how to work this beautiful stitch, Kathryn of The Spruce has a great tutorial that you can find here. There are several ways to complete the star stitch but the “complete star stitch” is my favorite and thats the way I will show you below.
To make the slouchy, I started out with a foundation row of 6 and worked 5 single crochet stitches into the back loops only until I reached a circumference that would fit Audrey’s head. This process creates a give that the star stitch does not and a ribbed looking effect which makes it a perfect base for the slouchy.
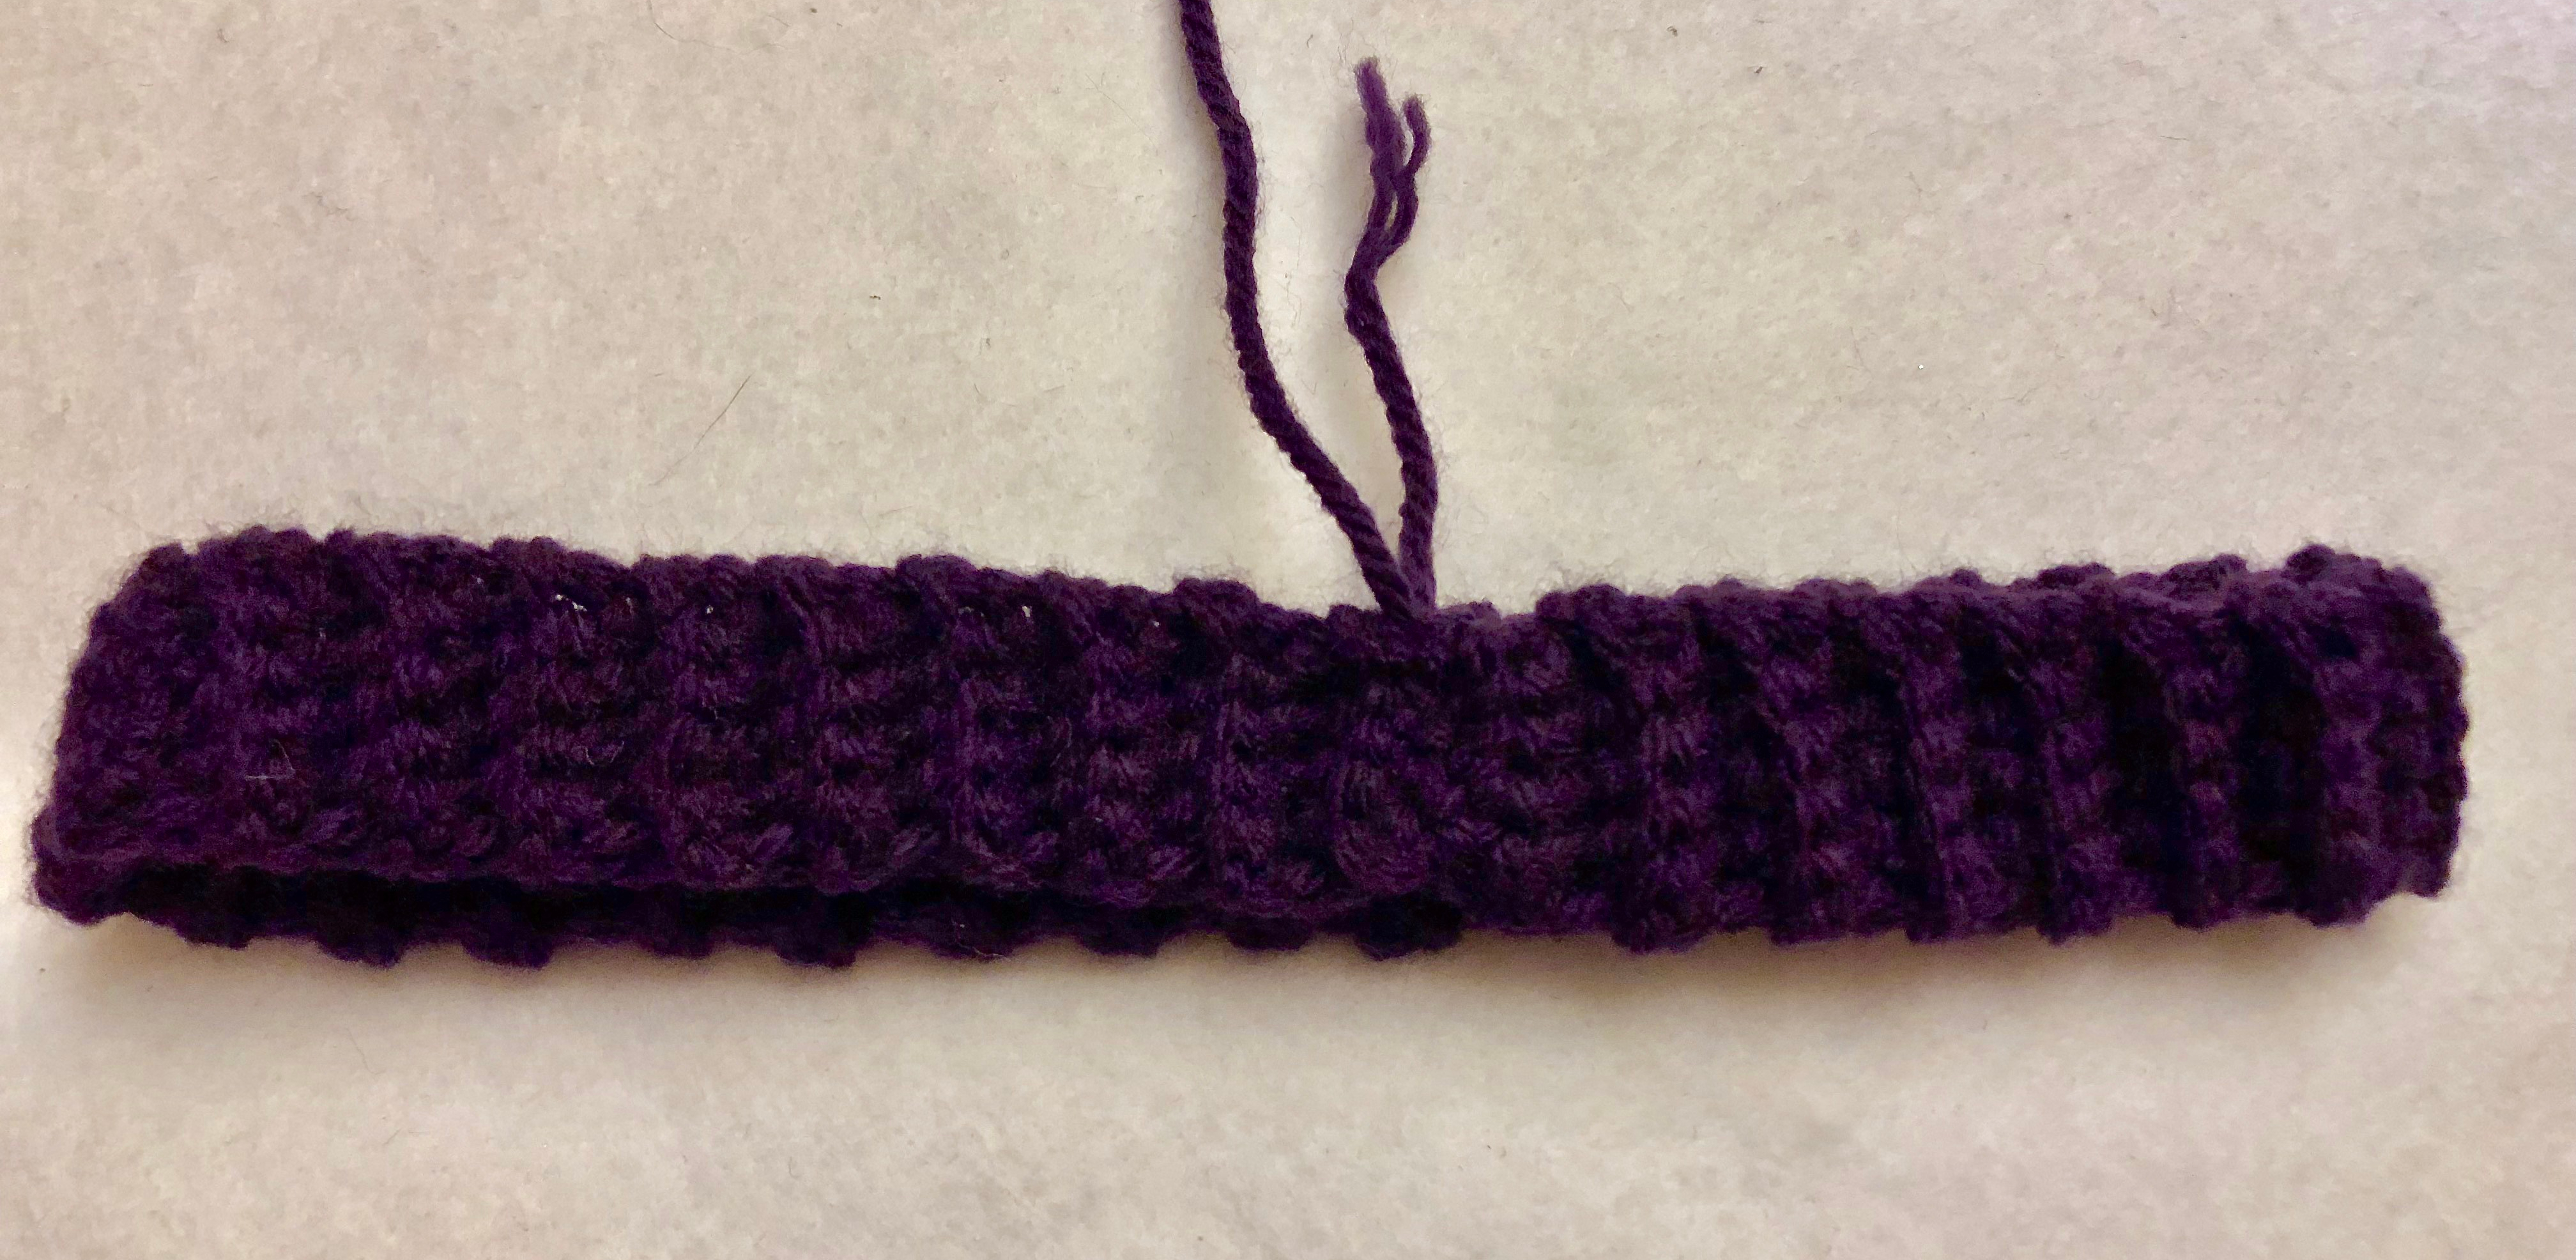

Once you join together the 2 ends of the ribbing you will work single crochets around the top. Your ribbing will consist of 70 rows total, so you will have roughly 70 gap spaces around the top. When pulling up your foundation for the star stitch you will work single crochets as evenly spaced as you can around. Slip stitch to join and chain 3. Now the fun begins.
Working into the 2nd chain from your hook, insert your hook and pull up (2 loops on hook). 

Now we work into the 3rd chain from hook and pull up another loop.


You should now have 6 loops on your hook, yarn over and pull through all 6 loops. 


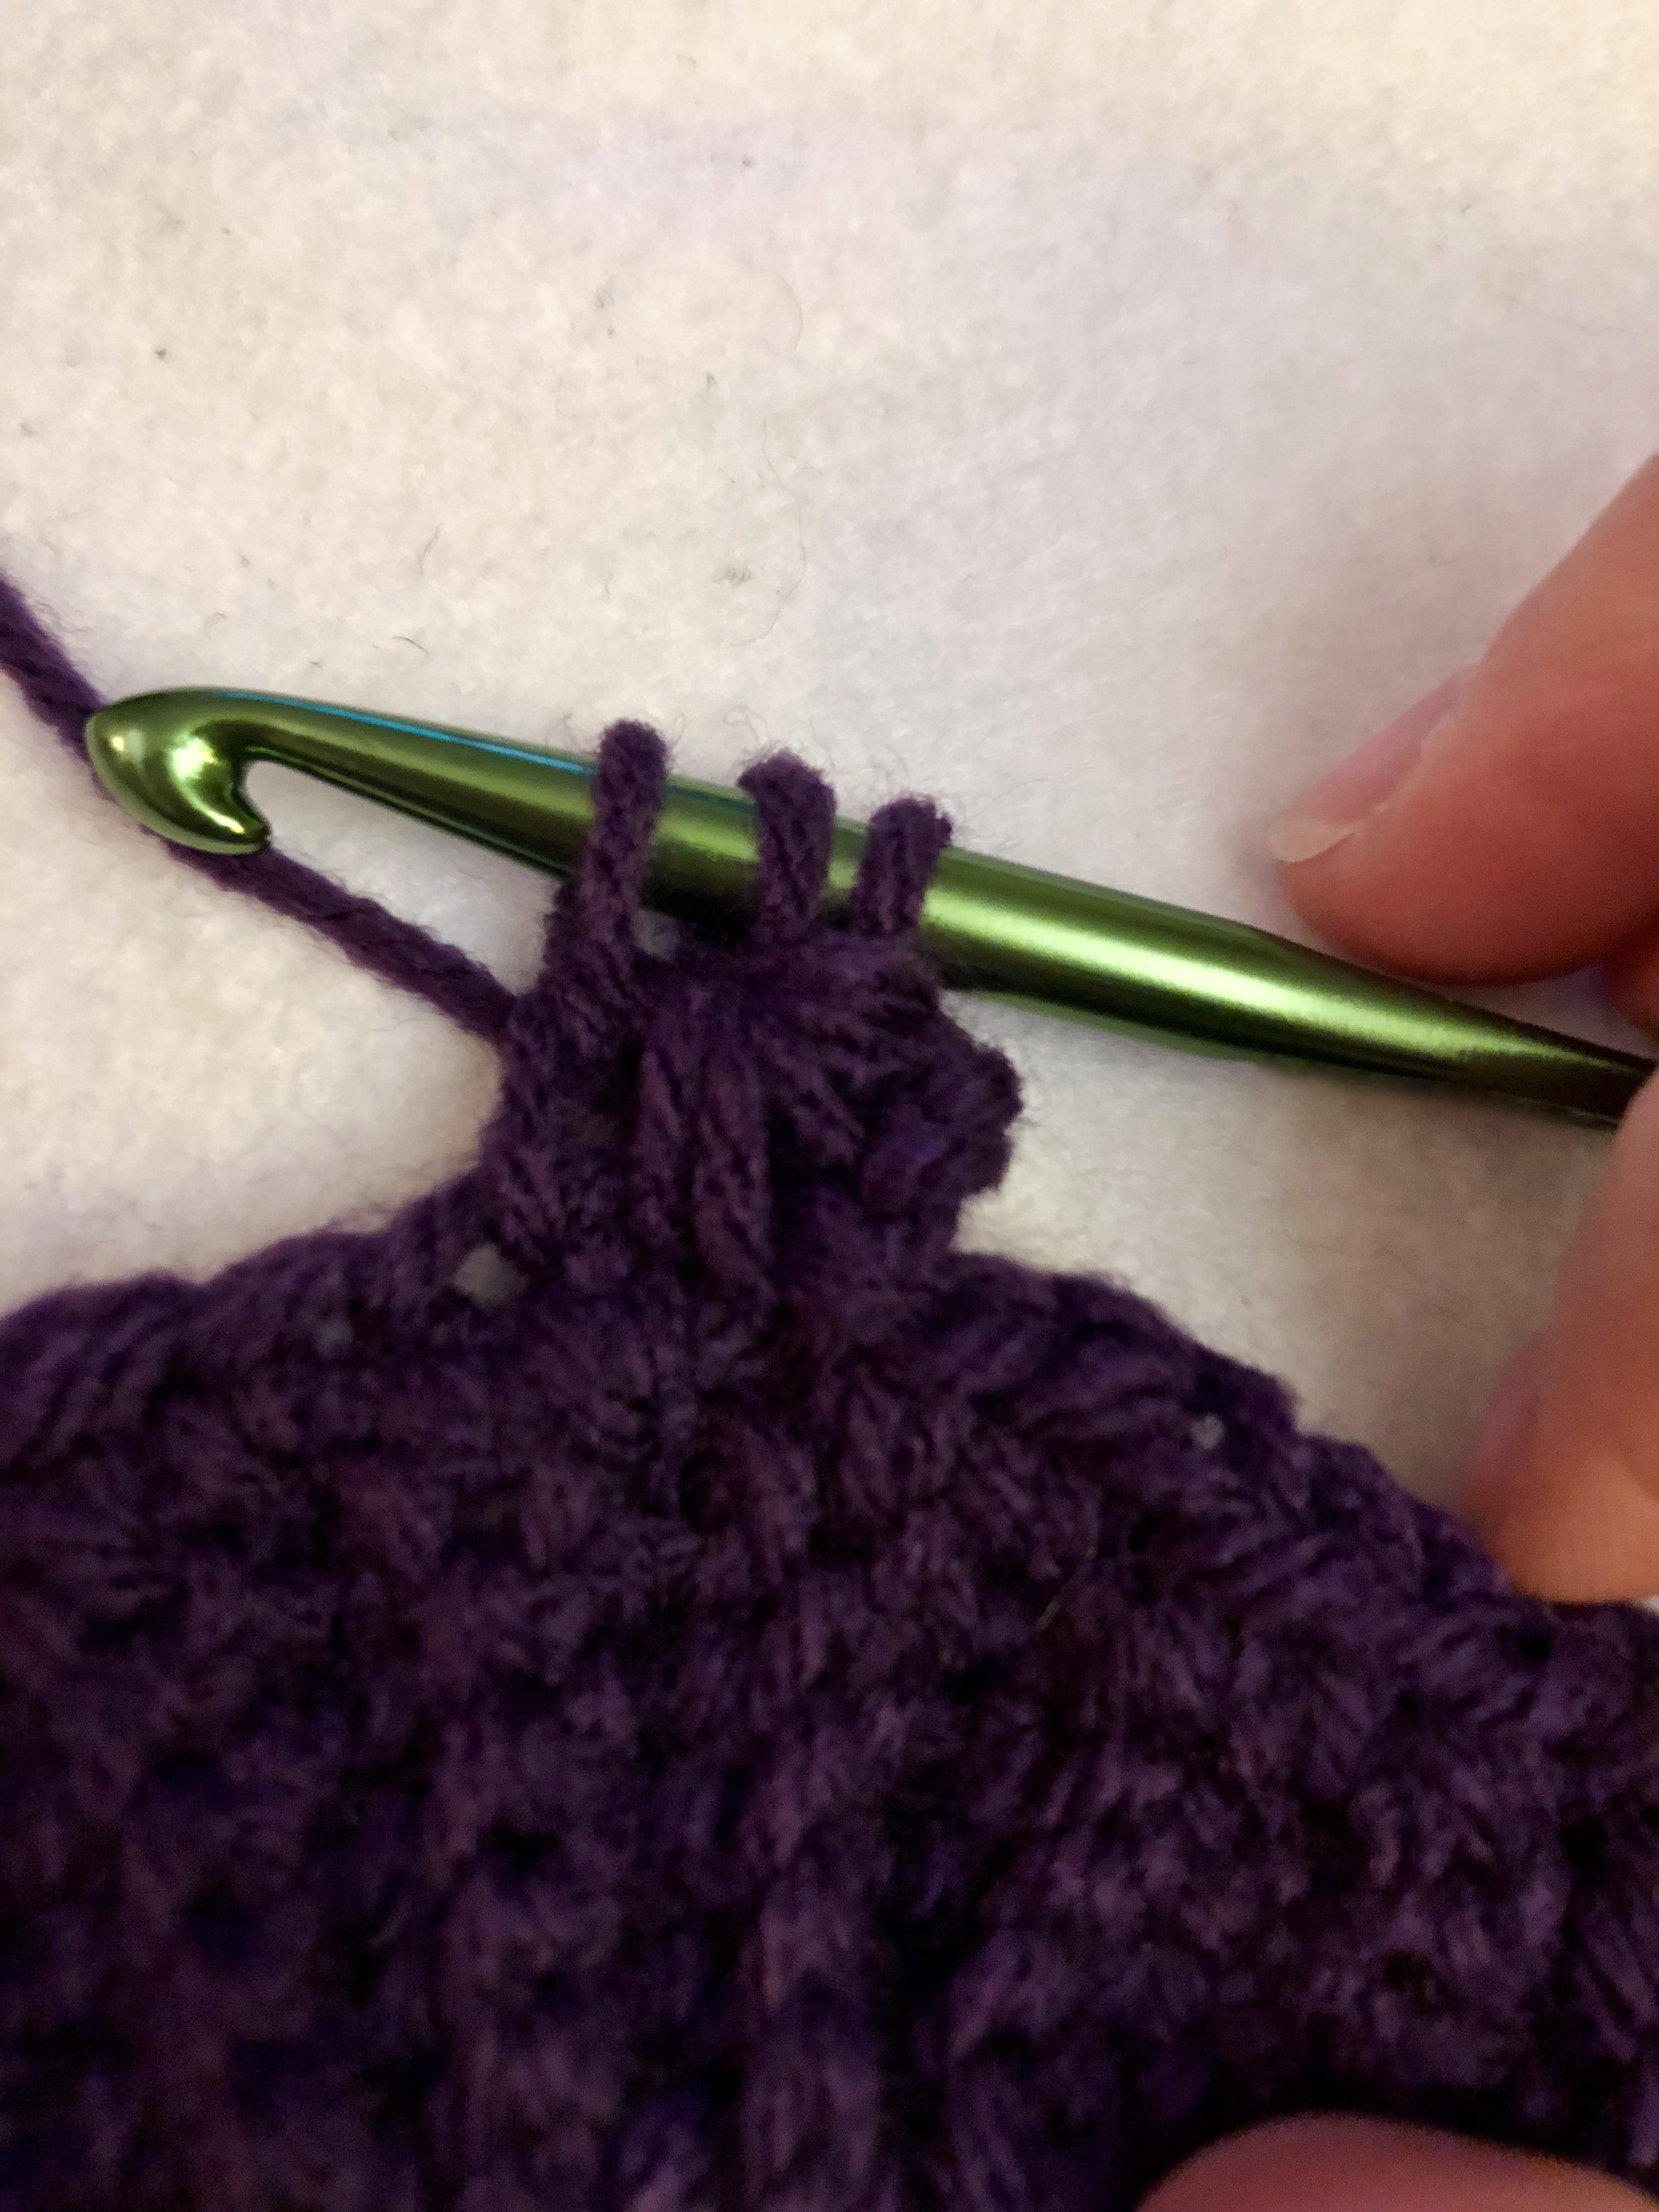
From here you insert your hook into the single crochet at the base of the previous star, yarn over and pull up.


complete the star as previous, by pulling a loop through all 6 on the hook and slip stitch. Continue this process around. Once you reach the end of the round you will join by making a slip stitch in the 3rd ch from the first star stitch in the round.


I continued working the rounds until I achieved the height I wanted of the slouchy. So pretty, am I right?!?


I completed the slouchy by weaving the tail through every few stitches around the top round, then pulled the tail tight and slip stitched in a stitch on the opposite side, like so:


Last step was to add some cute homemade pom pom’s to the top. For the tan hat, I made a yarn pom pom much like Jess from Make and Do Crew shows in her tutorial here. For the purple hat I made a faux fur pom utilizing a tutorial by Megan from Meg Made With Love, here.


The FREE pattern for the Toddler Star Stitch Slouchy will be available tomorrow so don’t forget to swing on by then!

