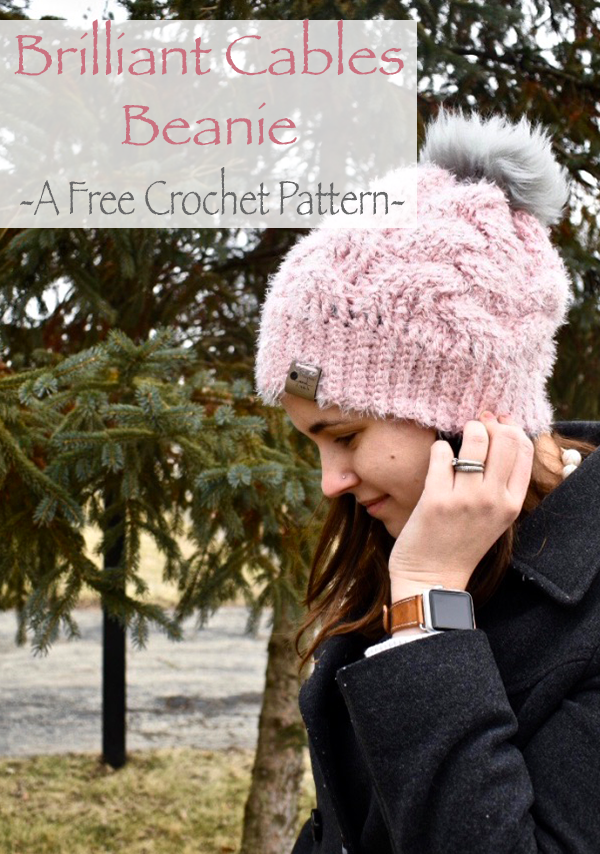
Brilliant Cables Beanie- Free Crochet Pattern

The highly anticipated Brilliant Cables Beanie Pattern is finally here! If you’d like to have a large font, ad free version, you can purchase the inexpensive colored PDF from our Etsy shop here.
You can also add to your Ravelry que here.
I am so excited to share this one with you all, as it is quite possibly what I consider to be the most beautiful beanie I’ve designed so far.
If you are intimidated by the cabling, don’t be! It’s much easier than you might think, and once you have the hang of it, you’ll be able to breeze through this beanie.
I’ve also written up a step-by-step picture tutorial to help you along the way. You can check that out here. But, if you’re still feeling lost and want to see a video tutorial, we recently released a tutorial on making our Cozy Cables Blanket Square. While the pattern in this video is worked flat, and the cables in the Brilliant Cables Beanie are worked in the round, this tutorial will still be helpful in teaching you the basics of how to cable crochet. You can find the high quality video on Youtube here.
And if you love this pattern so much that you’d like to make some in smaller sizes for the littles in your life, we have a Baby, Toddler and Child size available here.
I hope you’ll join me in adding this wonderful beanie to your winter wardrobe!
What You’ll Need
6.00mm crochet hook
8.00mm crochet hook
2 skeins of Bulky weight (5) acrylic or acrylic blend yarn- approximately 220 grams or 200 yards (I used Red Heart’s Hygge or Red Heart’s Soft Essentials)
Scissors
embroidery/darning needle
Pom pom (optional)
My Amazon Picks
Completed Measurements
19” circumference
10” tall
Gauge
In 6.00mm hook:
15 sc in blo= 4”
14 rows= 4”
In 8.00mm hook:
10 dc= 4”
5 rows= 4”
Abbreviations Used
ch= chain
sc= single crochet
blo= back loops only
ss= slip stitch
p/u= pick up
dc= double crochet
st= stitch
fpdc= front post double crochet
bpdc= back post double crochet
fptc= front post treble crochet
fpdc2tog= front post double crochet 2 together
dec= decrease (single crochet 2 together)
Special Stitches
fpdc= front post double crochet: yarn over, [working in front of your work] insert hook behind post, pull up loop, yarn over, pull through 2 loops, yarn over, pull through 2 remaining loops
bpdc= back post double crochet: yarn over, [working behind your work] insert your hook in front of post, pull up a loop, yarn over and pull through 2 loops, yarn over and pull through last 2 loops on hook
fptc= front post treble crochet: yarn over twice, [working in front of your work] insert hook behind post, pull up loop, yarn over, pull through 2 loops, yarn over, pull through 2 loops, yarn over, pull through remaining 2 loops
FPTF: front post treble crochet in front of the stitches just skipped
FPTB: front post treble crochet behind the stitches just skipped
Fpdc2tog= front post double crochet 2 together: yarn over, [working in front of work] insert hook behind 1st post, pull up loop, yarn over, pull through 2 loops on hook, yarn over, insert hook behind next post, pull up loop, yarn over, pull through 2 loops, yarn over and pull through remaining 3 loops
Pattern Notes
- Cabling will typically result in a looser tension. It is for this reason that I highly recommend using the yarn suggested, and making a gauge swatch before you begin. You may need to either adjust your tension or switch your hook size to achieve a proper fitting beanie.
- Once cabling begins, the stitch locations will change. To help identify which stitch comes next, I recommend pulling the sides of your work a bit to straighten out the round prior.
- You should also note that the back post double crochet between each group of 12 will be in the same location on each round.
- Take care to the abbreviations in each round and look out specifically for the FPTB stitch, if you accidentally work a FPTF instead, the cabling will not look braided.
- When working the fpdc sts in the 2nd and 4th rounds, you may also work 4 dc. The fpdc may help you to better track those stitches for subsequent rounds, but either stitch will result in a similar look.
- If you’re looking for additional help working cables, why not check out our first ever video tutorial on YouTube? While this tutorial shows you how to work cables flat, the only difference you need to note when working the center cable shown in the video and the cables in this pattern, is that on the rows worked on the “Wrong Side” in the video, is when you’ll be working the 12 fpdc rounds in this pattern.
Pattern for the Brim
With 6.00 mm crochet hook
Foundation: ch 11, turn (11)
Row 1-65: ch 1, sc in blo, turn (10)
Work a ss into each stitch of row 65 to each stitch of the foundation row, joining the brim and creating a cylinder.
Pattern for the hat
Switch to 8.00 mm crochet hook
Foundation: ch 2, p/u 65 dc sts around the top of the brim (65)
Round 1: ss into 1st dc, ch 2, *fpdc 12, bpdc 1, repeat from * around (65)
Round 2: ss into 1st fpdc, ch 2, *sk 4, fptc 4, FPTF 4, fpdc 4, bpdc 1, repeat from * around (65)
Round 3: ss into 1st fptc, ch 2, *fpdc 12, bpdc 1, repeat from * around (65)
Round 4: ss into 1st fpdc, ch 2, *fpdc 4, sk 4, fptc 4, FPTB 4, bpdc 1, repeat from * around (65)
Round 5: ss into 1st fpdc, ch 2, *fpdc 12, bpdc 1, repeat from * around (65)
Round 6-13: repeat rounds 2-5 two more times (65)
Round 14: ss into 1st fpdc, ch 2, *fpdc2tog 6, bpdc, repeat from * around (35)
Round 15: ss into 1st fpdc, ch 2, sc 1, dec around (18)
Fasten off leaving long tail. Use tail to weave in and out around stitches of round 15. Pull tail tight to close the hat. Tie off and attach faux fur pom pom to the top.


hi so im not clear on how many yards you need. do you 220 or 440?
Hello! You’ll need approximately 200 yards total. Hope this helps and happy crocheting!
Hi! I love the look of the cable stitch and your photo & video tutorials were fabulous. While the stitches turned out beautifully my hat came out massive and looking a bit mushroom shaped… I used the roving yarn, size 5, and had the correct stitch count the whole way through… I am thinking of trying again with a worsted weight yarn but not sure if that will solve my problem? I really want to love this hat…
Awe, thanks so much for the kind words Helen! So glad you like this design! You might just be running into a gauge issue. The easiest way to to fix it would be to drop down a hook size or so and see if that helps you. Or if the ribbing was fine and it was just the cable part that was too big, you could just skip going up to the L hook and work the whole thing in your J hook. And if all else fails, we do have this pattern available in worsted weight too! You can find that here: https://apurposeandastitch.com/bcb-worsted/
what should the lenghth of the brim be after working 65 rows. My brim seems to be too small for my head.
It should just a little shorter than 19″ when closed up. If it is not stretching enough for your needs, you could increase by 2 rows. Just make sure you’re only picking up the 65 stitches in the brim when you go to add the hat portion. 🙂
How much does this beanie stretch? I’m going to be making a couple for people with big heads and lots of hair. 🙂
Haha, it’s got quite a good stretch, but ultimately comes down to the yarn you use. The hygge I used stretched a lot more than some of the other yarns I used. Regardless though, I’d say you can get a good 1-1.5” stretch on it from just the stitches
i absolutely love this pattern. However i made this with Charisma Loops and Thread Bulky Yarn and the hat turned out huge! I used the hook sizes in the pattern. is there a way to make the hat significantly smaller? Will going down to a 6 mm hook for the body of the hat make a big difference in size?
Hi there! So glad you like this pattern! 🥰
You could try decreasing the hook size or, if you need to decrease by a lot to meet gauge, you could also try a smaller hook with worsted weight yarn.
We’ll also be releasing a worsted weight version of this beanie that uses a US I hook in just a few weeks, if you’d rather wait for that pattern to publish. 🤗
Can you explain how you still have 65 in a round when skipping stitches? Do you chain 4 for the skipper stitches??
Hello,
You will always be going back to those skipped stitches and working into them, if you are not ending a round with 65 stitches, you may have accidentally forgotten to work into them.
By skipping them initially, working the next 4 and then going back and working into the 4 skipped stitches, it creates the braided look to the pattern.
Hope this helps and happy crocheting!
-Bernadette
Eek! I’m lost on row 4. FPTB…I can’t wrap my
mind around this. Any detailed instruction would be great. I end up at the spot where my bpdc should fall and it calls for the 4 FPTB. I’m lost.
You’re in good company! The FPTB is the most difficult stitch of this pattern to wrap one’s head around. It’s the same exact concept as the front post treble crochets worked in front of the treble crochets just worked, but you’ll be working these stitches behind the strands of the treble crochets just worked, if that makes sense?
So once you skip the 4 sts, and work 4 fptc, you’ll have a bit of a cross over happening. The trick to get that braided look is to insert your hook still in front of the posts on the skipped sts, but behind the fptc just worked.
Hope that helps!
So when you
Question: I have Caron Cakes Latte and want to try this. Did you find the Hygge stretched from the nylon?
Hi Serena,
The Hygge definitely had a bit more give than some of the other yarns I’ve used to make this beanie. It’s also quite heavy so it can make the hat feel looser than a lighter yarn would. I haven’t personally made this using a Caron Cake, but I’d love to hear how it goes if you give it a shot!
Warmest Regards,
Bernadette
This pattern is so cute! I am wondering where you got your little leather tags. I have been looking for some (not too expensive ones) for awhile. Thank u 😍
Awww, thank you so much for the kind words! I get my tags from Jen at Paper Sushi Shop on Etsy. She is absolutely wonderful to work with and her prices are very competitive. You can find her shop here: https://www.etsy.com/listing/596648851/1-x-2-custom-leatherette-tags-for?ref=user_profile&frs=1
Thank you for this wonderful tutorial! I was able to make a hat for myself just before a snowstorm. I did a swatch and everything it still turned out a little big. That’s ok with me since I have very curly hair (it won’t squish my curls) but the next one I make I may size down the hooks. Again thank you for this adorable pattern. (The Hygge yarn is to die for!) I love it!!!
Aw, so glad you found the tutorial helpful and like the recommended yarn! Best of luck with the second one, I hope you’re able to achieve a better fit! Thank you for the kind words and sharing your experience ☺️
Hello 🙂 I’m having a hard time with the ‘p/u’ part after the brim. Could you do a short video on the technique for this? I really want to make this hat! Thank you in advance.
Hi Lhea,
Thanks so much for reaching out, I am so pleased to hear you’re excited to make this beanie! I simply do not have time do offer video tutorials at this time, but did find this video by WEBS Yarn Store, that shows this technique in motion. I recommend watching from 1 min 30 sec to 2 min 40 sec. She is working into half double crochets, so she is picking up 2 stitches per row, but for my pattern, you only need to pick up one double per single crochet in the ribbing. Hope this helps!
https://youtu.be/M8D9LGJwr8A?t=90
Hello! I absolutely love this pattern and am very excited to start it, but I can’t seem to get past the first row of ‘p/u 65 stitches’. I can’t figure out how to pick them up. Could you please help and do a short video on that part? I’d really appreciate it.
Well. I didn’t figure out how to print this pattern. And I went through it twice.
Hi Gloria, sorry you’re having issues printing the pattern- since this is the free pattern it is not formatted to be printed. If you are looking for a printable version, please visit our Ravelry and Etsy shops 🤗
Hi, LOVE the look of this hat! I have 2 questions before I begin. How many cables in total? Can I reduce the brim size to like 7 or 8 stitches instead of 10? Do you think that would make a huge difference in the fit?
Thanks so much.
Hi there,
Thanks so much for the kind words! There are 5 cables running around the body total, and you could certainly decrease the brim if you’d like. This beanie offers a bit of slouch, so it wouldn’t impact the fit enough to make it unwearable. Hope this helps, and you enjoy making your own beanie!
I got the braided look in row 2 with no problem, but when working the fpdc in row 3, do you work in the 4 fptc first or the 4 FPTF? I’m so confused.
Hi Heather,
You’ll want to work in the order of the new stitches (rather than the original order).
So on round 3 you’ll be working into the: 4 FPTF, 4 fptc and then 4 fpdc for each 12 fpdc segment. Hope this helps and makes sense!
If you’re more of a visual learner, we’ve had a lot of positive feedback about our picture tutorial which goes into detail about how to work each round. You can find that here: https://apurposeandastitch.com/brilliant-cables-beanie-blog-post/
Hope this helps and happy crocheting!
-Bernadette
Hi! I have a question… the pattern says to FPDC 12 a few times, but then it says to do 4 FPTC and FPTF, which makes 8 that are twisted together, but then it says to FPDC 4 more, which makes my cables look a little out of place… am I missing something? My hat isn’t looking like it should, and I’m only on the 3rd row. 😂 thank you!
Hi Ellee,
So sorry to hear your running into some confusion! The braids are made up of a total of 12 stitches, broken up in to 3 sections made of 4 stitches each. So every other round you’ll be working the 12 fpdc straight across, and the next round is when the cabling will happen. I do have a new video tutorial of working braided cables in the round that breaks this down into a little more detail that you can find on this pattern page!
Hope that helps and happy crocheting!
-Bernadette
Have made 5 already lol. Such a beautiful pattern! I used hygge and it seemed so heavy, but it’s so soft. I also used a soft yarn from hobby lobby and love the stitch definition that yarn produces with this pattern.
That’s so awesome that you’ve already made 5! Thanks so much for the support, we really appreciate it! I know what you mean about the hygge, you can’t beat that softness, but it is on the heavier side. Glad you were able to find an alternate yarn that works well for you! 😀
What kind of yarn?? I want the stitch definition (:
The yarns pictured here were Red Heart Hygge and Soft Essentials. I have also used Caron Pantone X and Patons Roving wool with great success and stitch definition.
Using Hygge, 65 rows is too long. Can you advise me how many rows will go with the pattern repeats of body. Thank you.
Hey Heather,
Thanks so much for reaching out. The body is worked in multiples of 13. You could also adjust it to be worked in multiples of 10 as I did with the baby pattern here: https://apurposeandastitch.com/mommy-me-brilliant-cables-beanie/ . Hope this helps!
-Bernadette