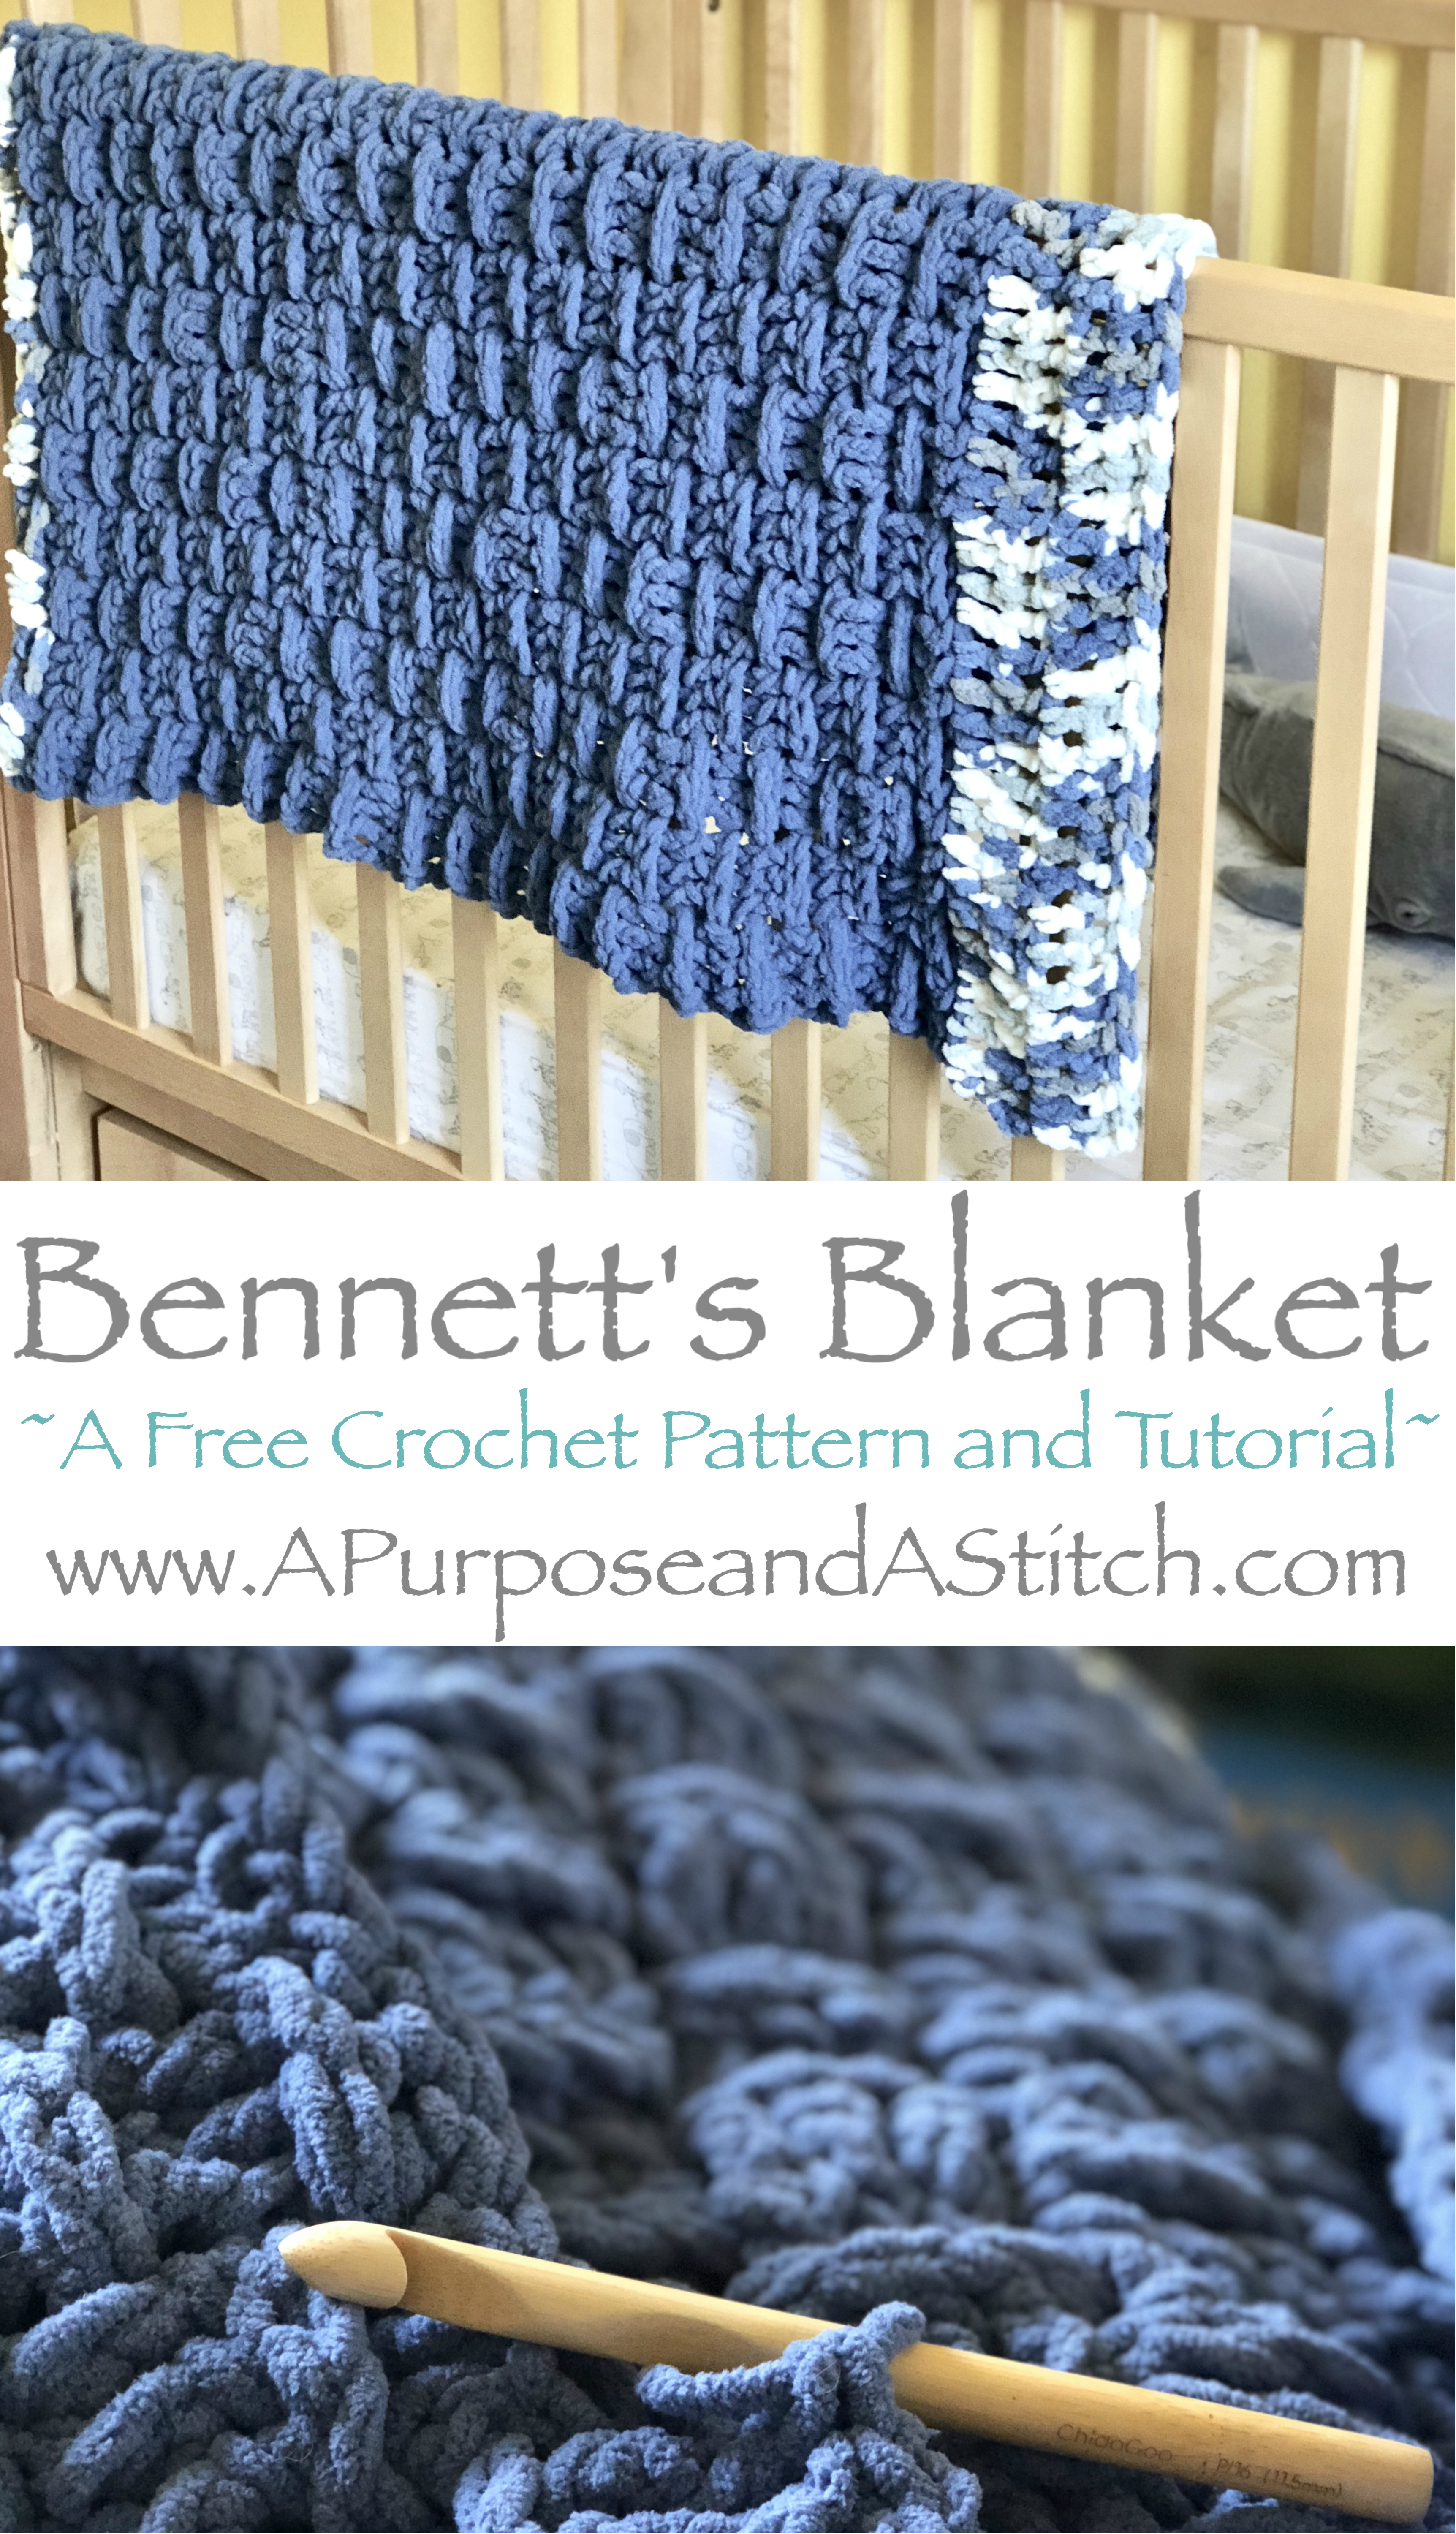
Bennett’s Blanket- Free Pattern

**Below you will find the step-by-step picture tutorial and written pattern for this super plush baby blanket.**
If you’ve been following me for a while, you may have noticed that I tend to focus a lot of my time on creating patterns that are relatively quick, easy and require 1-2 skeins of yarn. Since this blog is currently my “side hustle”, I simply don’t have a ton of time to devote to creating more intricate patterns in a timely manner.
That being said, this baby blanket was probably the quickest pattern for me to complete to-date, even though it was also the largest.

My younger sister just had their first baby (can you guess what they named him?) and I was so excited to get cracking on a homemade gift for him. However, I’ve also never made a crochet baby item for a boy before and was struggling to come up with an idea that I thought my sister and brother-in-law would enjoy as much as I hope my nephew will when he gets a little older.
I decided on a blanket months ago but was dragging my feet on what that would look like. I wanted to do something both unique but simple and new I would probably stay away from any lace, shells or floral stitches or borders. After dozens of swatches (this had to be perfect for the little man) and exactly one week before he was born, I finally decided on utilizing the Tri Square stitch.

I have seldom seen this exact stitch before, but love the look of crisp blocks that it offers. I think it looks quite similar to the basket weave stitch, but is worked in smaller alternates of front and back post double crochets.
The next biggest hurdle was deciding on the yarn I would use. Since they went with a blue woodland themed nursery, I was leaning towards a blue or brown yarn. When I found this beautiful blue, super soft, chunky blanket yarn by Yarnspirations, I knew I had found the one.

Once that was all figured out, the most time consuming part of this pattern was deciding on the stitch count and exact layout of color changes. After lots and LOTS of frogging and trial and error, I had it figured out.
From there, it was a breeze. Literally look me less then a day to complete and I love how it turned out!
To start, I began with a foundation chain and row of double crochets in my primary color. In the next row I switched to my secondary color yarn to begin working the Tri Squares for the majority of the blanket.


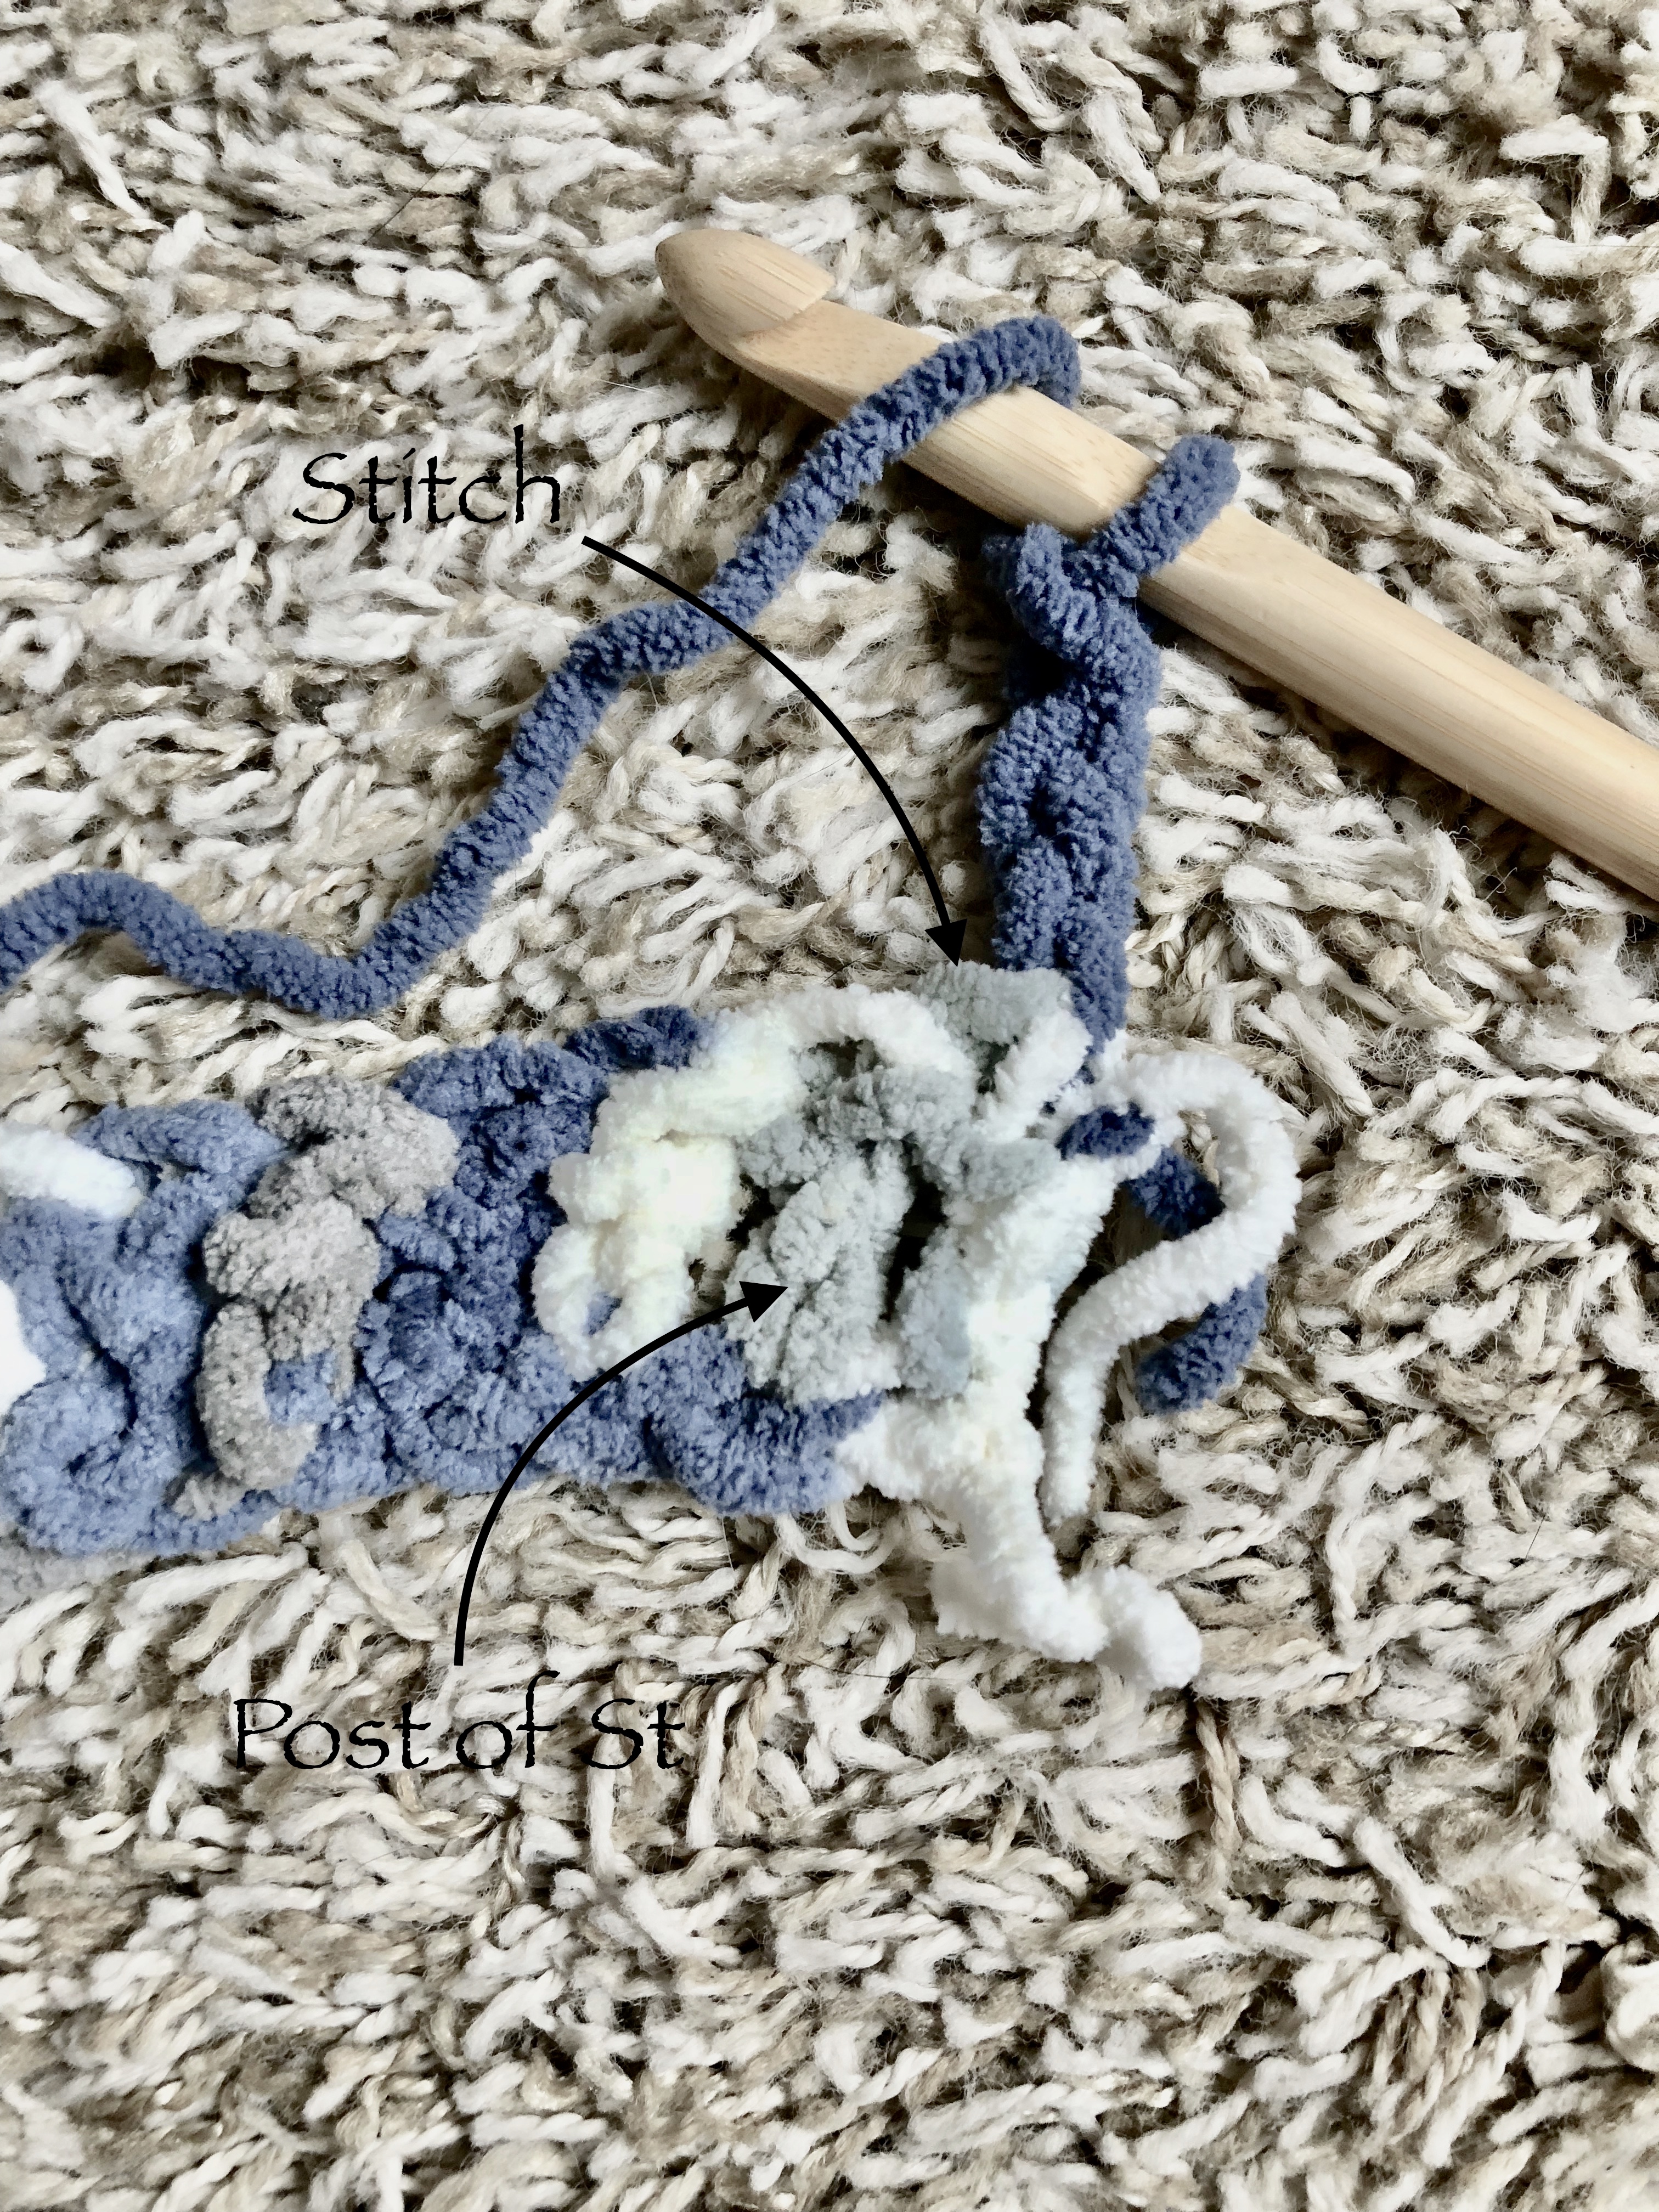
Working the Tri Square pattern is pretty easy once you are familiar with post stitches. With post stitches, you will be working around the post of each stitch, rather then into the “v” on top of the stitch as you typically would with a normal crochet stitch.
 Each Tri Square will consist of 3 front post double crochets and 3 back post double crochets, repeated across. To work the front posts, you will yarn over, insert your hook next to the post (from front to back), wrapping around the post and bringing back to the front on the other side of the post as you go. Then you will yarn over and pull up through 2 loops, yarn over and pull through remaining two loops on hook.
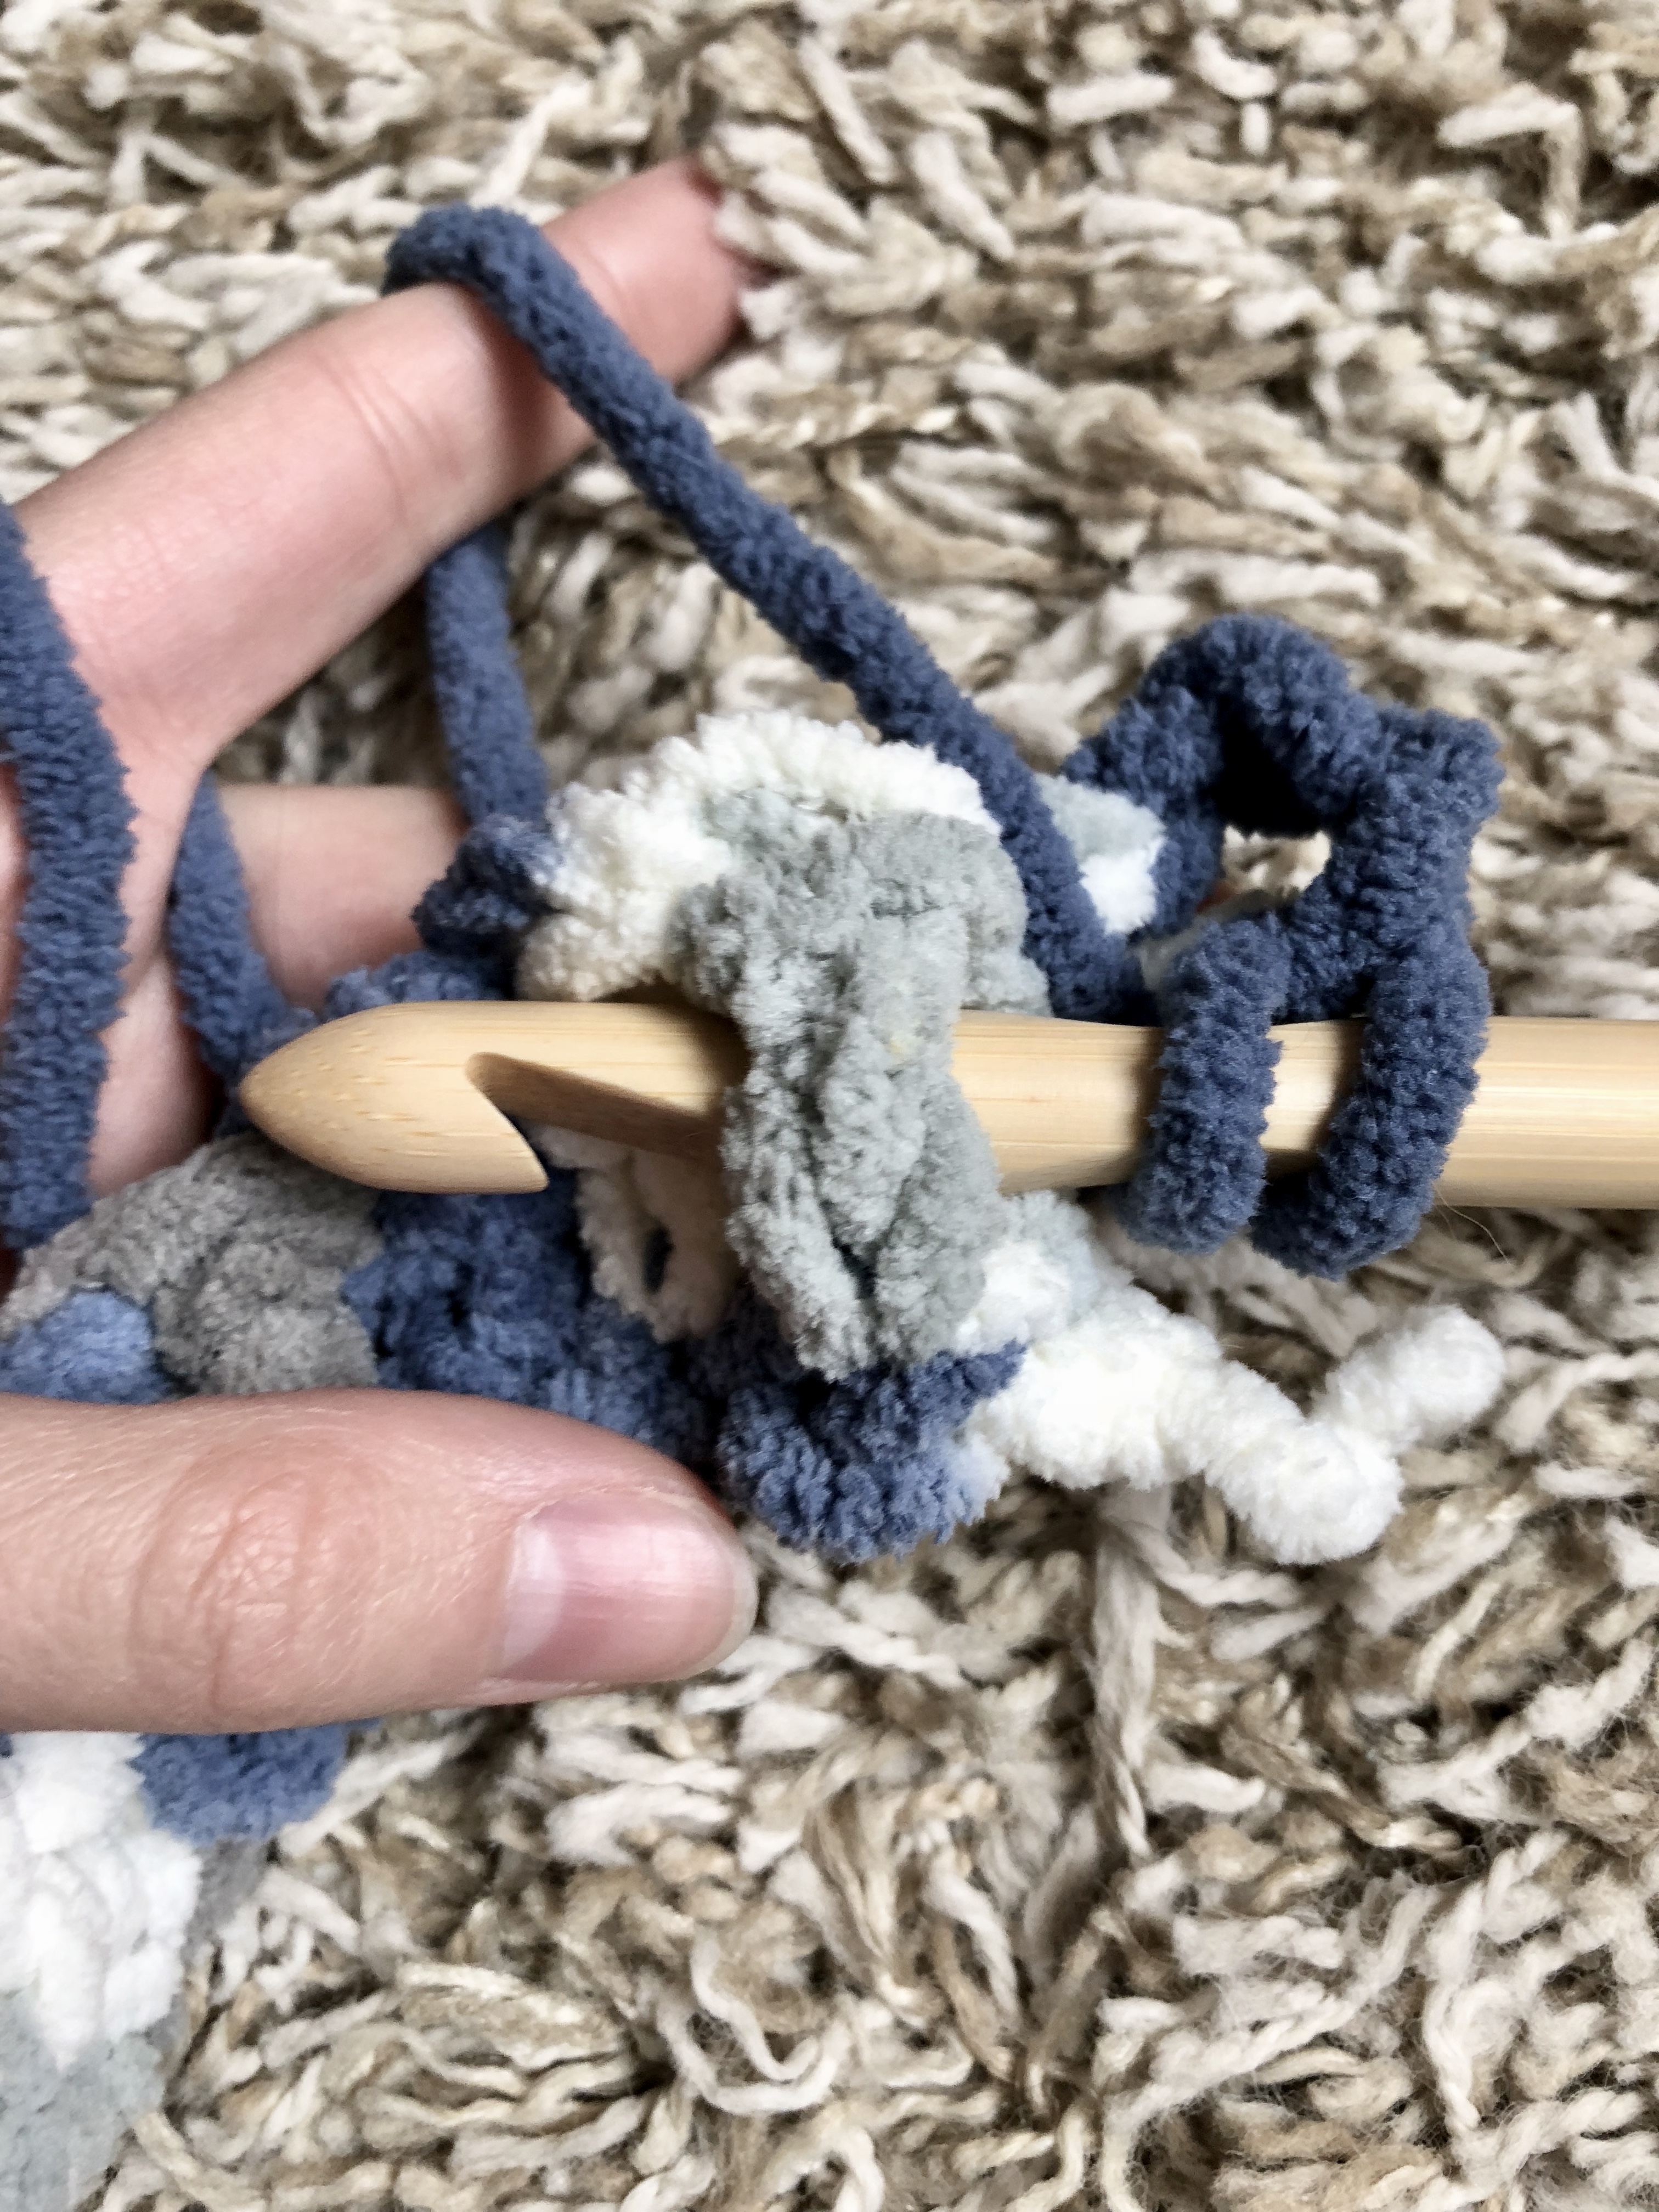
The back post double crochet is worked very similarly, but rather then inserting your hook from front to back to front you’ll; yarn over, insert your hook from behind your work forward, then towards the back again wrapping around your post as you go. Yarn over, pull through 2 loops, yarn over again and pull through last 2 loops. Back post double crochet completed! 😉

Once you are comfortable with post stitches, you can begin to work the Tri Square pattern.
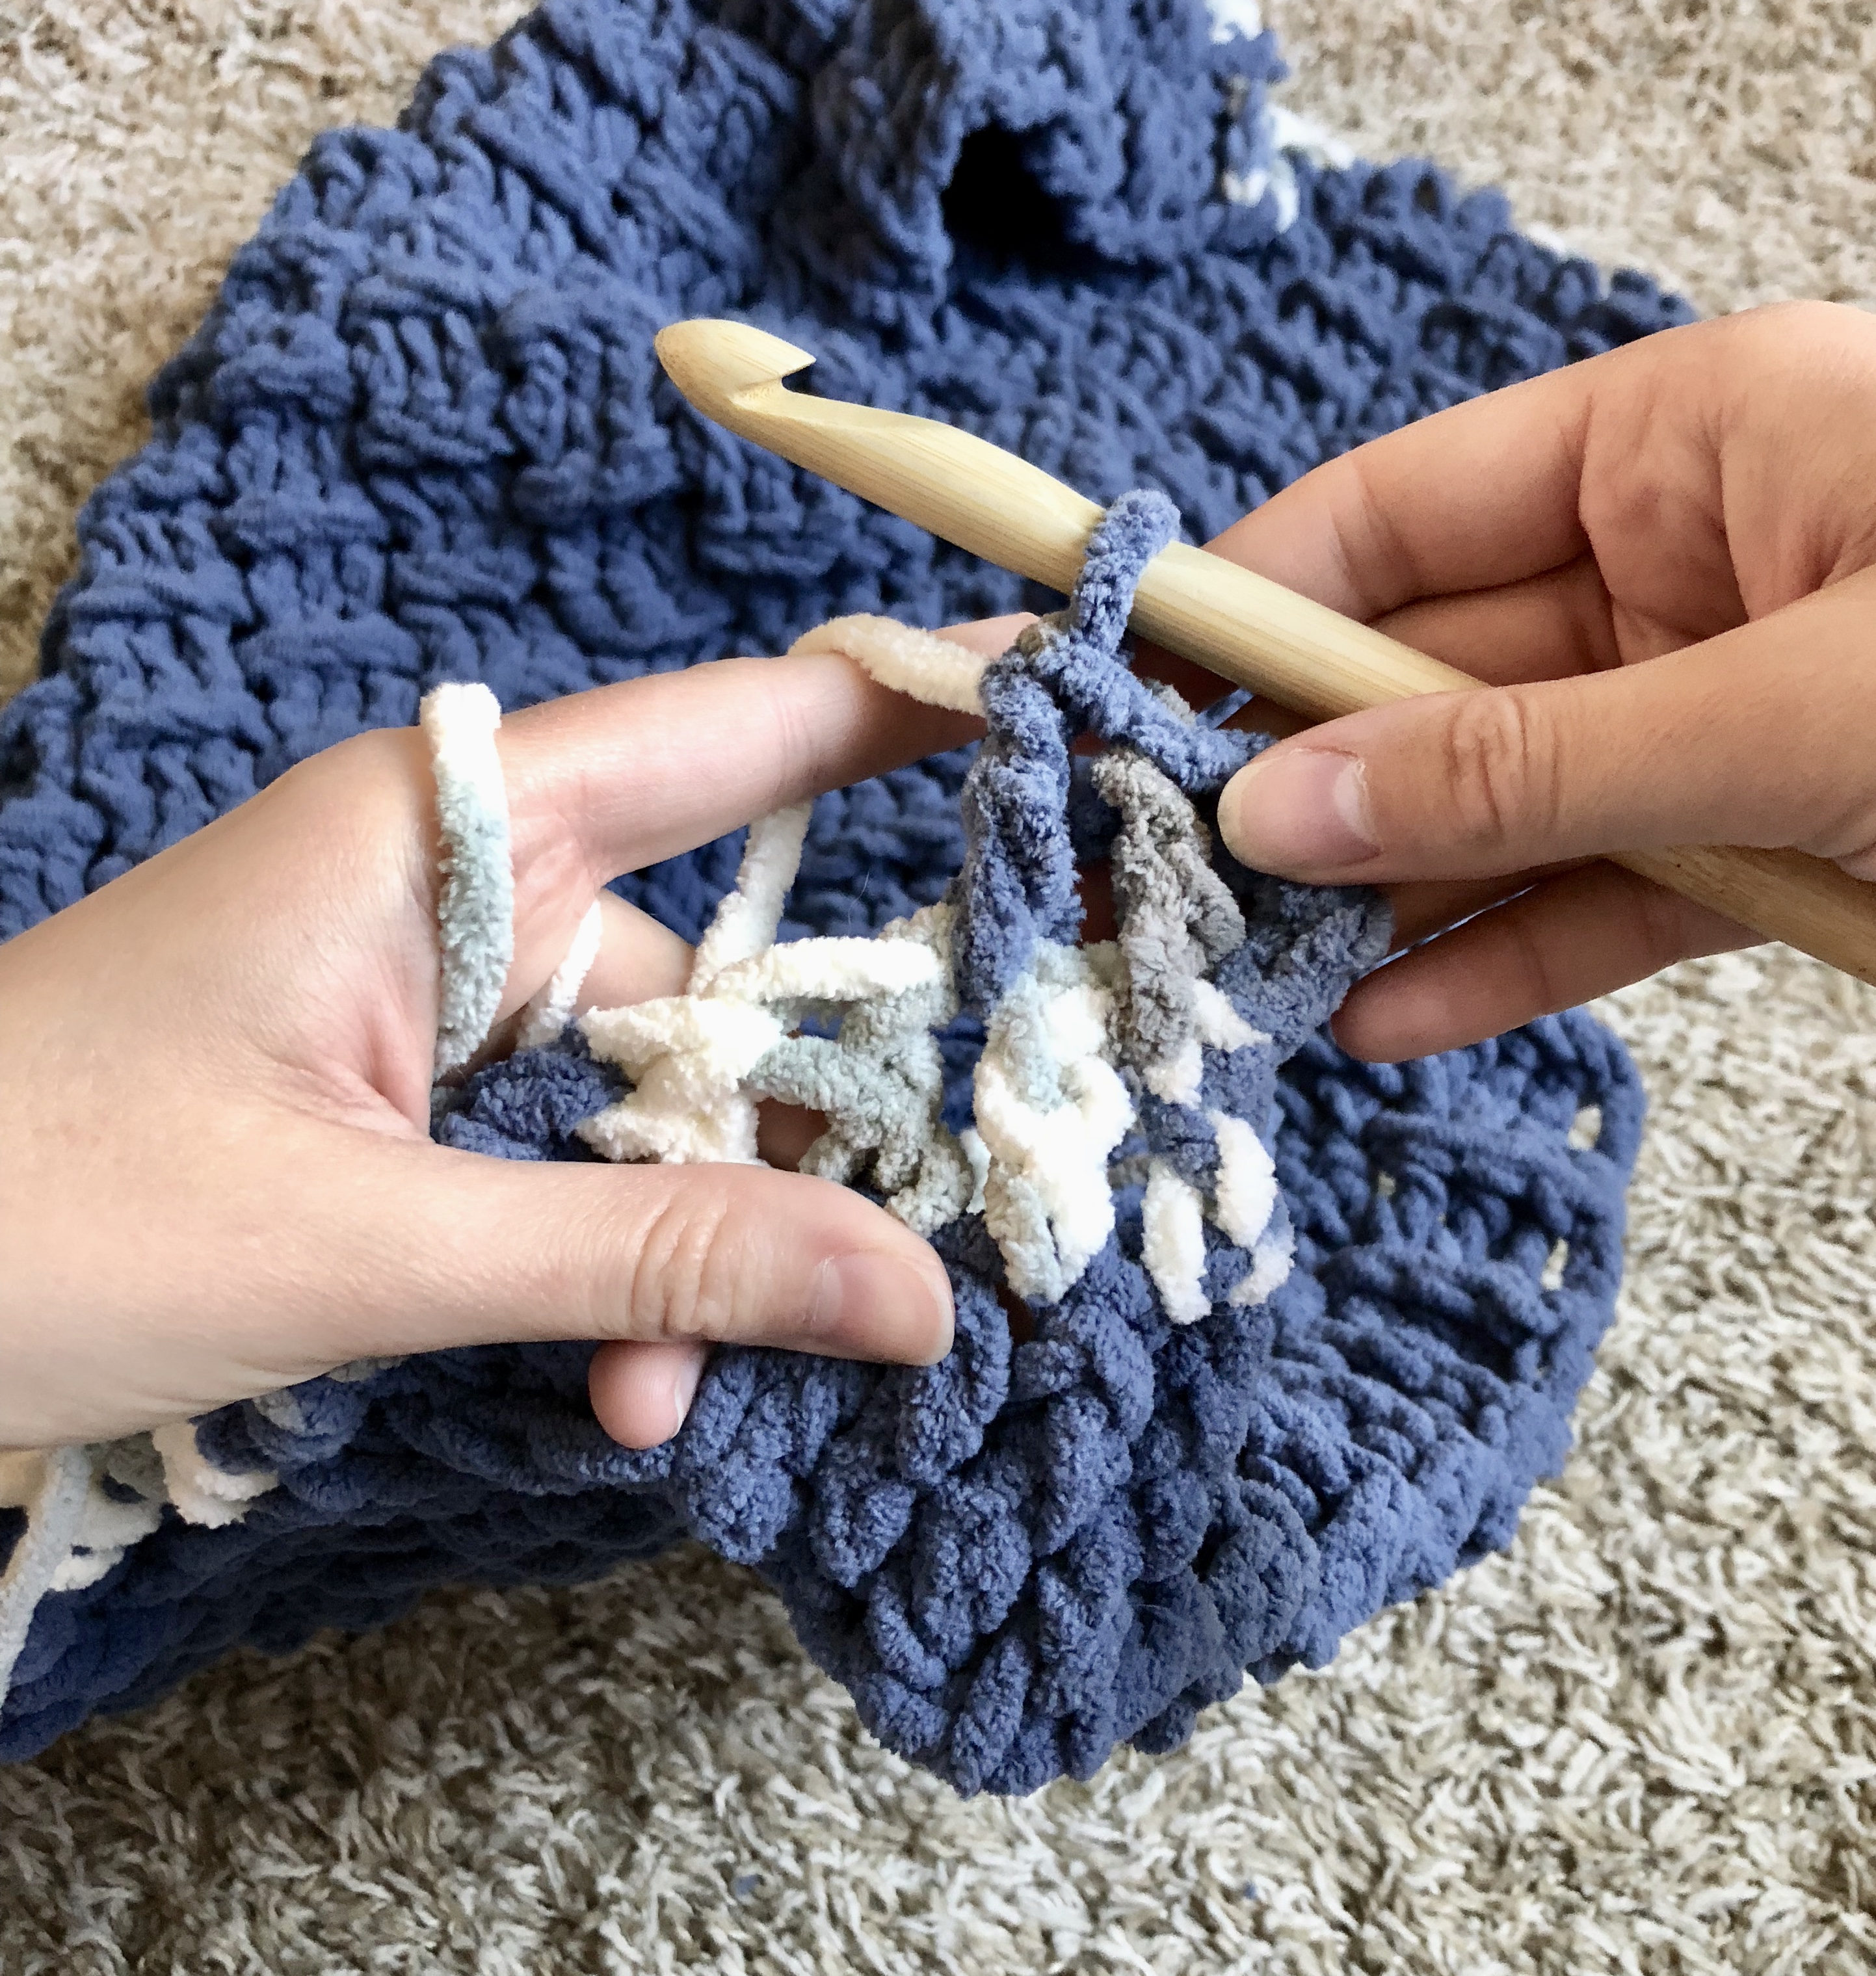
After your foundation row is complete, you will start to work the Tri squares by completing 3 front post double crochets. After the first 3 stitches, you will switch to 3 back post double crochets. You will then switch back to 3 front post double crochets and repeat across the row, double crocheting into the chain space of the turning chain from the previous row last.


When turning your work, you will chain 3 and complete 3 back post double crochets into the 3 front post double crochets from the row previous. You will then work 3 front post double crochets into the back post double crochets from the previous row and repeat this across.

From here, you will repeat those first two steps in each row (creating 3 front post double crochets into each back post double crochet from the row previous, and vise versa) until you achieve the majority of the height needed for your blanket.


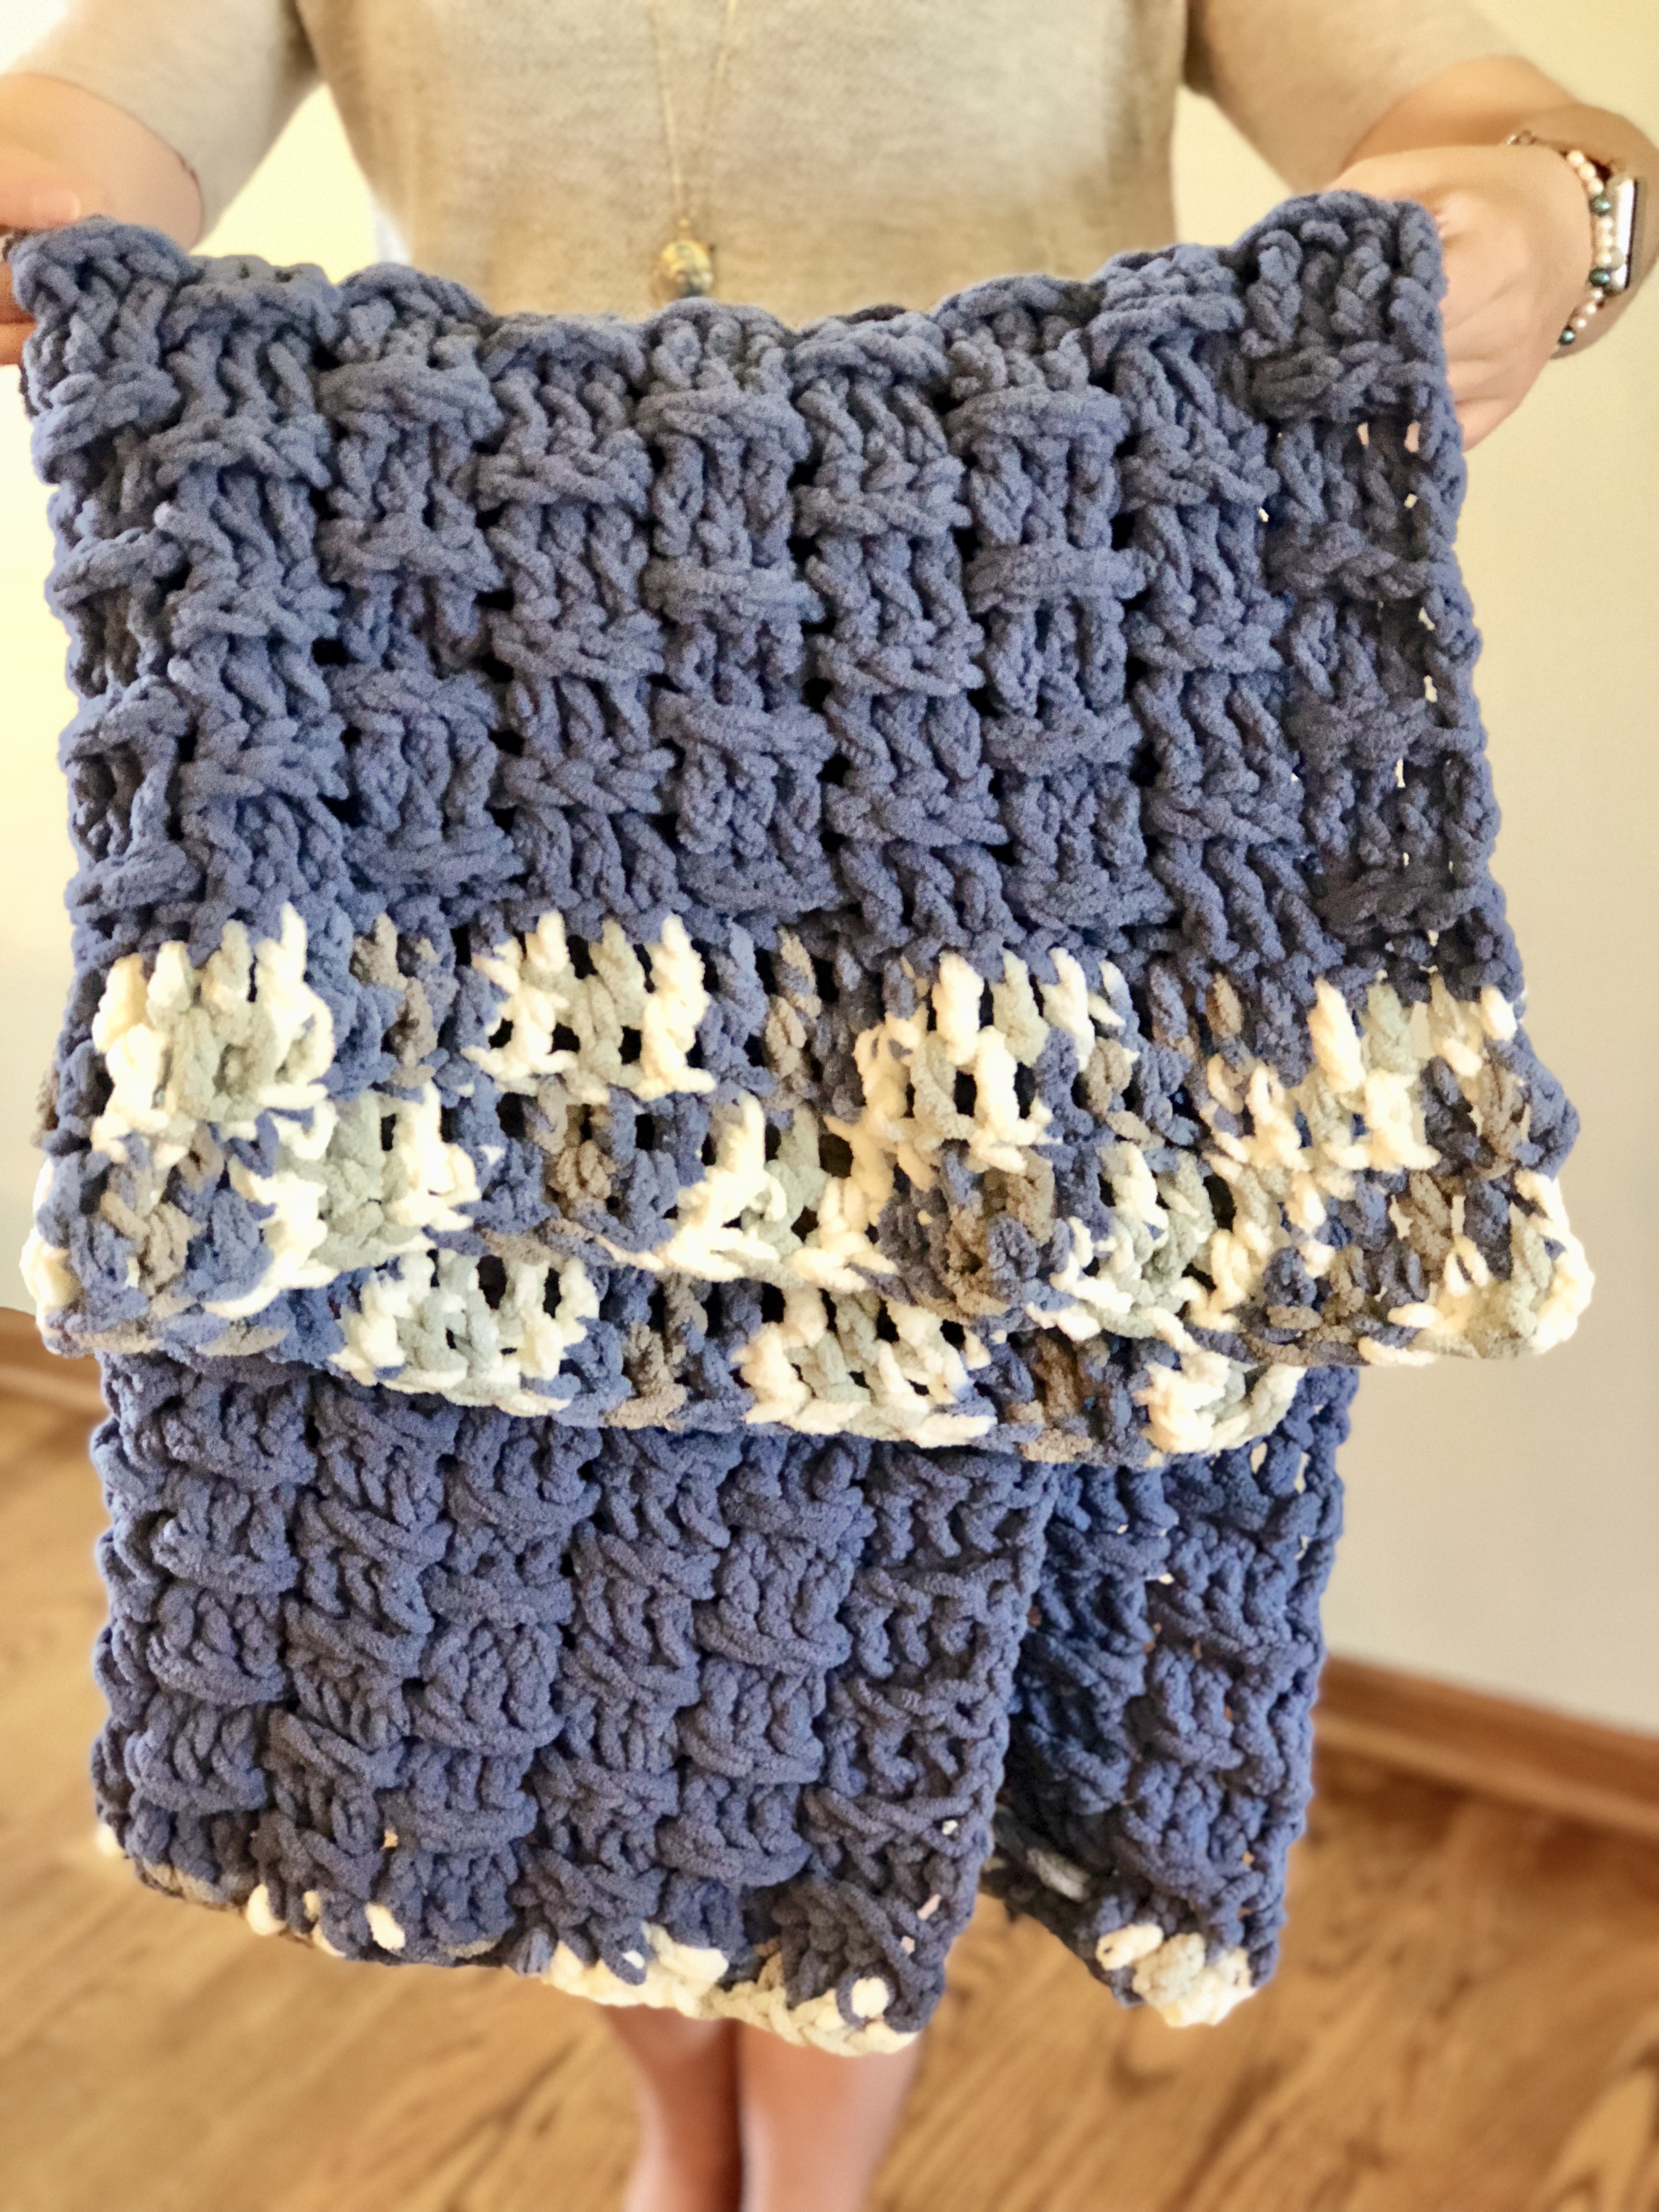
To add some additional detail and depth to this blanket, I switched back to the secondary color yarn for a few rows at the top of the blanket.
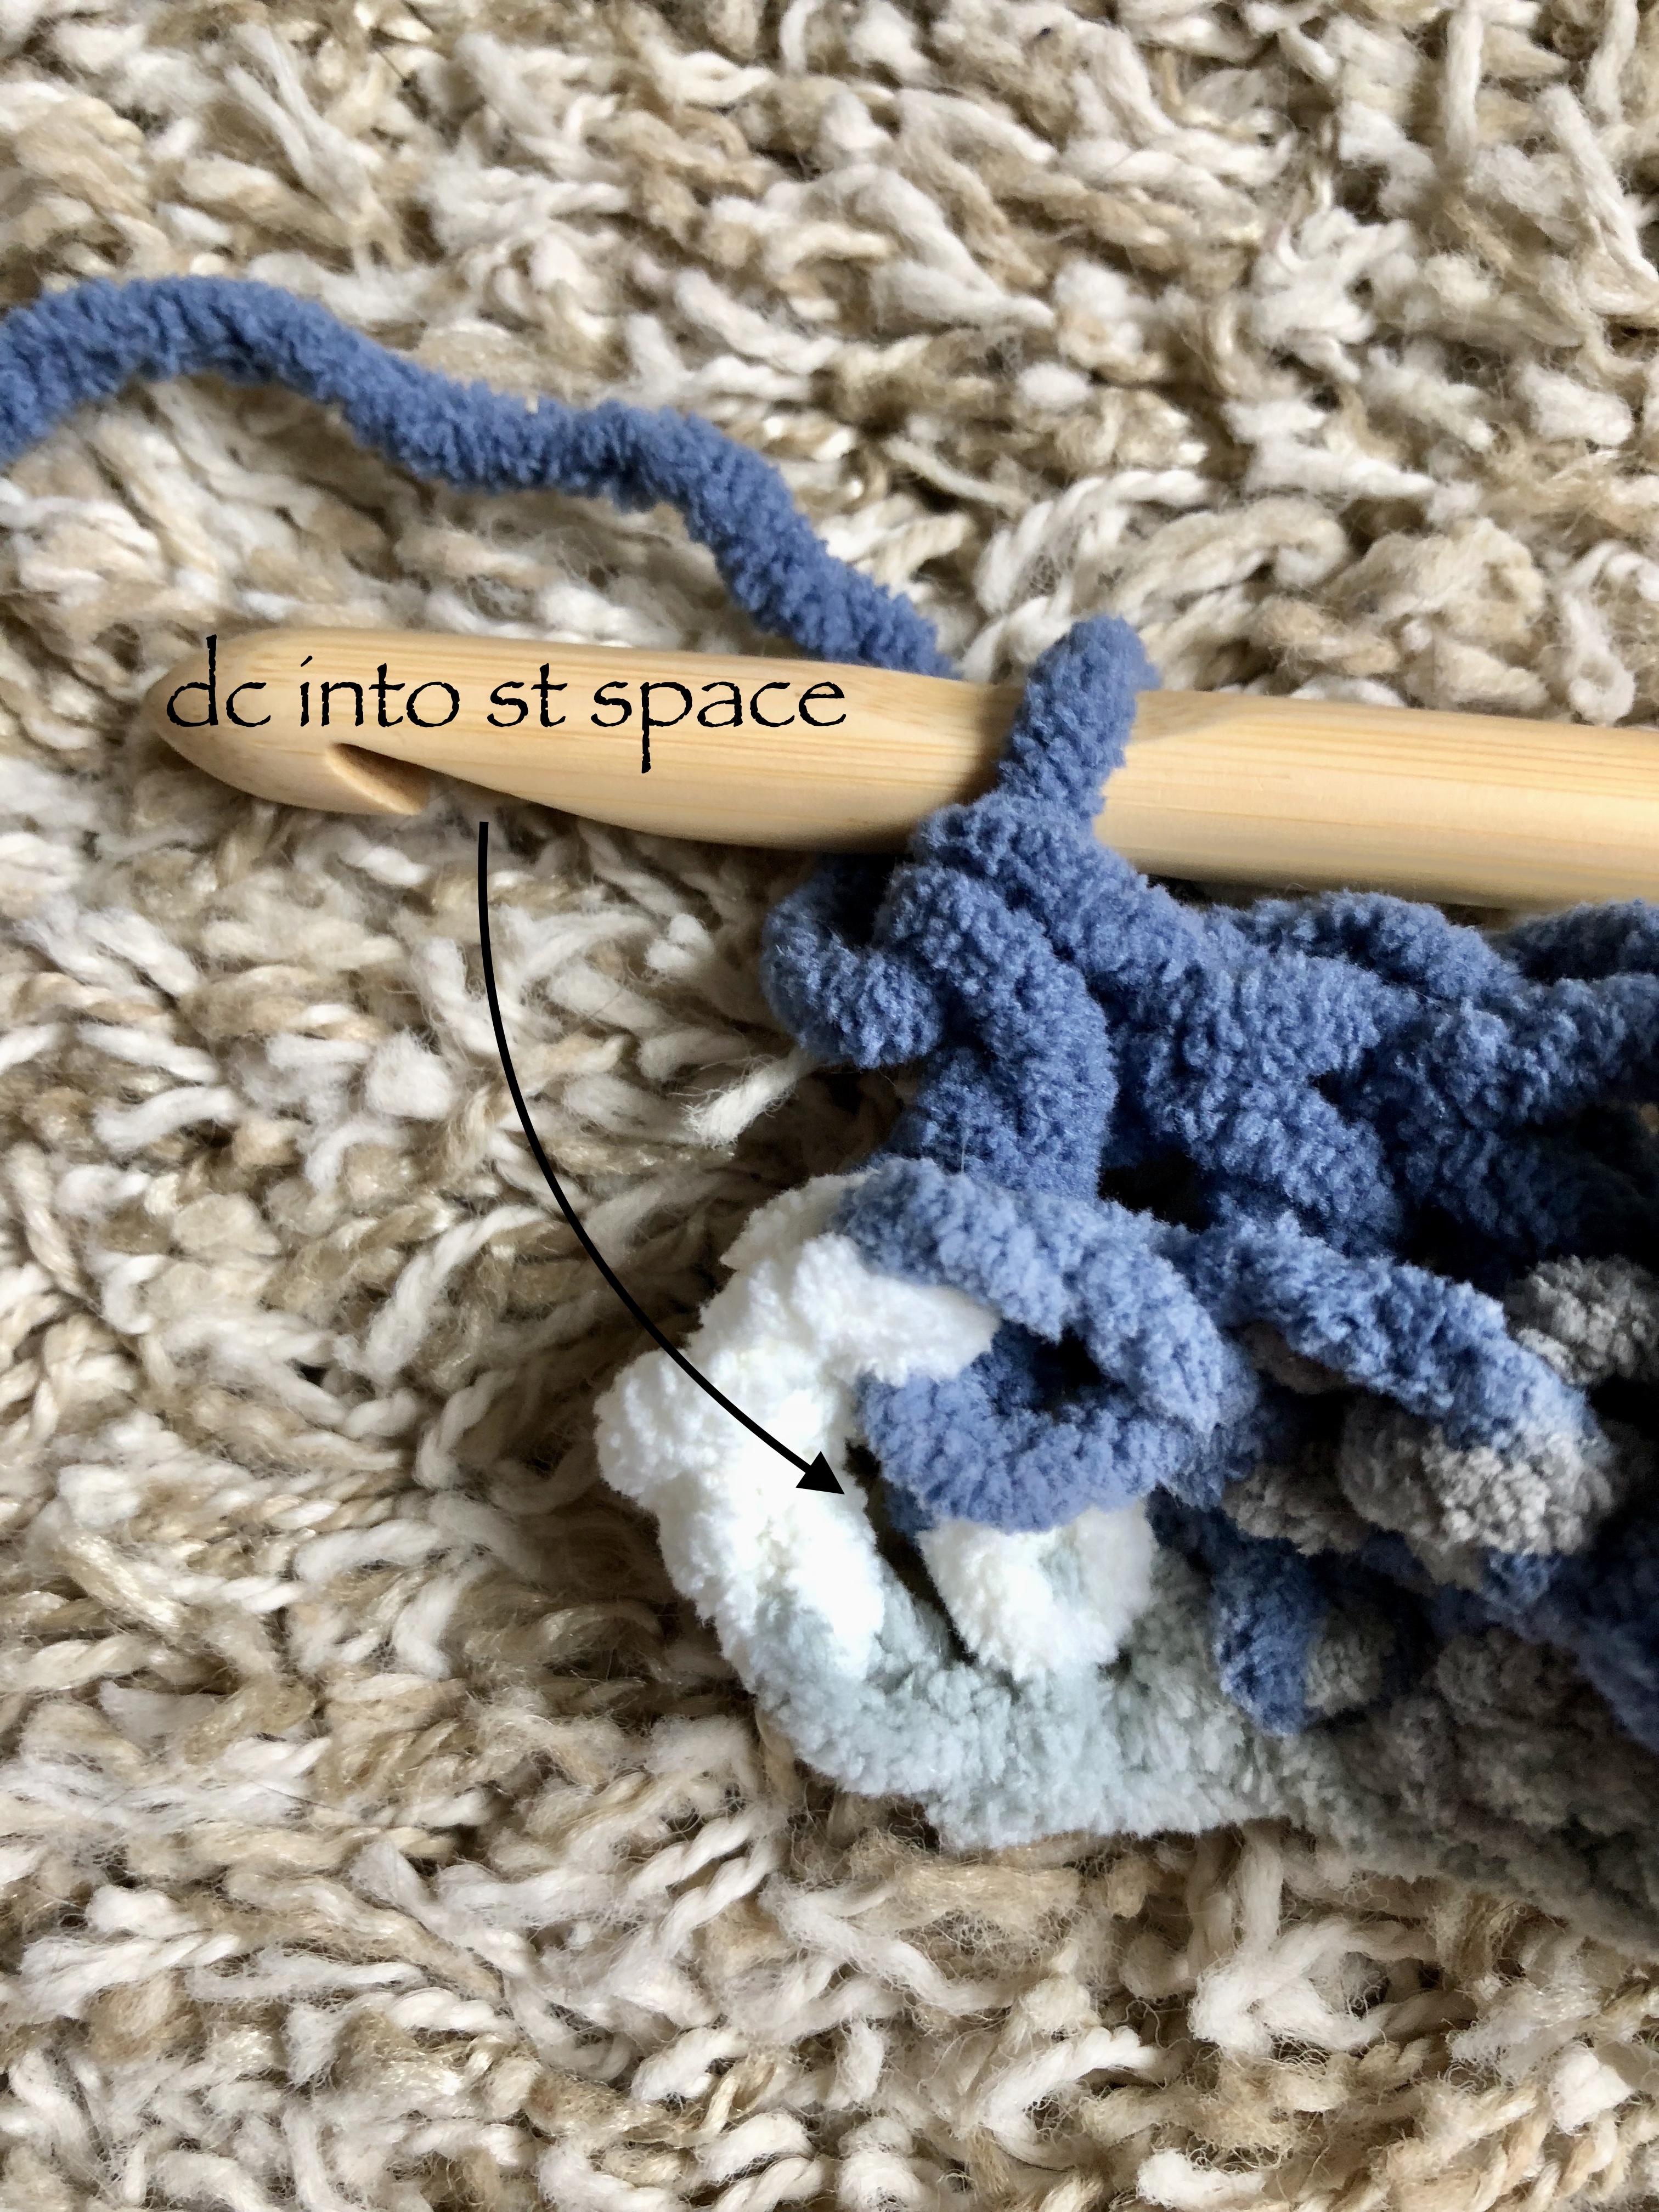
Instead of working these rows in the Tri Square pattern, I alternated between working rows of normal double crochets, and rows of double crochets worked between stitches. I liked the jagged look this gave to the top, mixing it up from rows of regular double crochets only or the Tri Squares.

Once complete, you will fasten off and weave in the ends. Block as needed, and thats all there is to it!
I hope you find this pattern as easy to make as I did and have just as much fun making it!
What You’ll Need
11.5 MM crochet hook
2 skeins of super chunky (weight 6) blanket yarn for primary color (I used Bernat Blanket yarn in Country Blue colorway)- approximately 250 yards
1 skein of super chunky (weight 6) blanket yarn for secondary color (I used Bernat Blanket Yarn in Countryside colorway)- approximately 60 yards
My Amazon Picks
Gauge
6 dc= 4″
3 rows= 4″
Completed Measurements
30″ wide x 36″ tall
Abbreviations Used
ch= Chain
dc= Double crochet
fpdc= Front Post Double Crochet
bpdc= Back Post Double Crochet
ch sp= chain space
Special Stitches Used
front post double crochet: yarn over, insert hook behind post (from front to back), yarn over, pull through 2 loops, yarn over, pull through 2 remaining loops
back post double crochet: yarn over, insert hook behind post (from back to front), yarn over, pull through 2 loops, yarn over, pull through 2 remaining loops
Pattern
Foundation: using secondary yarn, ch 51, dc across starting in 3rd ch from hook, turn(49)
Row 1: switch to primary yarn and ch 3, *fpdc 3, bpdc 3*, repeat from* across, dc into ch sp of the turning chain of the previous row, turn (49)


Row 2: ch 3, *bpdc, fpdc*, repeat from * across, dc into ch sp of the turning chain of the previous row, turn (49)


Row 3-36: continuing with primary yarn, repeat rows 1&2 17 more times (49)
Row 37: switch back to secondary yarn, ch 3, dc across (49)
Row 38: ch 3, dc in between stitches (or in between the posts, instead of into the stitches themselves) across, turn(49)
Row 39: ch 3, dc across, turn (49)
Row 40: ch 3, dc in between stitches across, fo and weave in ends (49)

Holy moley! I had a blanket as a kid with a similar but not identical stitch. It took me a while to reverse engineer the stitch; I’ve never seen it in a book or on a website. A couple of times a year I Google some variation of “front back post crochet -granny” hoping for a hit, and in several years of searching, you’re the closest! That’s a rare, possibly unique blanket you’ve made there. <3
How exciting! The stitches really do look similar! 🙂 It’s always the best when you stumble across a fun and unique stitch. So happy you like the look of this pattern!